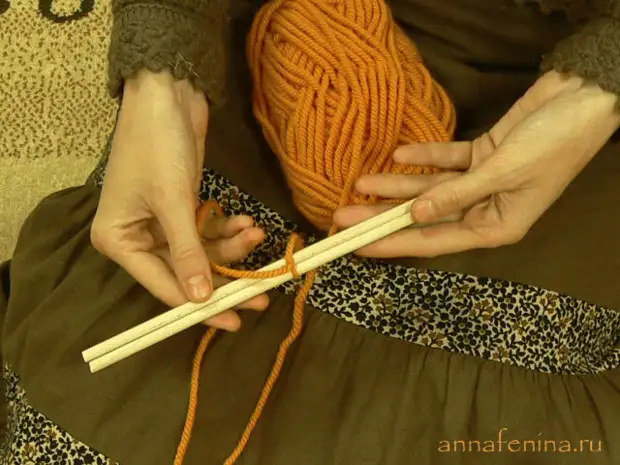
I invite you to an entertaining lesson for the manufacture of Indian Mandala Ojos de Dios. We will try to make a decorative eight-beam Indian mandala of wool and wooden sticks. Locate more comfortably, disconnect the TV and the radio and are necessary: tangle of threads, four chopsticks (I took a stick with a length of 25 cm and a diameter of 6 mm), scissors. We will not need anything else.

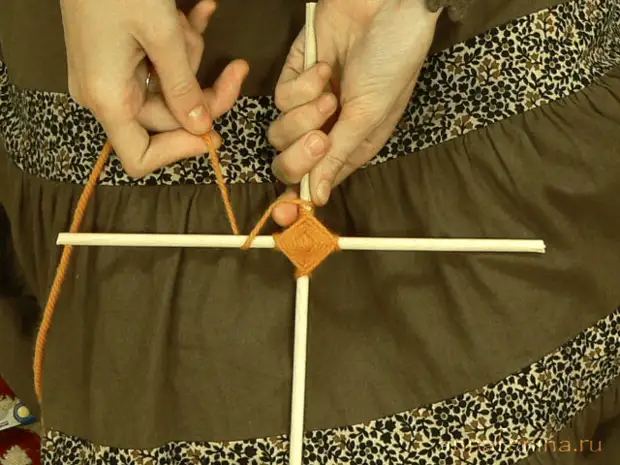
Moving two sticks together and tightly connect them in the middle by a double knot. We leave a small tail, which in the course of work will go under the overtake.
We will put the stick so that they formed a straight cross. Be careful and make sure that the angle between sticks remains 90 degrees in the weaving process. I will fix the sticks, firmly shifting them 6-7 times the painter, first on one diagonal, then by the second. Check that the cross is durable, and sticks do not stick.
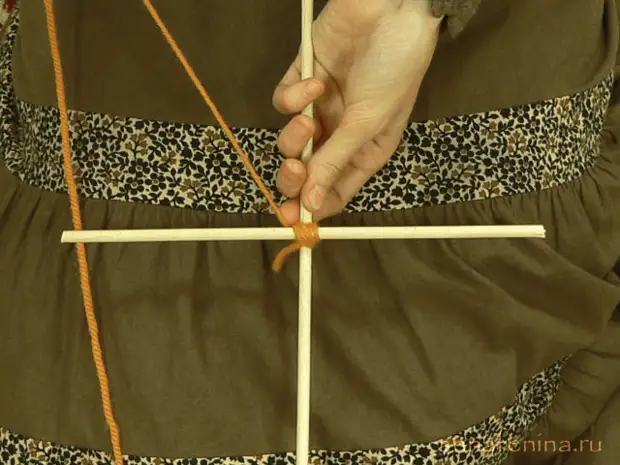
And now we begin to told the thread in a circle every wand. After throwing a thread from above, we make a complete turn around the stick, and when the thread turns out again, we throw it on the next wand. Do not forget about uniform tension. Welcome until you see that the square turns out. Make it of this size, which you want.
When you decide that the size of the square is sufficient, cut the thread with a small margin and tie it around the stick with which the square of the square was started with a regular single node. On wooden sticks, even a single knot is pretty tight.
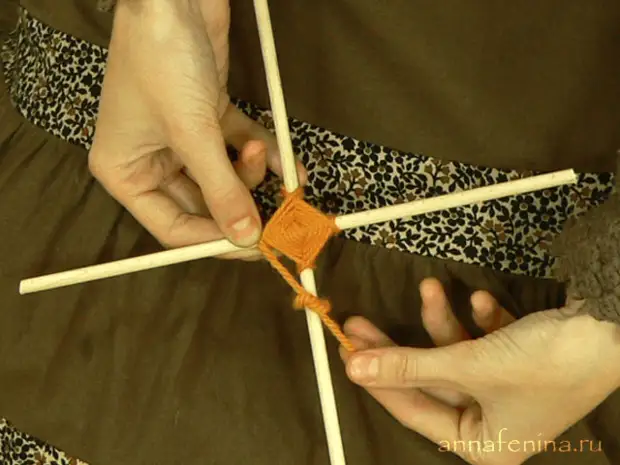
Then we bind a thread of another color to the same or other chopstick, leaving a small tail. And we start moving in a circle again. When you get to the first stick, let the poodle stayed there, pre-slightly stretching it. Listen to the braid at all all the tails that will remain in your weaving process.

When you finish weave the second color, secure the thread. The simplest thing is to tie it with the residue of the tail of the double knot. However, complex mandalas, for example, shaped or therapeutic rubbing in general, in general with one node - and that at the end. And not a drop of glue!
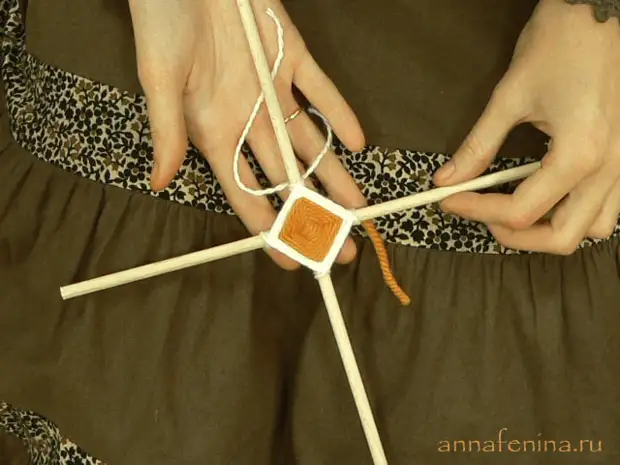
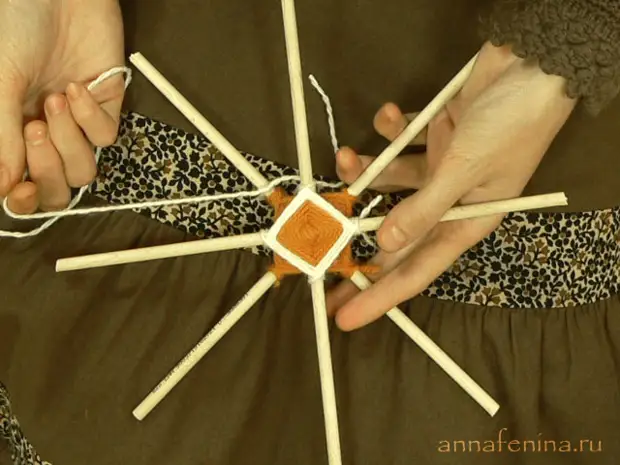
And then we put the same square on the two remaining chopsticks. Here is enough one color: it will be barely noticeable in Mandala. The size must be exactly the same as the size of the first square, or several millimeters more it.
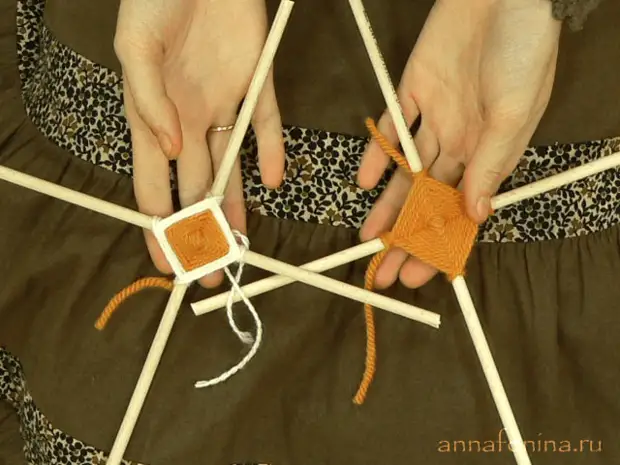
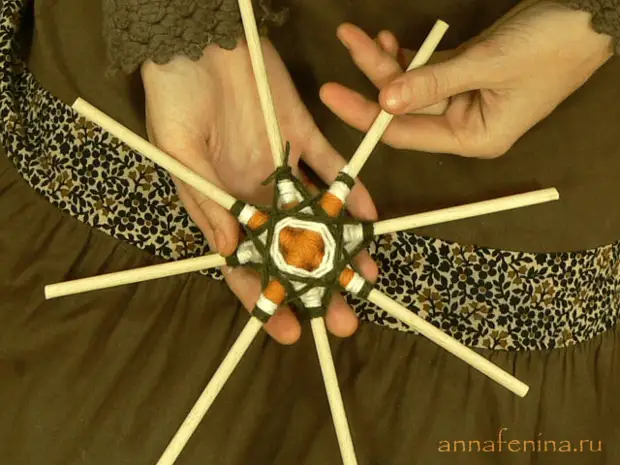
The first step is made. Ahead is the most difficult: socket. The socket is a small sun, which turns out at the very beginning of the mandala weaving and from the quality of which its fortress and quality depends.
Put two squares each other, evenly distribute the sticks and tie a thread to one of the sticks of the lower square.
We begin to catch the chopsticks by threads in two. That is, the thread passes under the mandala, captures a wand in two from the previous one, does turnover, and again goes under the mandala to the next wand in two. At first, the mandala may not obey and "walk". Your task is to make one full circle, returning to where they started, and then fix the squares relative to each other in all planes. Make as many circles as you like, but do not forget while weaving straighten sticks relative to each other in all planes.
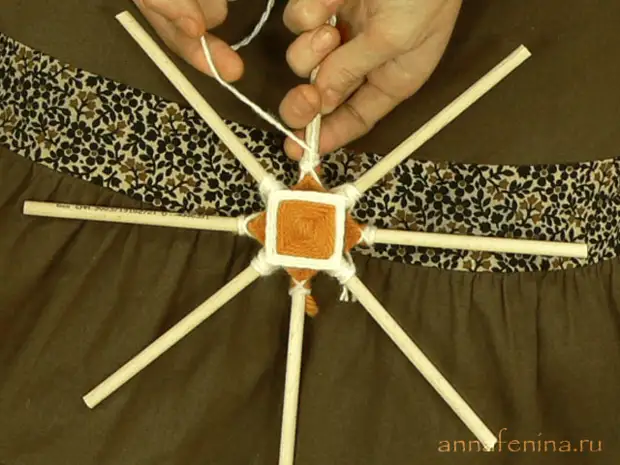
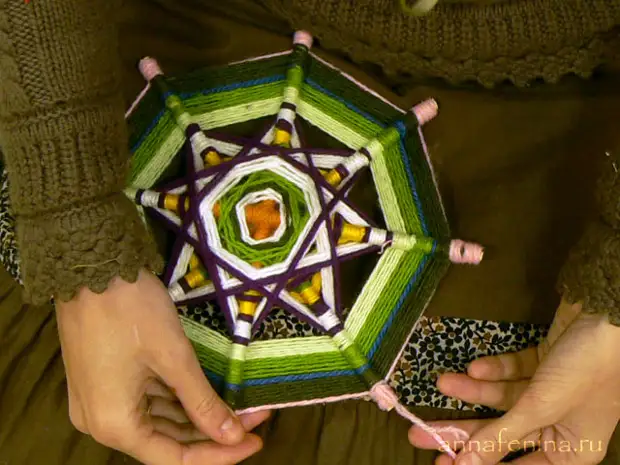
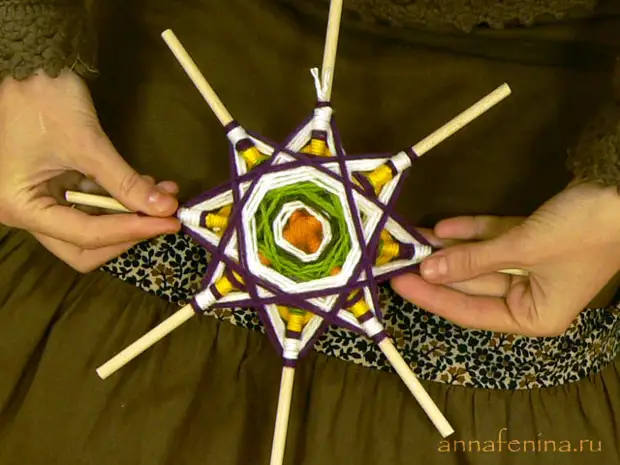
This is how it will look with an inside. The pattern that turns out when weaving "through two" is called "rays". And the whole composition is a socket. When you finish weave this color, secure the thread.
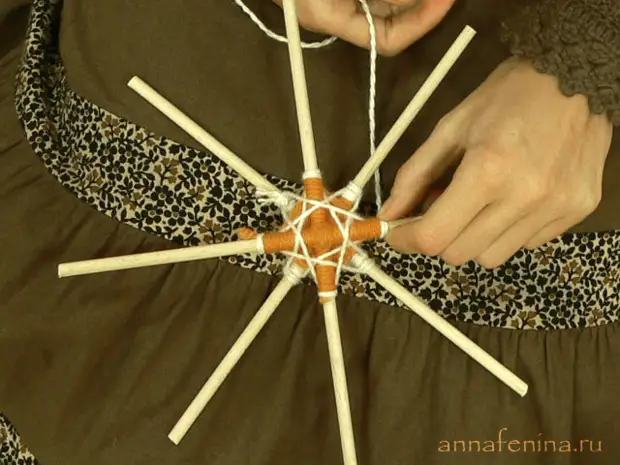
Tie the following color to the chopstick and start weave them.
From the wrong way will get like this. After finishing the dark green color, I spurled a few more rows of light green. You can use so many colors as you like.
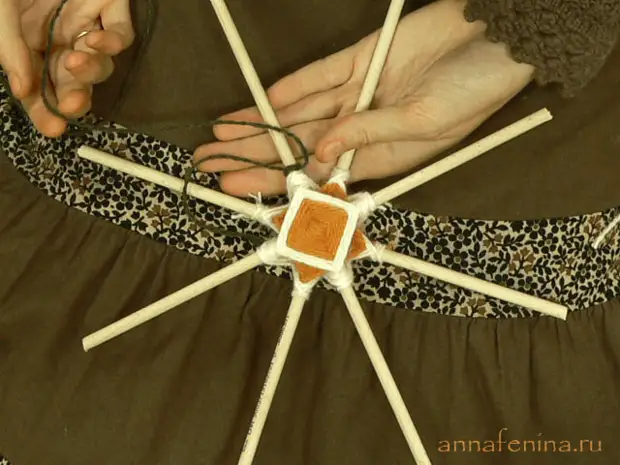
We are ready for a socket - the most difficult thing in the whole mandala. Now we proceed to the relaxed part of weaving - squares. Squares weave, almost like rays, only through one wand. It turns out that we weave the square then on the upper cross, then on the bottom, as at the very beginning. Tie to one of the chopsticks of the lower square thread of a new color and start weave through one wand. Having finished the color - secure the thread by the node.
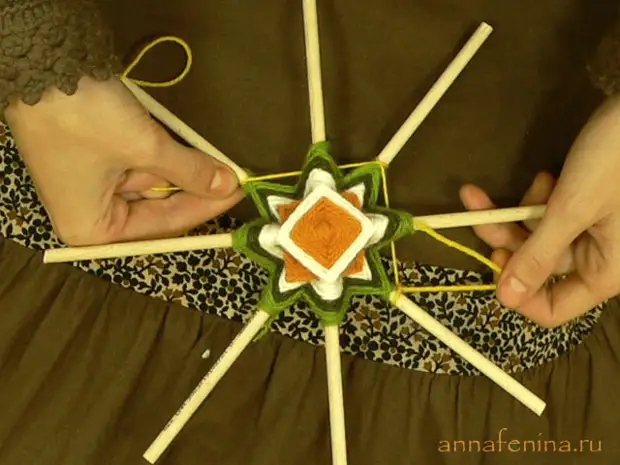
The gossip square is exactly the same width, but already on the upper cross. You can choose another color.
We begin to get such a beautiful flower.
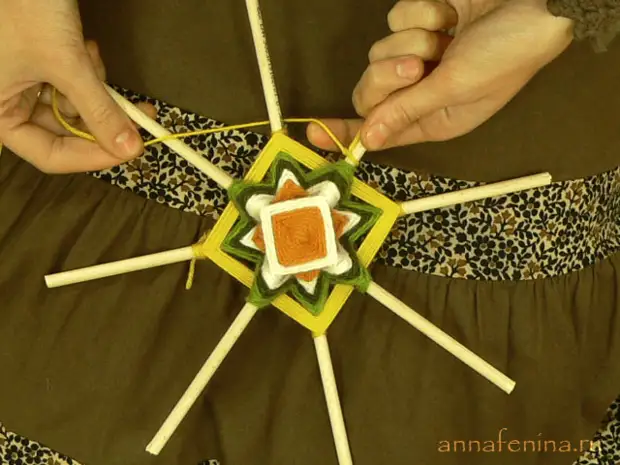
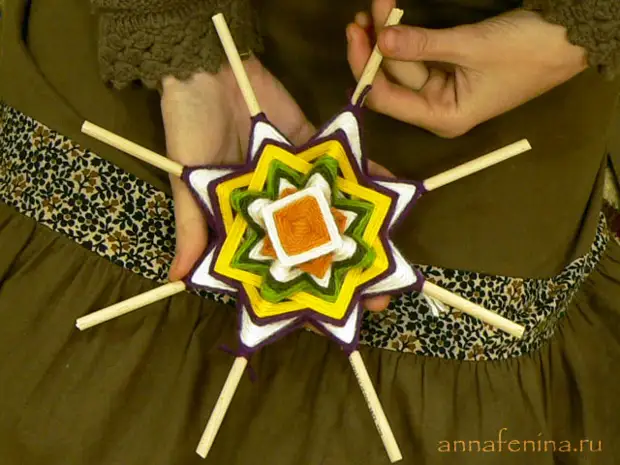
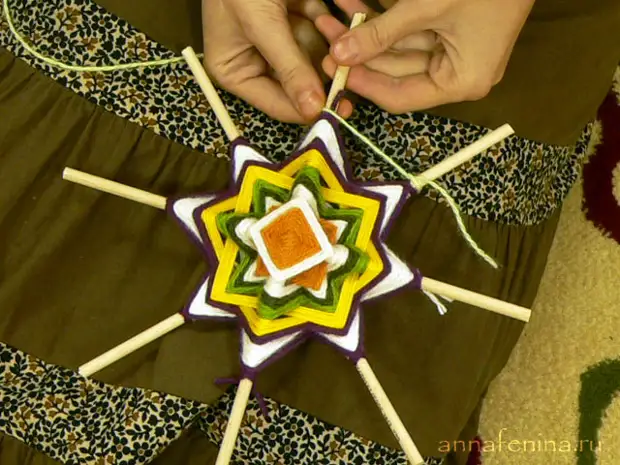
Add a couple more squares of another color. I decided to stay on violet, but you can add more colors.
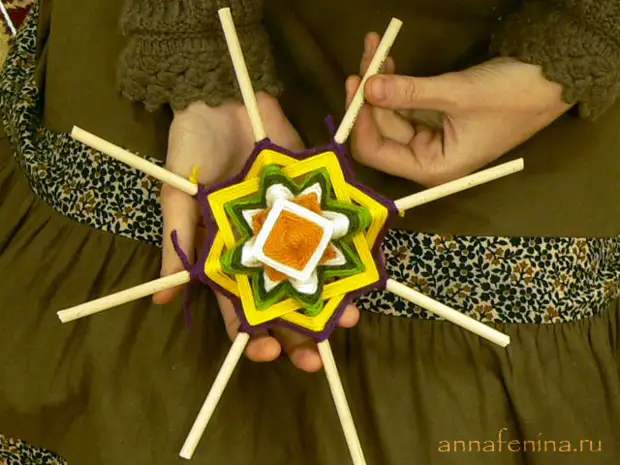
And now I will hit the rays for a variety. They are also done through two sticks, as at the beginning in the outlet.
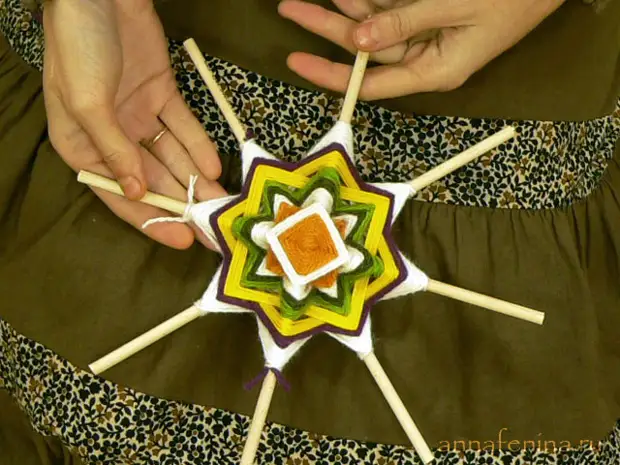
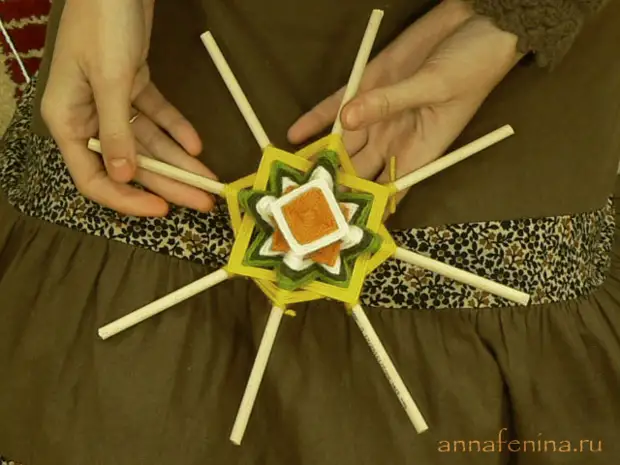
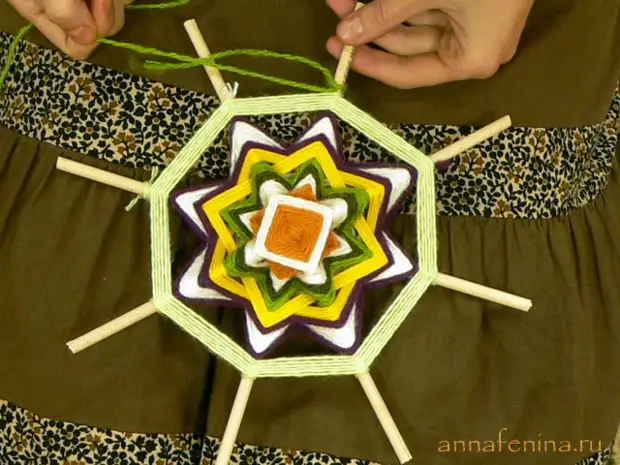
Add more colors as you consider it necessary, but be sure to leave at least one quarter of sticks to weave the final element of the mandala - the belt.
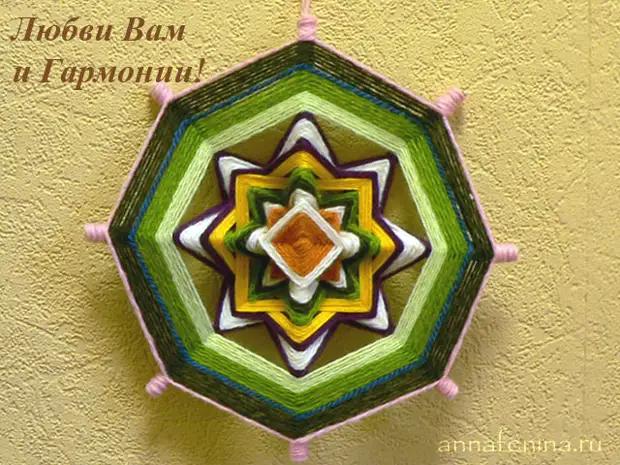
Own mandala.
Getting a weaving belt. We will learn a thread to any stick and begin to sequentially swell sticks in a circle. This is perhaps the easiest of mandala patterns.
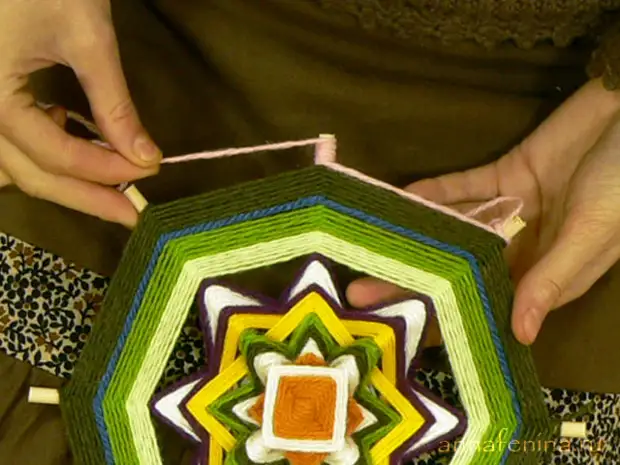
Having finished one color, go to the next one. After several rows of light green, I added one row of blue and completed the belt with dark green.
Well, the latest fixing pattern. We have left nonsense ends of sticks in length about centimeter. Tie to one of the chopsticks, the kitty will be the final color chord in the mandala.

It will be a kind of belt in one row. Put the thread on the next wand and wrap it to the end, to the top, and then turn it back to Niza and throw the thread on.
By going around the circle completely and clogged the ends of the sticks, tie a thread with the tail of the same color and make a loop from the tails.