
In connection with the upcoming day of all lovers, I will tell you and show how I do a cheerful Amurcher (or Cupid).

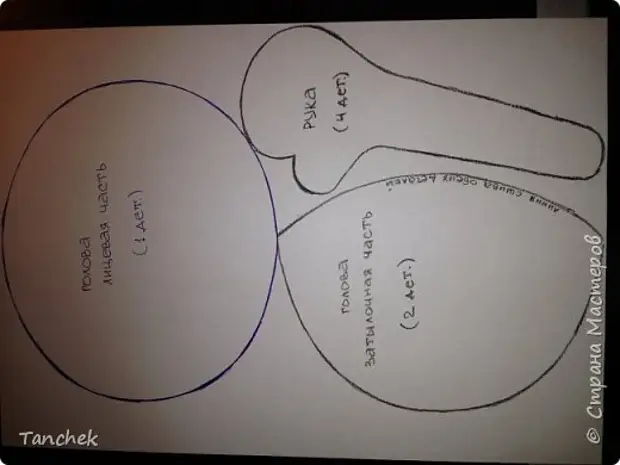
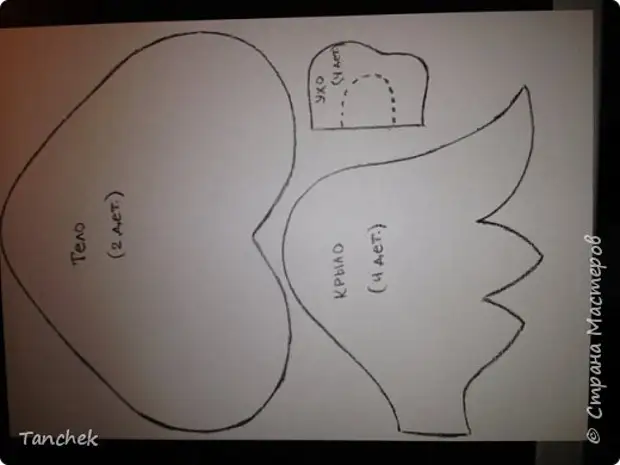
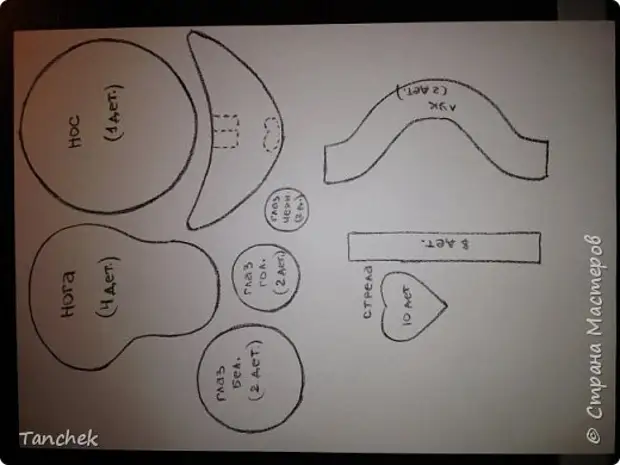
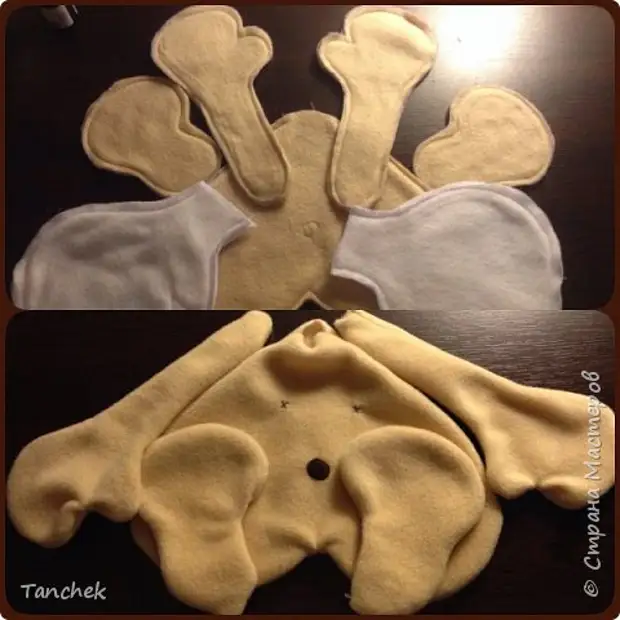
To start, patterns ...
For sewing I use Flis fabric, snatching ordinary syntheps.
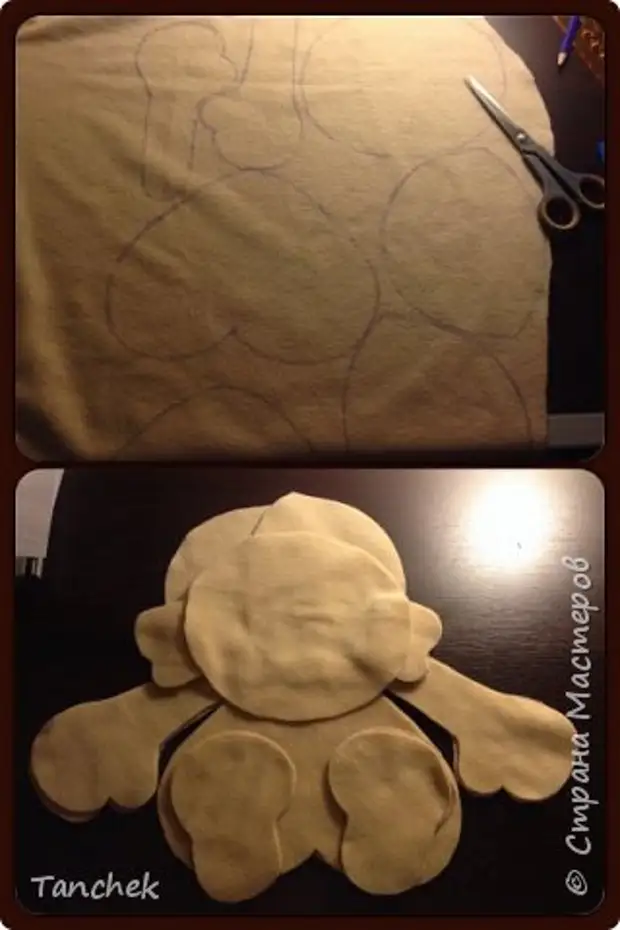
We carry the pattern on the inner side of the fabric, cut out all the details.
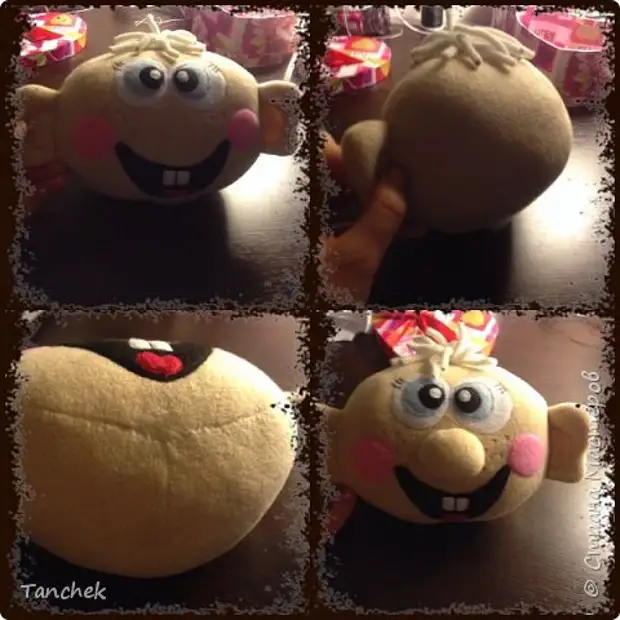
Immediately start with the nose. This is, initially, just a circle of fabric. We are tightened along the edges, pinch syntheps and, when stitching holes, correct the form to turn out to be oval.
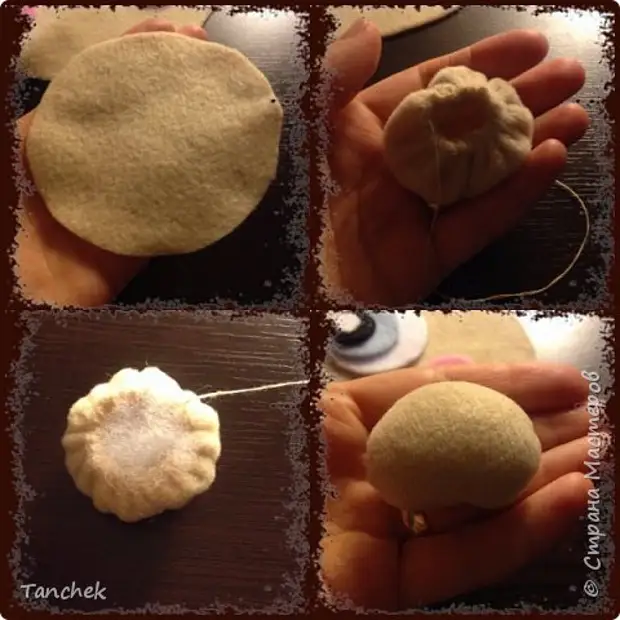
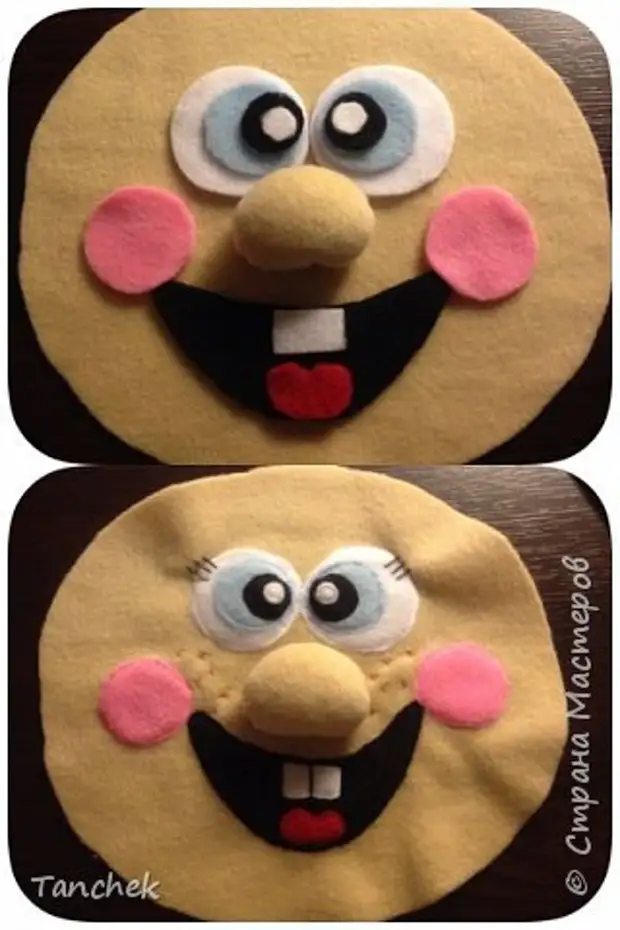
Performance of work is always starting from the face. Cut and sew all the details. Nose not yet sewn so that it does not interfere when turning the head from the inside on the front side.
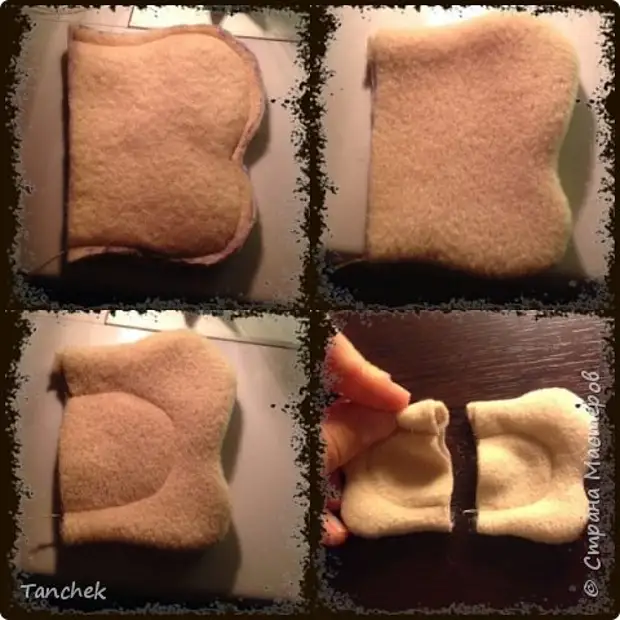
I do the ears like this: I stitch on the wrong way, turning and stitching, retreating from the edges, already from the front side. At the edges, the ears are formed by pockets in which you need to put a bit of syntheps. It seems to me that the ears look more naturally.
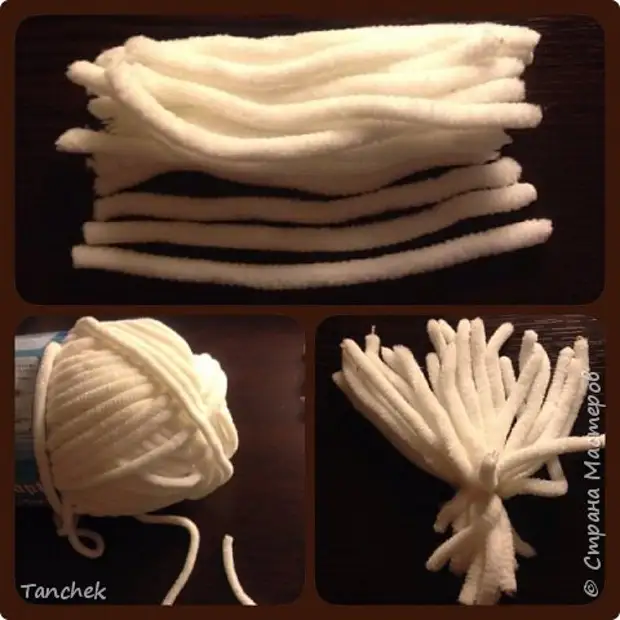
Previously, for hair used the usual yarn in this way: tightly wound on a longitudinal rounded item (I had a thickened metal rod for a ballpoint pen), lowered for a few seconds in boiling water, wetted to foam for hair super-strong fixation and dried. Then the yarn is easily removed from the squeege and the curls were obtained. Now I found such a plush yarn, which in itself is suitable for hair Cupid. I cut pieces of the required length, tying in the bundle.
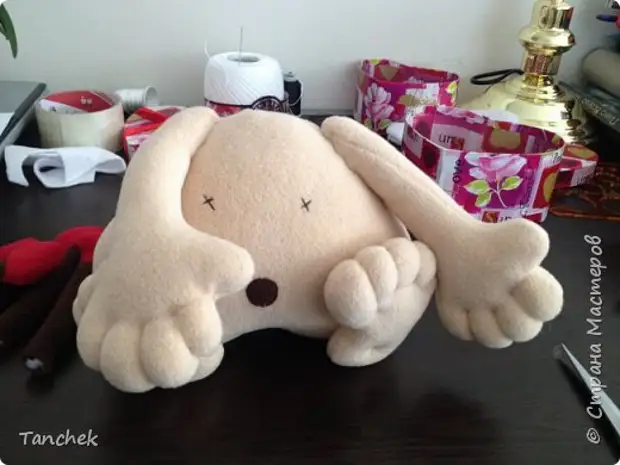
We grabbed both halves of the occipital part, coined both parts of the head face with the front side to each other, put your hair and ears, stick up, leaving the hole of the millet in order to turn your head and fill the Stentepon. Soak your head, pinch a synthet board, we sew the remaining hole and at the very end are sewn the spout. Head is ready.
Similarly, we flash, turn and pinch with a synthepship all other parts of the royal.
With the help of a dense thread and needles, we indicate your fingers on the handles and legs.

Now about arrows. I got three arrows behind your back (they only see the tips in the form of hearts), and one main arrow, which also has a tip and other HFF in the form of a heart. There is no bag for arrows in the pattern, as this is the fabric, folded in half and its size can vary depending on the number of arrows, according to your desire.
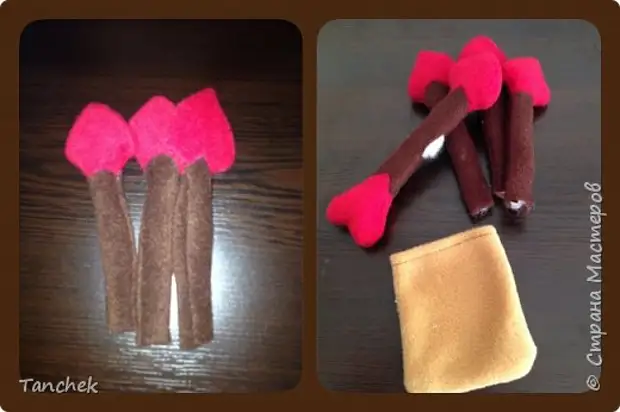
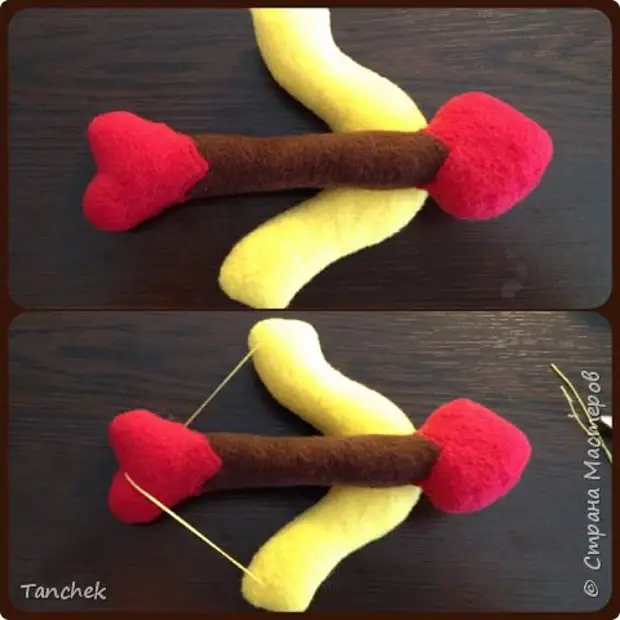
The main boom is sewn to a pre-stamped sintecon onions and with the help of a dense thread we indicate the title.
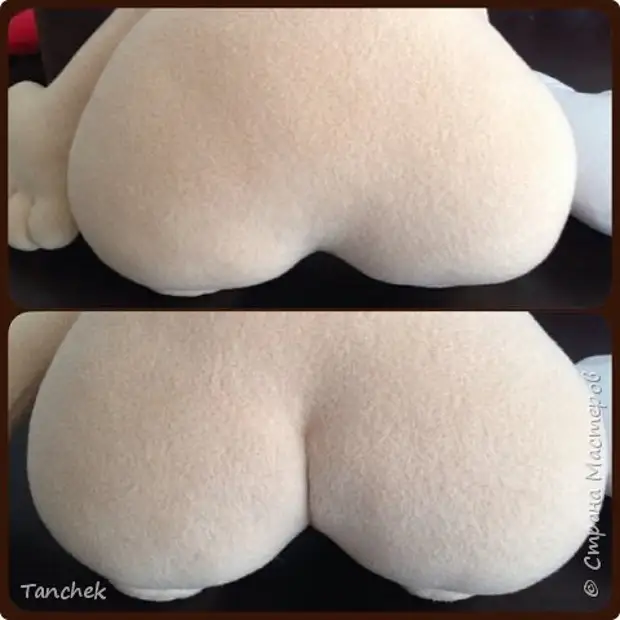
So that the Cupid was more fun, you can make a more pronounced ass with a needle and a dense thread.
Send legs, then the handles, and then the head.
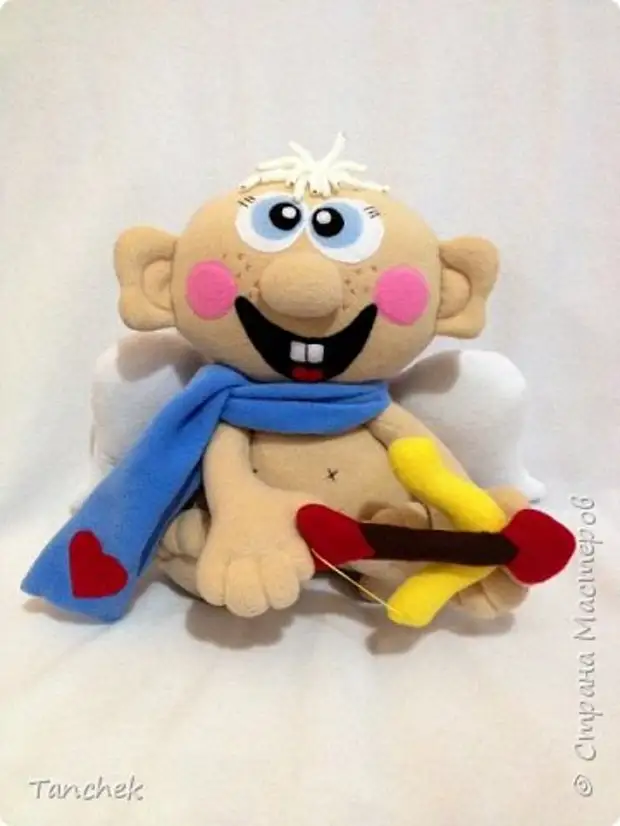
We sew all other details: wings, basket with arrows, bow with an arrow. And it turns out such angel. For the end of the image, you can tie a scarf.
The author of the master class: tanchek.
A source