
In my works, I very often use a machine line, in albums - I can not at all without it, it seems an unfinished page or cover and everything.
Sometimes the sewing machine is very helped - the product becomes durable, additionally fixes. But more often, the machine string serves as an addition or decor element.
I often hear that girls dream of a typewriter or have it, but they are afraid to work. I want to say that my first tool in scrap was exactly a sewing machine! I even didn't imagine scrap without her and did everything that she quickly appeared. I'll say right away: I've never sewn up to it and always was very afraid of her. Desire to learn how to deal with your!
I want to share my experience, tell secrets and all sorts of subtleties. Maybe someone my knowledge will help something and tell something.
Selection of machine.
My first car was the most common Soviet manual. Her handle really was broken, and the machine itself was going to throw the masters. They took themselves, repaired, adjusted and put an electric motor with a pedal! This can be done in any probably sewing store. And the price is small and it is worth it! Conveniently very. And the lines of these machines are the most flattened one of all that I have seen. If you want to understand you need such a serious instrument at all or not, then it seems to me that it is necessary to find and try, without capital material investments. The line has only straight, but there are such cars and a zigzag.
Now I have Janome SE522 - sooo it is pleased! (And I also sow the pupa on it).
I chose it: asked who of scrappers on what works, it was important for me that it took a good thickness, and just a thin fabric rocked. And not much expensive, and so as not broken in a year.
Main details in the work.
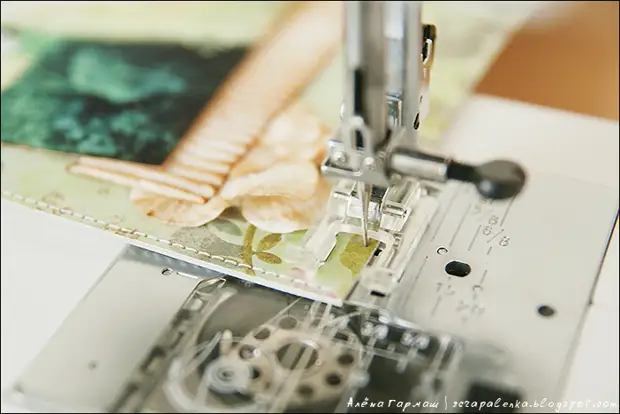
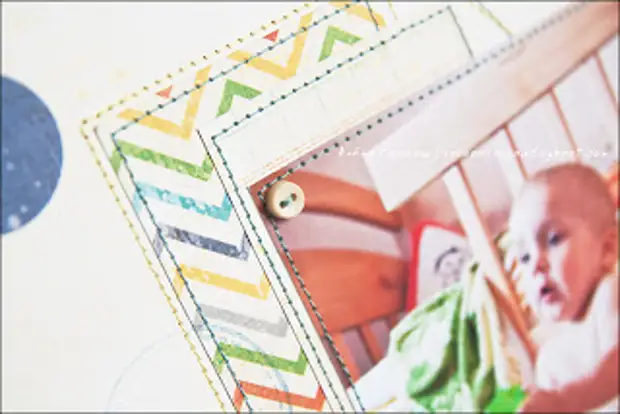
In my opinion it is very important that work with the machine was as comfortable as possible. To do this, I immediately bought a comfortable leg for me. It is transparent and no refill in front of the needle, I always see where and what she comes in! After all, we work for the most part not with a cloth !!! Need maximum accuracy and caution! It is called the appliqué foot (or for atlas, the image in the title article is just with this paw).
The correct needle is also very important. So that the hole in the paper was as accurate and small as possible. I first used the needle for the skin number 90, she has a special form to carefully pierce the material. Now I took the needle from the set that was complete with a typewriter - universal number 75. Thickness and length are smaller, but a dense cardboard with paper or cloth easily grabs. (on Soviet put a similar one - passes seam, does not stroke - there is not enough needle length on too thick material)
Threads are ordinary for sewing machine number 40. The Soviet manual machine with ease works with thicker threads, but modern not all accept them. I sometimes put the threads thicker (from grandma stocks, dense very), but then the move becomes very tight and you need to be extremely neat, so as not to break the paper or not confuse the threads themselves.
Basic rules of work.
The most important thing for me is accuracy! Many advise to begin to practice on unnecessary leaves, but as for me, it is better to start it right from something nonsense. Visit from the very beginning a reverent attitude. And not boring. If you find it difficult to take a landmark on paper or edge, you can draw a pencil thin line, it will not be visible under the line. I only rebel to this when you need to see a beautiful and exactly a circle.
Fit legs I always put "0". It is not necessary to clean the transportation, but the caterparts or the foot of the foot with the maximum fit can leave traces or shock, as if pulling paper. We do not need it!
The stitch length should be not very big and not very small. I put for postcards from 2 to 2.5 mm, and on large pages more often than 3 mm. I don't really like it very much as it looks, but less - risks to make too frequent holes in paper because of what it can just break.
Fix seam. It is very easy to do - pull the ends of the threads on the opposite direction and tie the knot several times, I cut the tips, some attach them to scotch paper.
Pre-paper are glued to the base. It is important that the details you want to sew did not move in an unnecessary side. Another problem with which I encountered when she sewed the pages to a cardboard basis - "bags" appear in some places under the paper. This is again due to the fact that it gripped the page is not completely, in some places. Therefore, it is very important as best and better and better to prepare and wait until the glue is dry.
Examples of using a machine line in the works.
In order not to be unfounded, I will show several of your work with the use of the line.
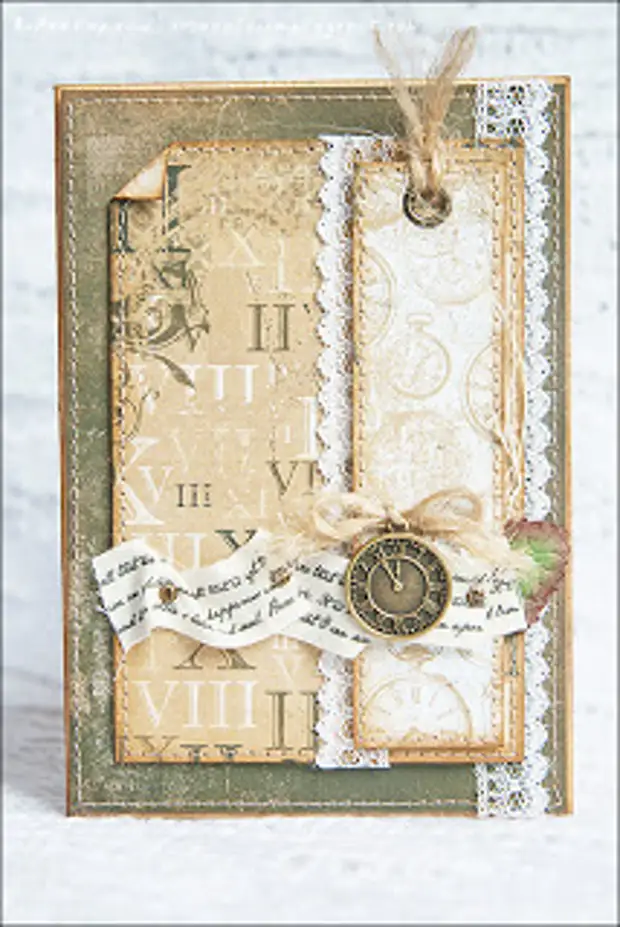
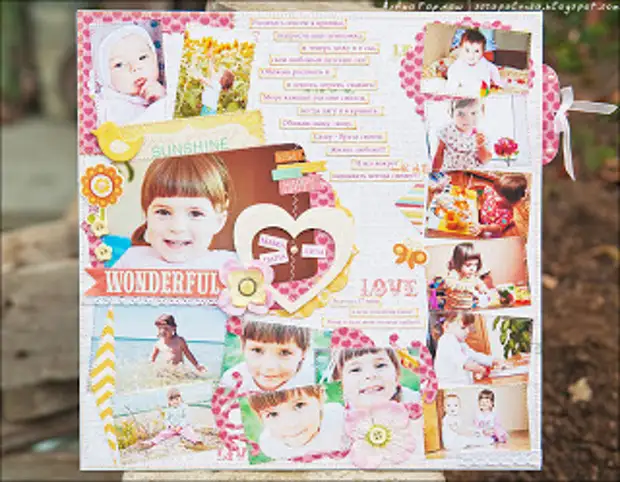
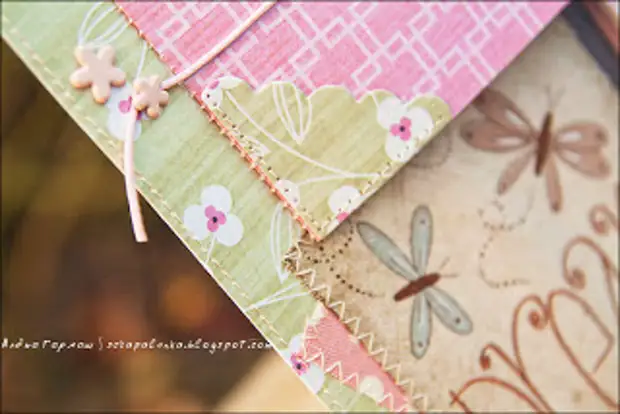
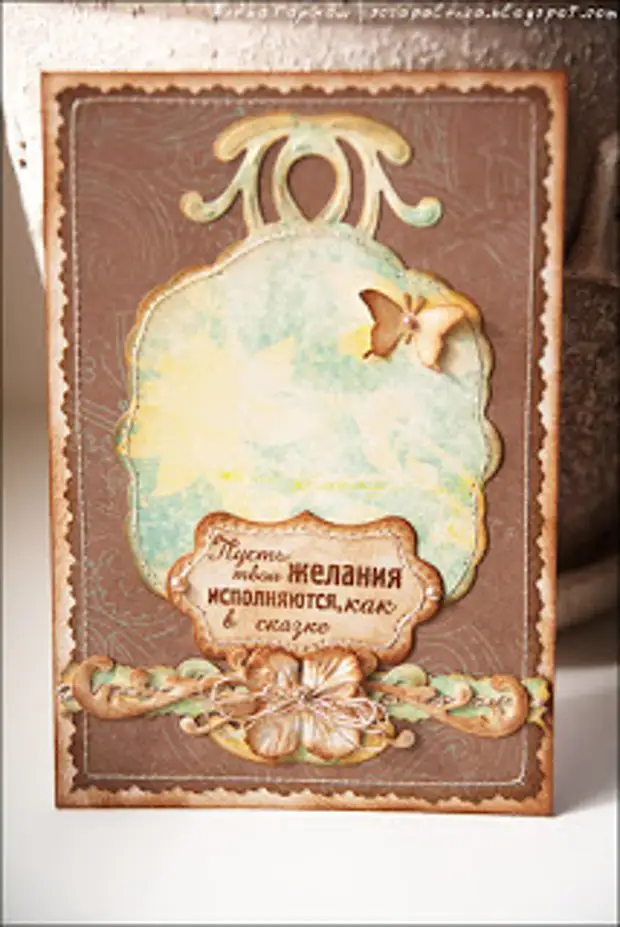
In postcards:
| 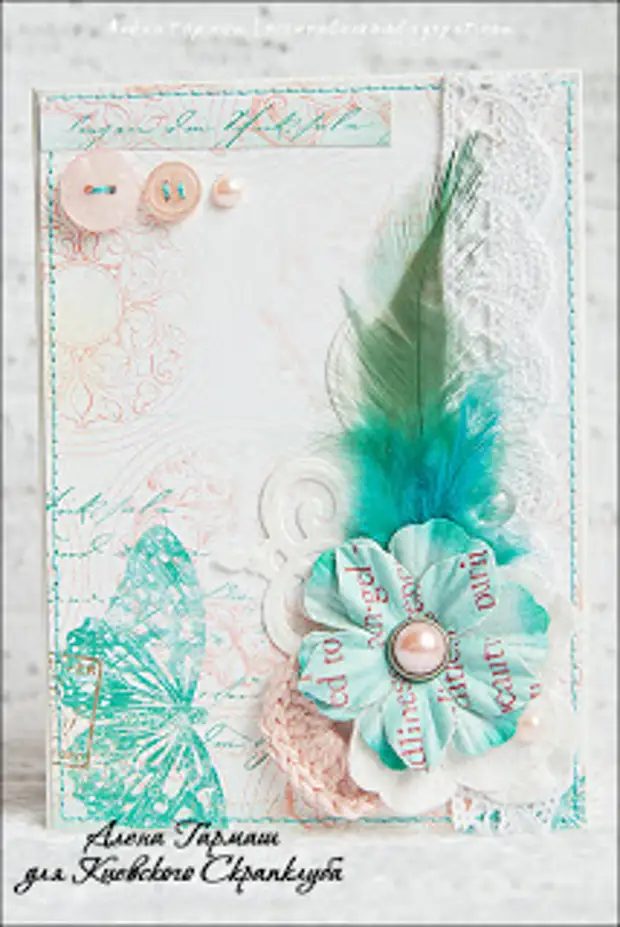
|
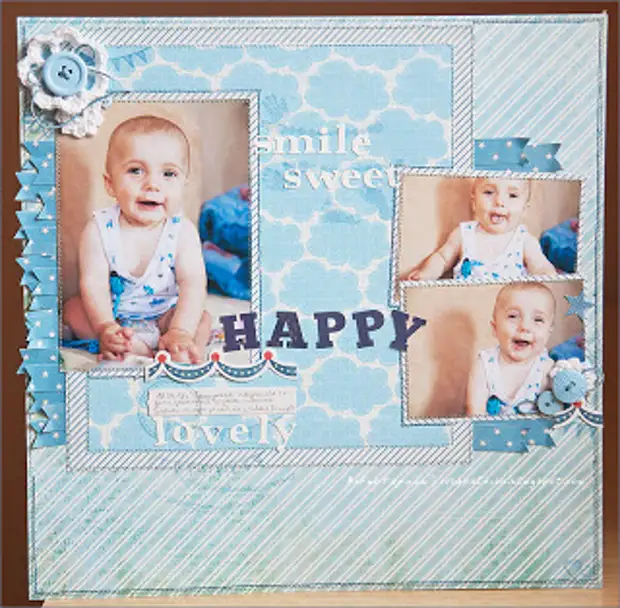
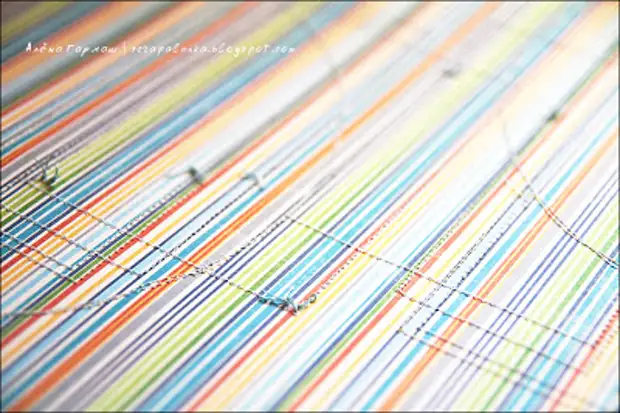
In pages:
|
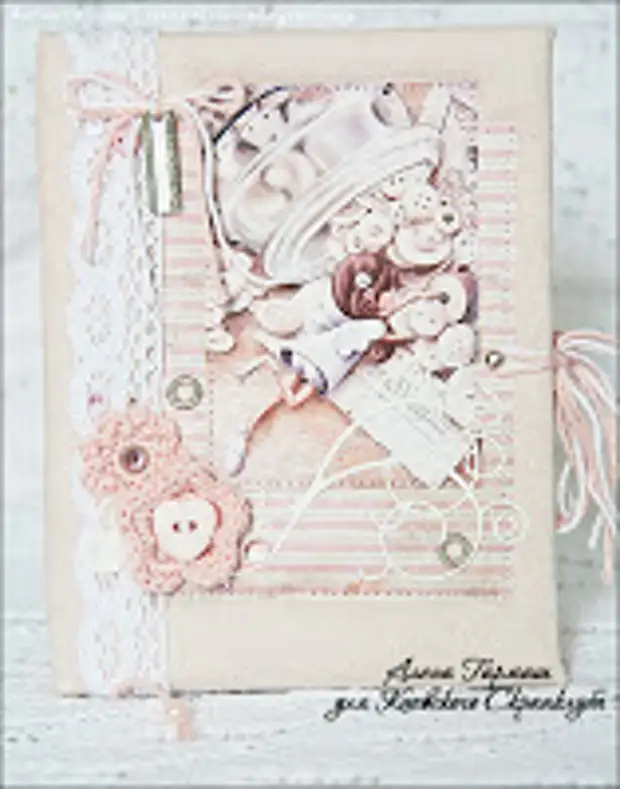
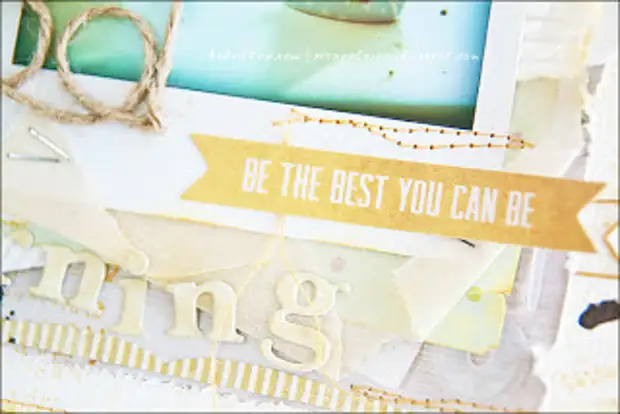
In notepads:
|
|
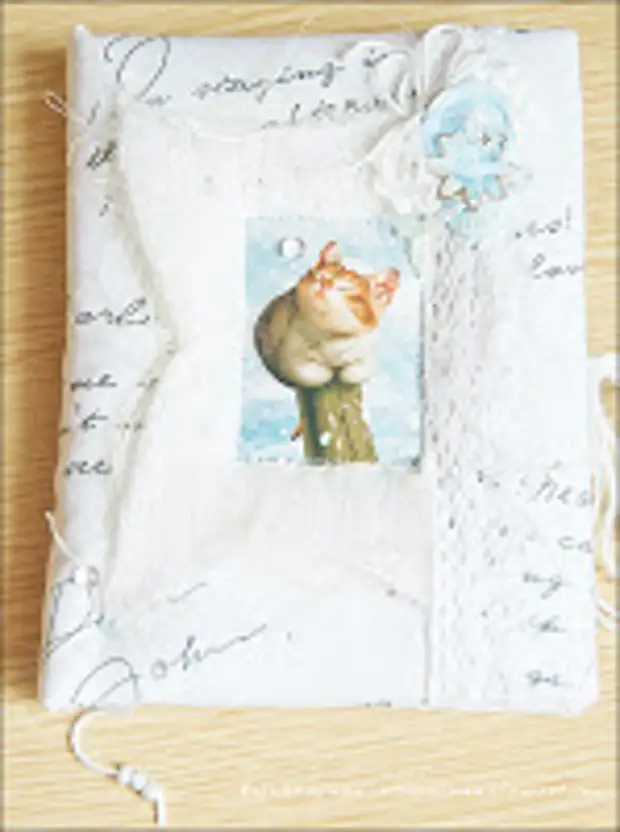
Paper or picture here sewing directly to the prepared basis is a tissue cover. It turns out very interesting relief and bulge.
Nearer:
And how the reverse side may look:
Some interesting and important moments.
If you are working with a picture or photo, it is important to know that the glossy paper can scratch the foot and the move will be very difficult. Therefore, all photos for photo albums or pictures for notebooks I print only on matte paper!
Machine line can be used as a decorative element and tails to pull out on the front side. I really like this technique, but in order not to stretch in the course of operation of the product, I sink myself on the opposite side.

If you work with a double-sided scotch, then be careful, under the alleged place the line never put a strip - the adhesive of this tape will stick to the needle, confuse the thread and score the mechanism of the machine!
Machine line is sometimes very necessary and looks well, sooo beautiful, but not always. It is important to see where it is necessary to apply it, and where it is not worth it. Someone this comes with experience (like me), and someone is more lucky and sees immediately =)
As an example, I will give my first postcard:
I look at her and think "horror is terrible! It would be good to just glue and everything ..." Probably every craftswoman has such an indicative work for yourself as an example and as a reminder that you do not need to abuse.
Try to avoid the reverse side of the line in your work! I eradicated this ugly opposite direction and hiding it always !!!
Sometimes it is necessary to separately flash the elements, fasten the thread and then glue to the base, and sometimes it is worth just abandoning this ventiy.
When you start to climb, necessarily hold the tails of both strings - it will help to avoid their confusion.
So I shared with you my secrets in working with a sewing machine! I hope someone found something useful and interesting for myself!
I sincerely wish you fresh experiments! Beautiful and neat work!
And do not be afraid to try !!!
Shared Alena Garmash.
A source