

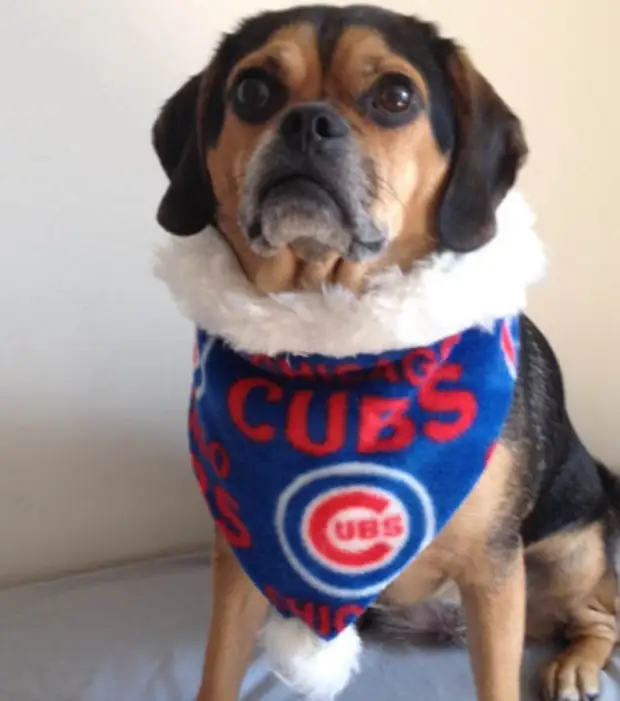
Each owner wants his pet standing out against the background of others, it looked well and was healthy. In winter, make a dog in an elegant and to protect it from the wind and dampness will help warm clothes. But it is not necessary to bypass local shops in search of the desired size, a model or coloring that you like. All you need to make your favorite, you can make yourself. The most basic and simple option of clothing is a triangular bandana on the neck. From Him, we will start a series of our master classes.
Materials and tools that need to have at hand to do something like that:
- Dense bike tissue
- Clasp "Velcro"
- White Pompon
- White Artificial Fur Loskut
- Scissors, thread, needle, sewing pins, sewing machine
The procedure will be like this:
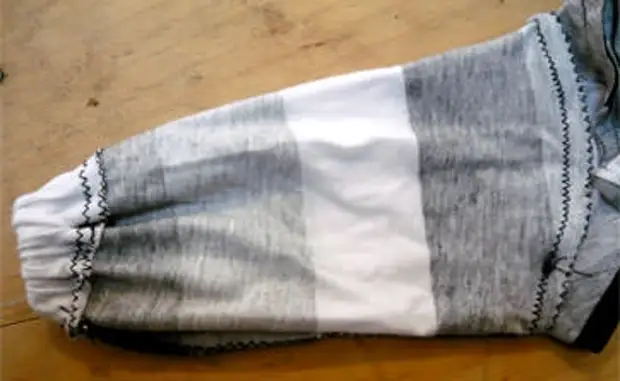
- To carve out the rectangular flap of the fabric of the desired size, measure the circle of your dog's neck and add 5 cm. The resulting value is a rectangle length. Its width should be twice as shorter.
- Fold the flap twice the length so that the opposite sides coincided. Mark the center of the rectangle on its underside. Then, spend two lines from this point to the upper corners, and you will have an equifiable triangle that needs to be cut. It will be possible to cut out which side of the triangle will be a gate of bandans.
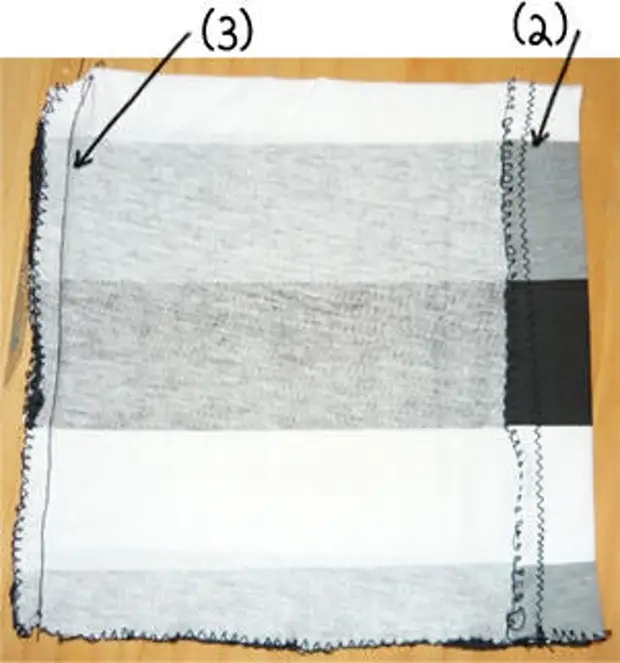
- Cut the strip of white artificial fur. With a width of 10 cm, it should be 6 cm longer than the gate of the bandans.
- Fold the fur strip in half the length, the front side inside, and secure the workpiece with sewing pins. Build both ends of the received rectangle, retreating from the long edge of about 1 cm, after which turn it onto the front part. Then overpow the long edges inward, as if you were going to grind them, and alive each separately.
- Now insert the gates of the bands between the fastened edges of the fur rod so that it is located exactly in the center, and push everything together along the entire length of the fur, retreating from its edge by about 5 mm. 6. Sew pompon to the lower end of the bandana, and the "velcro" on the free ends of the fur collar.
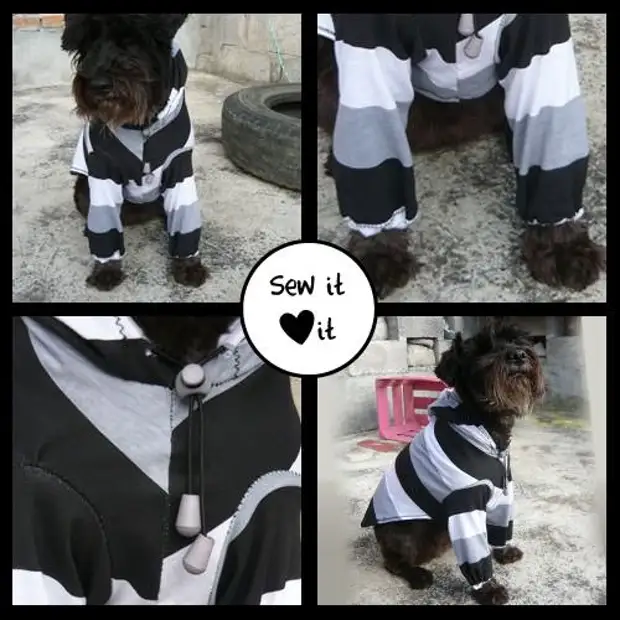
- This is the simplest outfit, work on which you will not take much time and effort. If you have basic cutting skills and sewing, you can dress your pet for something warmer (and complex), for example, in windbreaker on the lace.
How to sew a windbreaker for a dog (instruction with pattern)
To do this, you will need the following materials:
- Warm fabric
- Elastic Tape ("Rubber")
- Elastic cord, two tips and retainer for him
First, we remove the measurements and make paper patterns, only then go to sewing.
How to remove mercies
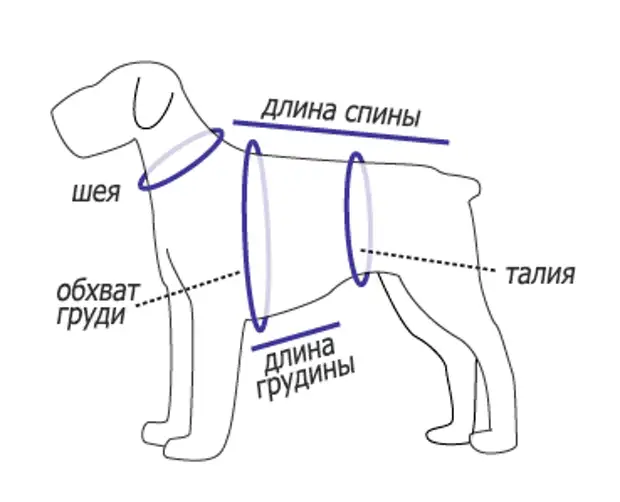
- The volume of the neck is measured at its base, in the widest part. Always add to this indicator about 2 cm so that the dog can breathe freely.
- Neck length is the distance from its base (the widest part) to the head of the head.
- Breast girth is measured in the widest part of the chest, immediately behind the front legs. To this indicator, also need to add approximately 2 cm (for very fluffy dogs - 3 cm) so that the animal is not closely in clothing.
- The sternum length begins from the blades and ends behind the chest, where the torso dog begins to narrow.
- Waist girth is measured in the narrow part of the torso, between the chest and hips.
- The length of the back is the distance from the base of the neck between the blades to the base of the tail.
- The length of the leg is equal to the distance from the lower edge of the blade (where the foot goes into the body) to the floor.
- Feet girth is measured at its foundation (of the place where the leg goes into the body).
Tog's pattern:
1. Draw a rectangle in which the length of your dog will be the length of your dog, and the width is ½ of her chest girth.
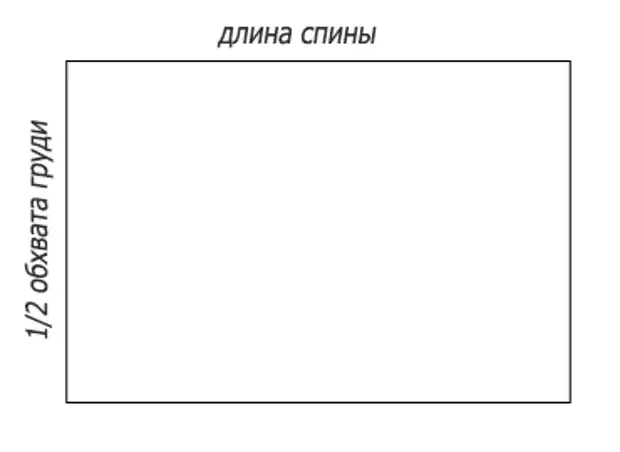
2. Mark on the rectangle of the breast length (a)
3. Mark the center of the rectangle in height (B)
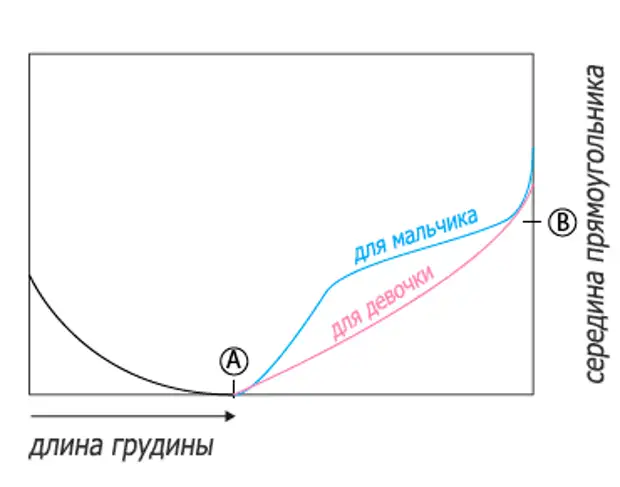
4. Spend a smooth curve from A to V. In the picture of the curve, more suitable female dogs, marked pink. The curve, more suitable for men's gear, is marked blue.
5. Mark ½ neck pickup (c) and a point of about 1 cm (slightly more or a little less, depending on the size of the dog) from the edge of its long side (D). Connect both points with a smooth line.
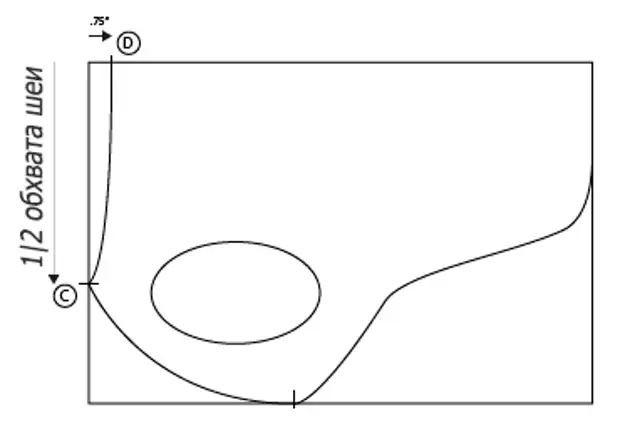
6. The hollow for the sleeve should be a little more than the neck of the neck, but at the same time be free enough for the dog can move without interference.
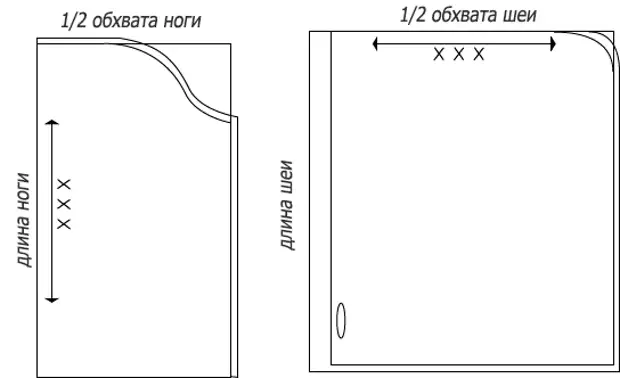
Sleeve pattern:
on the top picture on the left1. Measure your dog's legs
2. Draw a rectangle, the length of which is equal to the length of the leg, and the width is half a half.
3. Spend a smooth curve in the top of the rectangle in accordance with the girth
4. Leave a small battery on the seams on the right side and on the upper edge of the pattern (on the left and below they will not be needed)
Pattern of the hood (on the picture on the right):
on the top picture on the right
1. Measure the neck pickup of your pet
2. Draw a rectangle using the length of the neck and and ½ of its girth for the length and width of the part, respectively
3. Slightly round up the top right corner of the rectangle
4. Leave a small allowance for the seams on the bottom, left and right parties to the part. Do not add anything at the top.
5. Check the place where the lace hole will be
6. Roll up the cut of the fabric halved, the invalid side is out. Attach paper papers to it, as shown in the photo, secure the sewing pins and cut all parts of the future windbreaker. Treat the edges of the fabric by overlock or zigzag.
Having done the manipulations described, you can proceed directly to the sewing of windbreakers. It consists of three stages:
Stitching sleeves
1. Wrap the "rubber band" around the leg, directly from the paw to measure the grab of the cuff. Make a small allowance, since when crosslinking with a tip cloth will be squeezed slightly. Cut the resulting piece, and then another same length.
2. Explore the pattern of the sleeve on a flat surface with an inlet up. Stretch the gum so that it corresponds to the width of the fabric from the other side where the cuff will be. Print it to the pattern, retreating from the edge of about 1 cm, and in a stretched zigzag in a stretched state so that it remains elastic. When you release the gum, the cloth will gather. Do the same with the second sleeve.
3. Excellence the lower edge of the sleeve so that the gum remains inside, stretch the pattern again and push only the fabric. You must have a simple cuff.
4. Fold the sleeve twice the length and burst the edges.
Crossing and torso crossing
5. Wear a cloth with a smooth (not rounded) side of the pattern by 2 cm. In this cuff you will sell the lace.
6. Fold the rectangle twice and push the edge opposite to the cuff with a lace.
7. Remove the hood and grind the lace into the cuff. Put on it the lock and tips.
Stitching sleeves and hoods with torso
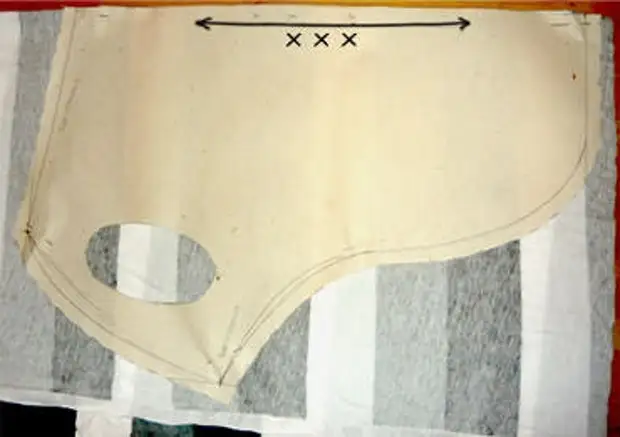
8. Roll into the rectangular pattern for the body by half the outfit outside and string the edge between the holes for the sleeves. Sleeps and hoods to the appropriate holes and remove the windbreaker on the front side. And here is your jacket ready!
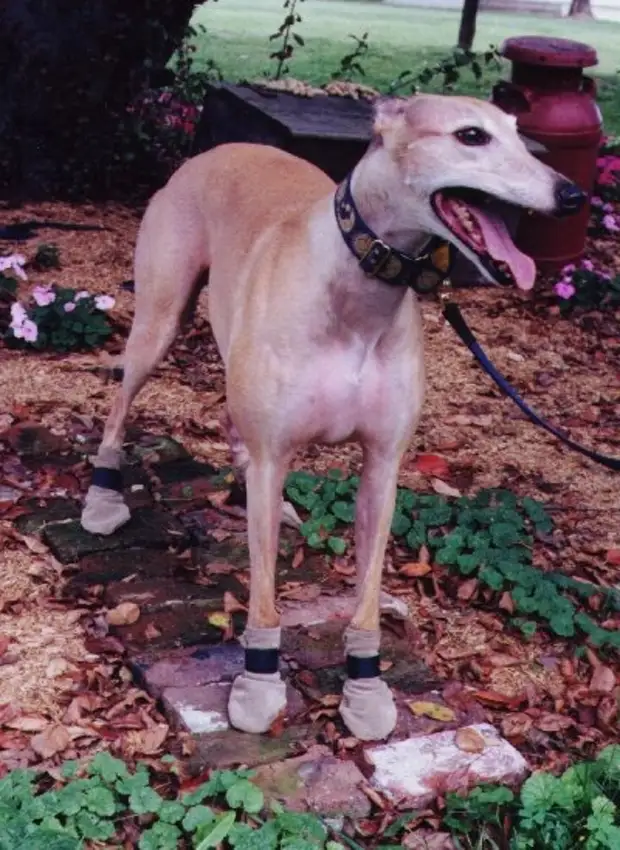
We sew shoes for the dog
Now that you have outerwear, you can think about the shoes that protect your pet's paws from scratches, as well as from dirt, reagents and cold.

You will need soft, but at the same time dense and non-moving matter, for example, suede, polyurethane nylon, burlap or upholstery fabric, and 4 identical segments of "Velcro" with a length of 10 cm and a width of about 2 cm each.
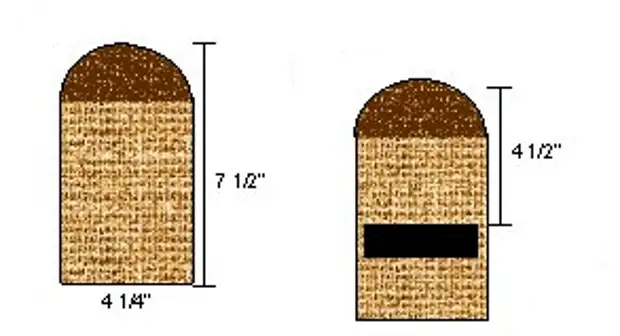
First cut 8 blanks of the same form from the fabric, as in the drawing. The length and width depend on the size of your dog, but the finished boots should cover the paw and some of the legs, as in the photo below.
Sew the rough pieces of "Velcro" on the front side of 4 out of 8 blanks, where you plan to make fasteners (it is best to arrange them above the dog's "wrist"). Return a little bit from the side edges, where there will be seams, and slightly more from the smooth side, as it were, limiting future tops.
Then sew 4 blanks with velcro and 4 untouched blanks in pairs with an inside, leaving unprofitable only a short smooth side.
Along the way, insert a lipucyclical part into one of the side seams. During the operation, the tape will remain from the inside, so make sure that it is not accidentally setting its free end to something. The pile should be on the same level with the rough stripe, but at the same time to look into the opposite side of it.
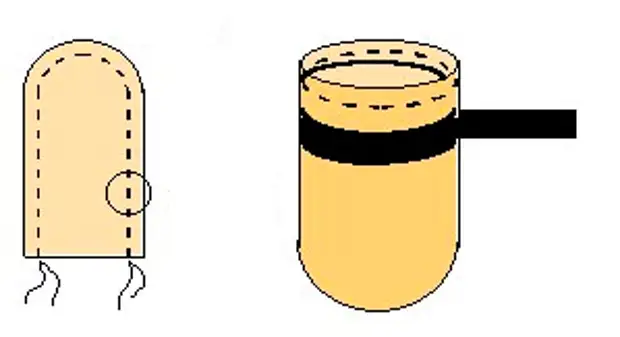
Put the shoes on the paws and zero, wrapped the ribbon around the "wrist" and pressing it to the rough stripe. When walking, shoes can turn around the paw, but should not fall from it.
A source