
Vertical landscaping interiors
Fitodesign is very popular and fashionable to date the type of interior decoration. More spectacular use of plants reveals vertical landscaping - the cultivation of decorative plants in the vertical direction. The easiest example is the cultivation of various indoor lien. Today, landscape firms offer to use special designs - phytomaoduli, in which any plants can be planted, forming a vertical "green" area.
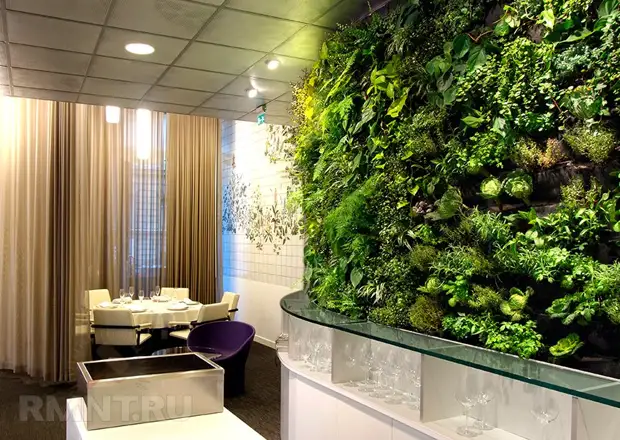
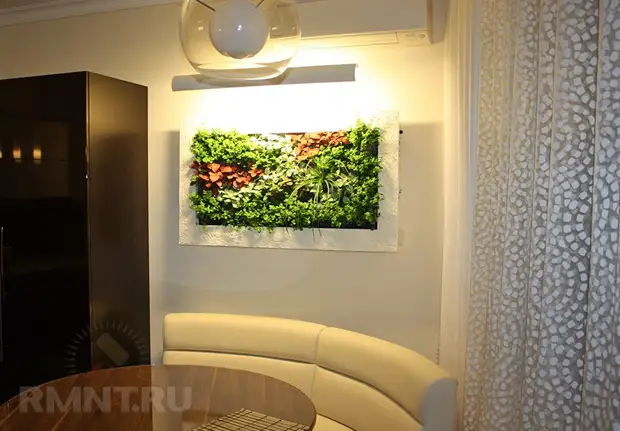
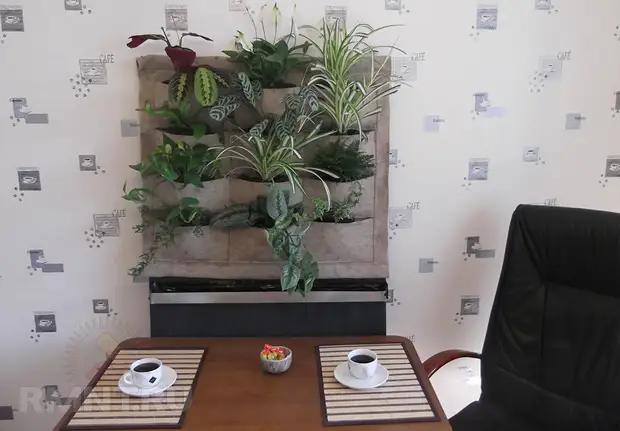
Fitosena is used to decorate ordinary walls, their sites, as well as as a mobile partition for zoning the room. The design of phytomoduli can be different - pyramid, cube, stela that can be installed in a niche, thus organizing a beautiful solution of "difficult" places in the interior. You can also use phytocartins, which in any room will become the center of the composition, attracting the eyes. If your house has columns, the use of green modules will be an excellent solution for their scenery.
Benefits:
- The phytomodul is a single design where a large number of plants can be planted.
- Plants are planted without land, and this avoids dirt.
- The weight of the whole design with the flowers is small, so the phytomodul can be mounted on the wall.
- Phyomoduli is very compact in depth (less than 0.2 m2), occupy very little space when mounting on the wall / column, etc.
- The design provides for the presence of a system of automatic irrigation, and therefore the care of plants is much simplified.
- "Green" walls create a huge aesthetic effect, since it looks luxurious and noble.
- An indispensable influence of plants on the percentage of oxygen in the room.
- When using phytomoduli on 1 m2, you can place more colors than if you used pots or vases installed on the floor or window sill.
The disadvantages include the high price offered by the interior landscaping companies. The average cost of a phytomodul size of 1040x670 mm is about 10,000 rubles. Number of plants - 21-24 pcs.
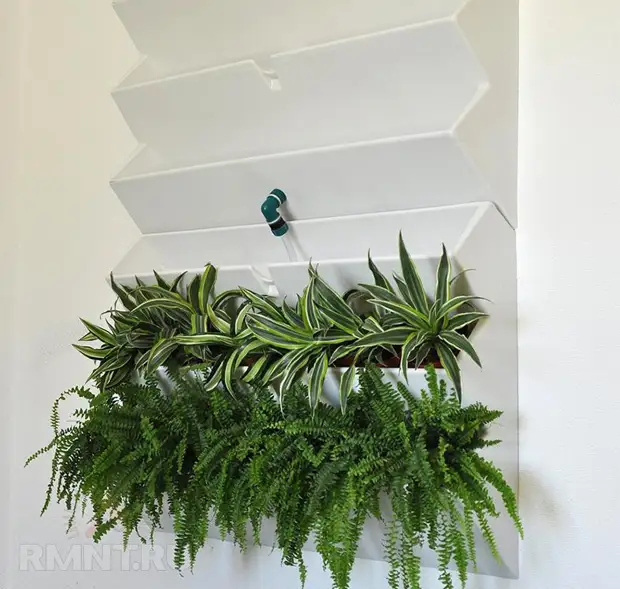
Design structure of phytomodulules
The phoconstructors offered in the stores are made of plastic (PVC) and sealed on the back side. Therefore, the wall to which the phytodul is mounted or near which the phytomodul is installed. No additional hydrophobic sucks do not need to do.
On the vertical basis cells are located - plant landing zone. This cells contain a system of automatic drip irrigation, a water tank and a motor for supplying water is provided here, as well as a humidity sensor is installed.
On the control panel, you can set a specific water supply program to plants as soon as the sensor will show the lower humidity limit, the automatic irrigation system will immediately work, and the plants will again receive the water they need and develop.
The dimensions of phytomoduli are different, on average from 30x30 cm for paintings and 80x180 cm for phytostine. The thickness of such structures is about 15-17 cm.
How plants are planted
For vertical interior landscaping, almost any plants of medium and small sizes are suitable for vertical interior landscaping.
Prepare plants disembarking cells, pour into each of them small grains of 1/3 from the height.
The basis or "soil" for plant landing is a moss sphagnum. It is sold now in flower shops. Moss absorbs well and holds moisture for a long time. Thanks to the bactericidal properties, it prevents fungal diseases.
In order to plant a flower into a cell, you need to remove it from the pot and slide all the earth. Then cut the roots' tips for 1-2 cm. If the root system is too big, then pruning on 1/3 of their length. Remains of the Earth wash in a basin with water.
After that, the roots of the plant wrapped in a wet moss and inserted in this form to the cell. If there is a place, put moss from above.
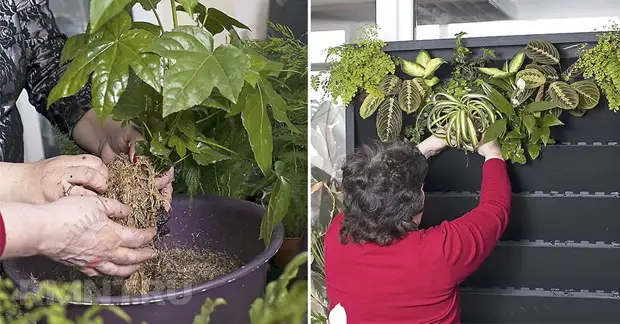
Thus, all other cells are filled. Try to plant plants so that there is no space between them. Form a beautiful "green" canvas.
What plants choose
All small plants are suitable for phytosta. Even cacti are suitable. If in the name of the plant in flower shops is the MINI prefix, then feel free to take this plant on the "wall". How to arrange the composition depends only on your imagination. You can use one species, for example, it looks good with spathiflow or anthurium. And it is possible to make a picture from plants, for this purpose the various types of MEDICAL. They grow long and do not lose their form.How to care for plants
Care of plants is the periodic waterproof water to the tank of automatic irrigation. You can also add different feeding. Spraying plants do not require, because wet peat evaporates moisture and thus creates optimal humidity and a special microclimate required by plants. As the plant grows, it will be necessary to cut down the discovers, remove dried leaves or flowers.
Installation of phytomodulules
Installation of phytocartine or phytomoduli is performed using fasteners, the same as for hanging the cabinet. First you need to make marking. Then drill holes in the wall and score a dowel there. Screw the screws not to the end. The module itself is screwed by the suspension. Now you can hang the module on the wall.Lighting for phytosten
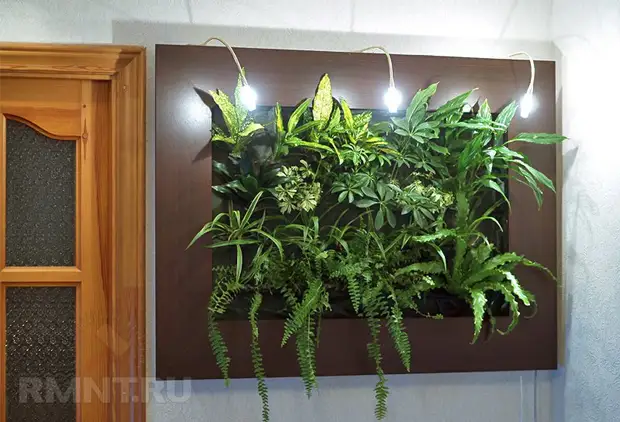
Lighting will be stylishly highlight the design in the overall room design. Luminaires can be mounted directly to the phytomodul (from above, on the sides, below) with the help of decorative screws and direct on the plants.
You can also use LED backlight. To do this, you need to attach a wooden bar (2.5 cm thick) from behind and on top to the Fitosen Frame. On the free edges of the frame and rearly glue the LED tape on the bilateral scotch and connect it to the power grid. When the light is turned on, the effect of "Parsi" phytosten in the air will be observed.
How to make a phytomodul on a felt basis with your own hands
The above describes the design of ready-made phytomaodules, which are put up for sale landscaped and flower firms, but the cost of the products offered by them is quite large. Can I make a phytostine with your own hands? Can! And its advantage will be the low cost of materials, disadvantage - the lack of an automatic watering system.
For the device of phytostic from felt 25x50 cm, you will need:
- Frame - needed for the fortress of the structure and fastening on it felt fabric. Board, PVC panel, etc. (about 250 rubles);
- Film for waterproofing, it is desirable to take a film for greenhouses. (about 100 rubles);
- Slim felt or any other tissue that is not affected - for sewing pockets for planting plants in them. (about 300 rubles);
- A small narrow pallet - to collect water from watering plants. Narrow flower pots can be used as such a pallet. If you work hard, you can find decorative versions of such tanks. (about 150 rubles);
- Scissors, construction stapler, marker.
Total, our phytosten size 25x50 cm without plants will cost less than 1000 rubles.
The first thing you need to do is to attach to the frame to the frame using a stapler.
Now we make felt pockets (fix pockets for a frame can also be stapler).
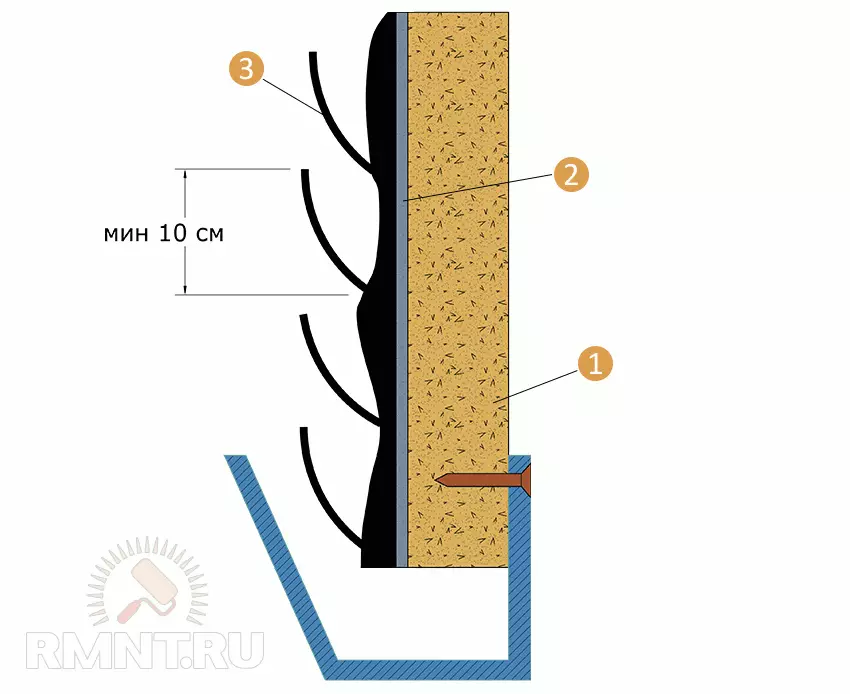
Water tank Breppy from below to the skeleton frame as shown in the design of the cutting section. Fastening the entire design to the wall is similar to the fastening of the phytomodules described above.
How to plant plants in a phytomodul on a felt basis
The technology of plant disembarks in pockets are different from plant landing in phytomoduli from PVC. For this phytosta, the roots of the plant also need to smoke from the ground, rinse and trim. Then the remaining tissue cut on the flap. Fabric flaps wrapped the roots of plants with a prepared new soil. Then we insert the resulting so-called pot with a plant in your pocket.
Important! Use special soil for plants, it is much easier than ordinary earth, so as not to lose design. For waterproof, add to the soil 1 part of the sfagnum moss.
This phytosten is not equipped with a vehicle system, so do not forget to water your plants as the soil drying. Such a design with proper operation and timely leave for plants will serve you about 5 years.
A source