
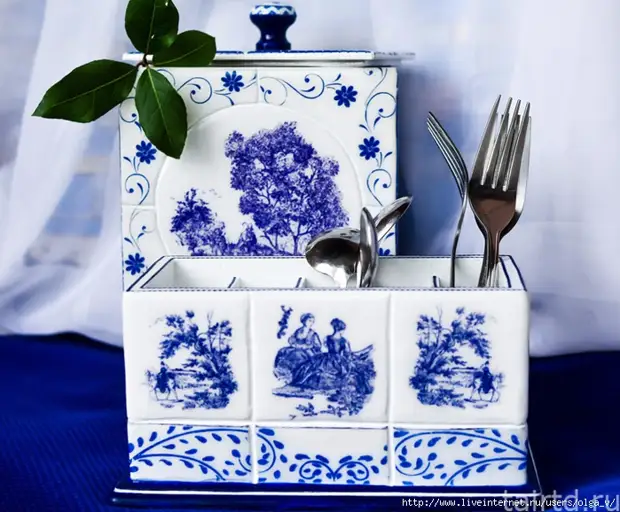
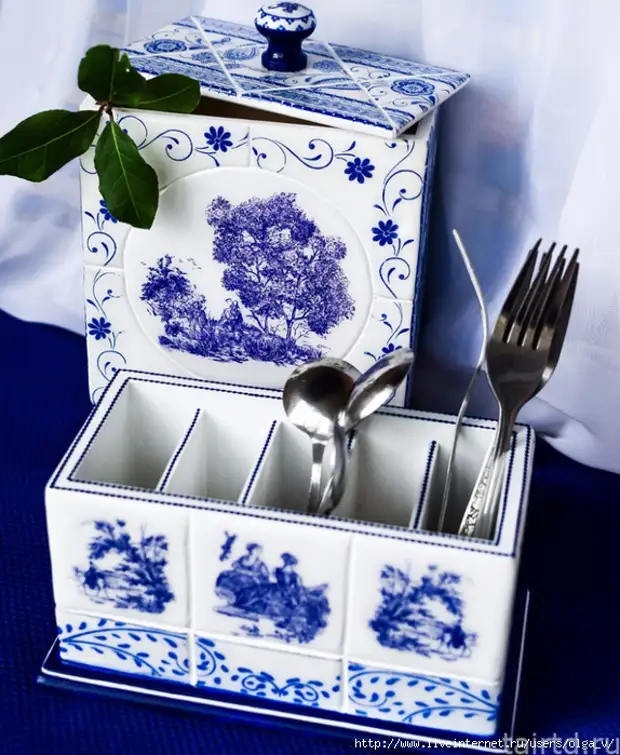
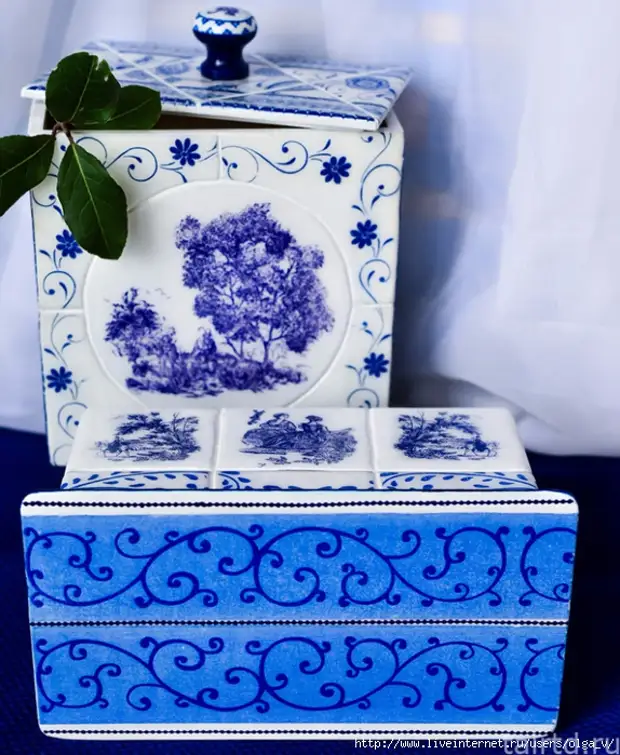
Author: We will make a stand for cutlery with a tile imitation in a Dutch blue-white style.
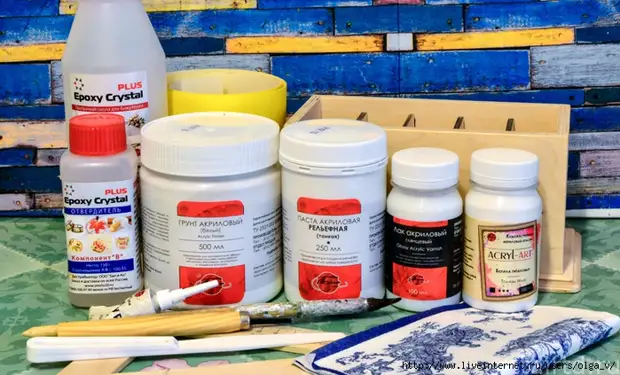
We will need the following materials:
• Acrylic white soil;
• Acrylic paint Belil titanium;
• Napkins for decoupage in blue-white gamme;
• Contour for glass white;
• Acrylic gloss lacquer;
• paste acrylic relief thin;
• jewelry epoxy resin;
• Mastichein plastic with a wide rib, a knife for wood thread with a V-shaped tip, a ruler, sandpaper of medium and shallow grain, plastic container for mixing epoxy resin, stationery, a protein brush.
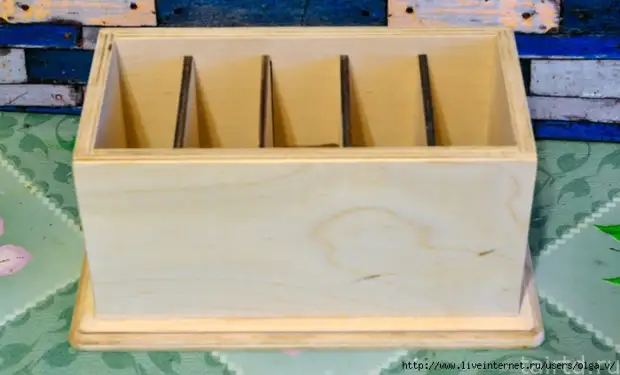
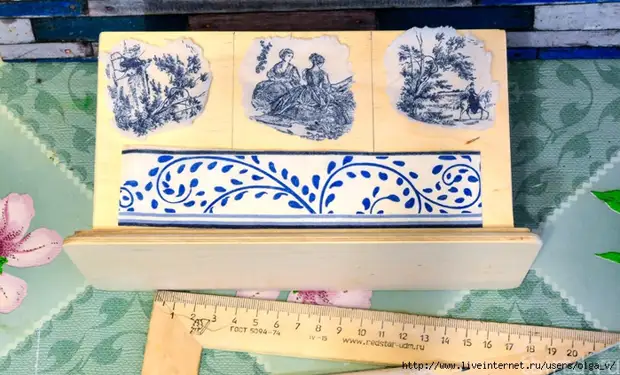
I took the workpiece called "Stand under the consoles", but I decided to make a stand for cutlery from it, because I already made a kitchen box in this technique and wanted to continue the set.
We think in advance and describe the drawing from the motifs of the napkins on the walls of the workpiece. Revelation motifs so that when gluing the napkins, we did not form "thorough".
We write down all the sizes of the tiles that will form in the future, for clarity, you can pencil on the workpiece to draw yourself a layout as these tiles will be located.
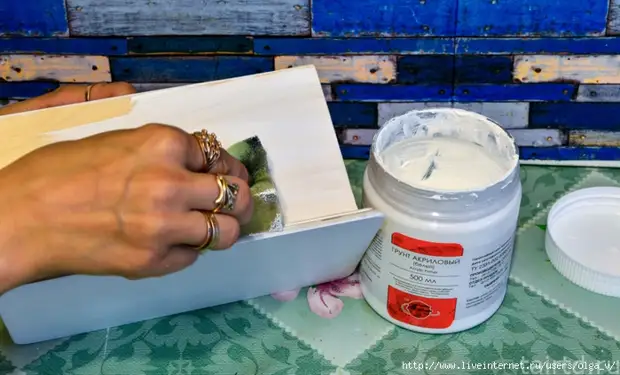
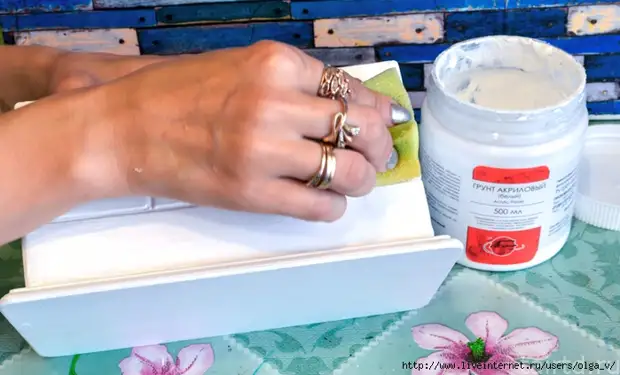
Breasting the workpiece by acrylic soil with the help of a furniture sponge, one time will be quite enough. Why is the furniture or construction sponge? It leaves fewer bubbles on the surface with pumping movements.
In this case, I primed the longitudinal movements, as if stretching the soil over the entire surface.
Inside the workpiece with a primer brush - the hand will definitely not climb there.
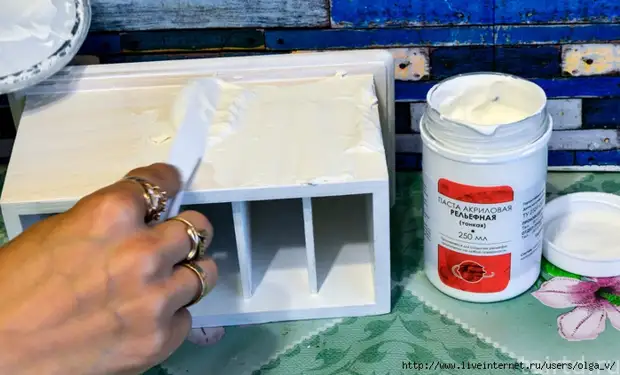
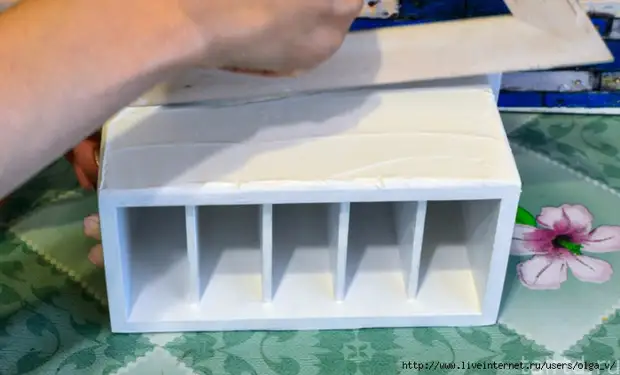
After the primer, you can not hide, because we are starting to form a tiled masonry with a relief paste. We apply a flat mastic paste with a flat layer with a thickness of about 4 mm on the entire surface, not necessary, otherwise the chips and cracks may appear later. You can add a little PVA in the paste for viscosity.
We will work step by step, with each wall separately, as we need to dry the paste layer on each wall of the workpiece and try not to damage it.
Now we take a ruler and watch the desired sizes of tiles along the edge of the workpiece.
Apply the line carefully, not on the layer with pasta, and nearby, on uncovered paste, the face.
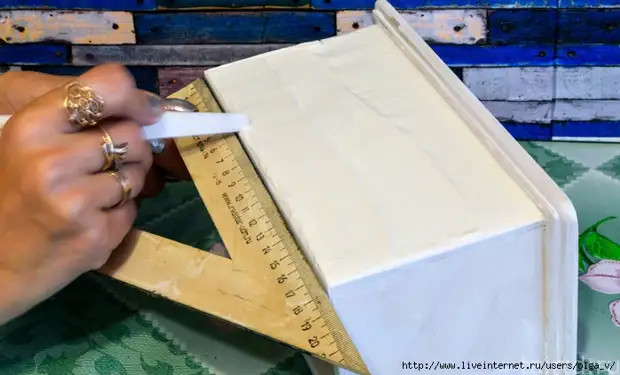
Now we apply the ruler, according to our marks directly on the surface with the applied paste, so we make a flat marking of our tiles.
You can do on the contrary, and wait when the paste will dry and hold the line with a pencil, but it was more convenient for me to work with the raw layer of pasta.
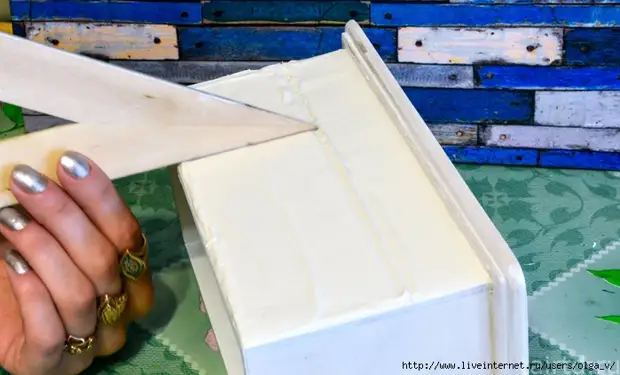
The edge of Mastichene is watched by all our marks made by a ruler.
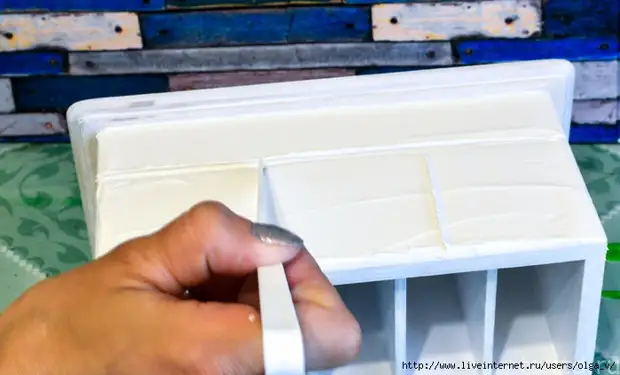
We leave the paste to dry, about 3-4 hours. When it almost dried, we take a knife for a wood thread with a V-neck and we are on our markup.
This technique is called "Carving" on a putty or texture paste. (Natalia Fochetina has a wonderful video MK about this). Who did not look, in our master class I just describe this technique in my interpretation
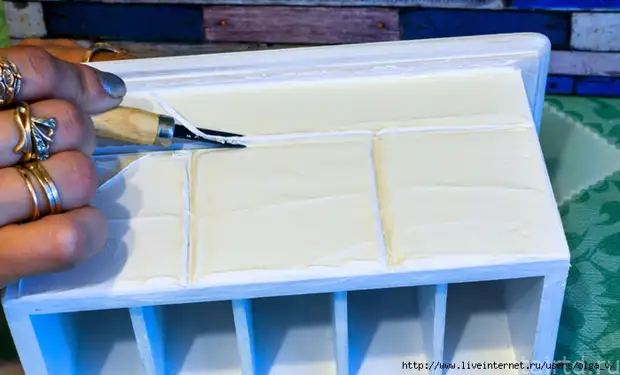
We succeed in the pasta to complete drying and proceed to the surface of the surface.
We take the sandpaper of medium grain and begin to grind the surface - we need to achieve the perfect smoothness of the tile. Finite grinding make a fine-grained skin.
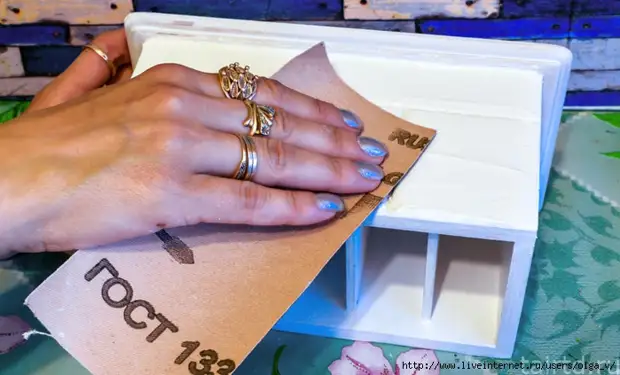
We form so all the edges of the workpiece.
Breasting a blank in 2-3 approaches. At this stage, the ground carefully, the furniture sponge of the longitudinal movements so that on the surface does not leave either bubbles or the strips. We succeed very well.
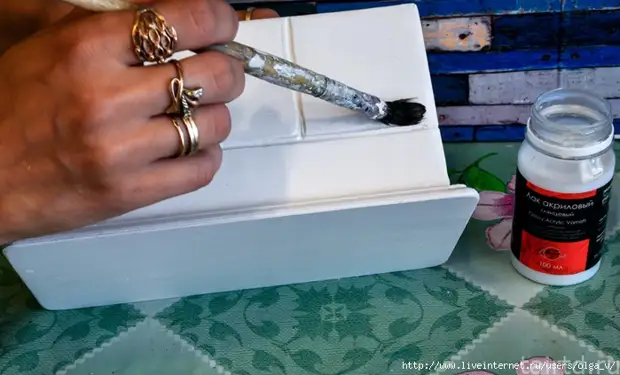
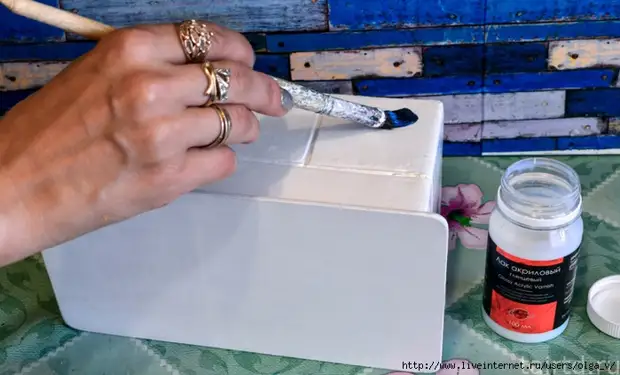
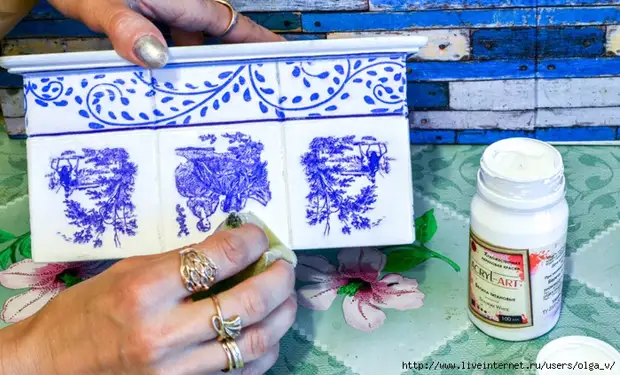
Skin. Fix the layer of acrylic glossy varnish.
Now the paint Belil titanium is missing all the primed surfaces.
Praying carefully, since a well-scratched blank is the basis of successful imitation in this case. The whole surface should be perfect white.
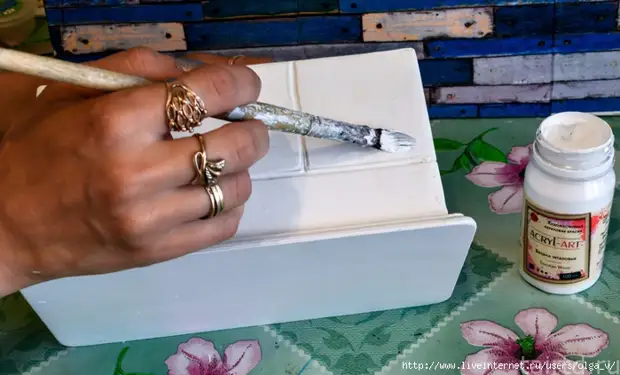
Skurim, fix the layer of acrylic glossy varnish.
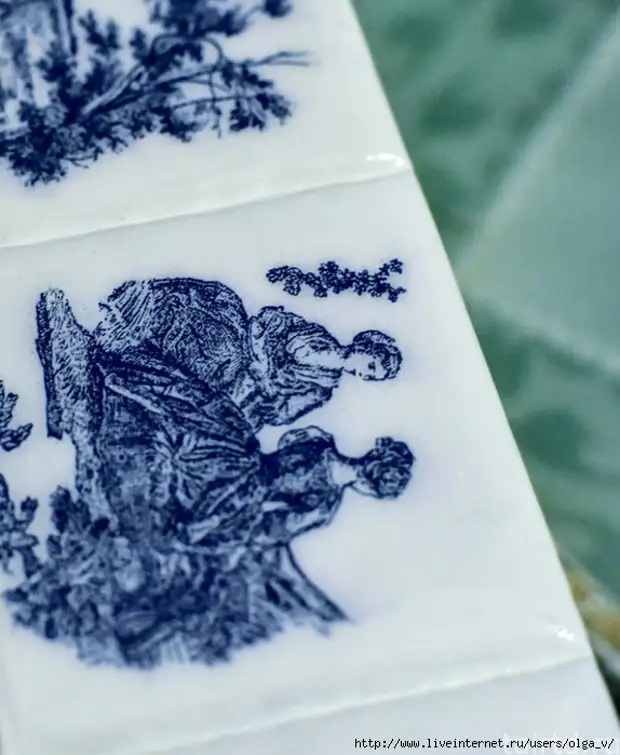
We take our prepared motifs, eliminated from napkins, and proceed to sticking.
I always stick a napkin with two files. On the file put the motif from the napkin "face" down. Spriver a spray gun.
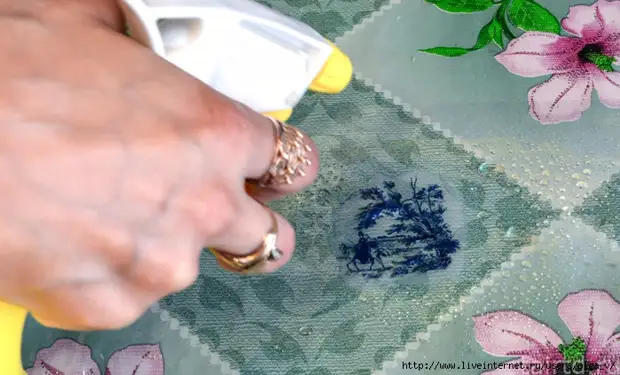
Caution with wet fingers stretch it.
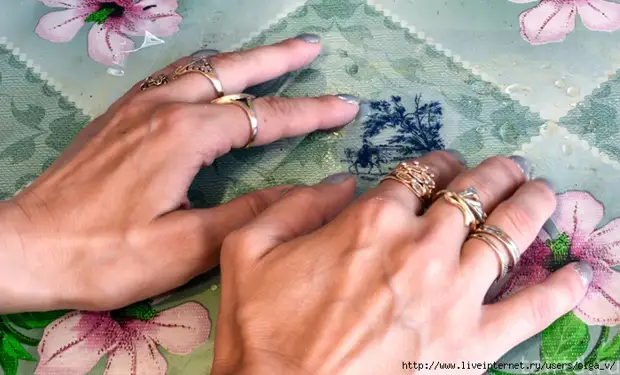
We put another file from above. We pass on top of the plastic card, thereby kicking out excess water and bubbles. Remove the top file. We merge excess water.
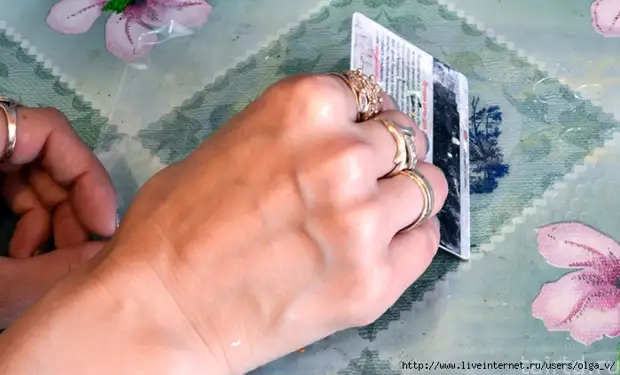
We wash the surface of the workpiece by acrylic varnish and apply the motive together with the file.
Again we take a plastic card and drive water and bubbles.

We carefully remove the file and spread irregularities with a tassel if they are still formed.
Envy. We cover the motive with two layers of acrylic varnish. Skin.
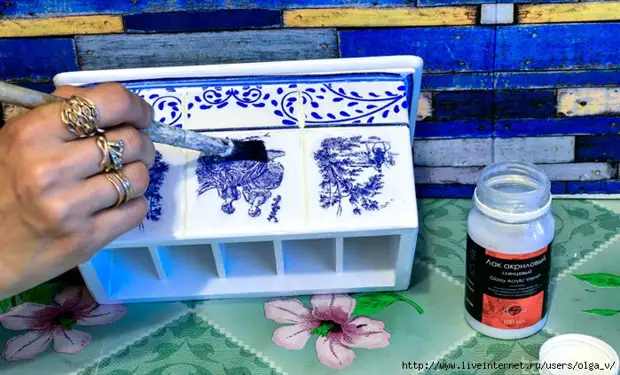
The paint whiten Titanium is missing the background with sponge movements, thereby lining it and hiding the edge of the napkin. Small bubbles can be won by the brush of "protein", slightly touching the painted surface.
Fix the layer of acrylic glossy varnish.
When the motives are glued and the surface is fully prepared, proceed to the final stage - the formation of tiles with a jewelry epoxy resin.
When working with it, it is necessary to follow some safety rules: work in the respirator (since the epoxy resin pairs allocated when mixing two components are very harmful) and use surgical gloves (to protect the skin of the hands from random ingress of the substance).
After the final drying, the epoxy resin becomes safe (we carry jewelry with epoxy).
We take a small plastic container, pour the first component of the epoxy on the eyes (at the rate of how much it is necessary for one line).
If you are still mistaken in the calculations and made more, then the remnants of epoxy can be pouring into Mold, if any. At the same time, the casting is still for the next work. Add a second component-thickener, approximately 3: 1 (three parts of the resin, one part of the thickener). We thoroughly mix for 3-4 minutes.
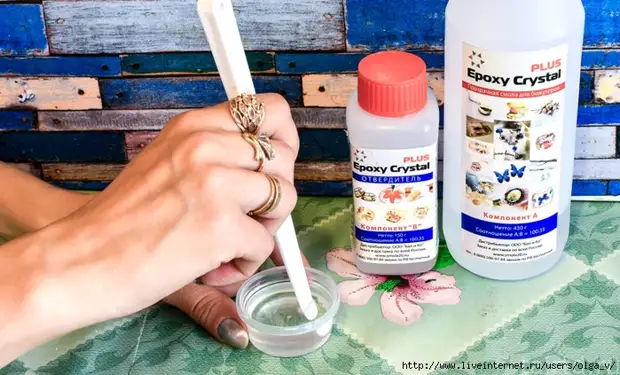
"Forget" about our epoxy of an hour for two, during this time all bubbles will come out and it will begin to polymerize, it will not be so liquid.
It is very important that the surface on which your workpiece lies is perfectly smooth, it is possible to check it with the help level.
The place where you will pour, should be a secluded, not passing room and certainly not a kitchen table. And it is desirable to make a mesh cap from flies for this purpose to cover their work after the fill to avoid microscopic hairs and dust to the surface.
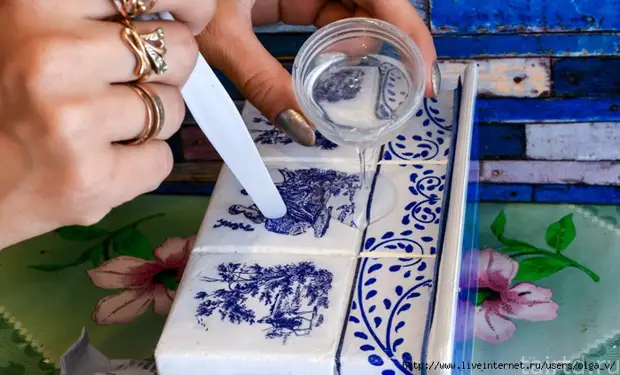
Mix once again with smooth movements in a circle and proceed to the fill.
We pour epoxy into the center and slowly begin to take it to the edges of the faces. Thoroughly control this process so that the epoxy does not run away from the edges.

And now the hour is two sterevatically, every 10-15 minutes we control the behavior of epoxy on the surface. If suddenly she ran away, we take a dry cloth and carefully remove it around the edges, as if forming a barrier along the edge of the surface.
We are approximately 7-8 hours, until the epoxy becomes viscous.
The degree of viscosity can be checked, lightly touching the surface with a wet finger. While the epoxy is still in such a state, it is capable of self-leveling and "poke" into it is not scary.
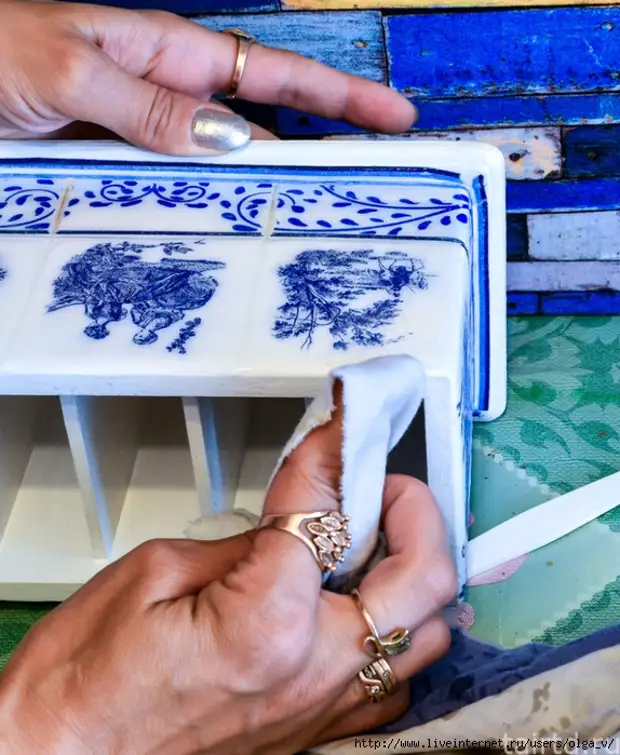
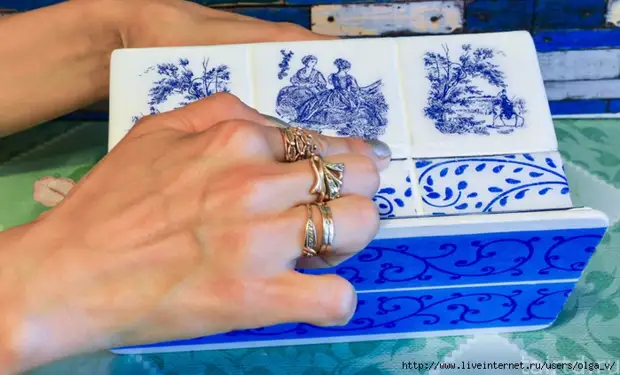
We take plastic mastikhin with a wide rib and spend the lines on our grooves made earlier. If the edge of the Mastichene is very narrow, we simply cannot form the edges of the tiles - epoxy will constantly bring to them and level the surface.
With a frequency of 15 minutes, we repeat this procedure to almost completely frozen epoxy, because it still retains its turnover, it's true to a lesser extent, and seeks to align the surface.
On the formation of one edge takes 12 hours, it is better to do the fill in the morning. By evening, one line you will have completely formed. The process is time consuming in terms of time, but it seems to me that the result is worth it.
Thus, we form all the edges of the workpiece.
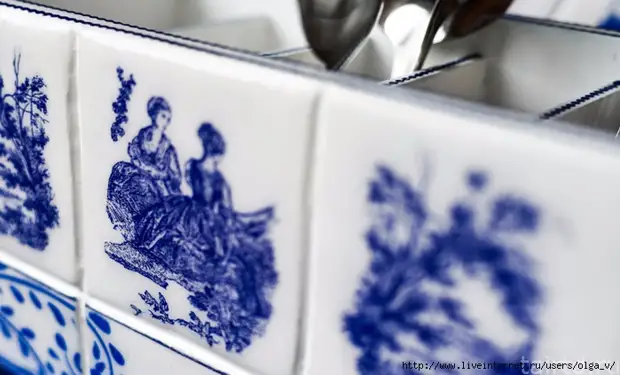
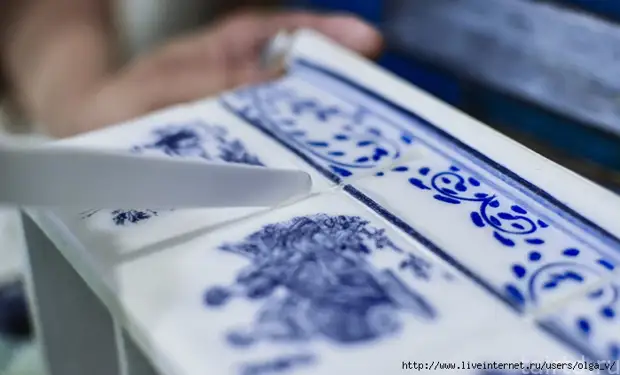
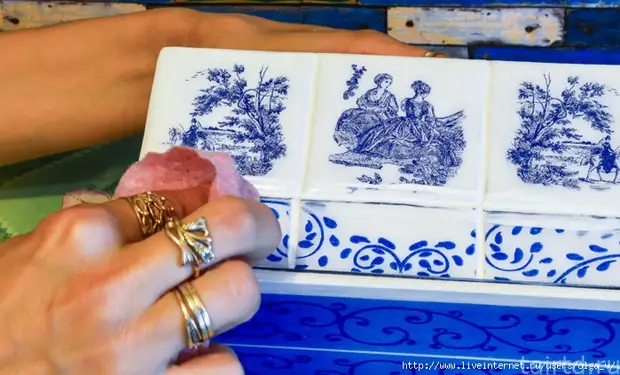
Now we make the imitation of the grouts of the seams. We take a white outline on the glass and spend it according to the formed grooves.
Immediately spend the finger on the groove with the contour - this is such an imitation of the grout.
Excess the contour, which fell on the tiles, immediately carefully remove a wet chopper or cloth.
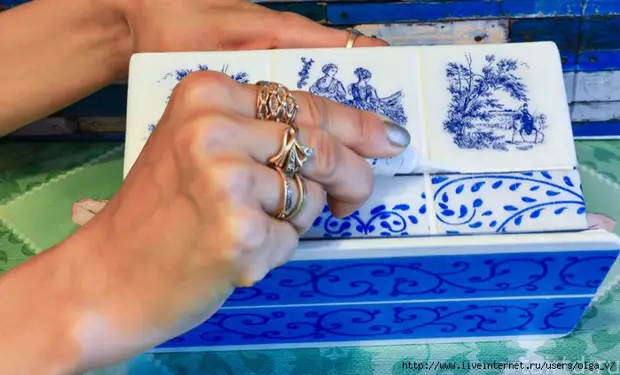
The surface inside the stand and sterns once again score paint Belil titanium. Fix two layers of acrylic glossy varnish.
Finish varnish make your favorite varnish.
The bottom of the stand you can decorate at your discretion - or leave white, or stick the napkin as I did. Also at your discretion you can decorate a bench slice on the bottom of the stand and the upper edges of the side.
And after long and hard battles with epoxy resin, we get such a wonderful set with imitation tiles!
A source