

Residential real estate owners seek to improve homes and apartments to their own taste and often acquire expensive interior and lighting items. In this master class, we will clearly demonstrate how you can, having limited financial resources, create a unique ceiling LED chandelier with your own hands. Its design will be original, and knowing the features of the manufacturing process, to design a similar element of lighting, you can and yourself.
Materials
To make a lamp, will be needed:
- U-shaped aluminum profile;
- LED ribbons;
- fixing profile tips;
- connectors and wires;
- screwdriver;
- saw;
- roulette;
- soldering iron;
- 3D printer;
- heat-shrink tubing;
- wires;
- soldering iron.
Source requirements for this project:
- The lamp is needed ceiling, the light should spread over the entire length of the room;
- premises elongated;
- Fastening points are only two.
Aluminum profile must be taken enough durable and moderately hard, while watching it is not too heavy.
Printer print printer is necessary to create a translucent diffuser, supports and caps. If this is not at your disposal, these items can be made from other materials.
LED strip in the framework of the security take with 12 volts parameters.
Step 1. Decide with the final view of your lamp. Proceed from the features of the room of its area and design. In this case, the lamp was a lamp in the form of broken lines interconnected.
Step 2. By creating a project, calculate how many meters of the profile and the LED tape you will need.
In this case, the initial length of the aluminum profile amounted to 5-8 meters. It will not be superfluous to calculate the parameters of the lighting of the room, based on the destination of the area. In the middle, the recommendations are as follows:
- passing zone - 50-100 lux;
- Residential - 80-100 lux;
- Working area for writing and reading - 400-500 suites.
Since the light was needed in the corridor, the parameters of about 100 suites fit perfectly. The calculation looked like this: the area of the corridor is 7.5 square meters, respectively, 100 * 7.5 = 750 lumens. LED strip 8 meters long covers the requested requirement.
What is important to know about 12V bands. Check the power you want and make sure the converter is capable of issuing it. Example of calculation: The initial LED bar with a power of 24 W operates by 12 V, and it needs 24/12 = 2 A.
Step 3. After all the calculations, the profile must be cut into pieces of different lengths.
Step 4. Start assembling the chandelier frame. It is convenient to place elements on the floor right in the room where you will install it.

At points where the parts of the lamp will be reset, use the cutting tools to carefully combine them. Separations are carefully treated so that they are not sharp or with jar.
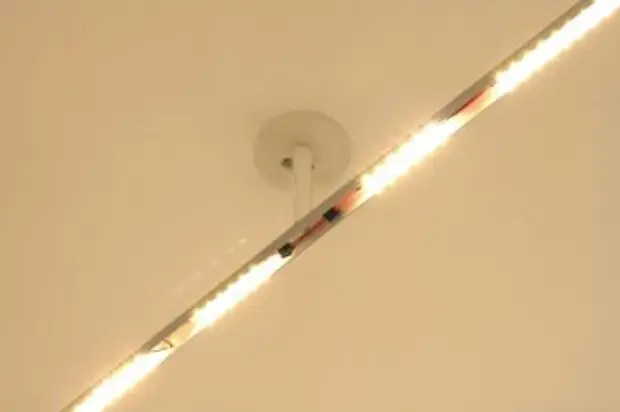
At the point of hanging the lamp to the ceiling drill holes. Do not forget to make another one next to them to turn the wire.

Step 5. In this case, the power source was, but the connector did not match the standard sockets, so it was necessary to move from it to a suitable case. The process you can see in the photo.


Step 6. Aluminum profile frame for aesthetic look. Use polishing cream and soft cotton fabric.
Step 7. LED ribbon cut into pieces, the length of the profile corresponding to parts. Cut them according to sections. Between yourself, connect the elements with wires. During the soldering, observe the polarity. Connection Safety Connection Places Clean the shrink tube.


Step 8. Take the lamp section, check the balance. If one of the sides outweighs the product, you will have to balance it with weights. Insert them is required in the profile itself, but on the opposite of the side oppressing part. In this case, they were made using three-dimensional printing. You can replace them with small pieces of wood, pre-painting them in the tone.

Step 9. Connect the power supply to LEDs.
Step 10. Now you need to hang a chandelier to the ceiling. To hide the wires and cables were used printed on a three-dimensional tube printer. You can replace them with other elements by purchasing suitable in the store.
