
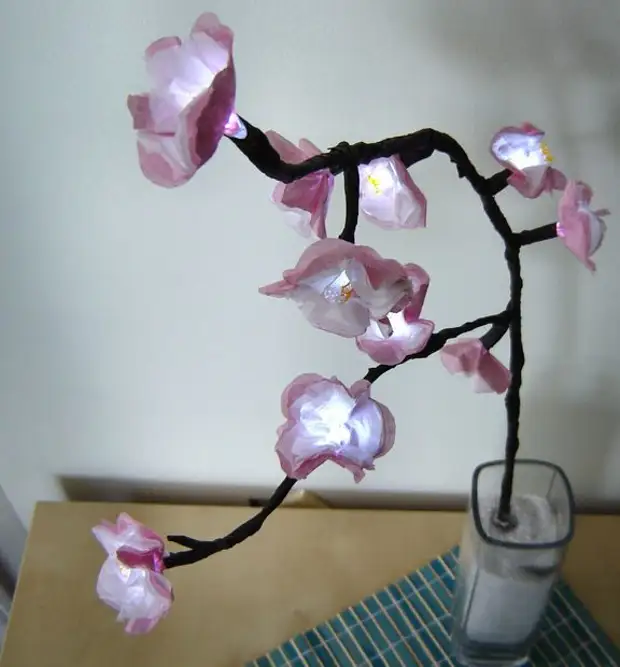
In essence, there will be no revelations in today's master class. Just one of the obvious solutions. It is simple and quite cute. But let's start! So blooming cherry!
New Year's garland on batteries
White and Pink Fabric or Gift Paper
The branch of artificial colors (I used it is artificial, but the real is also quite suitable)
Ribbon for winding stem (brown)
Vase
Decorative sand or crushed stone
Twist tape
Glue
Pliers
Scissors
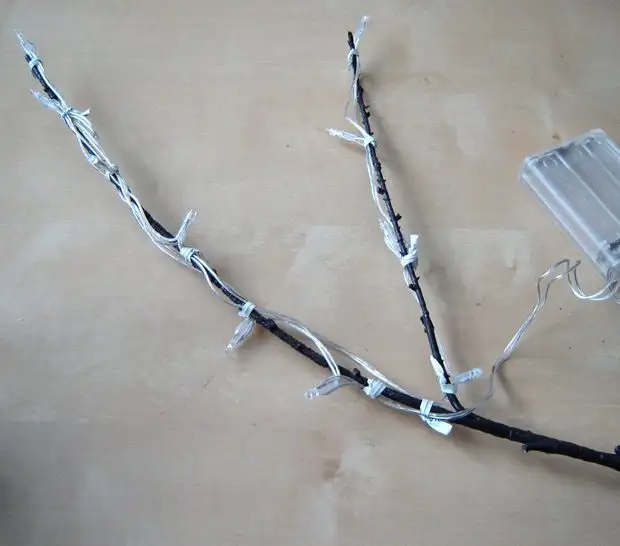
Step 2. Fix light bulbs
Clean flowers and extra processes from the branch.
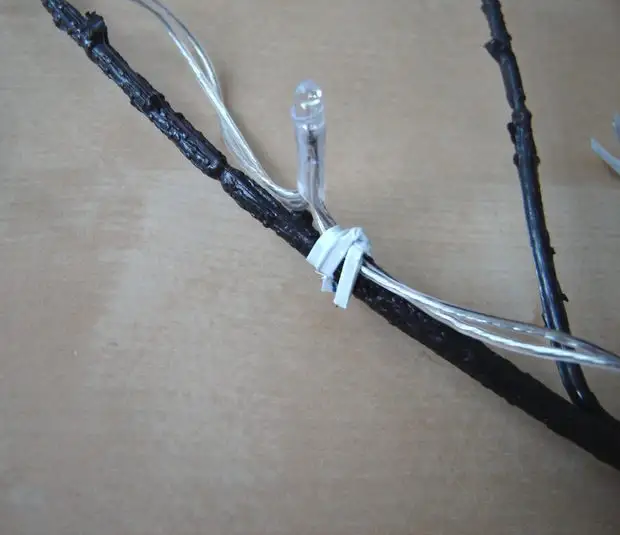
Starting from below, fix the light bulb on the branch, trying to do it evenly.
Step 3. Cooking material for colors
I used four shades - two white and two pink. You can experiment with colors and textures.
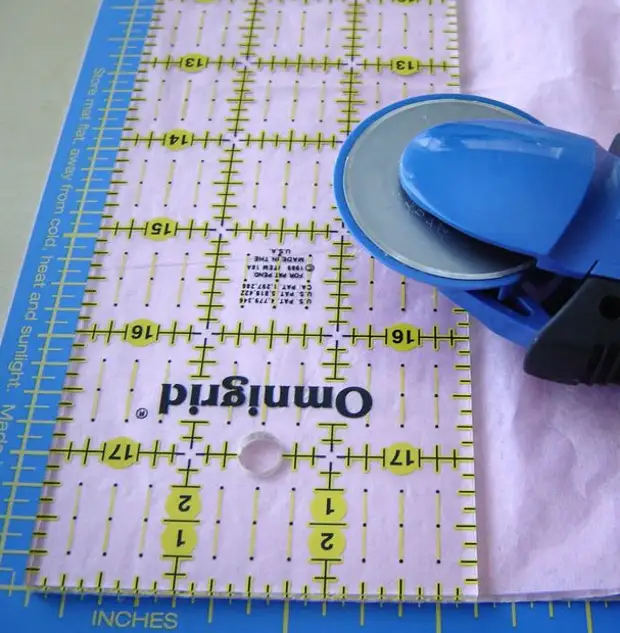
We need to cut out four layers of material (tissue or paper) squares 3 by 3 inches.
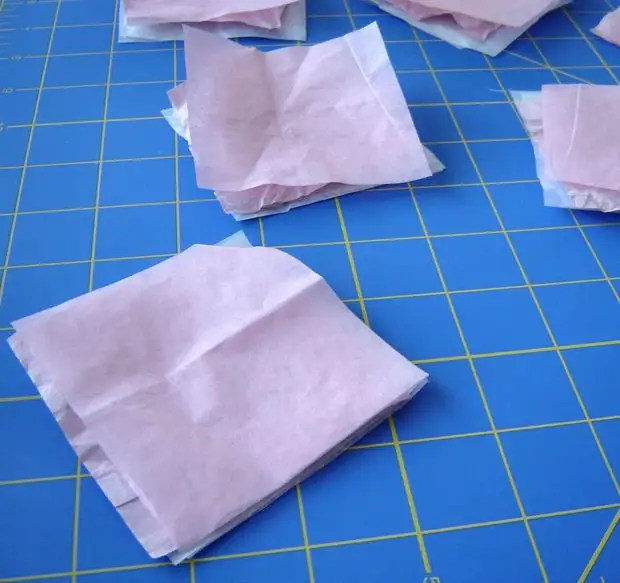
You will need one such a set for each light bulb.
Step 4. Cut the flowers
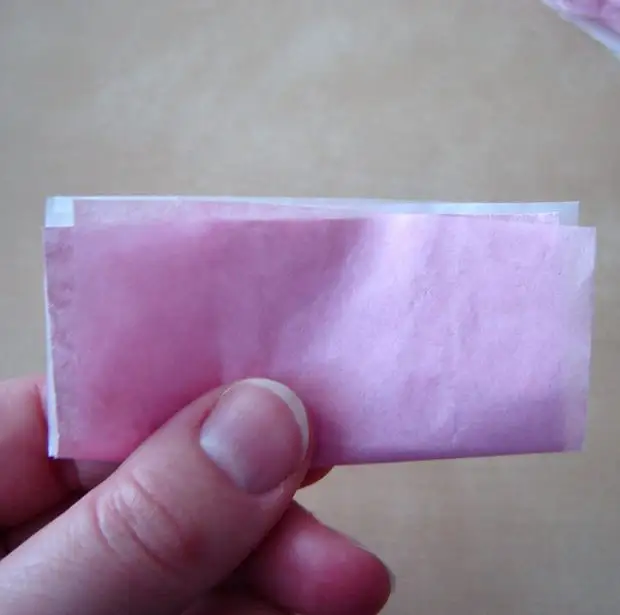
Fold each square (of four layers) in half. Like this:
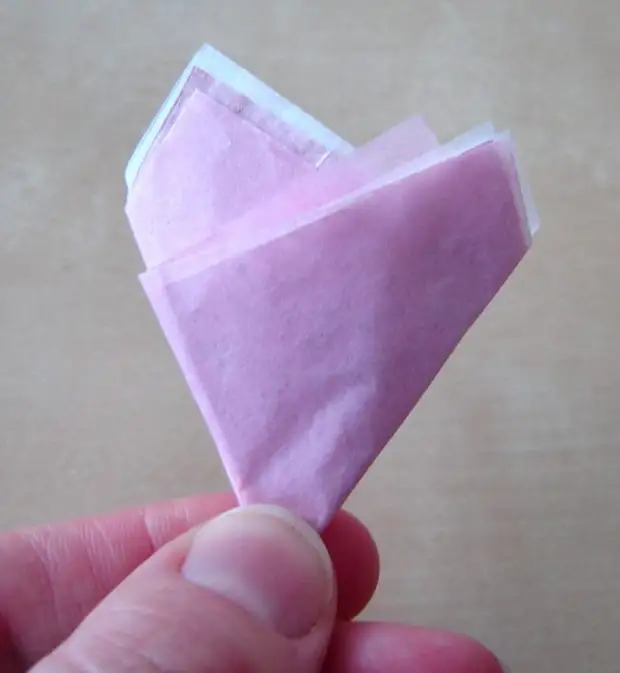
Then like this:
Then like this:
And then cut the top edge with a semicircle. Like this:
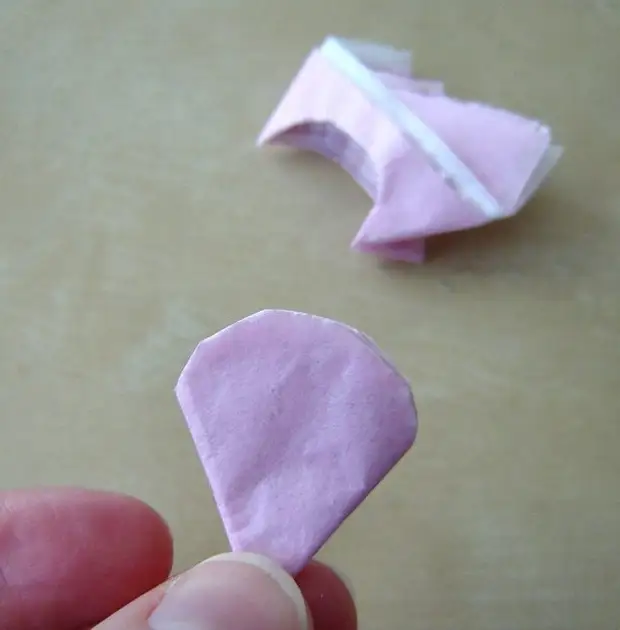
Expand.
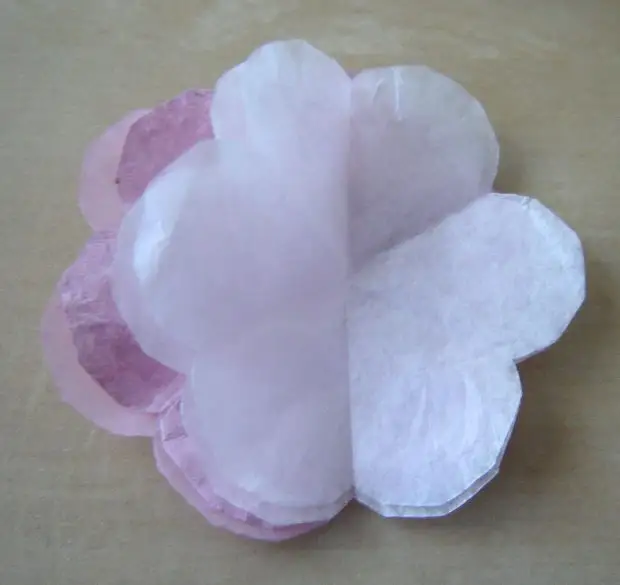
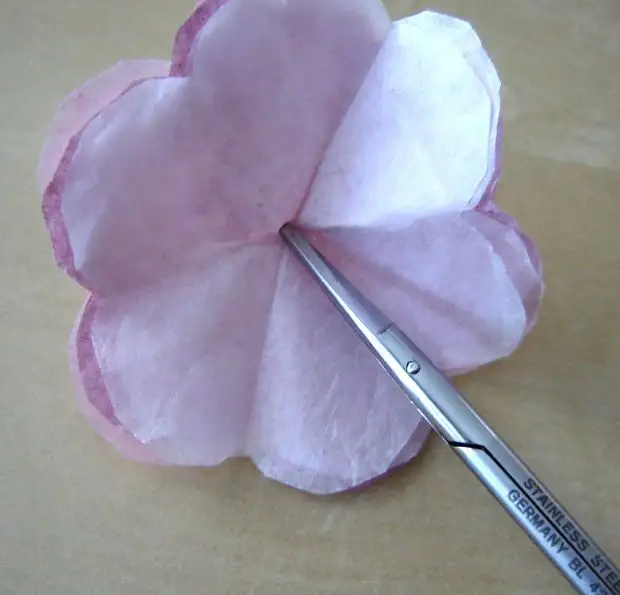
Now you need to glue all the layers together:
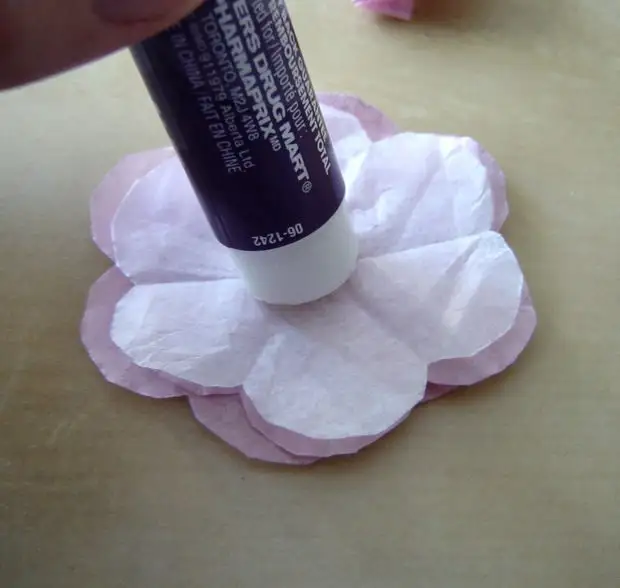
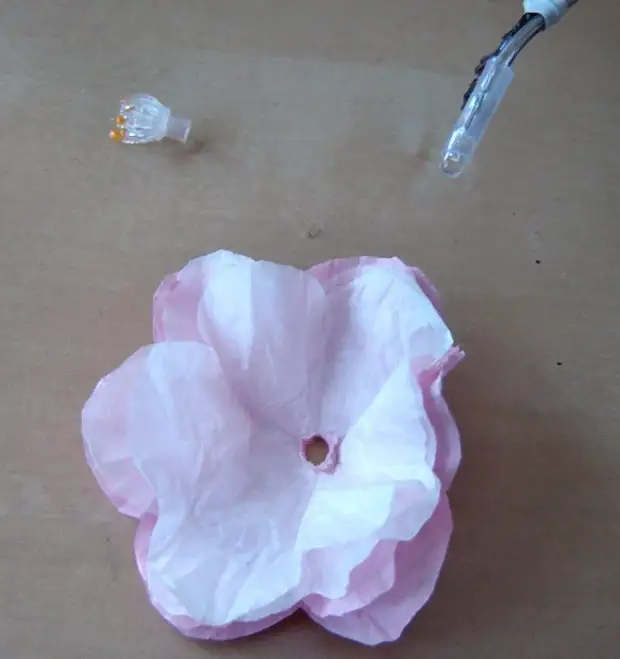
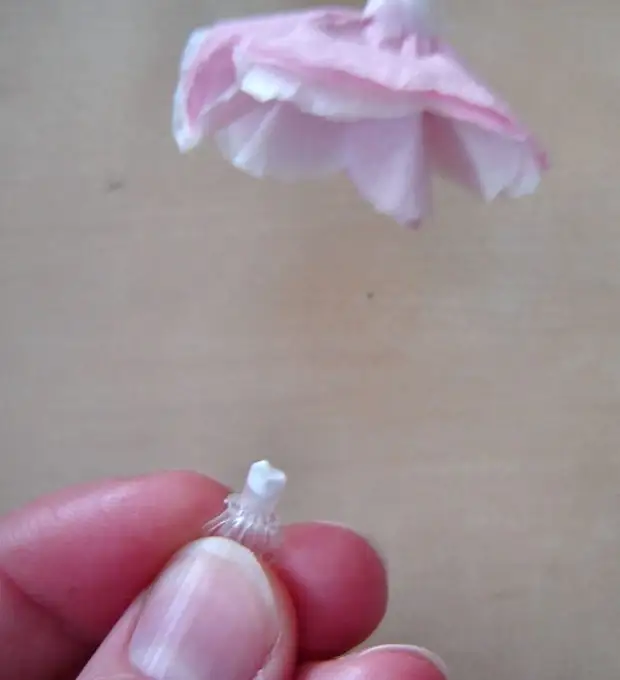
And pierce in the middle hole:
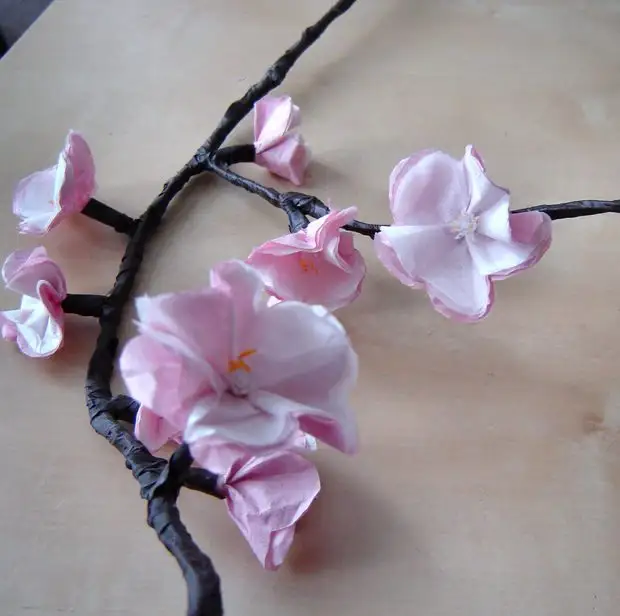
Step 5. Wear flowers on the branch
In the artificial colors that I used, there were stamens. I thought that if you decorate the LED in the center, then the light would become more scattered and beautiful. If you are using a real branch, and you don't have plastic stamens, then you can stick to the sand on the LED to make the light less bright.
In the following photos, you can see the process of rolling and fastening colors on the branch:
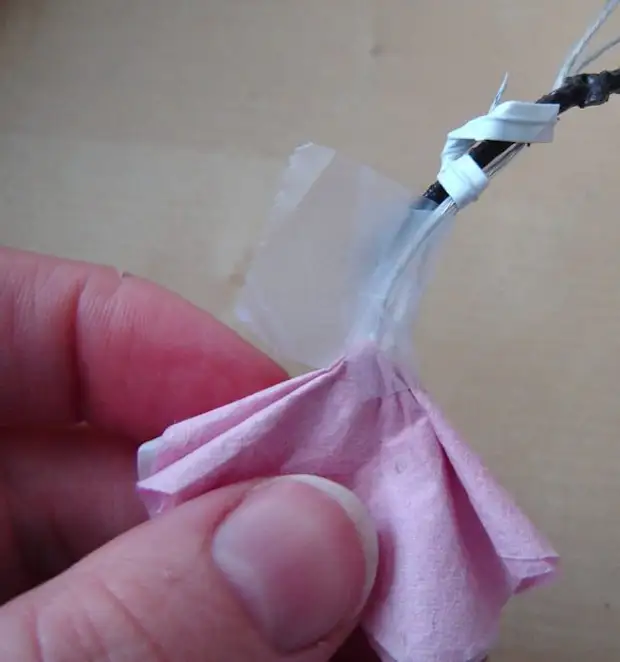
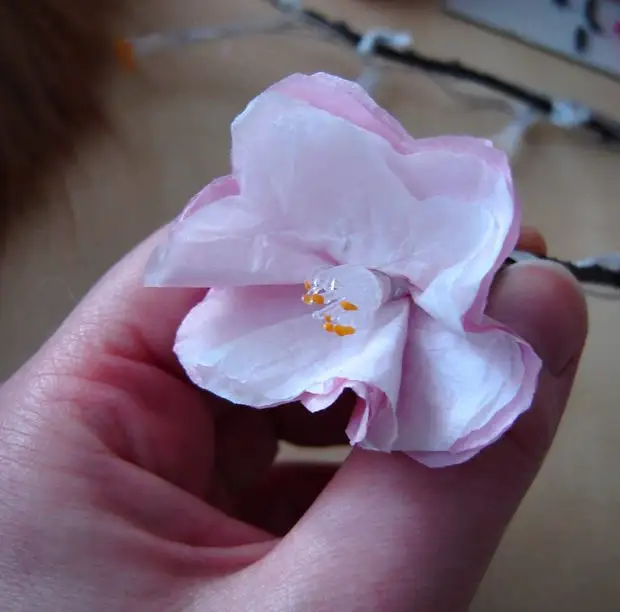
Lightly remember the inner layer so that the flower looks natural.
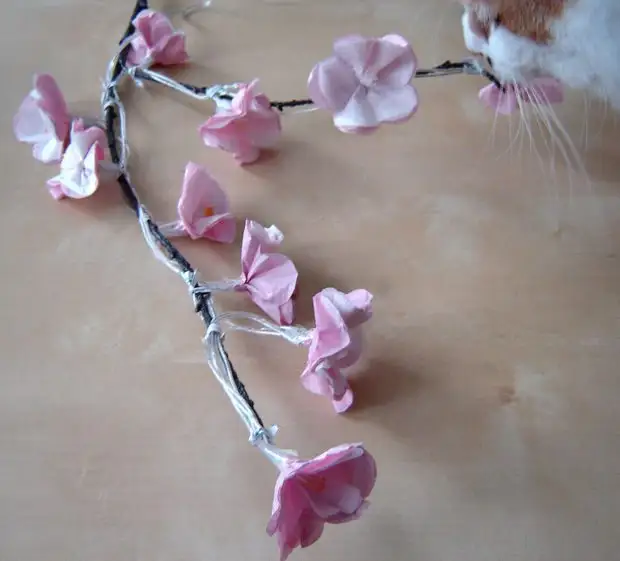
Step 6. Watch the branch
Watch the ribbon branch.
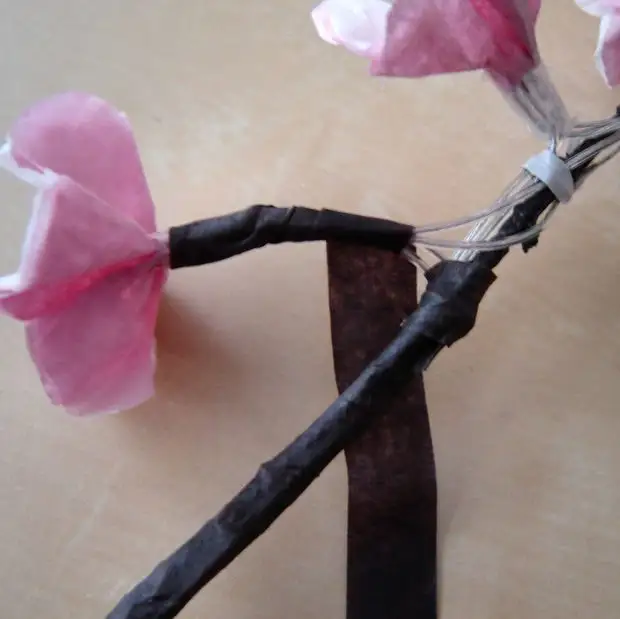
We try to make it a lot to disguise all the wires and make the appearance of our flower more natural.
Note Translator: Apparently, a special tape is used here, which is used to create all sorts of artificial colors. I do not know accurate translation for this thing.
Step 7. Completion
Put a branch with a battery in a vase and start to fill the sand.
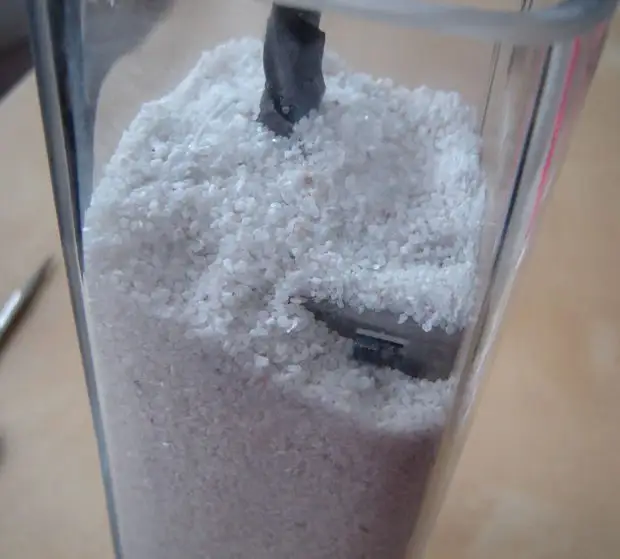
Make sure the switch remains on the surface.
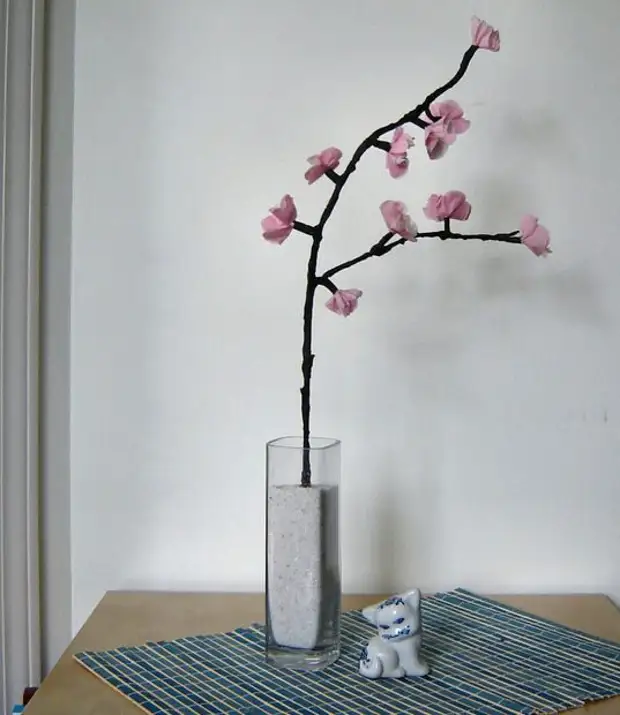
Unfortunately, when the batteries need to be changed, you will have to get a branch from the vase. But while you have new - just enjoy!