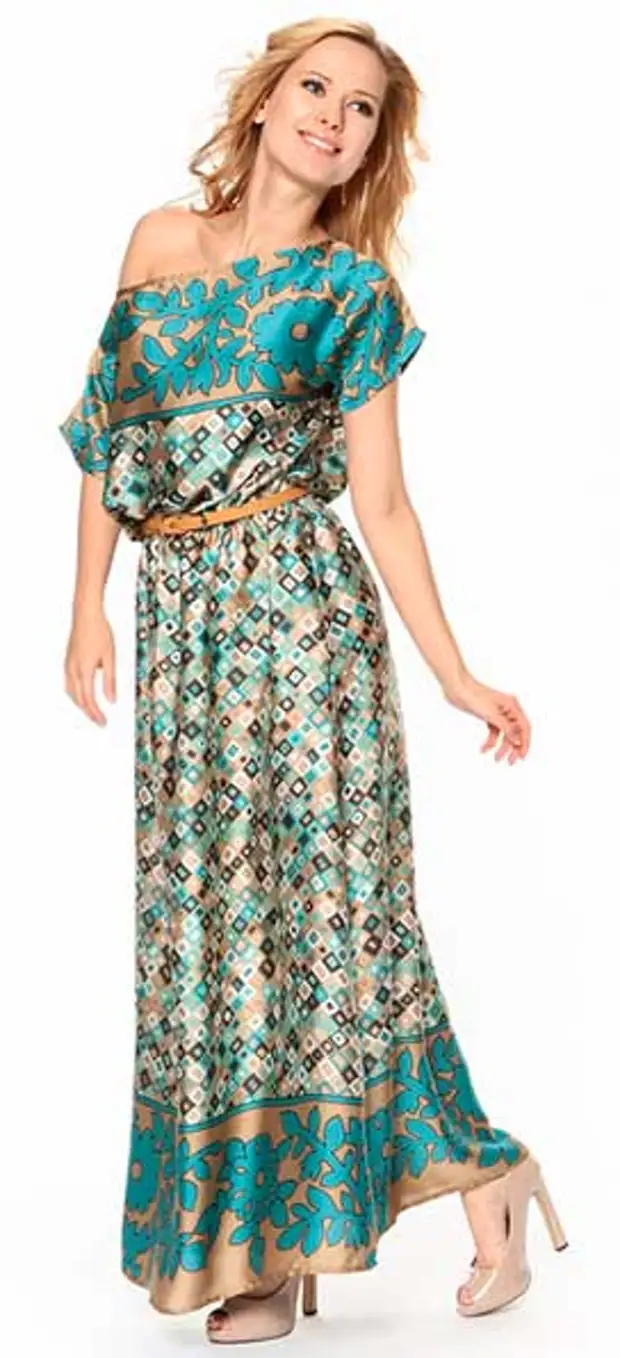
I think everyone has already prepared and gathered with the Spirit
We will continue.
Here are some more pictures of the same dresses.
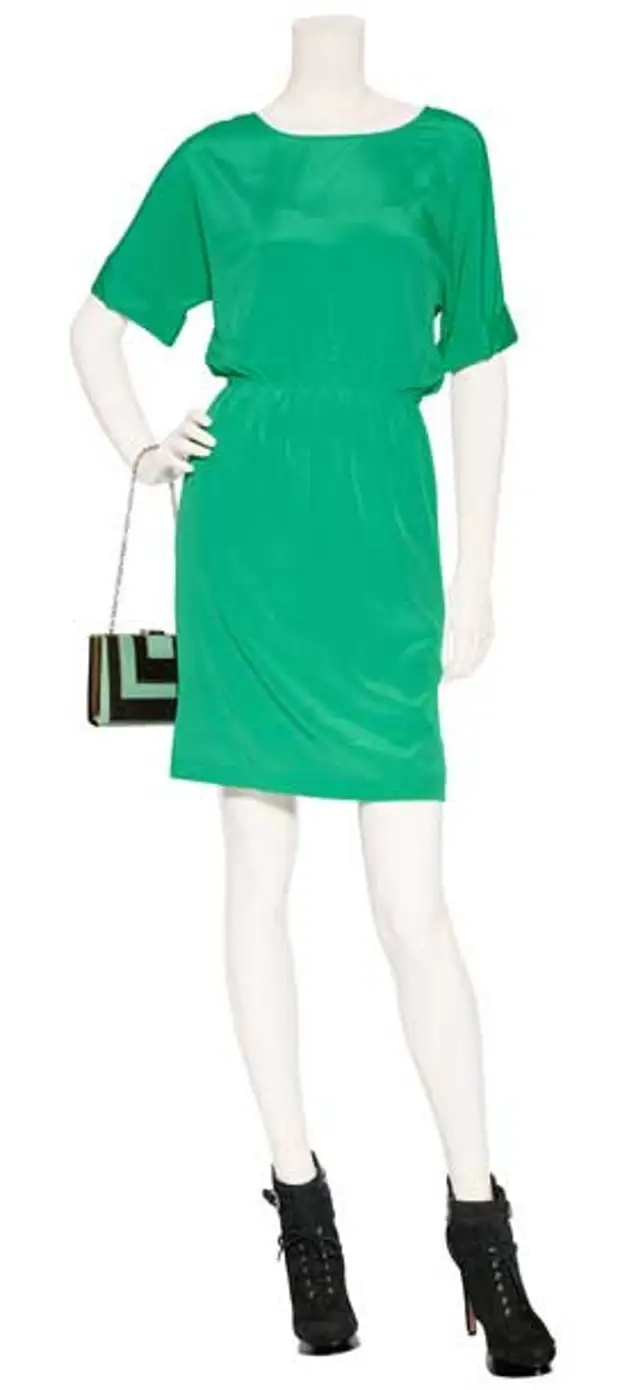
Another option
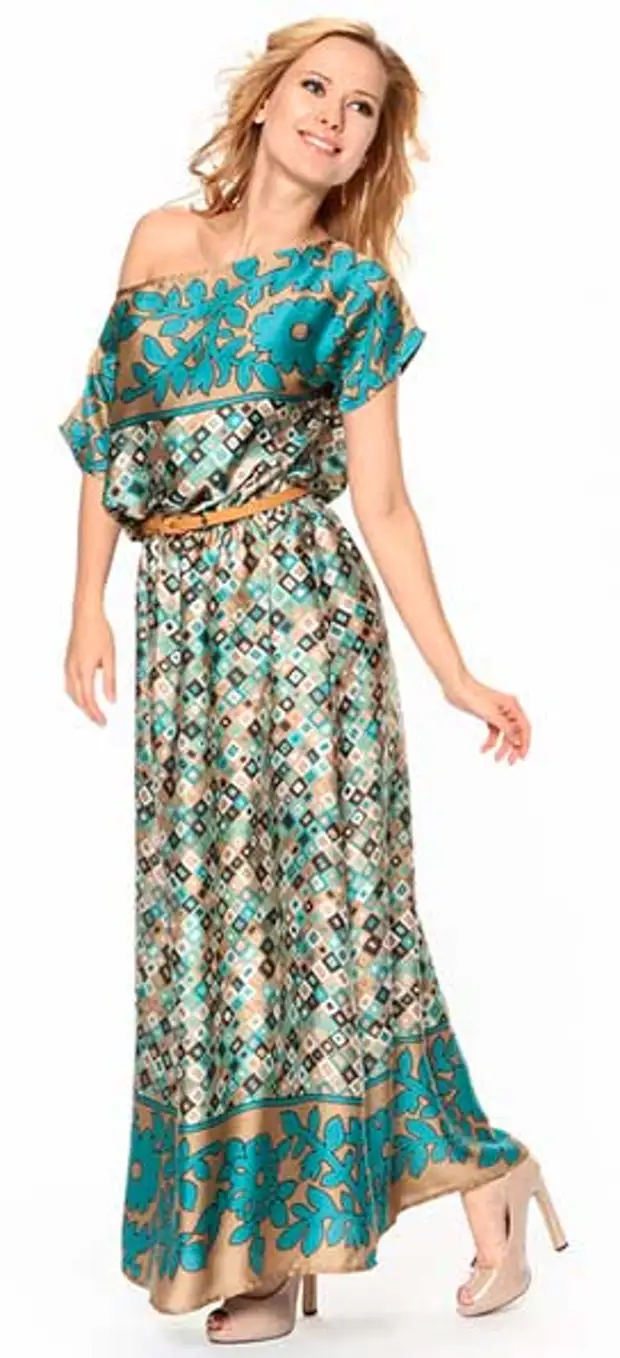
And here's a long version of such a dress
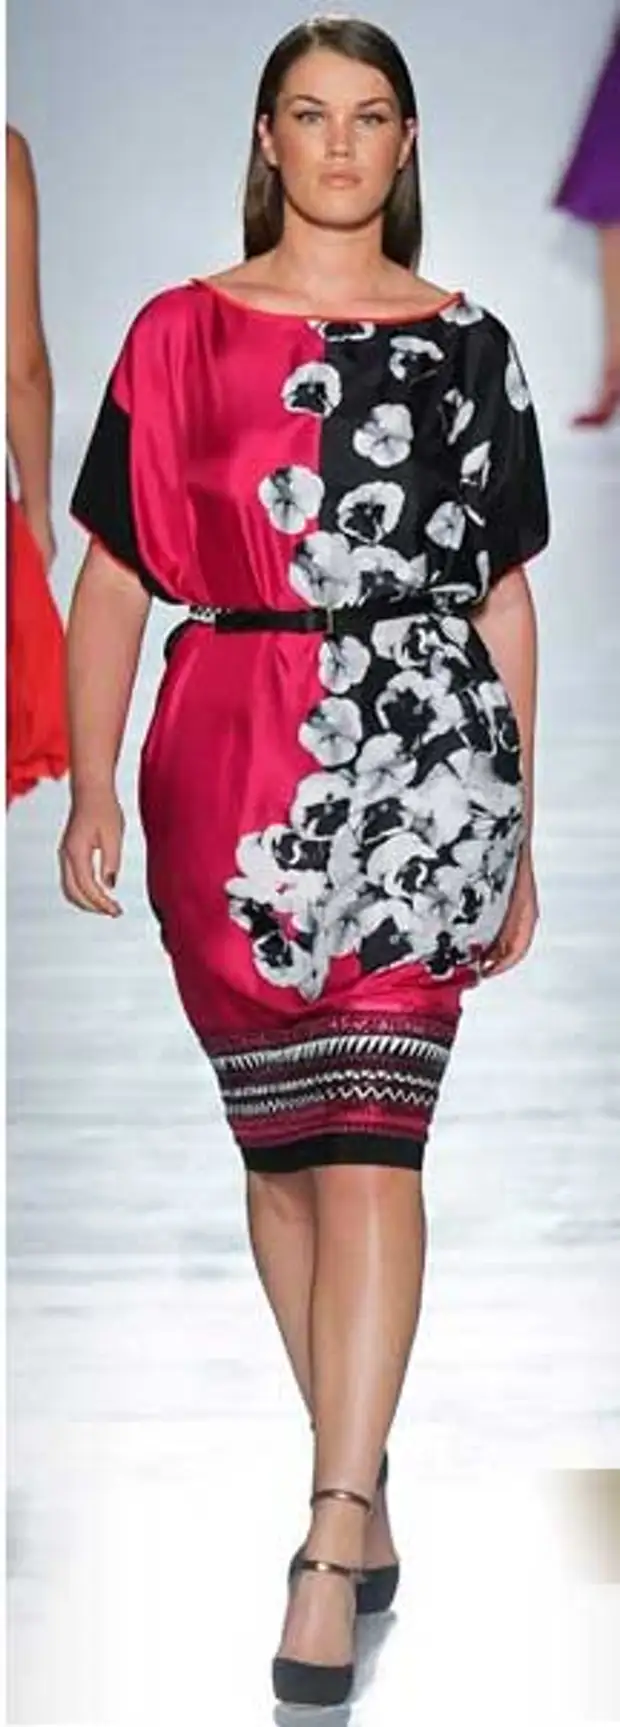
Last time I promised to give a pattern. But since I cherry this dress immediately on the fabric, I completely forgot about the measurements.
Today I will give measure. Pattern next time
Before removing the measure, tie a narrow rubber or cord on the waist.
The back of the back to the waist and the length of the transfer to the waist is removed from this elastic
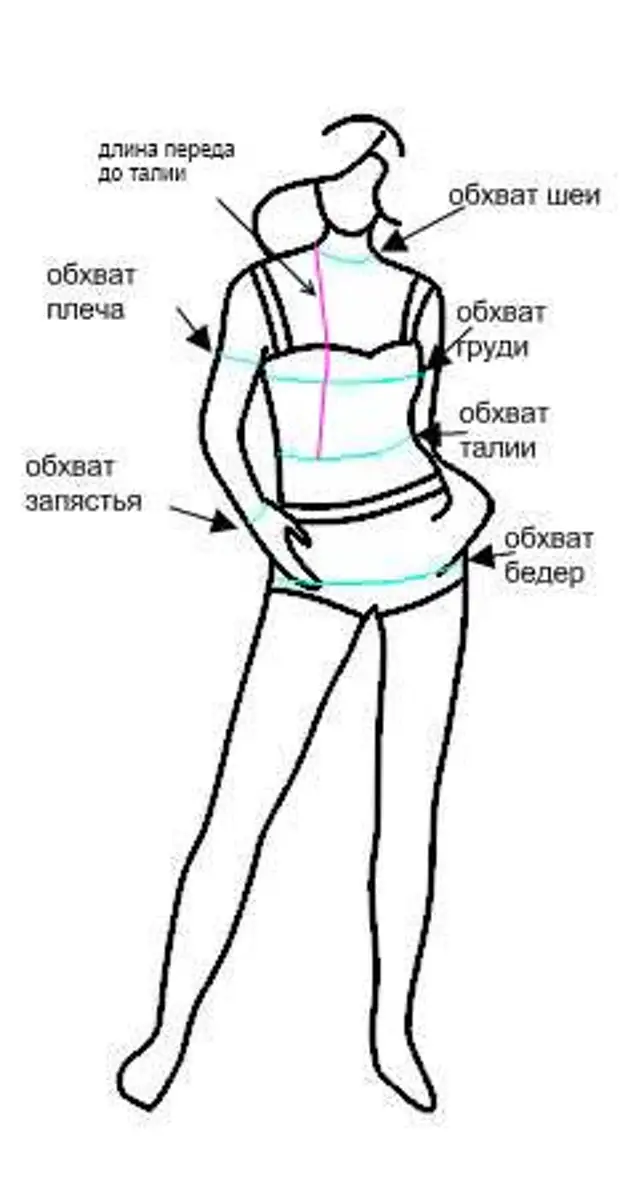
1. Chest girth (measured horizontally through the most protruding breast points, the backwater ledge is taken into account)
2. Waist girth (horizontally from the narrow point of the figure)
3. Girth of the hips (horizontally along the widest place of the hips through the most protruding points of the buttocks, taking into account the protrusion of the abdomen)
4. Girth of the neck (horizontally based on the neck)
5. The length of the shoulder (measured from the cross line of the shoulder and the line of the neck circumference to the end point of the shoulder)
6. The length is transmitted to the waist (measured vertically on the edit point from the point of intersection of the neck and the shoulder line through the most protruding point of the chest to the waist)
7. The length of the back to the waist (measured from the start point of the shoulder to the waist line).
8. The length of the product from the waist (measured from the waist line to the desired product length)
Before building a pattern, let's talk about the freedom to fite freedom.
You yourself must choose them depending on your fabric and the desired dresses silhouette.
In the simple dress proposed by me, it is necessary to make an increase in breast girth and hips girth.
Slender girls can sew dresses from tissues of any rigidity and free forms, and more fitting the body.
Make big boobs and thighs (10-20 cm for girth) when sewing from hard tissue - there will be a dress free, the skirt will hang around like a princess, emphasizing slimity and fragility.
The same wide dress sewn made of fine fabric will hang out elegant faldami.
Girls appetizing forms of hard, poorly draped fabric, I recommend sewing models of a more adjacent silhouette, choosing an increase in a smaller dress with big add-on hips from rigid tissue will look bang, add volume.
And from a thin, well-draped fabric, chiffon, for example, can also sew a dress taking big absorbs. Especially good will look free long, a slightly broken down.
And yet, if you have a figure with bright forms: outstanding breasts, convex buttocks, then the fitted dress should be seen only from the knitwear. Pattern from us without pullouts, so that only elastic fabrics can adequately "crack" your forms.
In order for you to better navigate with add-ons, look at these dresses:
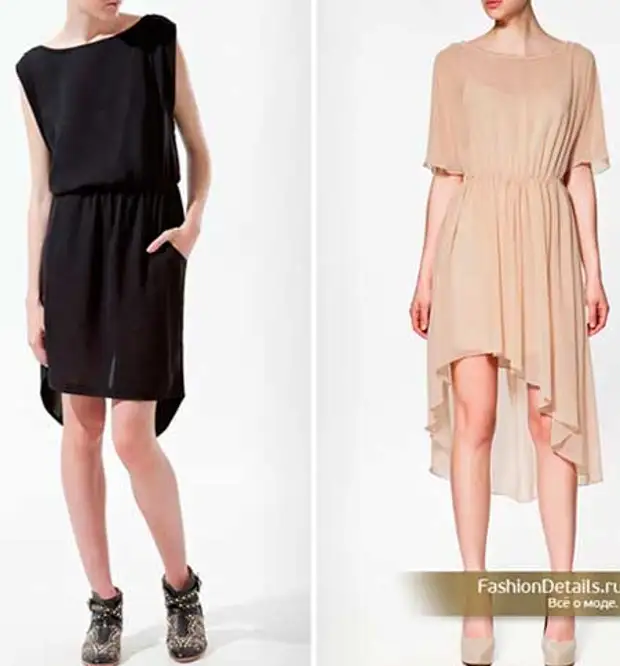
Here gained grasp chest and hips are taken approximately 20 cm. Right also scrambled down the book.
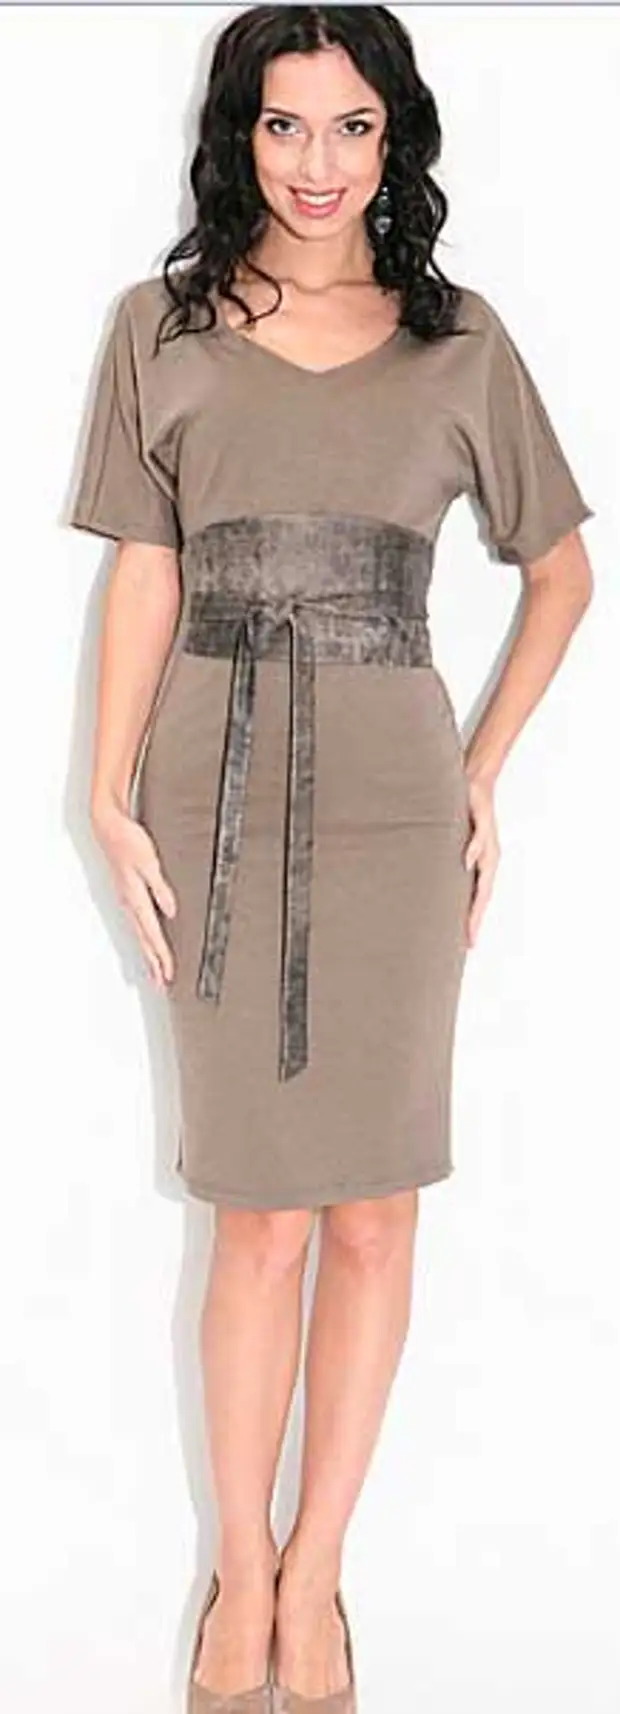
Here is a thigh injection 0 and, judging by the tension on the hips, even taken a negative increase. This dress can be sewed only from dense elastic knitwear.
Keep in mind: since there is no breastwork, then in the chest area there will be a fold. In the picture it is clearly visible.
But this dresses in the figure below the hips increases 6-8 cm.
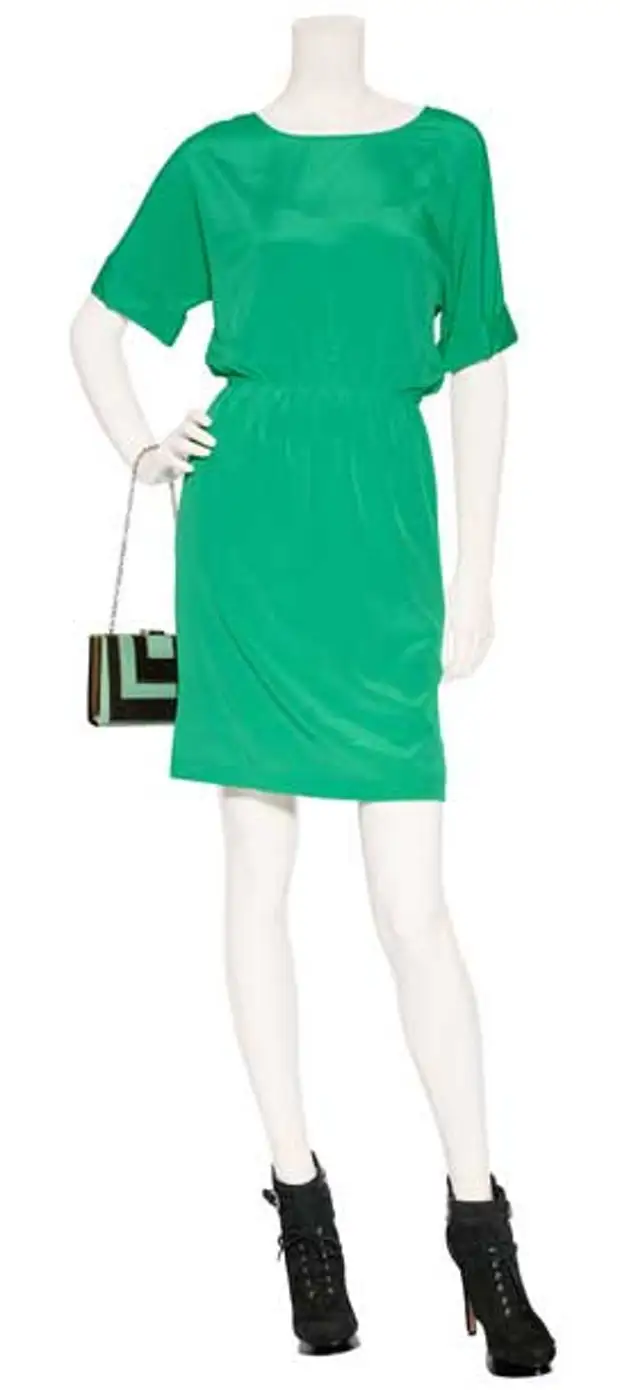
So think and select the value of the freight before starting the pattern.
Now go to the construction of the pattern.
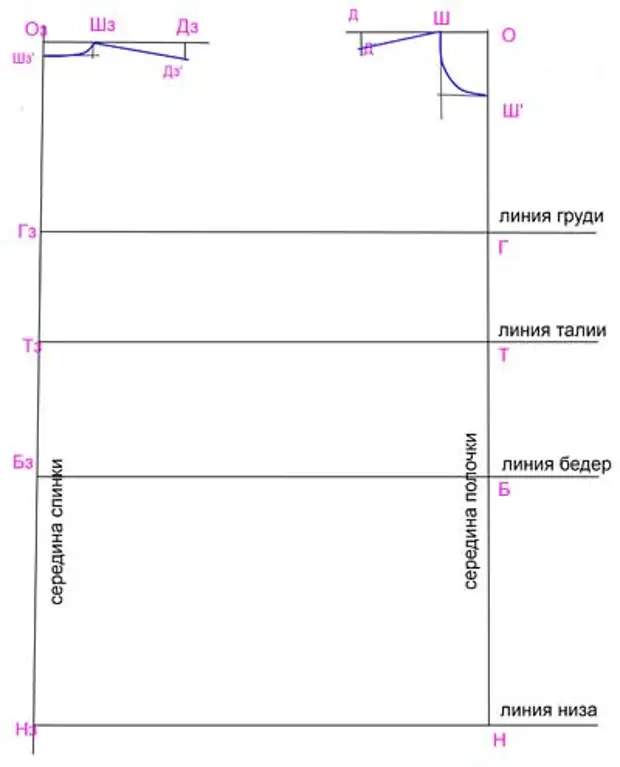
1. Recovering a little from the bottom of the paper and the right edge of the paper, draw a straight angle, put the point of N.
The horizontal is a line of Niza, the vertical is the line of the middle of the shelf
2. Put off the bottom of the bottom of the length of the dress from the waist, blackboard, get the waist line. We subscribe.
At the intersection of the waist line with the line of the middle of the Present point T
3. Put up from the waistline of 16 cm, blacksum horizontal, we get the chest line (conditionally). We subscribe.
At the intersection with the line of the middle of the Present point
4. From the waist line down the line of the middle of the shelves lay the magnitude of the girth of the thighs divided by 5 (about: 5). We put the point B. We spend the left horizontal.
5. From the point of the middle line, put up the length transfer to the waist plus, if you sew a dress with a rubber on the waist or wearing a dress with a belt, 3-4 cm for science.
We put the point O. We carry out the horizontal to the left length approximately cm 25
6. Decoile from the point about this horizontal to the left, the neck girth is divided by 6 (OSh: 6). Put the point sh.
7. From the point of laying down the line of the middle of the shelf, the distance between points O and W plus 1 cm (the width of the neck + 1 cm). We put the point sh '.
From point sh, we give the vertical down, from point sh 'spend the horizontal left. We curl the angle of their intersection. Here is the line of the neck
7. From point sh, we put the length of the shoulder left to the left, we put the point D.
From point d up vertically, laying 4 cm, put the point d '. Connect points sh and d '. This is the shelf's shoulder line.
All until the shelf is left.
8. From the point of the Niza line to the left, we deposit the value: girth of the hips plus the gain is divided into 2 ((OH + POSSIVE): 2)
We put the PC point. We spend the vertical. We get the line of the middle of the back
At the intersection with the linen of the hips, we put the point of the BZ, the waist we put the point of the TK, the chest line - the GZ point
9. From the point of the TZ on the line of the middle of the backs, we put up the measure of the length of the back to the waist plus 3-4 cm for the intake
We put the point of Oz. From it to the right build a horizontal length approximately cm 25
10. Put the right from the point of OZ magnitude the neck of the neck divide by 6, we put the point of the SS
11. From point SZ to the right, we postpone the length of the length of the shoulder, we put the DZ point
12. From the dz point, we put down vertically 3 cm, put the DZ point ', connect the points of the SS and DZ'. This is the shoulder line back.
13. From the point of Oz, we put down the line of the middle of the back 2 cm, put the point of the SC ', connect the points of the SS' and the shp smooth line. This is the line of the neck of the back.
For those who love for sure: spend the horizontal from the point SS ', and from the point SZ - vertical. At the place of their intersection twigs the angle.
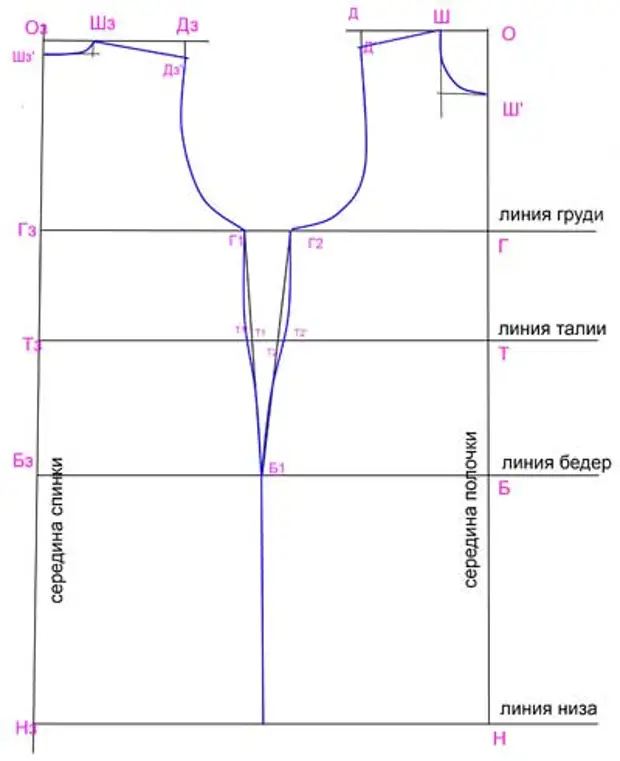
14. From the point of the BZ, lay the thighs to the right to the right: girth of the hips plus an increase, divide by 4. We put the point B1. From this point we spend the vertical down to the bottom line.
15. From the GZ point lay down the size of the chest to the right value: chest girth plus an increase, divide by 4. We put the point of G1
16. From the point of the breast line to the left: chest girth plus an increase, divide by 4. We put the point of g2
Depending on the girths of the chest and the hips, which you have chosen additives, the points G1 and G2 can coincide or be at different times from each other.
I sometimes make a greater increase in the chest than on the thighs, and I have a point of g1 and g2 - this is one point on the breast line.
17. Connect the points of G1 and B1 to the straight line. At the intersection of this line with the line of waist, we put the point T1.
If you want to stop slightly and get less at the level of the waist, we depose from the point T1 to the left 1.5 cm. Get the point T1 '. We carry out a new boc line through the points of G1 T1 'B1, twisting the line on the waist and from the waist to the thigh.
18. Connect points G2 and B1 straight line. At the intersection of this line with a line of waist, we put the point T2.
If you want to sneak slightly and get less at the level of the waist, we deposit from the point T2 to the left 1.5 cm. We get the point T2 '. We carry out a new boc line through points G2 T2 'B1, twisting the line on the waist and from the waist to the thigh.
19. Promima.
Connect the dots dz 'and g1. From the end point of the back of the backrest, the line of the armor begins at a right angle to the shoulder line, then smoothly curls to the point G1. Look at the picture
The same on the shelf.
Connect points d 'and g2. From the end point of the shoulder, the backrest line starts at a right angle to the shoulder line, then smoothly curls to the point G2. Look at the picture
Do not be afraid to draw "not so." It is precisely necessary to draw a runtime when it is supposed to stack the sleeve. And our dress with a single sleeve. So the draw smoothly from hand, looking at my drawing
On this we will finish the construction of a "basis" of our dress, which will be preserved and will continue to simulate to get a bunch of dresses unlike each other.
Let you not frighten that the pattern, and in the future and the cut-out dress looks like a nightie. When you try it with a belt ...
And for the belt, and the dress itself sat exactly on the waist, as is now fashionable, I sew the waist of the gum. But back to this later
So that our dress looks like those that in the pictures, it's a complete "bush"
I have a length of this single-circuit sleeve 10 cm.
We continue the shoulder line by 10 cm. From the extreme point of the shoulder, blacksmiths perpendicular down to the intersection with the chest line, then we twigrate a little - this is a line of nose sleeves
Curly the angle between the sleeve and sideways
I have a sleeve length on my shoulder, as I wrote, 10 cm. And from the point G1 (on the back) - 4 cm to the right along the chest line. I connected these points, rounded the angle at the point G1 and got a pretty one-piece rusher.
You have a sleeve to be different, as you may have another width of the breast line.
You see in pictures above: The sleeve can be 20 cm long, and 3 cm. Decide yourself.
I also add a little simulation.
In order not to make any fasteners, we need to increase the cutout of the porridge so that the head is free to pass.
On the shoulder of the back, I expanded the neck of 4 cm (lay the right on the shoulder line 4 cm, put point 4)
I increased the depth of the neck of the back for 2 cm.
(Lay down from point shz 'down the line of the middle of the backrest 2 cm, put point 2)
Connect points 2 and 4 smooth line
The same with a porous shelf:
We are expanding the neck of 4 cm (from the point w on the shoulder on the line lay 4 cm), we put the point 4 '
The depth of the neck, if you like how, for example, on a green dress in this post, we deepe on 2 cm (laying from point sh '2 cm down the line of the middle of the shelf), we put the point 2'
Connect the points 4 'and 2' smooth line.
We apply the arrow to the drawing direction of the share thread, it coincides with the line of the middle of the shelf and the back.
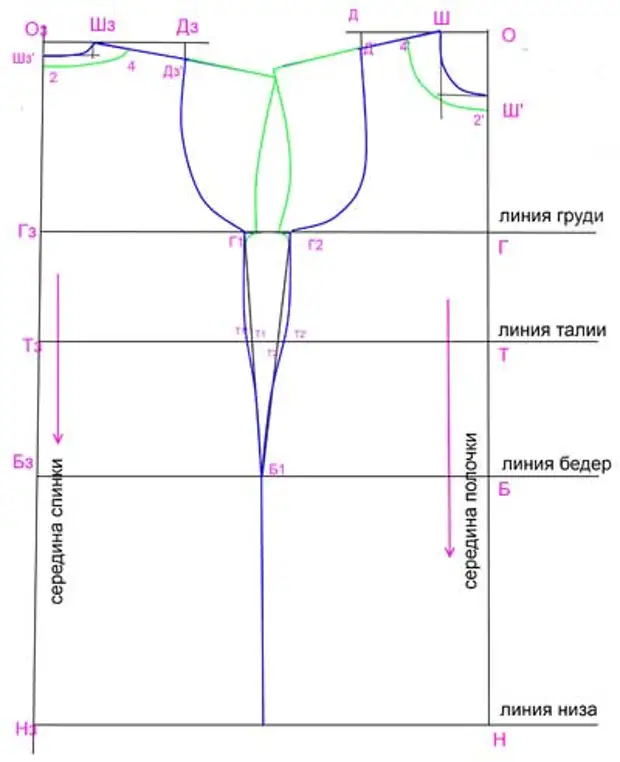
All, drawing ready!
A little later, consider the modeling options, including for pregnant women.
Although, if the tummy is small, you can already sew through this pattern, making an increase to the freedom of fickling from 10 to 20 cm on the thighs and chest. You still need a little lengthen the shelf on the middle, see on 4, starting the lengthening line from the sides.
It seems that I checked everything 100 times, but I still can not notice any error.
a source
