It will not be an exaggeration if you say that the garden bench is very necessary thing in the country area. If you install a bench in a shady, then it will be nice to relax in the summer in hot weather. And in the evening, sit on her and look at the sunset no less nice.
The question of the acquisition of a garden bench occurred quite often on the reasons mentioned above, but the implementation was postponed for a long time, due to the fact that it was difficult to choose the appropriate option. Or did not suit the price, or in quality, or there were problems with transportation. Therefore, ultimately decided to make a bench with his own hands.
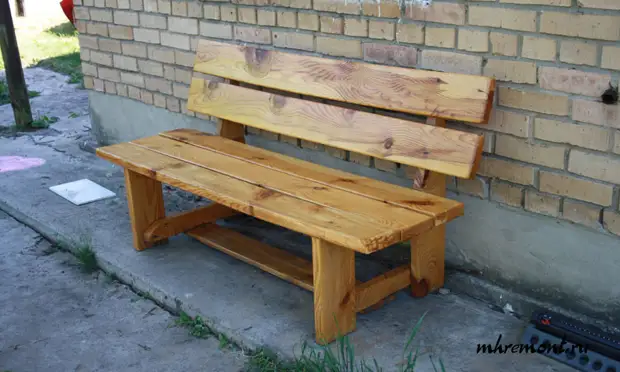
Photo of a finished bench
Having wondered how to make a garden bench, a number of fundamental requirements were identified to be satisfied.
- The bench must be made of available materials that are not difficult to bring to the country.
- The bench must be comfortable.
- The bench design should be such that it can be made with your own hands without the use of a special tool.
- The bench must be finely transferred outdoor conditions, i.e. It should stand the entire country season in the open sky and not lose its appearance and functional qualities.
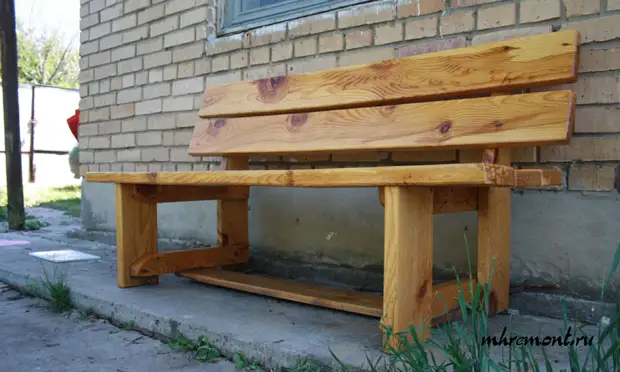
Stock Foto Benches from another angle
Based on the requirements described, a project of a garden bench shown in the photo above was born. Material Wood benches. In the manufacture of a wooden bench, a special tool is not required. To protect against external adverse factors, the bench is covered with varnish. So most initial requirements it satisfies.
In my opinion, the most difficult and interesting in the manufacture of the bench is your own hands is the design and ergonomics. The main factors for ergonomics on which the attention should be paid is the height of the bench, the seat width, the angle of the backrest, the backrest width and the long bench. It depends on these parameters, it will be convenient for the bench or not.
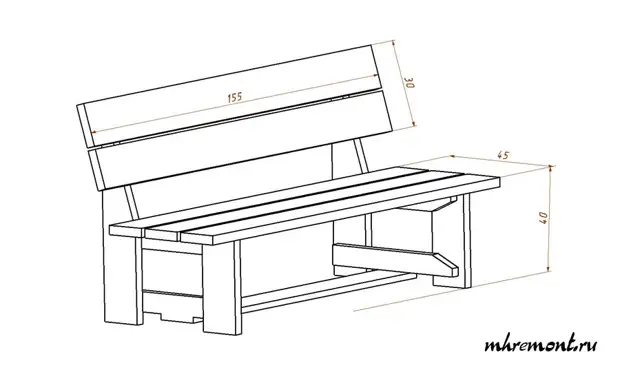
Bench drawing
All sizes in the drawing are given in centimeters, only the angle of inclination of the back and the overall height is not specified, about this next. And first I want to comment on some sizes.
- The length of the bench is chosen in such a way that three people can accommodate on it. If you purchase a standard size 6m boards, then two boards will go to the manufacture of the bench, and the cropping will not remain practically. In addition, transporting boards 1.5 m long can be easily on a passenger car.
- The thickness of the board is selected 40mm, which ensures the rigidity of the bench design.
- The gaps between the boards on the back and the seat are needed that water is not delayed on the bench, because The bench is standing in the open sky. As a result, considering the width of the board and gaps, it turns out that the width of the seat is 40 cm, this is enough to comfortably sit the adult person.
- The angle of inclination of the back is about 18 degrees. How to make such a tilt will be described further.
Now I want to say a few words about the design of a garden bench. As can be seen from the drawing and photo bench has four legs. In this case, the rear legs perform the role of the backrest holder. To give hardness, the legs are interconnected.
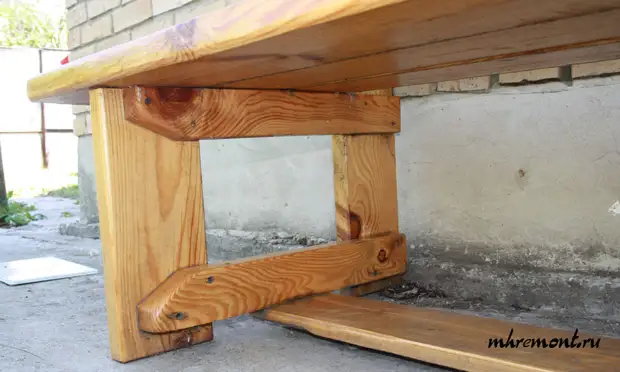
Elements of carcass
Work on the manufacture of the bench begins with the fact that the boards are being seen on the desired size.
- 5 boards with a length of 1500 mm.
- 2 boards with a length of 360 mm.
- 2 520mm boards. Next, these boards are cut down in length, resulting in 4 bar. These bars are needed to connect the legs and fastening the seating. Also on these bars an outer angle is removed so as not to cling to his legs.
- 2 Board length 720 mm. On these boards is a cut. They will perform the role of the back and leg holder at the same time. Dimensions are indicated in the drawing below.
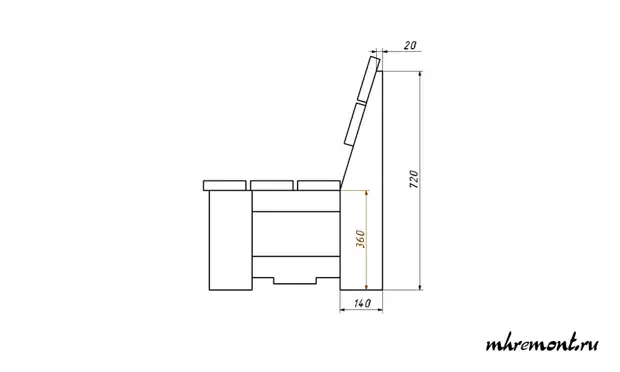
Bench drawing side view
All these sizes are indicated with the fact that the final width of the board after planing, etc. Processing 140mm.
After all the boards are sliced, they need to secure them to get rid of burrs. It is also desirable to take chamfer that the edges are smooth. After that, you can proceed to assembling a garden bench.
First, the legs are collected. The legs are connected to each other with the help of self-tapping screws. After that, the seats and backs board boards are attached to the resulting legs. These boards are also attached to self-drawing. In order to hide fasteners, the mount should be done on the back.
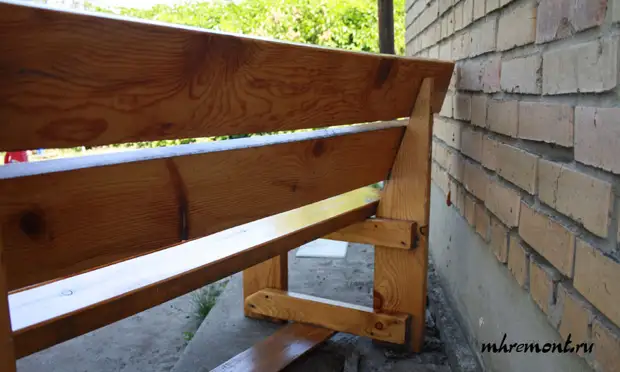
Photo bench benches
If the lengths of the self-samples are not enough, you can pre-drill the hole with a diameter greater than the screw of the self-press.
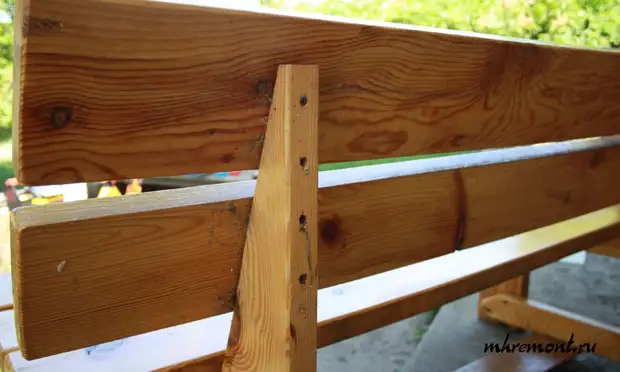
Fastening the back
The final stage of the assembly of the bench is the installation of the lower crossing, which fastens the legs with each other.
After the bench is collected, it can be covered with varnish to protect against moisture, applying a yacht varnish. Or treat impregnation from rotting as a children's sandbox. Of course, the coating of the lacquer looks much better, but it has one essential disadvantage, the bench becomes cold to the touch.
Also, if you just cover a lacquer, she will be crawled. For the bench to be smooth to first cover it with one layer of varnish, wait for it when it dry. After that, emery paper to process the rough places appeared, after which it is covered with two more layers of varnish. Then the bench will be smooth. On the photo bench which is the fourth year. So it is well preserved. Naturally, she is cleaned into the house.
To make it easier for you to make a bench with your own hands I will give the drawings benches.
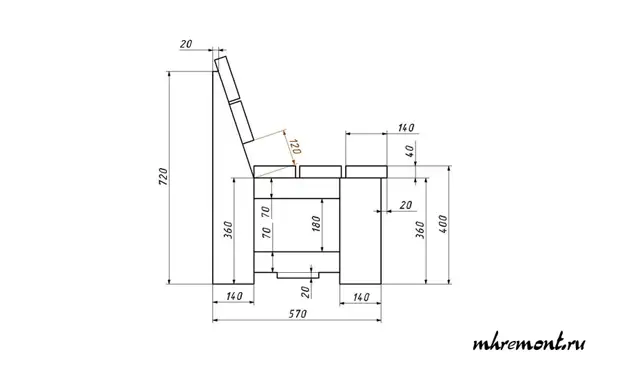
Drawing side view with sizes
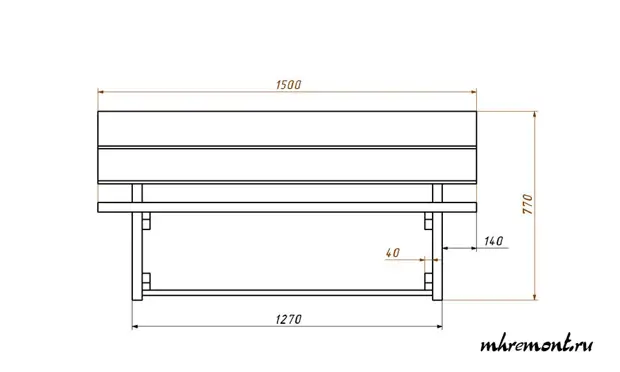
Drawing front view.
A source
