
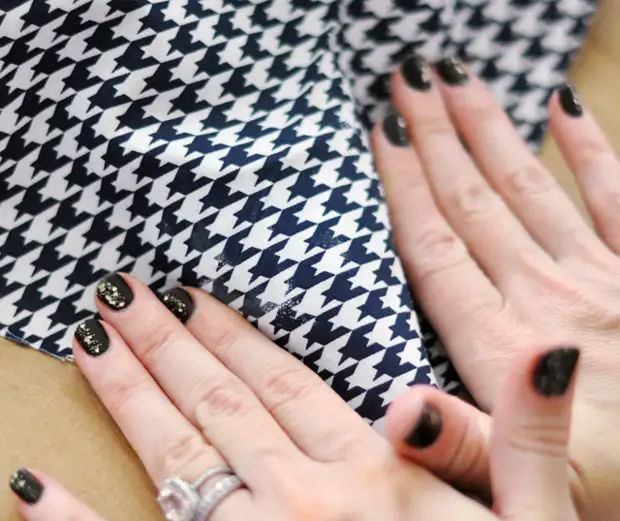
Oh, I like such ideas for alterations! We take the old favorite non-tunnels and make something new on them! Let a couple of times, but also creative, in the tone of the outfit. And it's not a shame that "rain and dancing until the morning" such shoes are hardly able to die, but the effect is shaking!
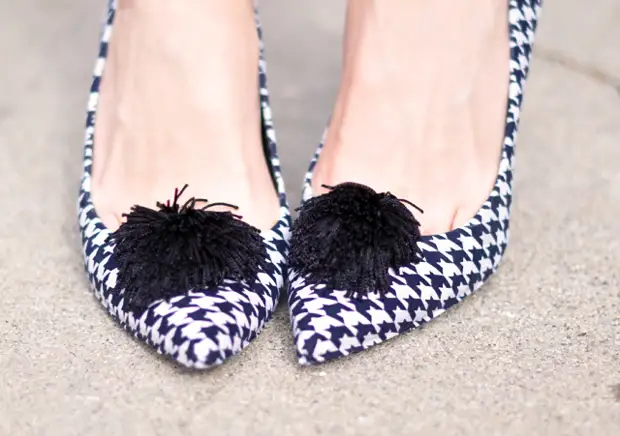
Here is such a "update"! MK farther
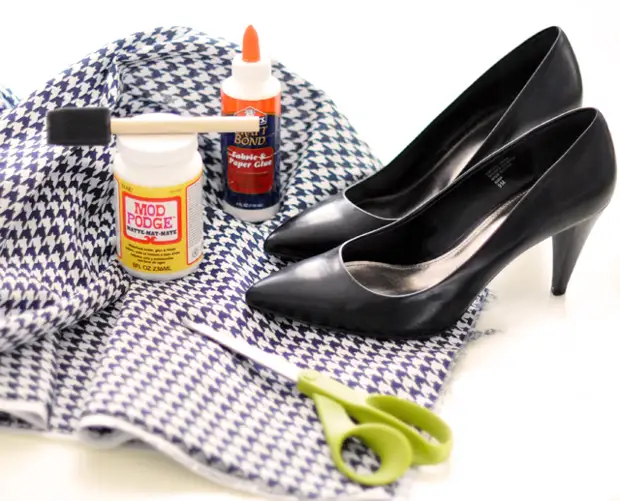
"Take a couple of shoes - for the convenience of work, select with more - less sharp spout.
Fabric in the "chicken leg" of a suitable size.
Acrylic adhesive for fabric or matte varnish for decoupage (for decoupage it is fabrics - in OBI or specials. Handicraft stores it occurs)
Sponge for applying glue, scissors, mass (mass!) Patience.
Well, rushed:
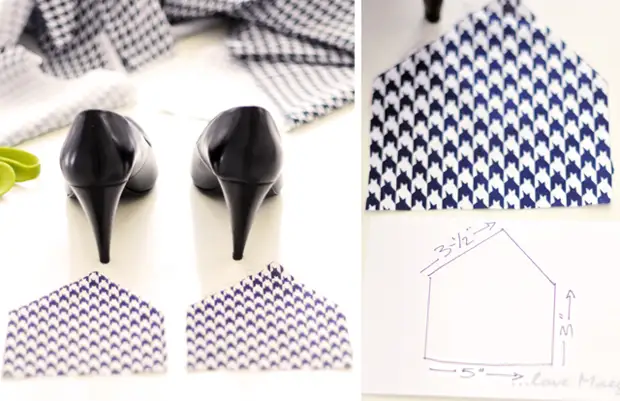
Cut the two incorrect pentagon shapes - such to closed the heels. If the fabric with a pattern of type of foot or cells - do not forget to ensure that the direction of the pattern on both heels coincides.
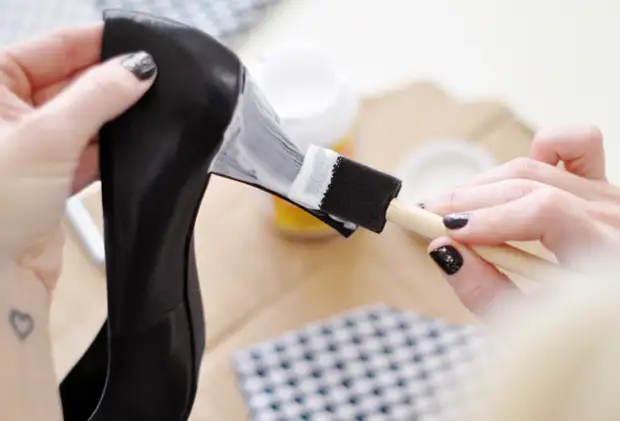
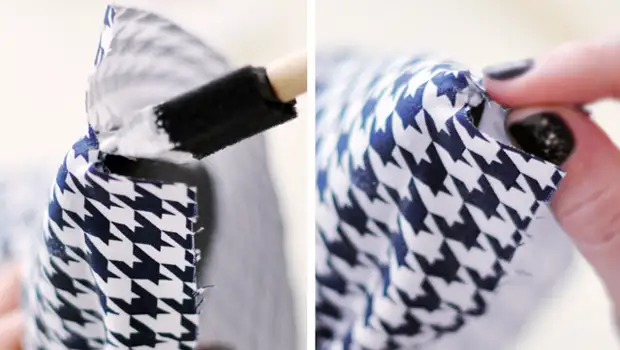
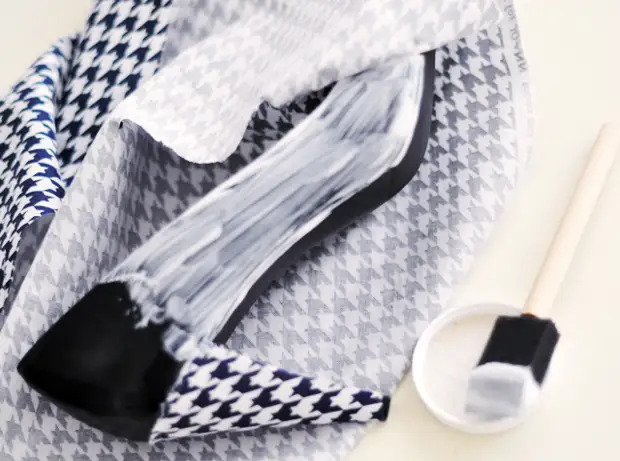
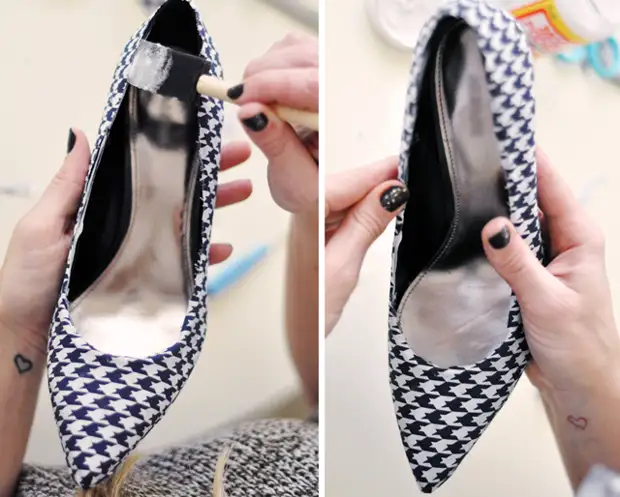
Using a sponge, apply glue through the fabric to the entire surface of the heel, well-missing it only once.
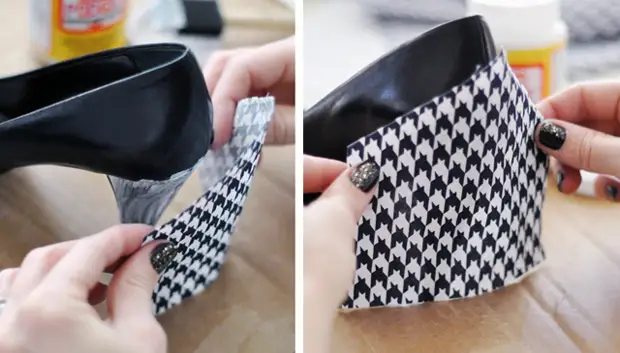
Having imposed each "detail" on the heel triangle up, press - and do not forget to smooth all the folds.
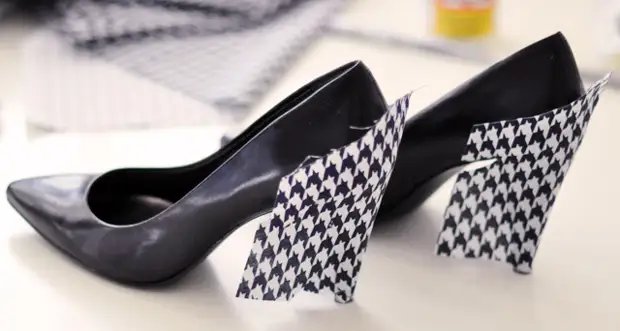
So that the fabric lay smoothly - leave here in this form later heels to dry. As the glue dries - you will doit everything sticking, leaving 5 mm stock.
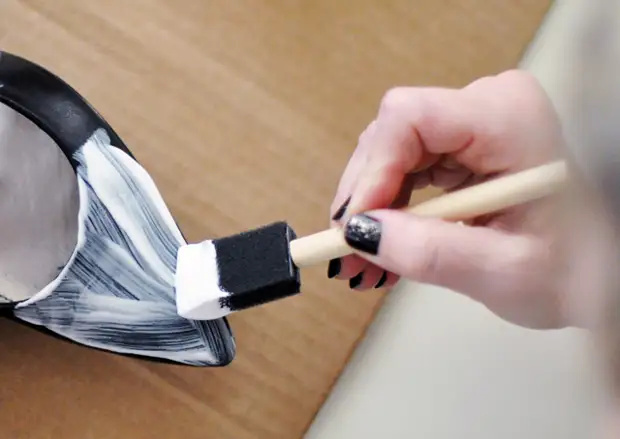
Itselves, until they dry the heels, are engaged in noses of the shoes - we also miss them alone, but good, glue layer. Cut the two large rectangles from the fabric, it is necessary to cut them, focusing on your shoes - the size will change depending on your size of the shoes and, depending on the shape of the nose. It is better to cut with a reserve - it will always have time to trim too much.
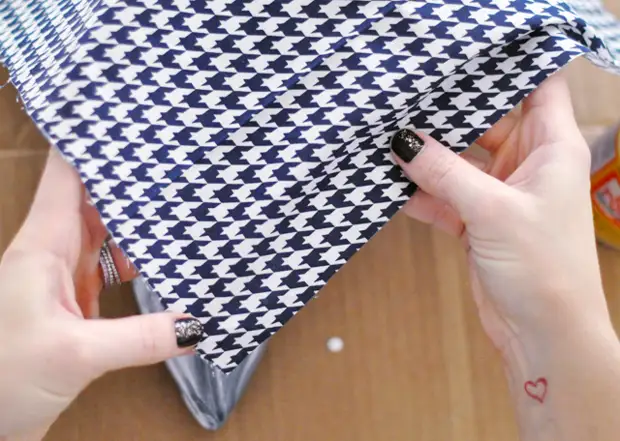
Still in the drawing all the time so that it goes in one direction and on the right and left shoe.
Piercing a piece of fabric to the nose in the center, thoroughly smooth out all the fabric assemblies, pulling it out. Leave it in this form to dry.
As soon as the fabric is more or less "grabbing", take it for it in the sock area and reserve there a small "triangle" on the very edge - so that then you can adjust and put the cloth in this place. Try not too much to break the drawing too much.
Now how to put this sock: add more glue to this place, bend the fabric from both sides at the time of the envelope, so that it turns out to get on top of each other, press it well and wake the glue once again.
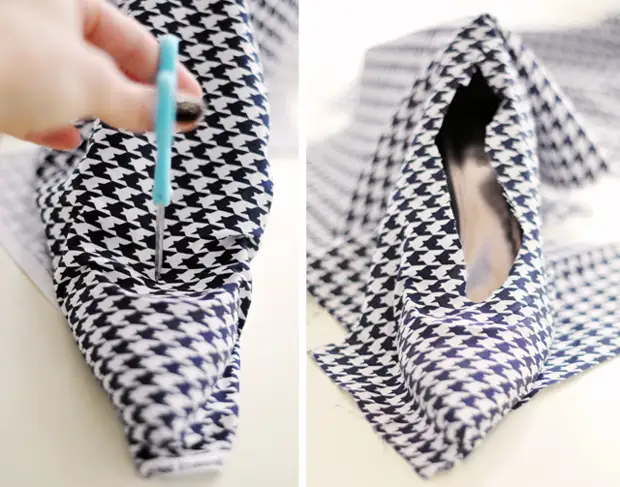
Enter the remaining fabric freely on shoes (so that the drawing with the socks coincides), then take a small cut in the center. Gradually increase it, all the time checking that you still have enough fabric to cover your shoes on both sides. But so that the hole is quite large, so that the fabric can be fine with it on the sides.
Making a turn every side, sculpt the sides, press and press the cloth, leave to push in this form, then only take on the second side.
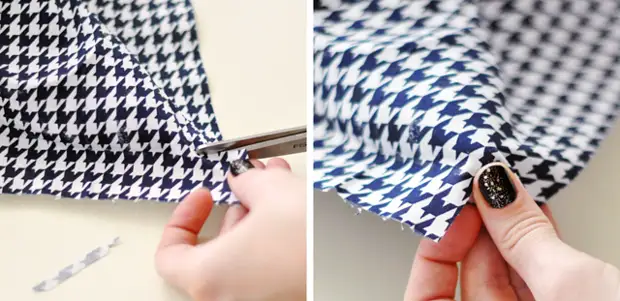
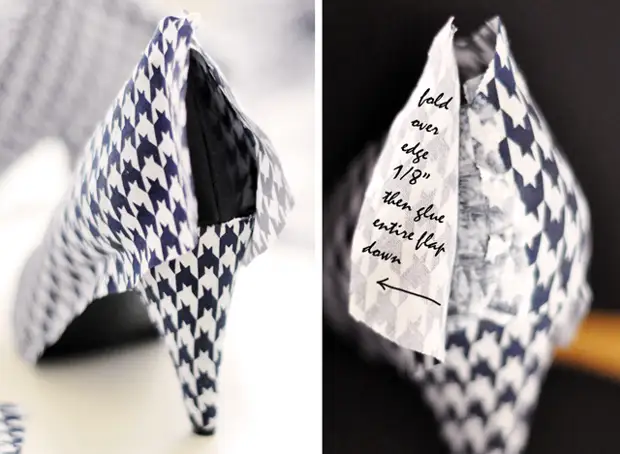
When everything gets free - unnecessary tissue can be trimmed - but leave CM 2 for the bending "just in case" - including rear seam.
How to make a rear seam: First, we glue one side of the sticking fabric to the heel, then, when it gets dry - the second, brass, on the first one. Or you can try to marce and stick straight exactly cropped in real seam heel each of the parties - but this method is more suitable for fabric without a picture. If you need to combine the drawing - the method of the mustache is more convenient at times.
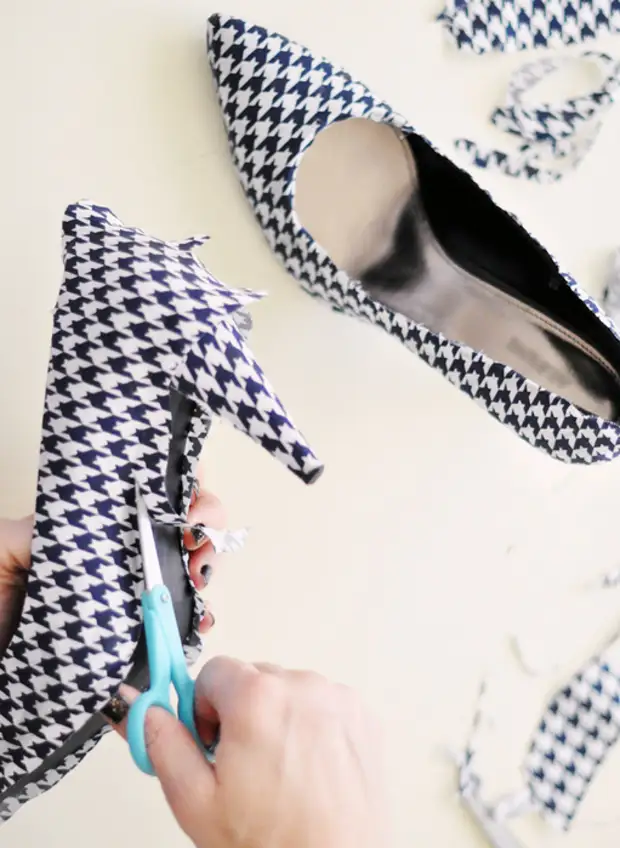
Crop the extra fabric around the entire shoes, leaving about the margin of MM 4- 5 or cutting along the edge of the sole. The author of the master class did both and so - depending on the area of the shoes with which he worked at the moment.
Lainding the edge of the edges of the edge inside, bend the tissue remains there and press it. Leave to push (now you understand why I talked about patience))?
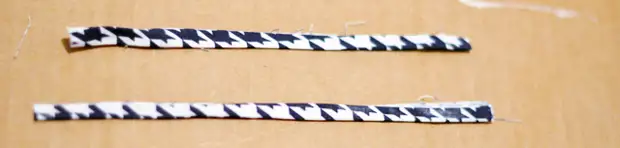
We have left a noticeable seam between the heel and the heel. It must be hidden. For this, four strips are cut from the same tissue width no more than 1 cm, the flashes are folded like oblique tape, are sampled (so that the threads are not sticking out anywhere). You can use and simply oblique tape is a fond - contrast, for example. Launching a good place under the tape glue, press the ribbon there, and its edges - a mustache - fix the same glue under the heel from the outer side of the heel.
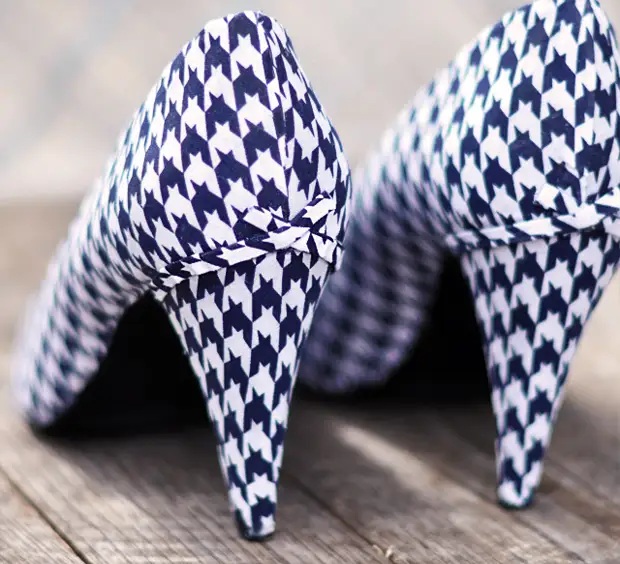
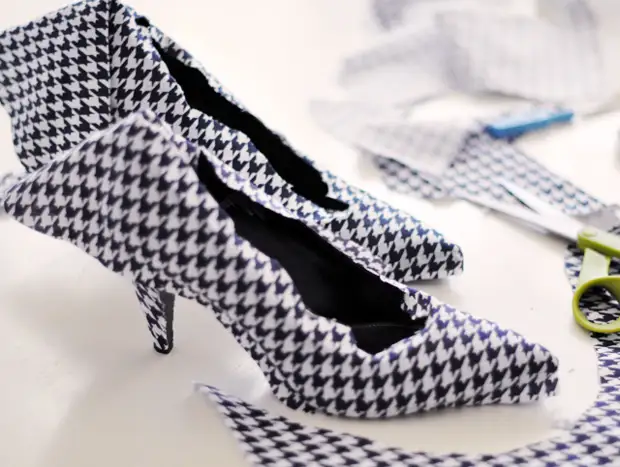
That's it. The important thing of large girls is completed. Do not forget to decorate noses of slippers suitable jewelry)))
Remember that in such a rework it is not terrible to send at all those shoes that you can still wear. Make the "shoes at times" for the needlewoman nothing more than a palaughter, but for young fashionable - the junction.
A source