

Whatever you sew - from evening dresses to a cover on a chair, "no assemblies cannot do.
We bring to your attention one of the easiest ways to achieve perfection without much effort.
How to make a fabric assembly.
Many craftswomen are familiar with a popular way - a double line with a long stitch and a weak thread tension is laid on the machine, and then the threads are manually stretched out, which helps evenly distribute the assembly. The method is effective ... But far from all kinds of fabric. Very often, the threads in the process literally cut your fingers, break off, it is hard to pull them out, and if you have no coquetty fruit in your work, but a whole skirt, the task turns into a torment requiring a fairness!
Take into service our master class, and you will forever forget about these problems. Assembly? What could be easier!
You will need:
Tooth thread (better than waxing)
sewing machine
We make ideal assemblies on the fabric using dental filament
Step 1

You can use the usual tooth thread, but the waxing slides is better, which will make the process even faster and more convenient.
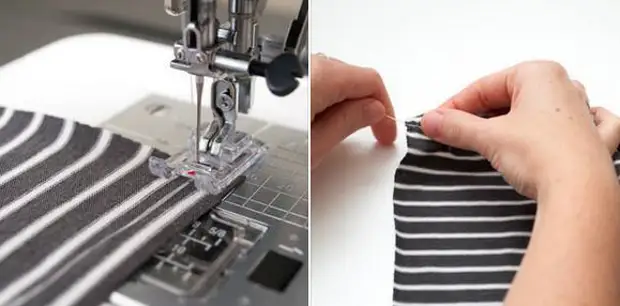
Put the thread on the product from the wrong side at a distance of approximately 1 cm from the cut, leaving the tail at 5 cm. Lower the paw machine so that the thread is exactly in the center.
Step 2.
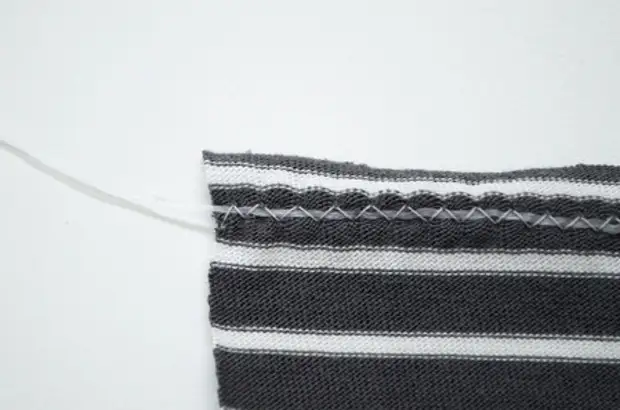
Set the machine on a wide and long zigzag. Start the line, carefully following the needle to do not hit the dental thread - it should not be attributed to the fabric, stitches must cover it over.
Step 3.
Having finished, cut the threads close to the tissue, and leave the dental threads to leave the same 5-centimeter tail, as on the other side.
Step 4.
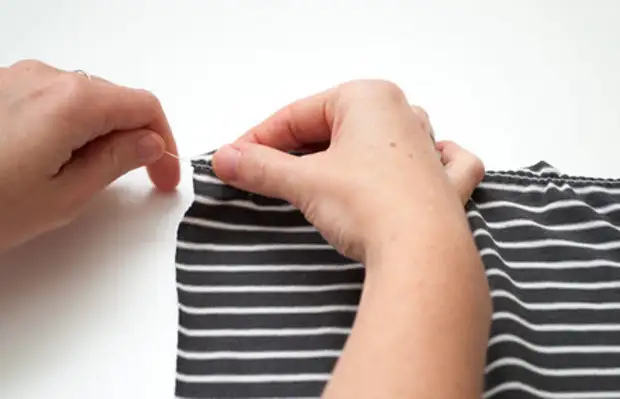
Grasp one of the tails and pull, glearing fabric, then repeat on the other side.
Step 5.
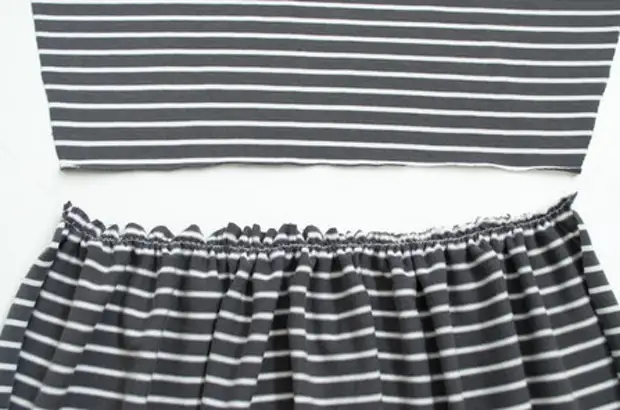
If you, as in our example, sew a dress with a seamless skirt, continue to pull the dental thread until the skirt width is equal to the width of the leaf detail.
Step 6.
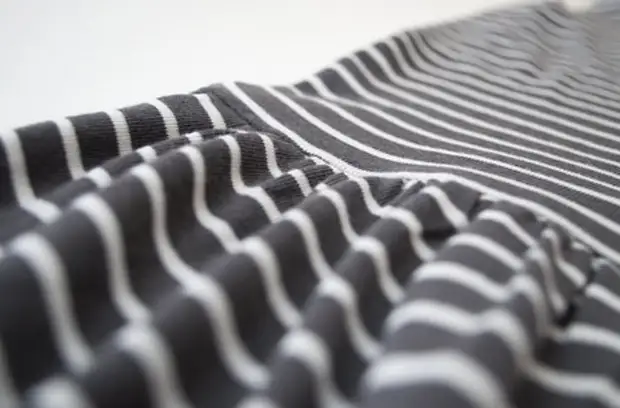
After your items are sewn, just remove the thread, stretching it out entirely.
Easy and fast!
A source