
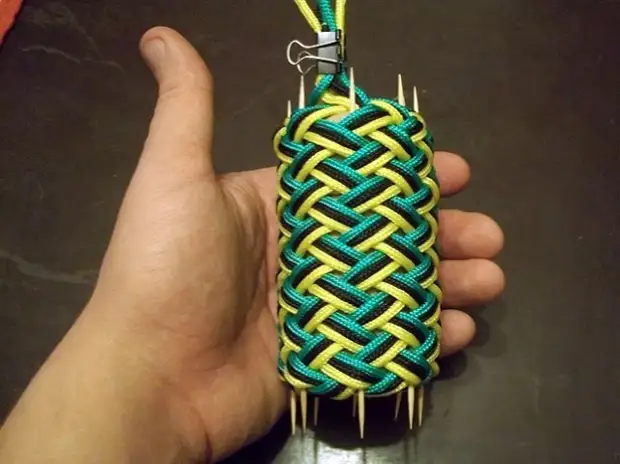
"Turkish head" (Turk's Heads) - the naval node, named as similar to the Turban and due to the fact that Western Europeans called all residents of Central Asia by the Turks. In this technique, we can weave flat and cylindrical products. We will weave this:
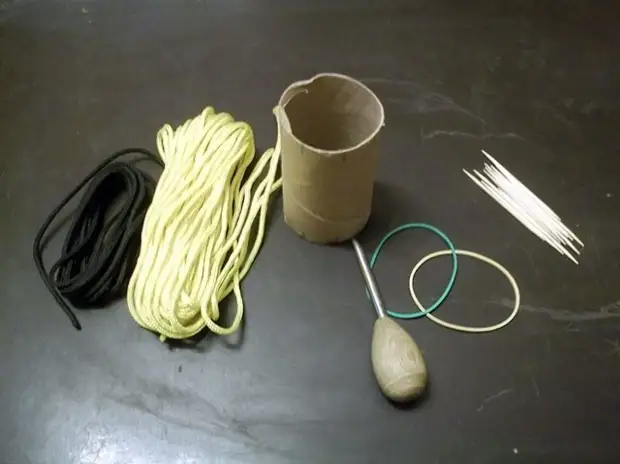
Materials and tools.
Next:
Cord of one or different colors. Better a fearful, not twisted. Parakord, for example, but he is roads. I used a polyester cord with a diameter of 2mm. Any cylindrical thing, any. In D.S. It will be a cardboard tube from under toilet paper. Toothpicks or matches. Office rubber bands. Scissors, lighter - cut and send the ends of the cord. And special tools: tubular awl. Buy is unrealistic, you can make from the girlfriend, for example, from the ballpoint housing. You need to cut the tip at an angle of about 25-35 gr. You can not do the handle to it and will come so. I did somewhat sewed from a stainless tube of different diameters (under a different cord).
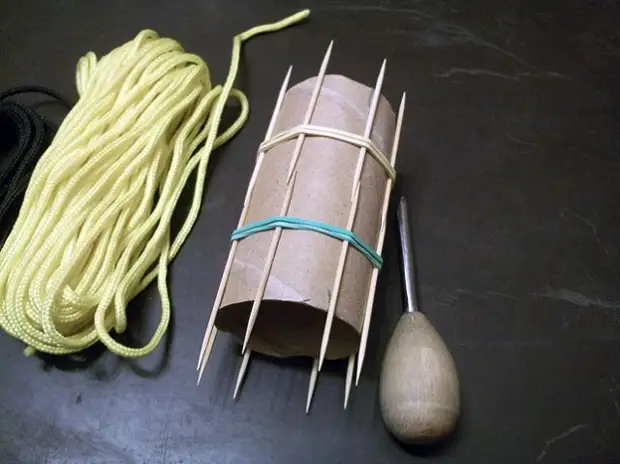
We make a pattern.
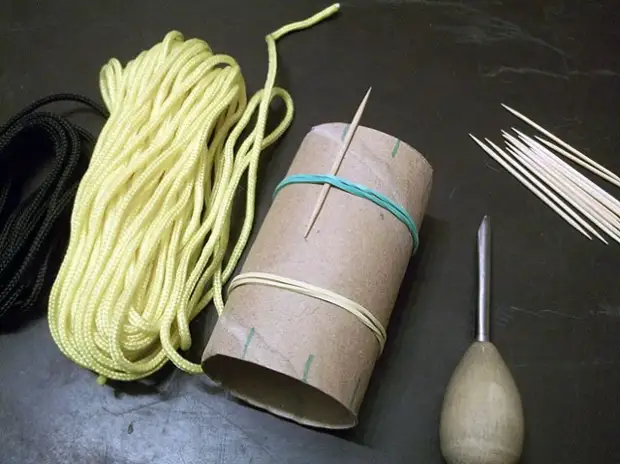
On the cylinder we wear two office gum. Gum should fit tightly to the template. Under the gum we bring toothpicks (or what you chose there). Toothpicks We place evenly in a circle on both sides of the template. The amount on each side should be equal. In my case it is 8 + 8. If everything is done correctly - it should turn out something like this:
Weaving.
Fix the cord on the template:
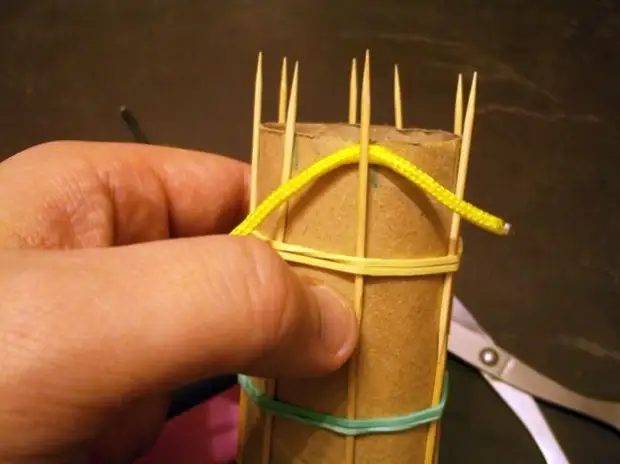
... and wind it on the spiral to the opposite side of the template. We bring it to the toothpick:
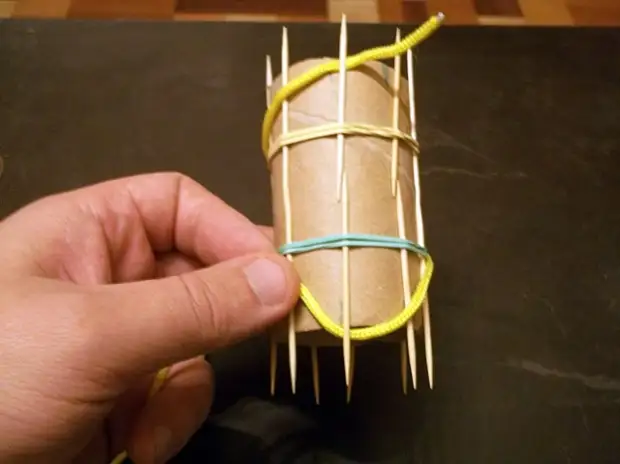
... and wake up the spiral in the opposite direction. Because I work predominantly with your left hand - I am a shape on the right left. We bring the cord for the next pin of the template (after busy), in D.S. Behind the fact that the end of the cord is fastened.
... and continue to twist the spirals.
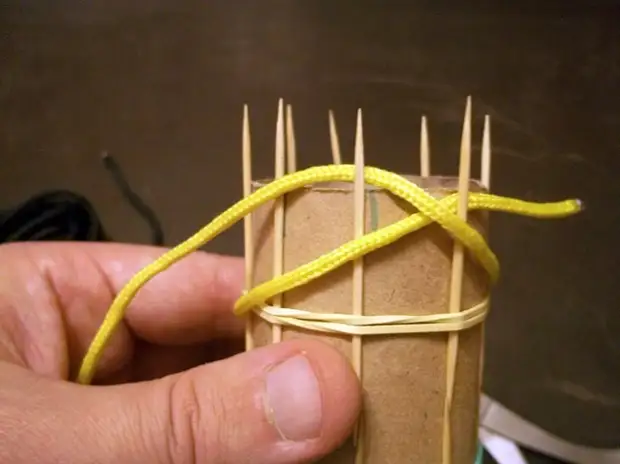
On the second twist, we need to turn the work end of the cord under the already wound. Here for this we will need a tube awl. We enter it under the cord from the opposite side, insert the work end of the cord into the hole of the sewn and take a sequel along with the cord:
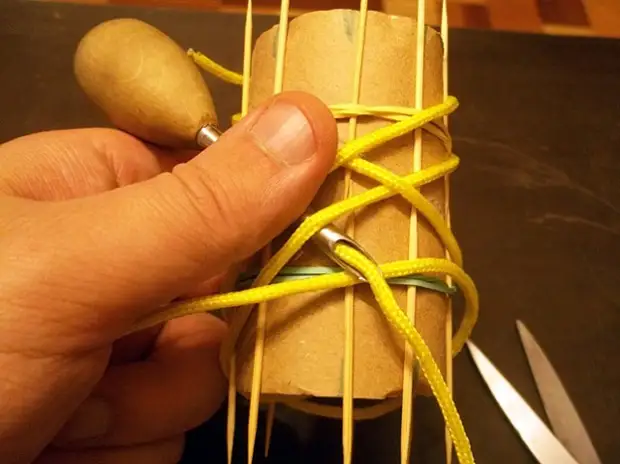
... it should get like this:
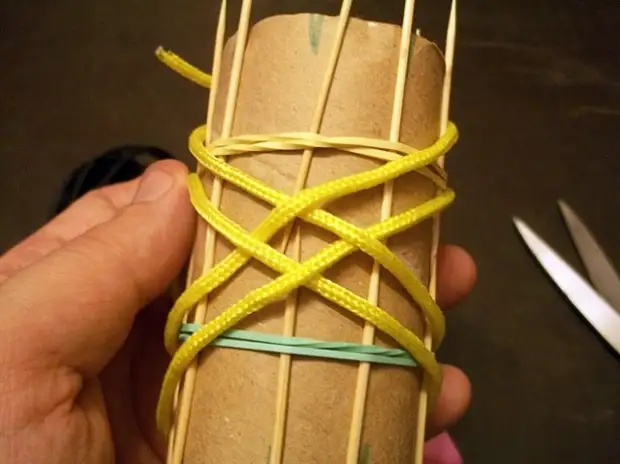
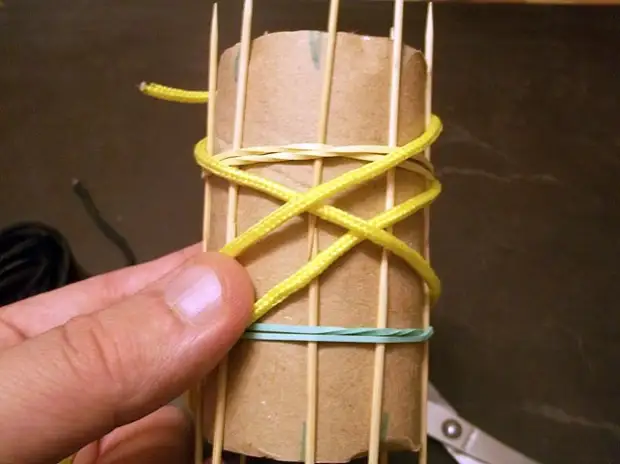
We repeat until the cord fill the entire template and pins. Weiently focus on the previous row: if in the previous row cord from above - we start it down and vice versa. In the last rows, it may be difficult: in the previous row, the cord is twice the same (twice from above or twice from the bottom). Do not be scared, this is normal:
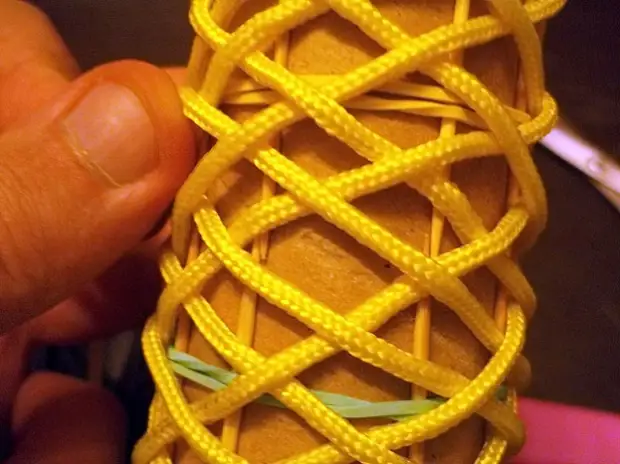
When I mastered the technique, I bought this several times: it seemed to me that I missed something somewhere. )) If everything is done correctly - it turns out in the photo:
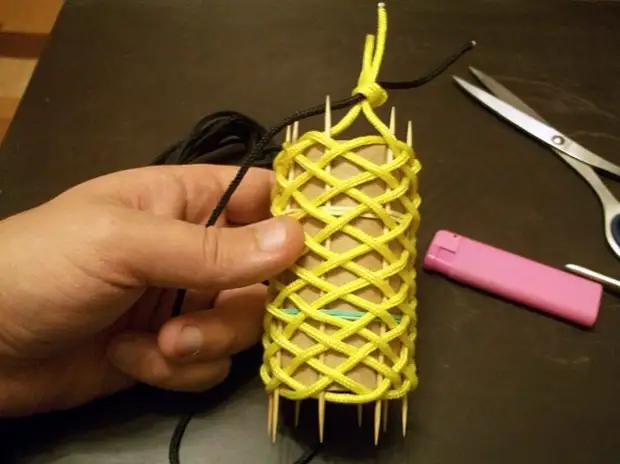
It can be continued with the same cord (if you make a monochrome nut) or start a cord of another color. In the photo at the top I fastened the second cord. Operations are no different, so I do not describe them. If everything is done correctly - get this:
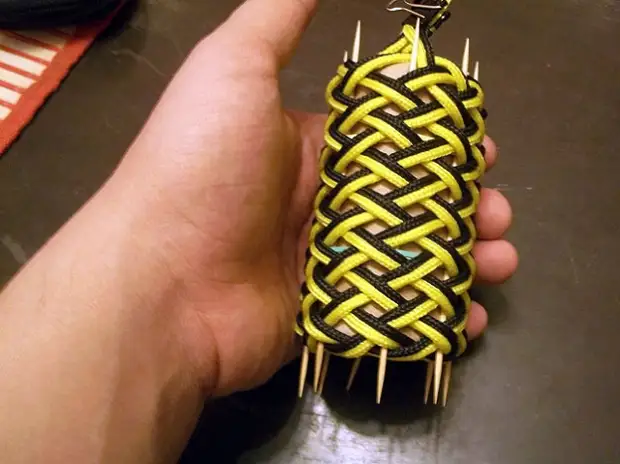
... more + one color and get what was on the first photo. Pull out the toothpicks and remove the product from the template.
This is not a finished product, rather a semi-finished product. Now the node must be tightened. This is all the same seed, gradually tightening the plots of the node. In this node, you can weigh the bracelet, shake the handle of an umbrella, a bottle or a flask and so on.
A source