
Now the miracle finally happened and I finished the pattern of moccasin, which were published in the post: https://www.stranamam.ru/post/3782282/#com241877
Everything went smooth while I did not reach the valve. Very start to remember everything that I was taught at the Institute and different working moments. But apparently, I have not yet constructed such moccasin, so all methods that can be applied in this pattern that can be applied. I will not "pour water" for a long time, the only thing I want to be immediately warned: the construction is purely individual and may require a small adjustment for each case, even if one person has a great deal of right from the left, then it is necessary to build for each leg. This is if the difference is noticeable. In short, there will be questions - I will consider and help everyone without exception, since I have volunteered to draw
So, let's begin. We will need millimeter paper, scissors, pencil (soft and thin), adhesive pencil, an unnecessary segment of the fabric (for sewing a prototype), a ruler, a square, cardboard, a centimeter tape (and even better Kurvimeter who has), paper and awl.
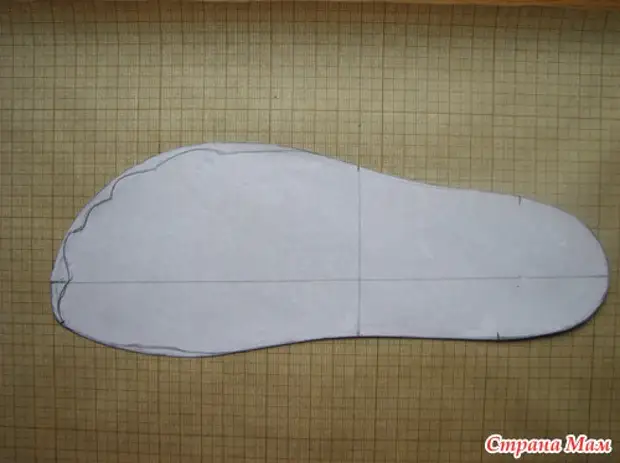
We take a small piece of cardboard for insoles, become on it, we supply your leg (better right, since most people have a little longer than the left) holding a pencil clearly perpendicular to the cardboard. Well, if this is done for you, who will be near, as it will be better when A man stands straight, leaning on two legs. You still need to put on the leg to wear a fat sock (the one that will be worn with this shoe). Circled. Without going down from the cardboard, we note the main points: we project an ankle bone insole from the inner and outer sides, the narrowest part near the foot of the foot and the symmetrical point to it from the outside. Now we take the insole and smooth the line in the field of fingers. We celebrate the point in the sock: between the big and index finger and the most protruding point of the heel. Connect the line. That's what should happen:
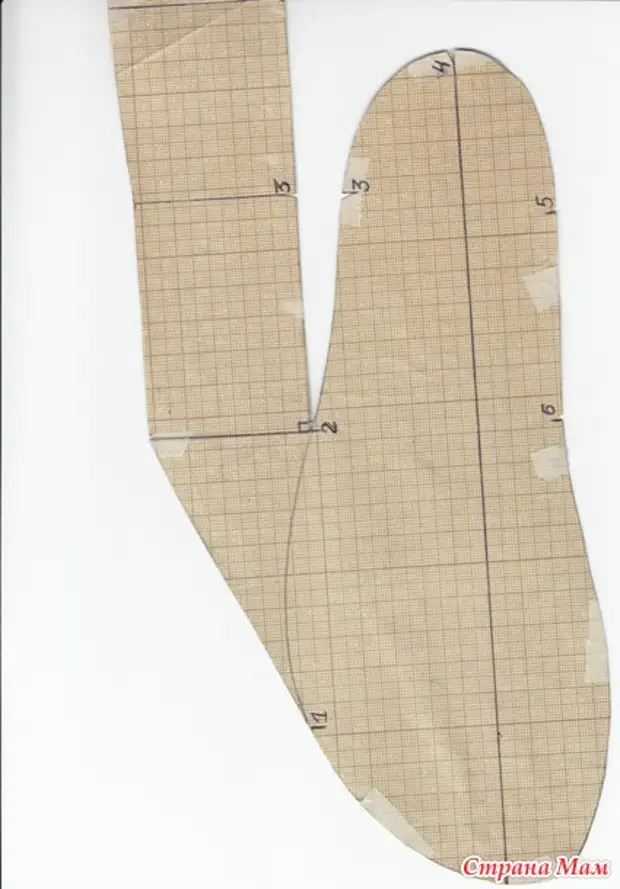
Now we take millimeter paper, cut out a piece of 70x40 size (this is for 39 sizes of shoes). We put our insole on paper by combining the line on paper with a line on the insole. We supply the insole and post all our points. Add another point is the point of the maiden. Come on the point according to the drawing.
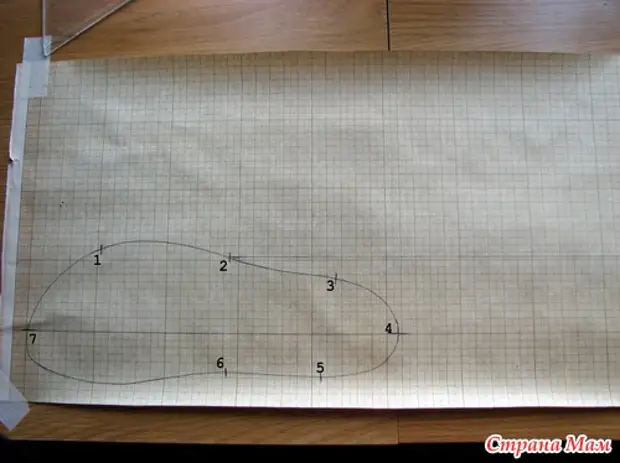
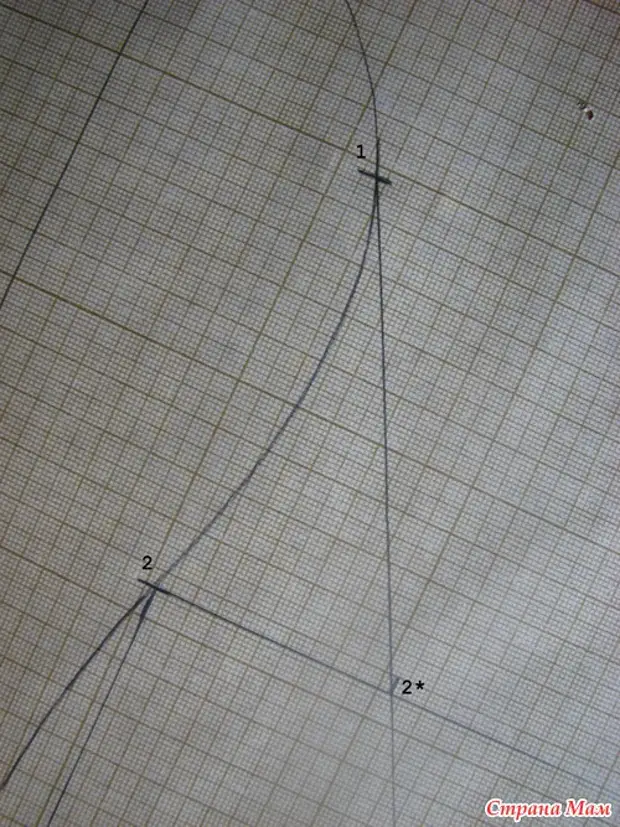
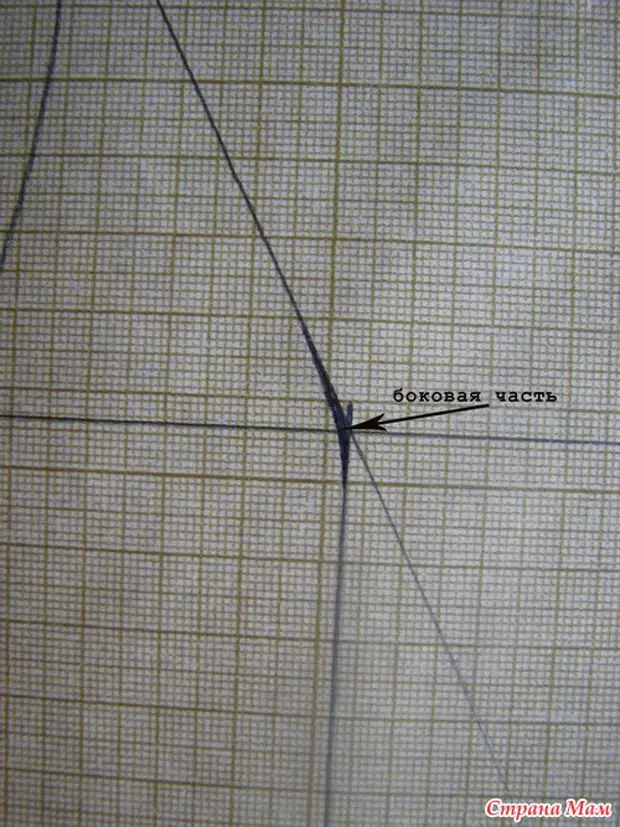
Next, we carry out the line from point 2 to the right parallel line 7-4.
From point 2 up, we postpone a perpendicular equal to 5 cm. And we put the point 2 *.
We connect the straight line 2 * and 1 point.
Now we will measure the perimeters of the curves. To do this, take a centimeter tape or a curevimeter.
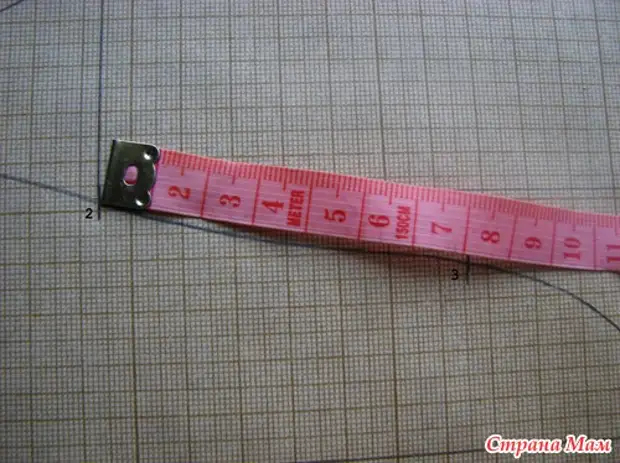
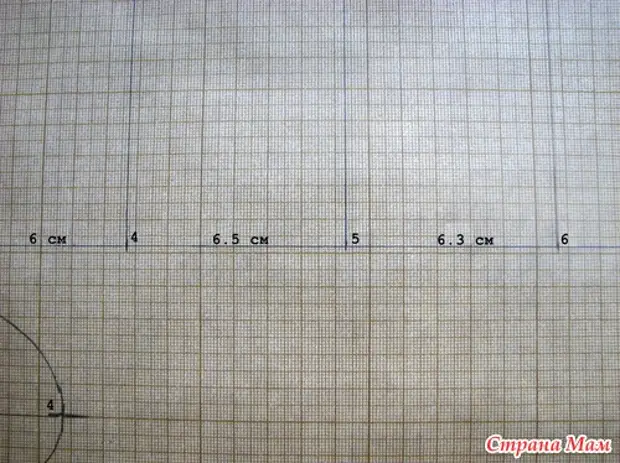
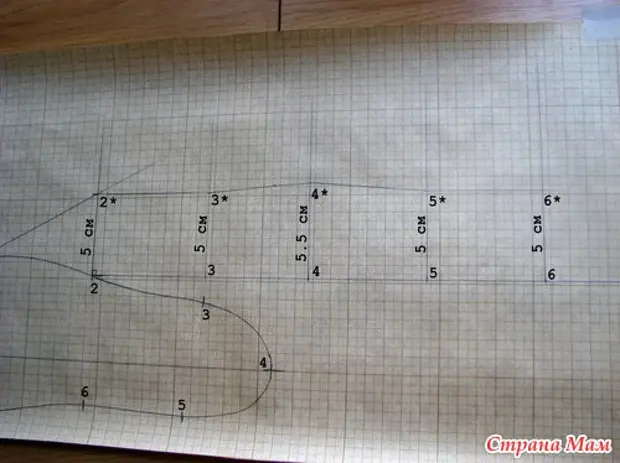
We lay out the centimeter from point 2 to point 3, write the value on the leaflet, then from point 3 to point 4- write, from point 4 to point 5, from point 5 to point 6. We have 4 data. All data in the sequence as they walked on the insole lay on our straight and note the corresponding numbers. Here they are clear:
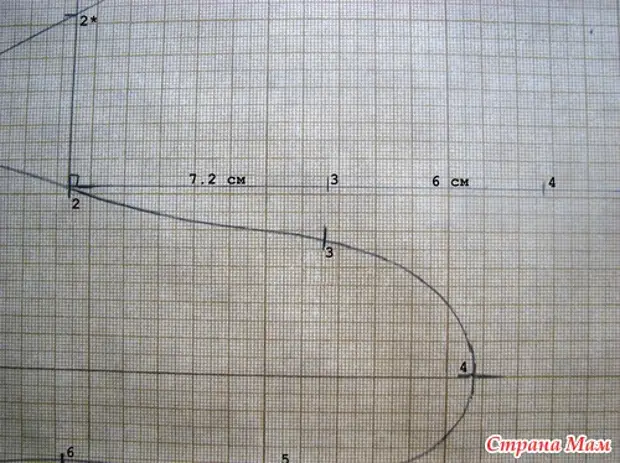
Next, we spend up from the points received, perpendicular with such parameters:
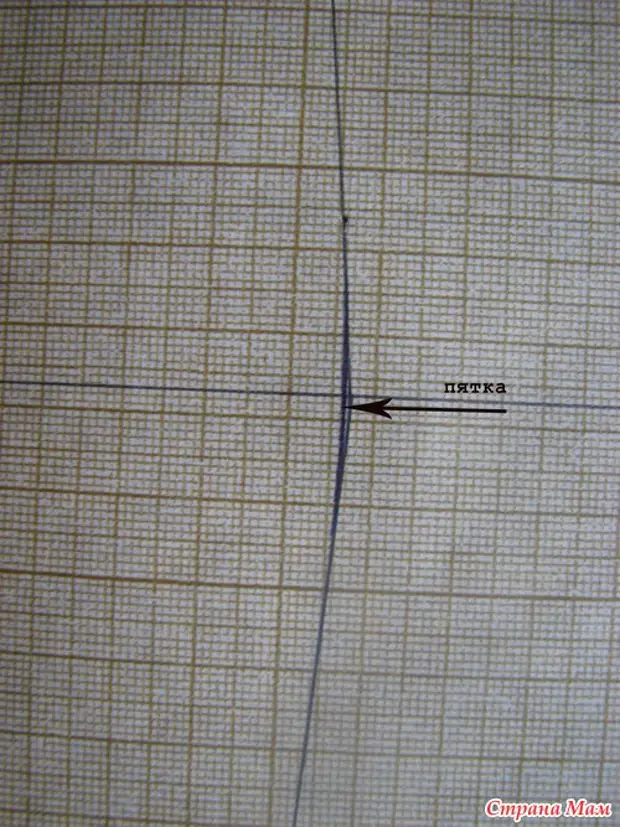
from point 3 up 5 cm. 3 *;
from point 4 up 5.5 cm-point 4 *;
from point 5 up 5 cm-point 5 *;
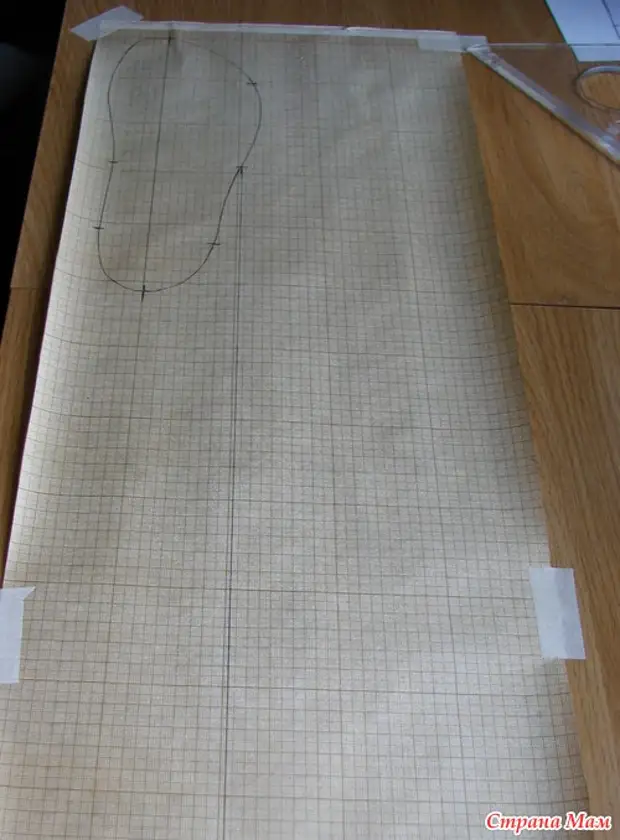
From point 6 Up 5 cm-point 6 * and prolong this line a little further, a little more than 2 times. Connect the resulting points to each other. That's what it turns out:
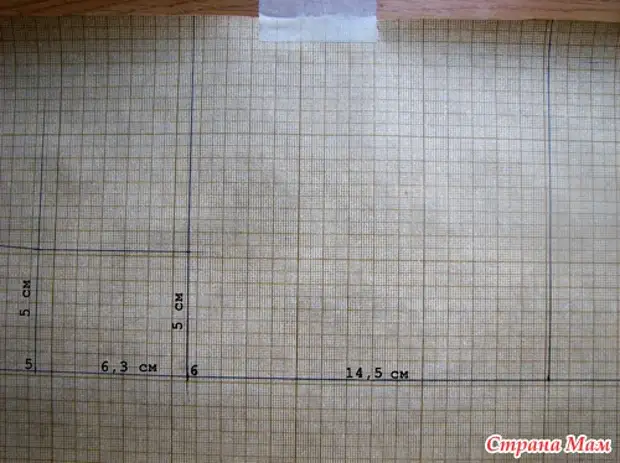
Go to the construction of the valve. Direct 2-6 extend to the right by 14.5 cm. From the resulting point, we deposit up a long perpendicular.
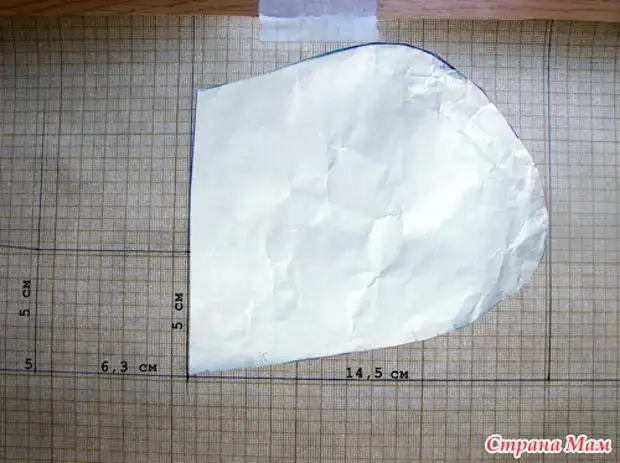
Now you need to translate the insole and the beginning of the sidewall with the drawing. Plus points 2 and 6. For clarity, you can connect their line. We stick on tight paper and cut out along the contour. I already had a trial billet from fine cardboard. Here is a template:
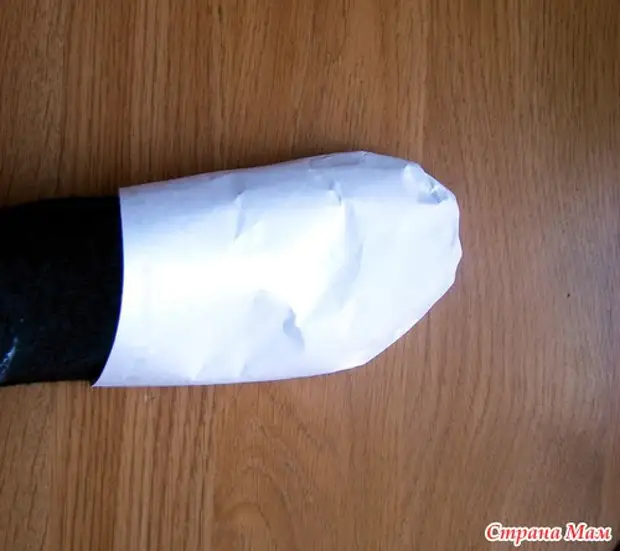
We take a sheet of pure A4 paper and turn your foot as shown in the figure below. Well climb the line edge line. Paper should fit the foot as close as possible.
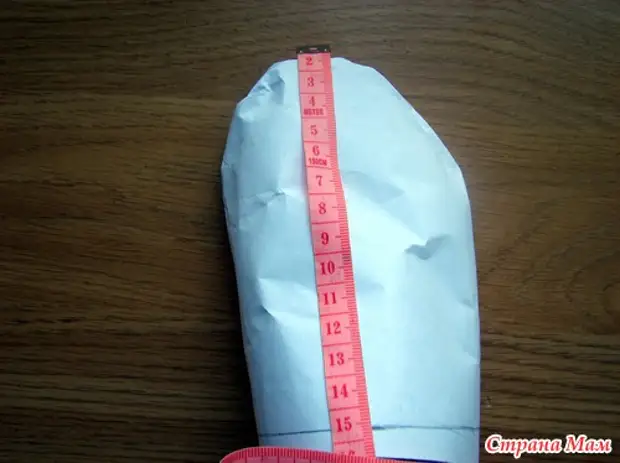
Santimeter ribbon We note in the center of the foot up 14.5 cm. Moreover, the beginning of the tape should begin from the face of the foot trace.
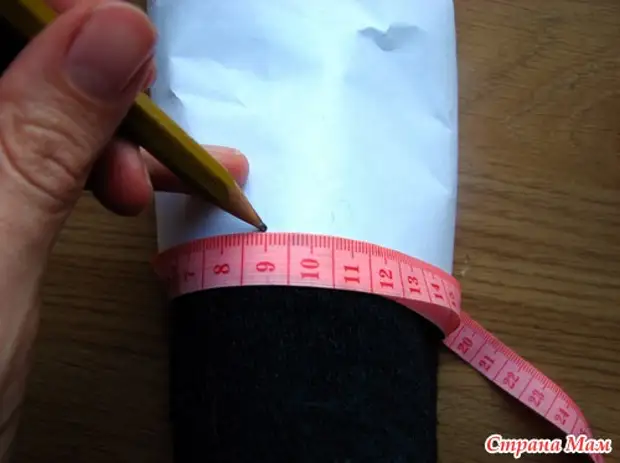
Without removing the wrapper from the legs we are on the template made above. We try to accurately get on the track of the template. Now we project points 2 and 6 on the wrapper from the sides. We take a centimeter tape and put on the obtained points on the wrap, right on the leg. Connect the line on the tape.
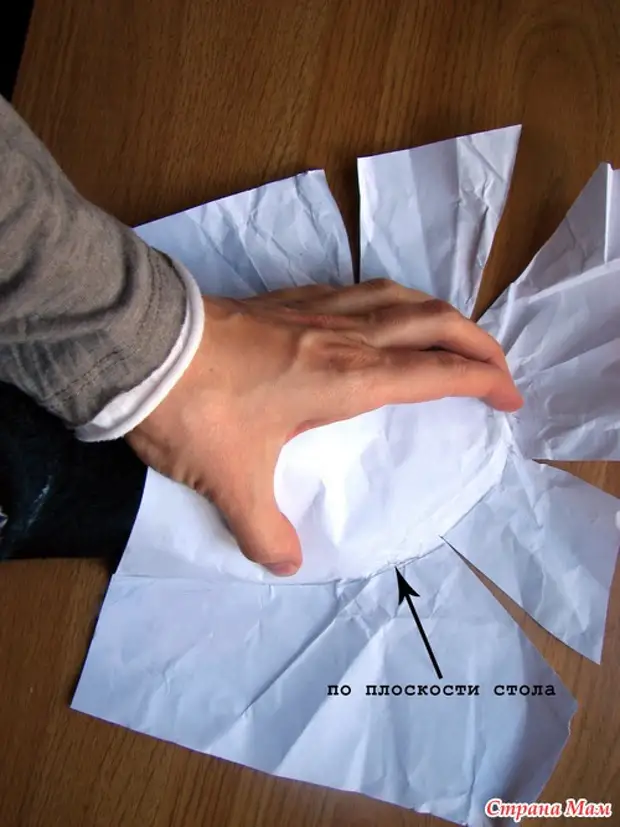
Now we deploy the wrapper and cutting it with the petals a little at least before the fever. We apply again tightly to the foot and supply a soft pencil face from all sides. Like this:
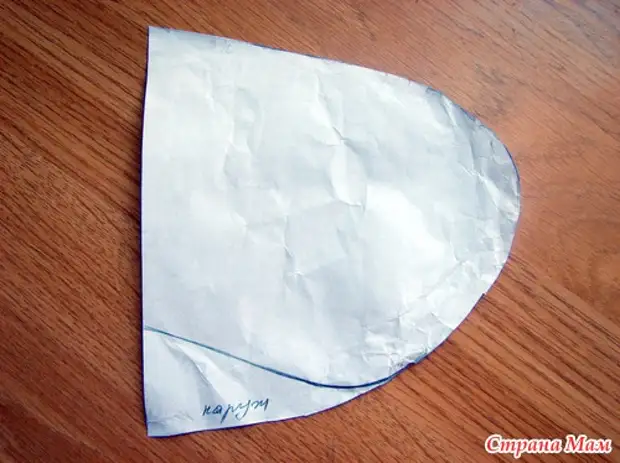
The resulting valve scan is cut along the resulting face and at the top edge of the valve. Again, we take our template, we get up on it, we apply the valve (do not confuse the inner and outdoor side, mark it in advance) and press the sideline of the template to the valve. Draw the circuit of the template on the valve.

This is what should happen:
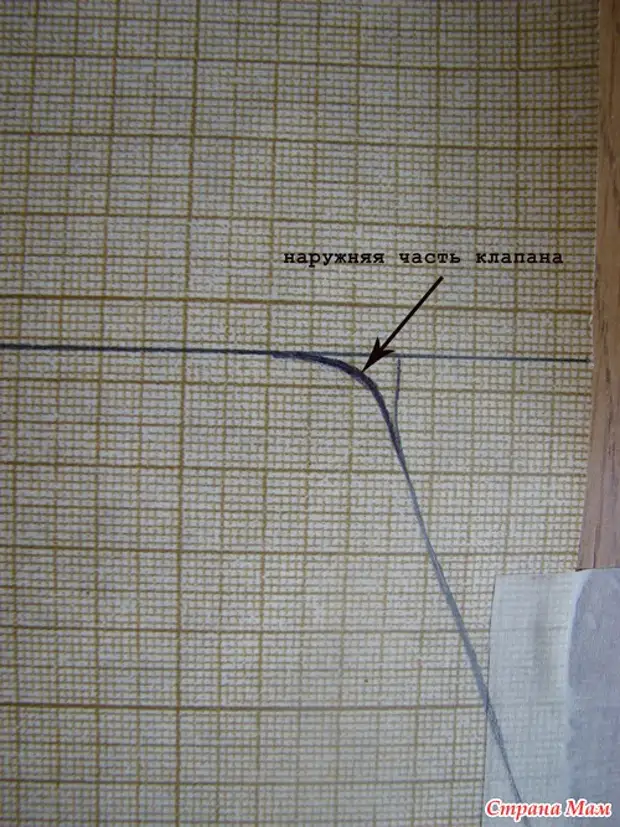
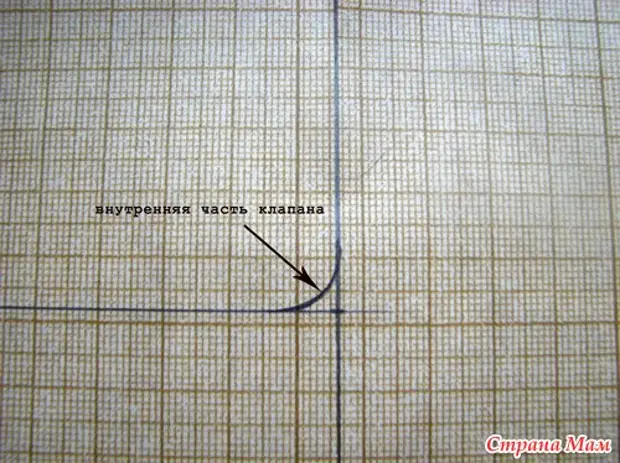
Cut from the outlined circuit valve. We apply the valve to our drawing along the line from the point 6 upper edge of the valve. The inner side of the valve is adjacent to point 6. Vividly:
Draw a valve outline.
Curl corners.
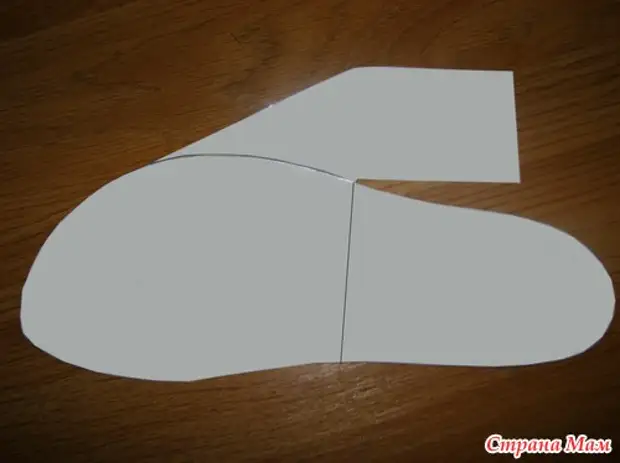
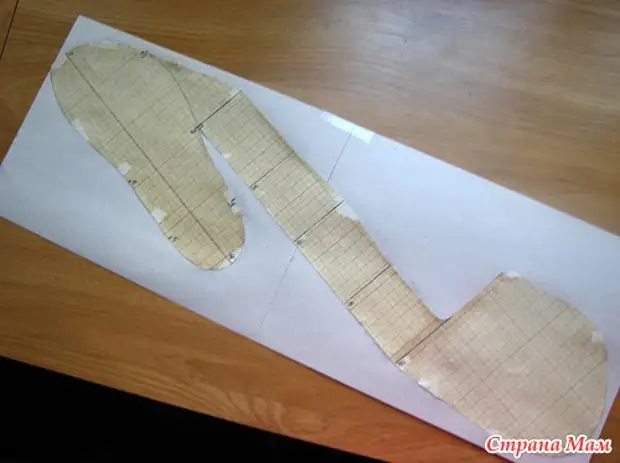
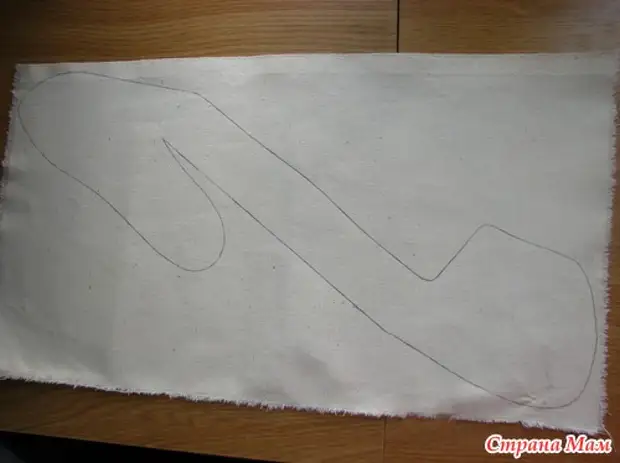
Moccasin drawing ready. Cut it:
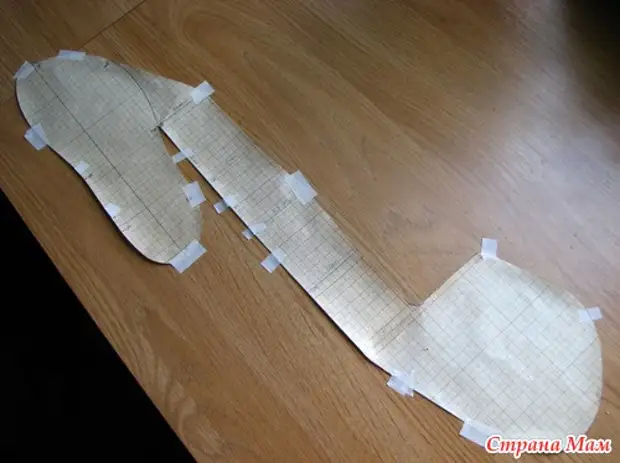
Take a cardboard and stick the drawing on it, cut out.
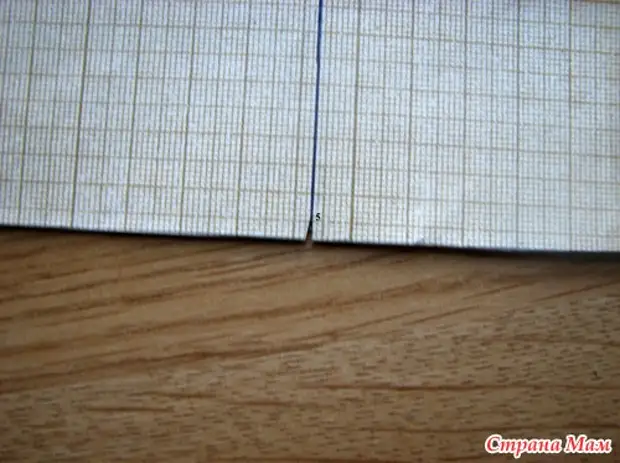
Manicure scissors make cuttings at points 3, 4, 5, 6 on the insole and on the sidewink, respectively.
I advise you to decide one sample of moccasin from a dense unnecessary piece of fabric. I got under my hand a dense coat. We put melo on the fabric we will supply it and celebrate all the cuttings made. Do not carve on the fabric!
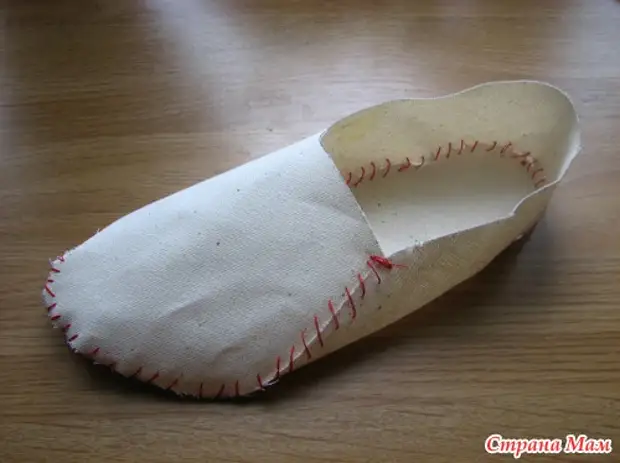
It is enough to make a half-breaker. In the sewing process, first secure the details of the insoles and the sidewalls on the outlined cuttings, and then hurt threads. Here is my half-welcome. With his made moccasins, they did not rush very quickly, therefore the seam is not a fountain))))) To see how it will look for another leg, remove the moccasin and put on another leg.
That's it seems to be. What will incomprehensible- ask. Be sure to boast ready-made products. Good luck!
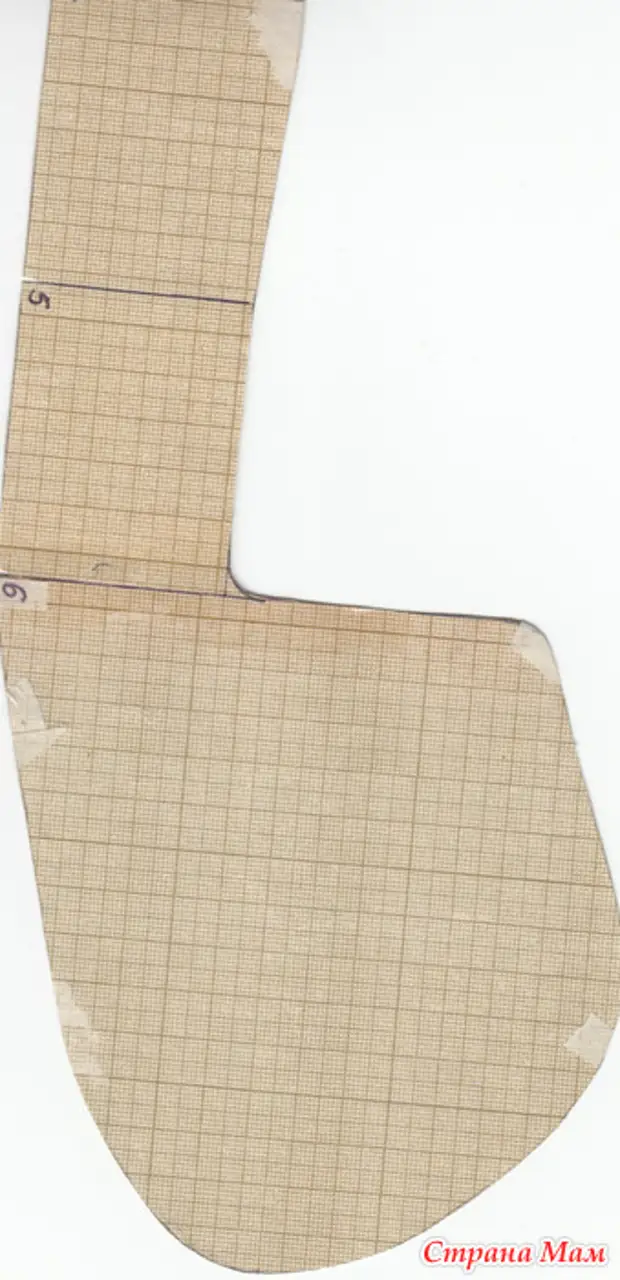
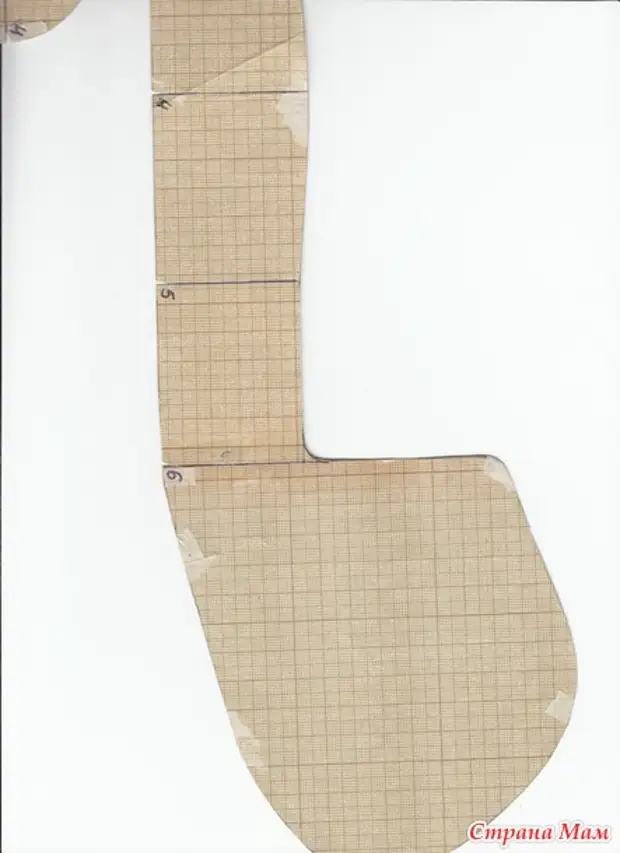
PS: By numerous requests to attach pictures of the scanned pattern of moccasin. Fully scanned did not work, will be in the 3 stages. You just need to print and combine the numbers on the pattern.
a source