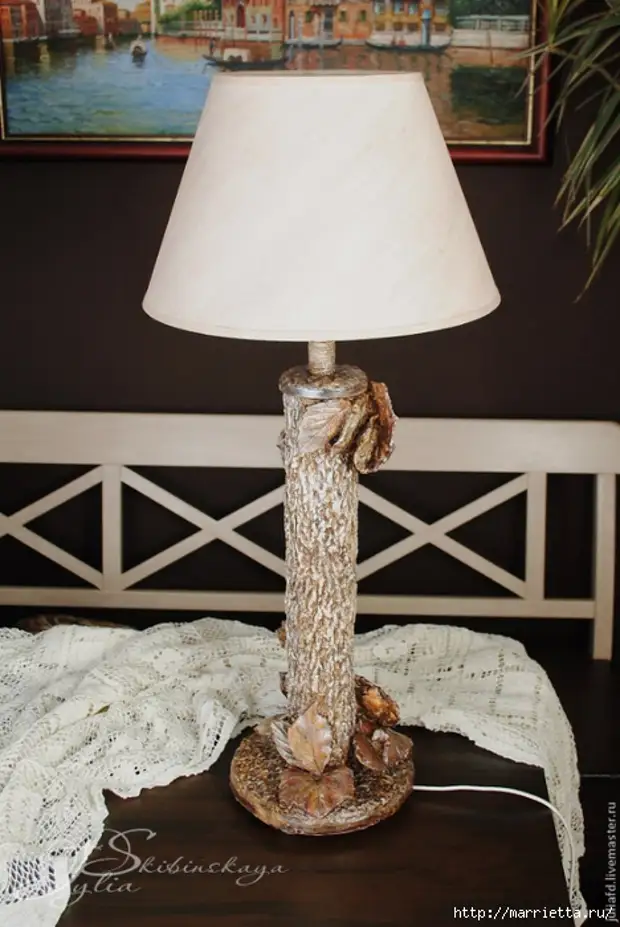
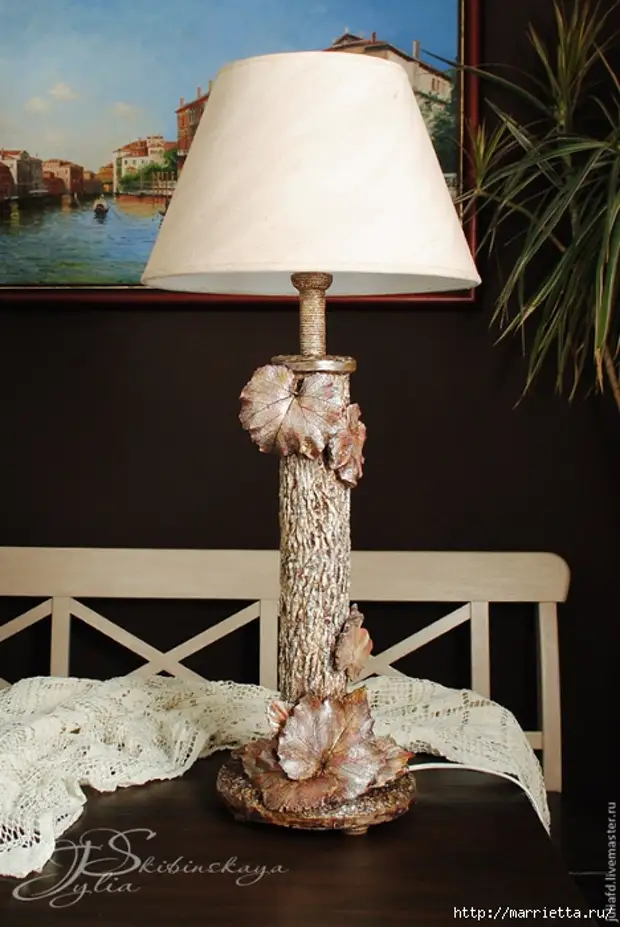
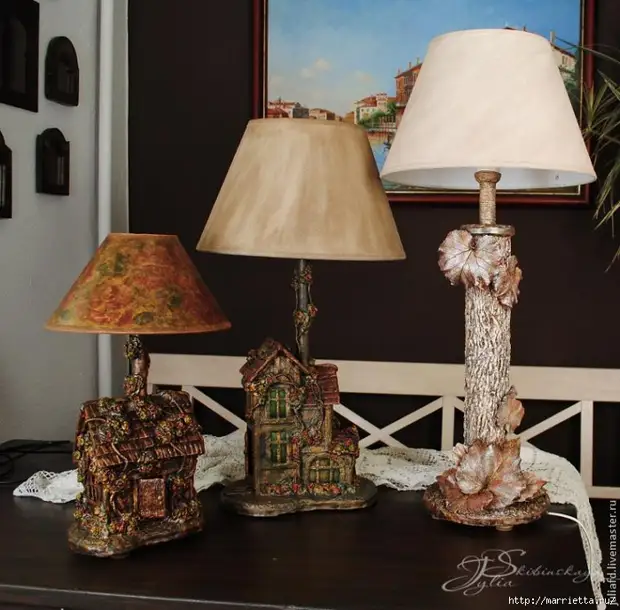
This time we create a lamp - the flooring "Autumn Waltz" from empty plastic bottles and covers
To work, we will need:
1. Two empty plastic bottles
2. Caps from milk or juices 4 pcs (for legs)
3. Metal cover from the can of any suitable diameter
4. Plastic tube (in my case, I continue to use hollow plastic tubes from exhibition cats)
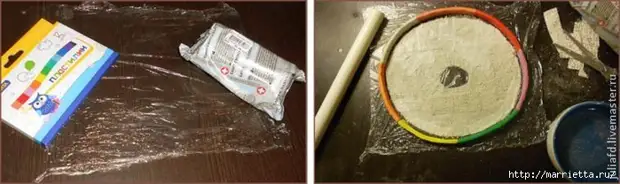
5. Plasticine
6. Gypsum Bint
7. Alabastra
8. Packed acrylic (as a whole, you can do and the alabaster or any putty or plaster, remaining from repair, I have a spacure)
9. Food film or package
10. Napkins or paper towels
11. Glue PVA
12. Cord or piece of any rope
13. Paints (I use remnants from painting walls + artistic acrylic paints)
14. Cartridge with ring, cord, switch and fork
15. Abazhur.
16.Reign
1. Make the base of the lamp
The first thing we do is cast the foundation of our lamp. To do this, it is for an even base of the package or food film, on top of it we make a closed loop from plasticine to any form we need. Next, as a reinforcing layer, I use a gypsum bandage. They put the film inside the contour. The bandage is moistened with water, respectively quickly collapsing and reinforces the bottom of the base. With the center of the bandage layer, leave a hole for the tube, since according to plan the cord of the lamp, it will take through.
Now we knew alabaster. It should not be too liquid or very thick. The consistency of sour cream is quite suitable. Now we take our tube, install the center of the future casting and fill our improvised form in the center. At the ready, keep the level, and so far the gypsum has seized, by the level I correct our tube to an even vertical position. As soon as the gypsum cooled (and it heats up when frozen), it is possible to continue manipulation.
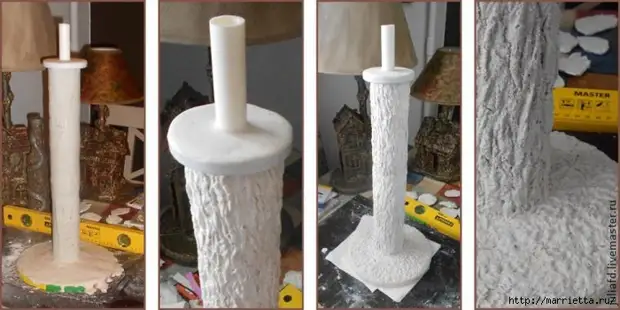
2. Create a frame of the lamp
For my idea, the lamp must be a tree trunk, decorated with leaves. Here is the basis of this trunk we need to do. To do this, we take two empty plastic bottles, cut the neck and bottom. If the diameter is too large, you can cut the resulting plastic cylinders vertically and adjust the diameter under the desired one. So I entered.
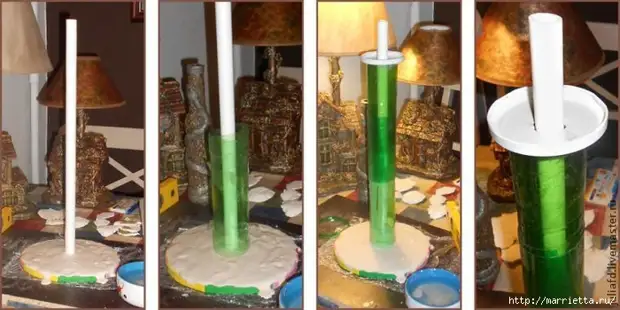
By installing the first cylinder from the plastic bottle on the base with the tube, weathered alabaster and pour it inside the plastic bottle to secure the base of our future trunk and make the lamp stable.
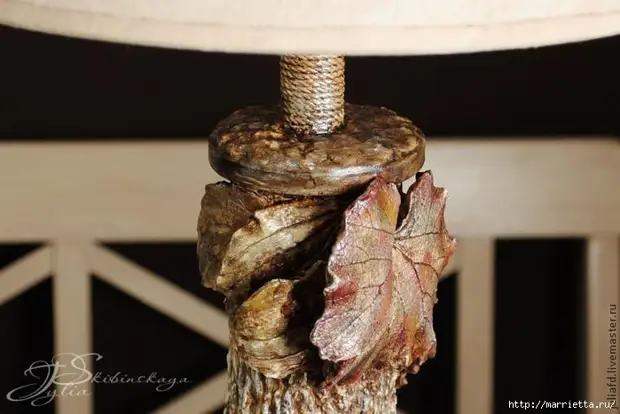
Next, the second cylinder from the plastic bottle is above the first and glue two bottles with each other using a tape (painting or ordinary). Now we take our metal cover from the can, make a hole around in the middle and dress up onto the central tube on top of our entire design. And we pour our lid by alabaster, not forgetting to align it in terms of level. So, the frame of the lamp is ready!
3. Make the trunk
Now our framework needs to give form. For a start, we take a gypsum bandage and a shield our design by a pair of layers without any patterns and sings. Next, using the whole of the same gypsum bandage, we create a texture that resembles a bint of a tree on our "trunk", robust slices of bandage. There is a complete creative flight, each under his hands perfectly easily easily invested in several ways to imitate the bark. Main start! The base of the lamp around the trunk also decorate the gypsum bandage. This and "reinforcement" on top of the base (we turn out and the bottom of the upper part) and the decor.
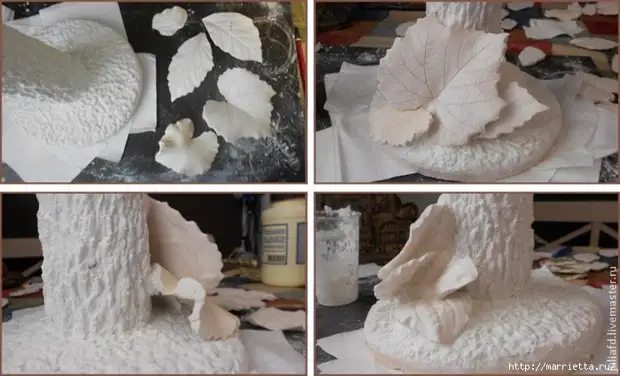
When the bark and "grass" around the trunk are made, we take a putty (alabaster, plaster, you can add a bit of PVA), we will drag it with a liquid and tassel on the trunk and the base. We need to close cracks, pores, minor holes. If this is not done, then you willrtie to paint all this design. At this stage, it is better to hoist on a stack of napkins or paper towels and leave to heal.
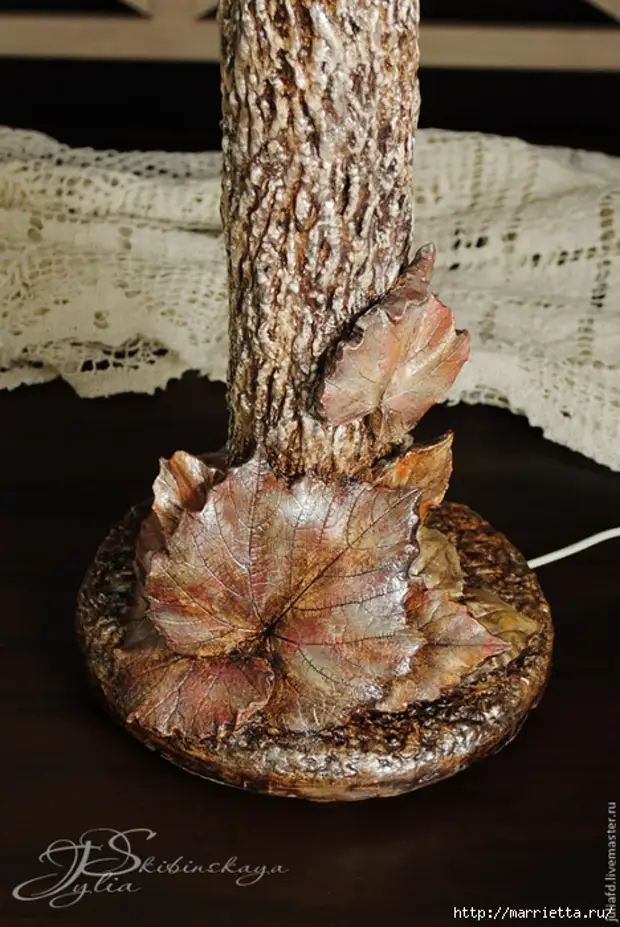
4. Decorating the lamp
For the decor, I made castings from Alebaster with live leaves. On the holes already placed such a plan of MK on the casting of leaves, so I will not repeat. The technique is old, on the Internet it was described many times. And everything is very simple.
As models, I took the leaves of grapes, girlish grapes and plantain. Castings were sucked at the time of decorating the lamp. But you can use and not quite serious.
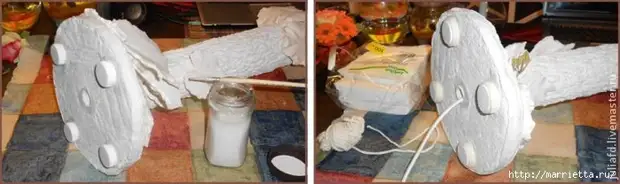
Now fasten the leaves to the crude and the base of the lamp. For this purpose, Papier-Masha is useful. From the same napkins at which the frame was filing, I pierced the "lazy" papier-mache. Soaked in water and crushed the wipes in the blender. Further pressed, put in a plastic cup and stirred with PVA glue. The mass turned out not completely homogeneous, with lumps, but for our purposes is very suitable.
Next, out of cast leaves, we make a composition and secure it on the papier-mache to the trunk and the base. All the gaps between the leaves fill the papier-mache. Yet thing must be not only beautiful, but also practical. And the clogged dust will not please anyone exactly. Yes, and paint the design with a lot of voids is not very simple.
Papier-Masha even raw perfectly holds the weight of the leaves. So the decor is not falling off and it is immediately clear that you turn out. Well, if you do not like the location of the item, it is easy to access it and without harm to the invoice to be transferred to another place.
When the entire decor is assembled, we leave the lamp for drying. And it is better to wait for the complete drying of the gypsum.

5. Latest strokes
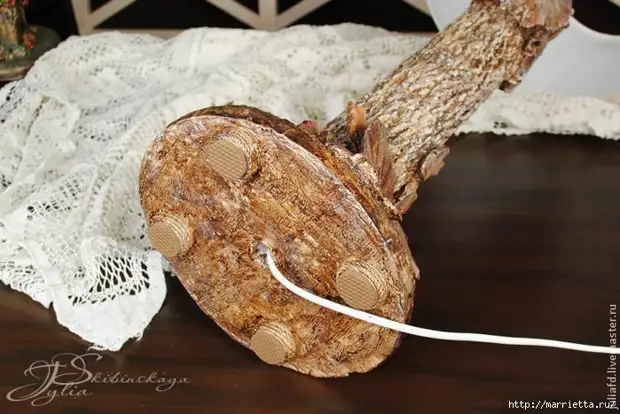
After drying, the lamp can be turned over without risk that leaves will be shouted or shifted. Now we take four lids from milk or juice and glue to the base. The lids should be the same so that the lamp stood steadily. Usually I decorating the "legs" of the economic cord so that they look carefully and fit into the overall picture.
Now install the cartridge with the cord. When gluing it to the plastic tube, do not forget about the level. After the cartridge is installed and glued, the upper part of the lamp, along with the bottom of the cartridge, I wind up all the same economic rope.
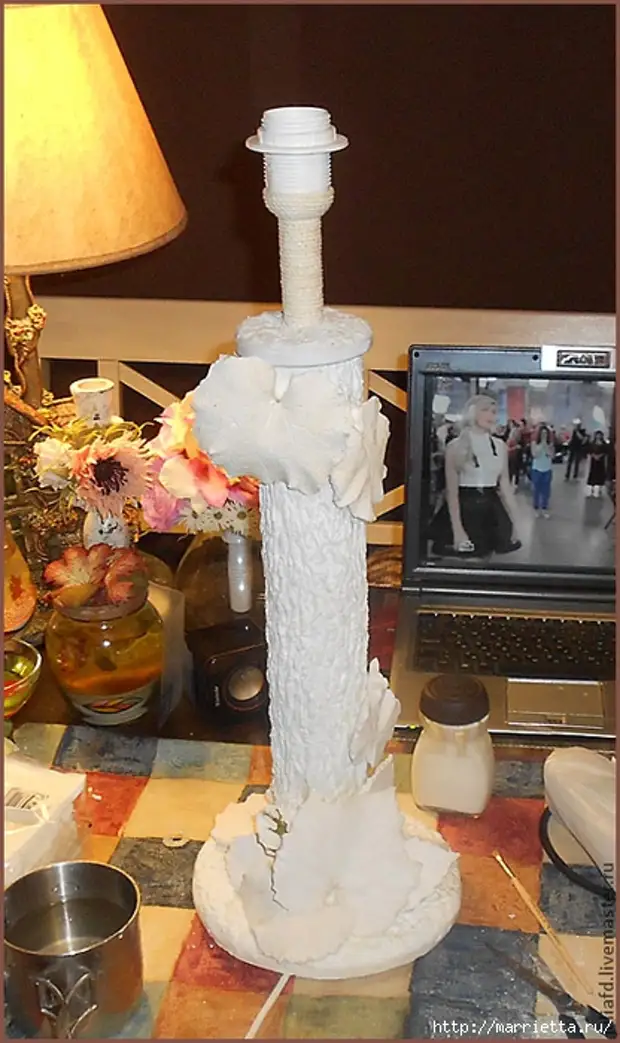
When choosing a rope, it is important only that it is not a darous. That's it! Our lamp is fully charged and ready for painting and varnishing. For painting, I use the bank acrylic paint remaining from the kitchen walls. Shades and other I add art acrylic paints. The patina effect gave bitumen. And the first frost sounded silver. A lampshade I tinted with artistic acrylic, mixed with PVA and water. This is what happened as a result: