
According to the author. Today we will have a savory dress and cape from a fabric designed for handkerchiefs. I admire the colorful colors of this canvas and would like to show you how easy it is to make such a kit for yourself or to order.
To create this kit, we will need 2 handker with dimensions of 125 x 125 cm, pattern, 4 coils of threads, oblique beyk and a bit of patience :) And if you once already sewed a dress, you will easily easily and quickly and quickly.

1. Pattern.
I build the pattern personally on the figure using the main measurements and apply standard additions. If you still do not know how to build patterns, then the best solution for you will learn to do it, because it is very important, the planting of the product and a successful pattern depends on the pattern, this is 70% of success, so I will tell you that I personally build a pattern by the German technique Muller and Son, she is satisfied simple in the construction, but if you build for the first time, you may be easier to build on the Russian method and preferably adapted, such a can be found on the cutters and sewing courses. But if you feel the strength and determination to master the really standing technique, take the study of the Muller technique. I will immediately say that the most important principles of construction are described in a pair of text pages and the attached drawing clearly shows which stages need to pass.
If in this master class, it is checked enough comments with a request to reveal the secrets of building a German technique, I will make a detailed manual with which you will learn, finally build the exact patterns. So, waiting for your response, but for now you can ask questions in the comments, I will try to answer everyone :)

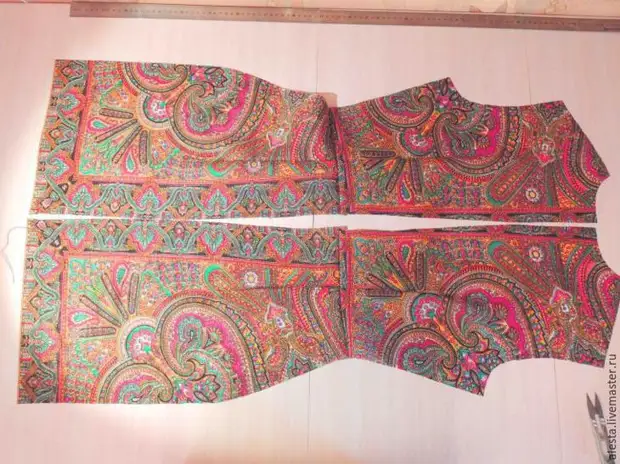
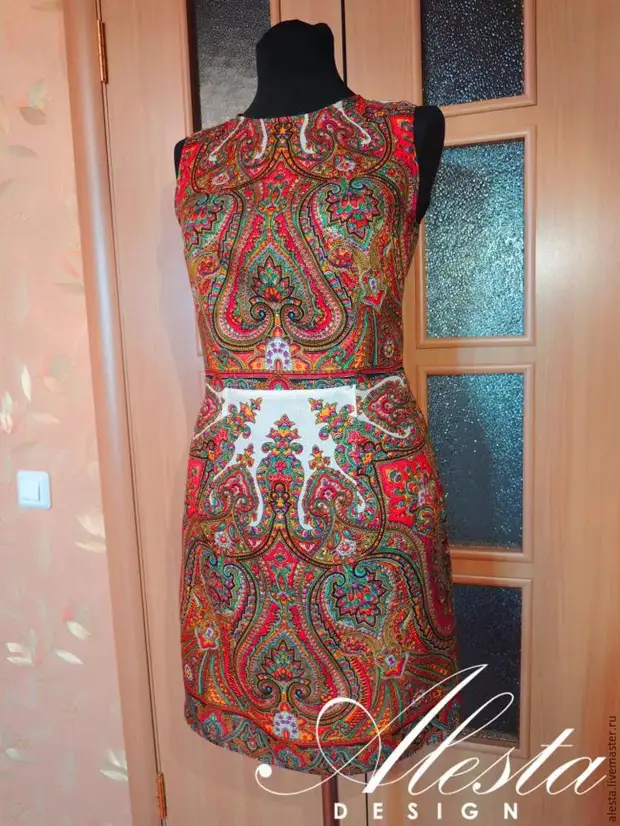
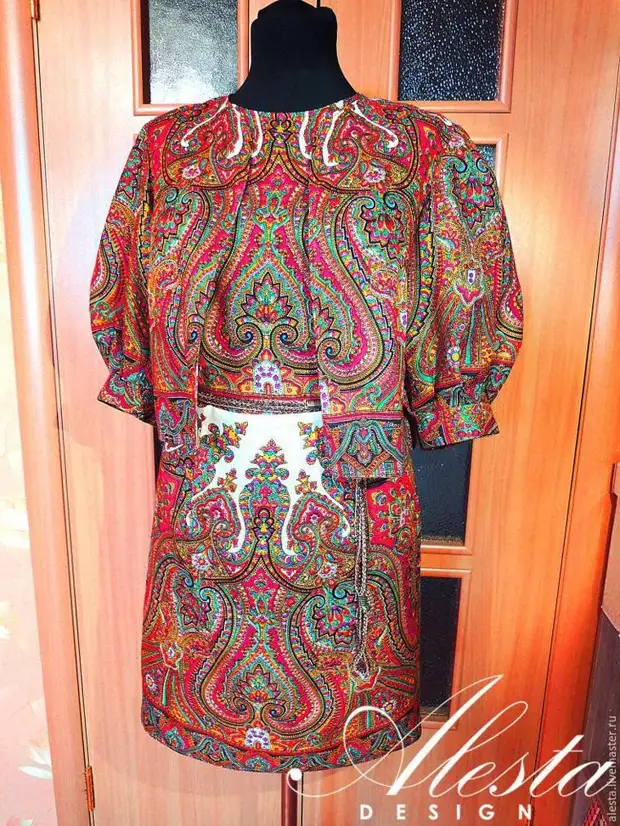
Dear reader, in this master class you will learn how to draw a product with minimal fabric waste, because to make 2 products from 2-handers - this is a special skill and today I will tell you how you can achieve it. Just from one handker I got a dress, in the photo you can see the location of the pattern on the fabric, plus we must take into account that there is a special pattern in the center and it is white, it needs to be competently beat, for this comparable drawing center with the center of the product And the location of the white fragment will be placed on the neck area and the lower part of the dress is located with a waist pattern. In other words, we share the dress on the waist and match the drawing with the top of the part, in the photo my pattern is not cut along the waist, so we turn it out for the shelf and for the bottom of the dress, as in the photo.


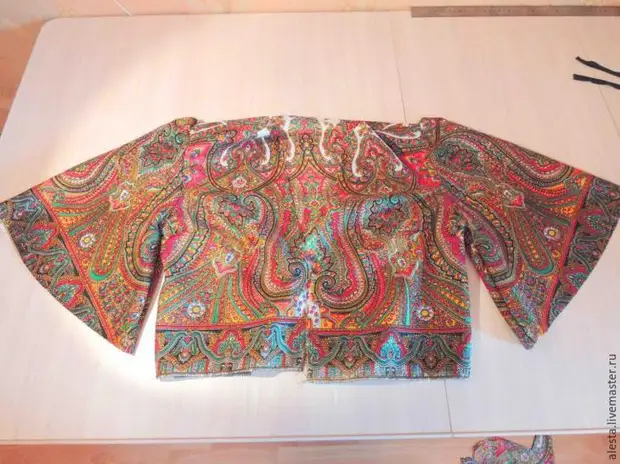
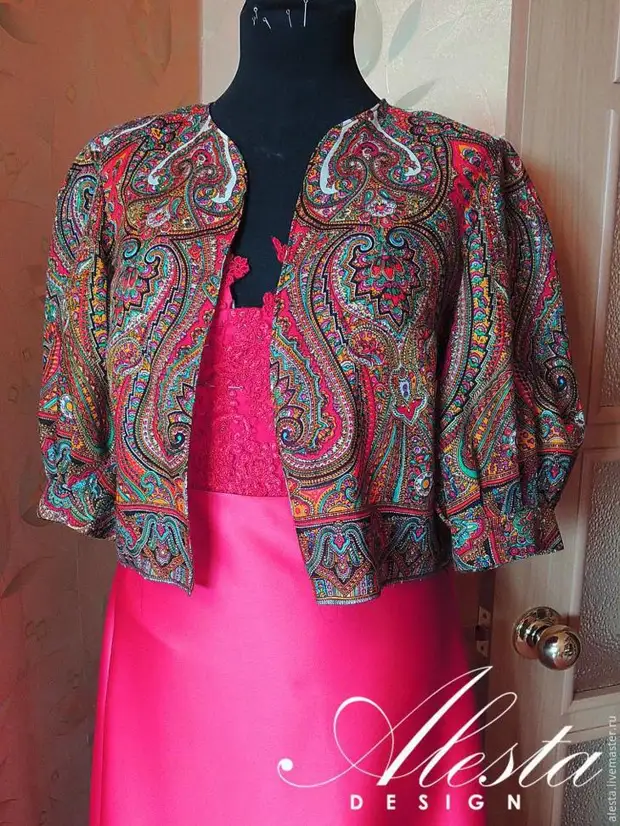
Cutting-care jacket.
To cut the capes, we will need another one-piece scarf, and now pay attention to how I placed the details :) Surely, you have not seen this yet. The fact is that the fabric that according to the equity and on the transverse does not stretch in no way and it gives us the right to place the parts according to the figure, in this case everything spins around a small fragment in the center. So, we rebuff the details with the expansion of the side lines, especially the sleeve, it will have to be fluffy and the most. As a result, the remains of the fabric are minimal. These little loskutka is even difficult to imagine where you can use, but we will find it use in the future, I will soon begin a series of master classes "sew from trimming fabric". If you are interested, write in the comment in the comment, I will definitely listen to your opinion, because this is an important and pleasant to me - to know that I have a reader who is waiting for a new useful information, and a lot of years have accumulated it and now I am happy I share my incomparable!

2. Suitable.
So, our items are carved and we need to prepare a product to fit, for this we estimate the molding, as well as side and shoulder seams by a temporary line. You may argue that it is quite difficult for yourself to make fitting, and I do not agree with you, because you are not a client and you have the opportunity to try out the product more than once and make sure that after the changes, the whole village is as it should. Perhaps the photo does not pass, but in my case it did not take the shoulder seam, I corrected him a little, the rest of the landing pleased me, as always in the case of the image of Muller.
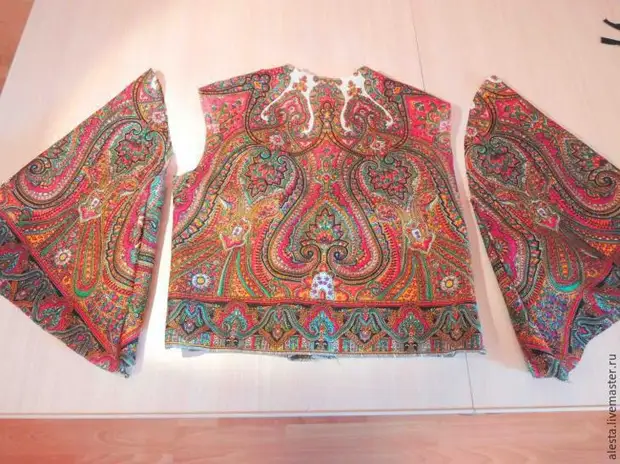
As for the jacket-cape, it was perfectly saturated almost without fitting, as she was free.


3. Tailoring.
We are ready to start the final finish of the product, a couple of hours and your dress will be ready. I advise not very hurry at this stage, because it depends on it, as far as our product will last. So, neatly stepping the molding, then connect the bottom of the dress with the top, in parallel, stepping the castings on the jacket. Yes, yes, it is so, we learn to work in the stream, namely, try to perform all work on the typewriter to go to wet heat treatment, then to processing on overlock, thus reducing the sewing time. And once again: we need to connect the filthy, stacking seams on the waist, molding on the jacket, side seam of the sleeves, you can also have the brachial seam. Before proceeding to further processing, we need to disappear. We do it carefully with the help of the tip of the iron, we form bully on the chest line, but do not convex the bulge itself, I think it would be appropriate to the video, how to do it :)
So, our sweeps are crammed, seams on the waist processed on overlock and is also rooted, the shoulder seams are fully prepared, the side seam of the jacket and sleeves is also processed, we still have a side seam of dresses and proceed to the processing of open sections, pre-processing them the dress with the simplest seam : Overlock plus tag 0.1 cm, looks careful, requires a minimum of time. On the midline of the back, we will have a secret lightning, it is sewn to last after the treatment of sections. And now I will tell you how to handle cuts for the minimum time, everything is very simple we use the usual oblique beyk, which after an annoyance on the wrong side and secure the line.
4. Finding the finished product.
Well, we finished sewing our dresses and capes to him, and I have an assumption that it was this moment that we inspired us to make all the sewing stages and get a finished product. I want to thank you for your attention and wish you successful creativity, and for my part, I am always ready to help the Council on any issue! Do not modest, ask what you have long wanted to sew, but something failed, we will analyze together. And if you liked the master class, I will be glad if you write what other topics are interesting to you, the best comments will be embodied in my detailed manuals. You can also find another my master class on creating a dress with a podium, like D & G.
A source