Koncho ... the word is what ... But the theme of such jewelry is quite extensive. They are all sorts of - from those who dangle at Cowboys in Texas on hats, until those were brought from China and sold in the sewing departments of the Central Commissions. And many, many options and ways of use.
And there are coins. Coins are good, coins are beautiful. And it so happened that KonCho from the coins somehow sealed in the soul, or something. Maybe some kind of binding to history affects, the appearance itself may be. There are many examples of manufacturing such jewelry on the network. And, as they say, I walked around and about, and I could not resist.
In general, I decided to make a bracelet with a coin. I confess, I am not the first in this matter, and I do not pretend to anything. More important to me was the process of manufacture and tell about him.
There is a lot of info, and therefore reading advise to stock patience and tea mug (everyone has his own). And for those who are in a hurry, I think, too, everything will be clear if you simply scroll through the photos.
Go…
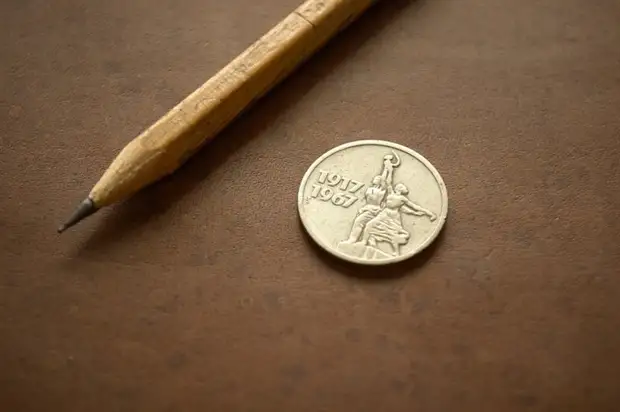
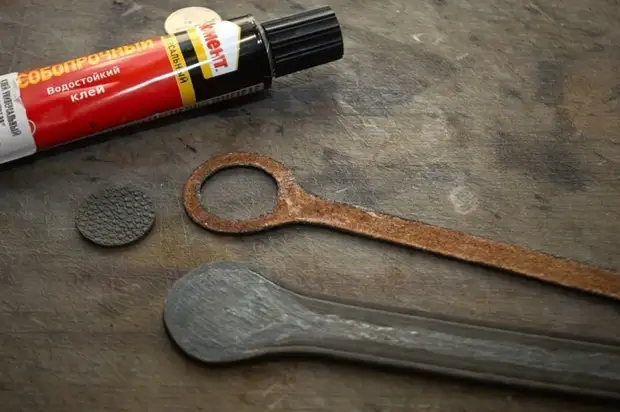
The choice of coins for KONCO is purely individual. Subsequently, each itself is determined with what he likes. I, in turn, chose it:

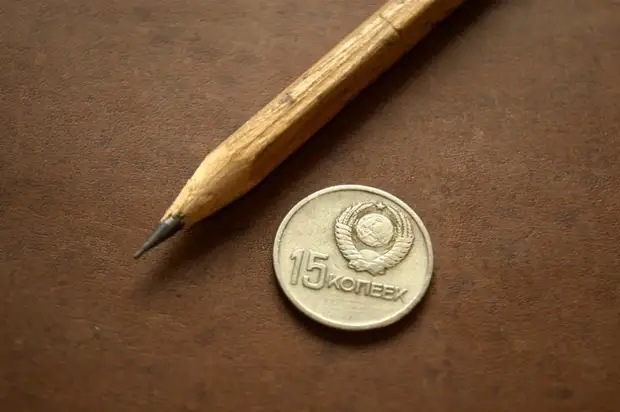
Yes, this Soviet spot has become my experimental rabbit.
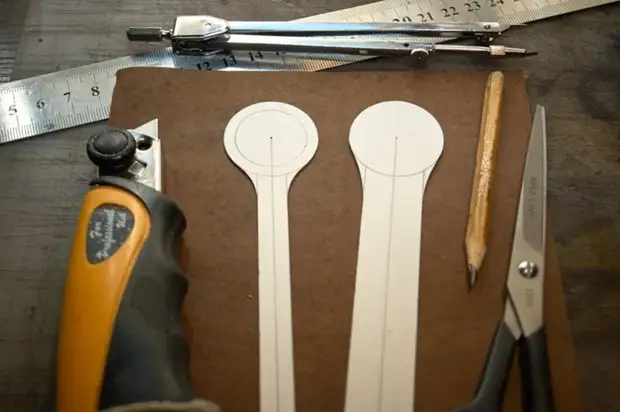
Stage two - sketch
This process is also purely individual. Many things I do, relying on the idea that lives in the bowels of the cranial box, and rarely carry something on paper before starting to do. However, in this case there were several questions regarding the geometry of the future bracelet, and a number of issues of a purely technical nature - the type of closing, the allowance for seam, etc.
Actually, soon something like that appeared on the paper sheet:
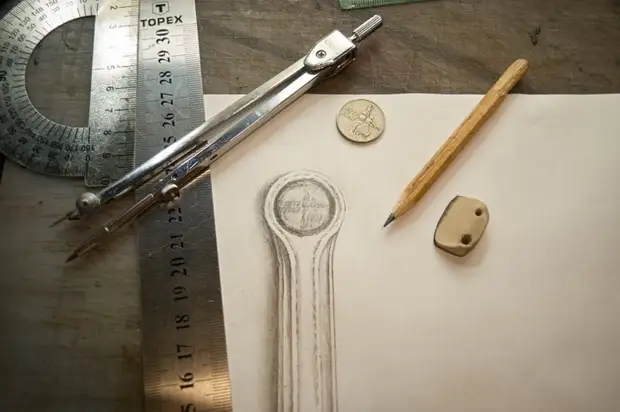
The essence is that I wanted to make a bracelet that is functional and at the same time laconic, and its ending would be a fastener. At that moment, when I drew it all, such a concept seemed to me quite sane. And my underwater stones have not yet revealed a fresh brain.
Stage three - pamal and selection of material
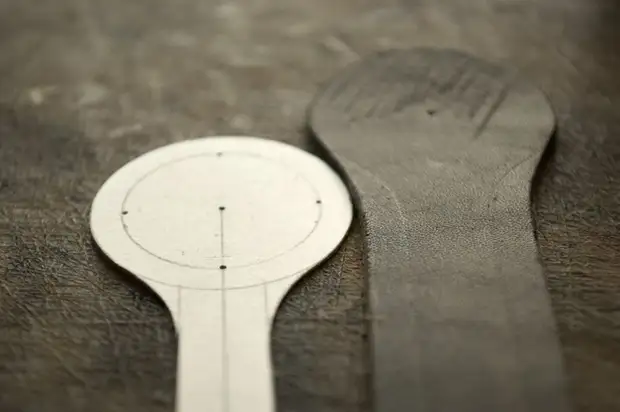
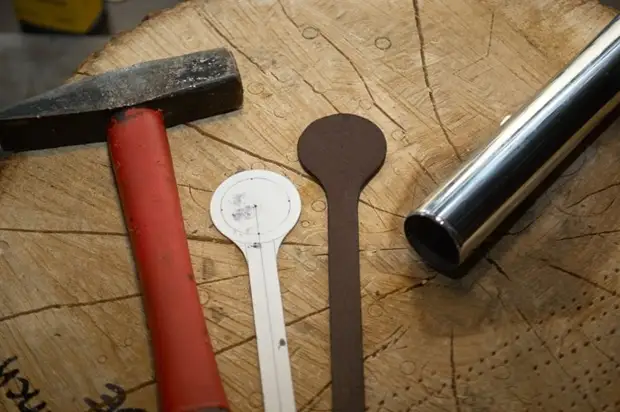
For the manufacture of patterns in "home" conditions, I use the Watman sheets that are glued to double-sided adhesion to a plastic basis. Plastic is not thick, such as on information stands, from which pockets for leaflets are made.
You can do and just watman. But I do it. For small details, this is what you need. And the additional rigidity of the pattern is plus to their durability. It turns out, on top of paper, bottom plastic.
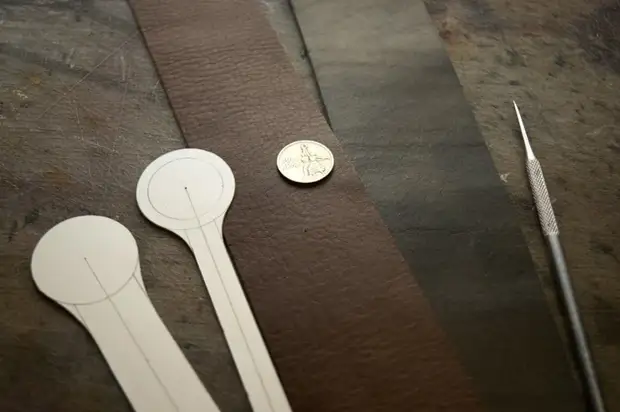
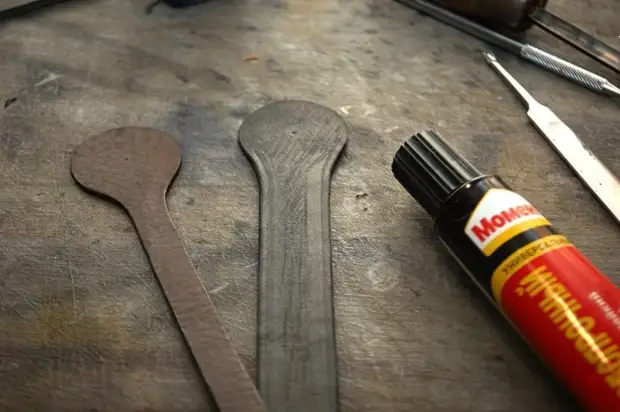
The next step is the choice of material, i.e. Skin. In my case, I immediately knew what it would be from what. The base of the bracelet was supposed to be black, and the decorative element, washed from above, is dark brown.
There was no needed skin thickness, so I had to harden: take a layer of one and another piece to make them thinner. The bottom turned out to be 2.5 mm, and the upper in the region is 0.8-1.0 mm.
The upper part should be fine enough so that when the wrist, it does not deform the bottom.
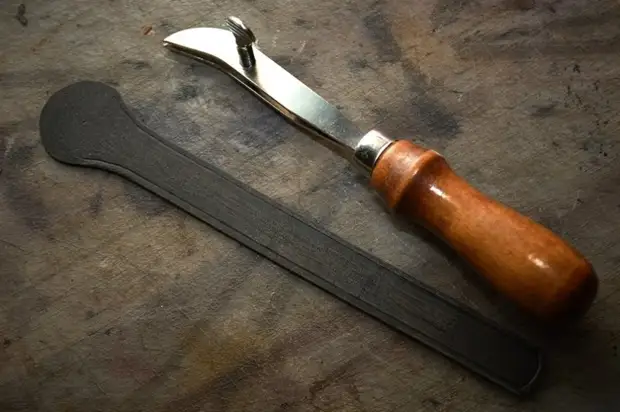
Four. We start to "cut"
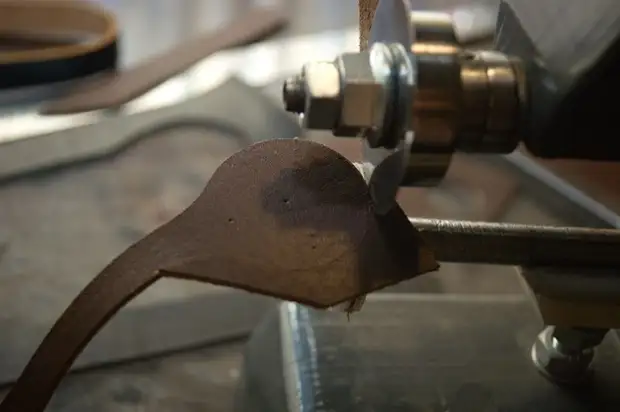
Further, just focus on some aspects of the process, because most of its part is quite standard.
Priming
We transfer to the bottom item markup under the top
We do something similar for better clutch of glued surfaces
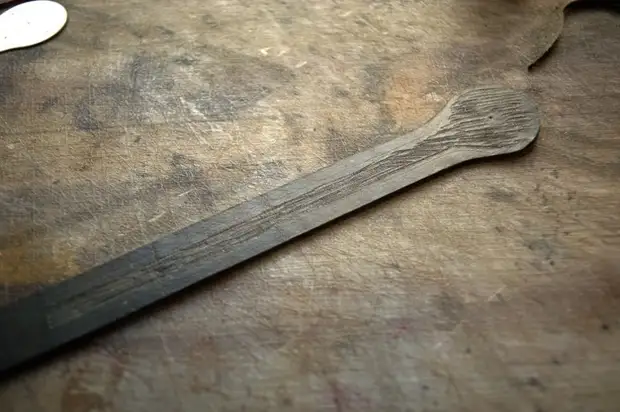
Remove the chamfer for better turn round
We make a pump on the bottom item
Painting of the treated end end
Almost ready for gluing ...
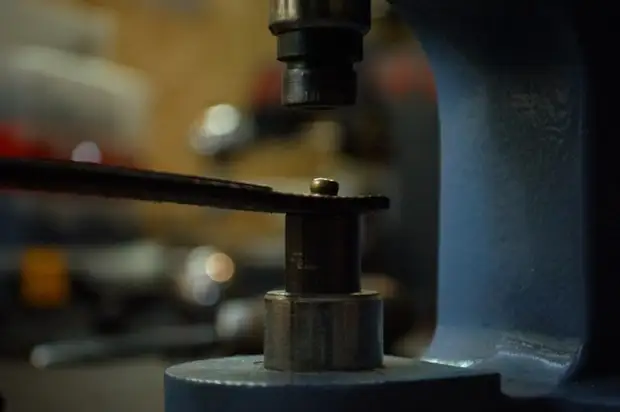
Important moment. Punching the upper part occurs after all operations with it. Otherwise, processing a dick (end) will be wildly uncomfortable. For punching such a diameter, I just picked up a piece of chrome pipe. Sharpened - works.
The glue introduced its own adjustments. For some reason, preparing the bottom item to the gluing, I decided to cover the entire surface where the coin was subsequently subsequently. But not so much scary, as it seemed. From a thinner skin with a different surface structure, an insert was cut out.
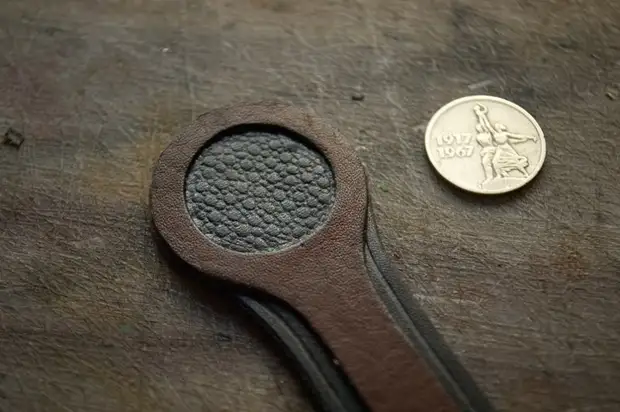
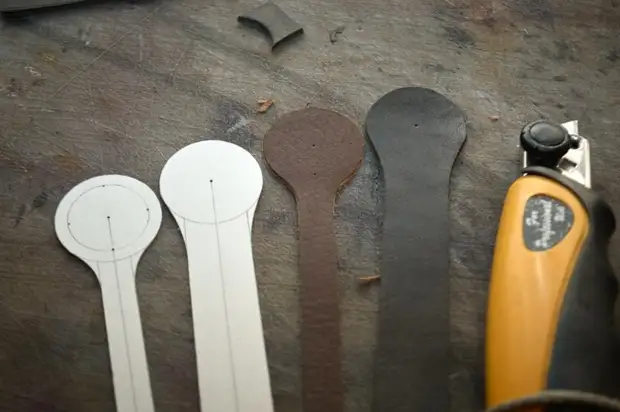
Actually, what did it happen
Next follows processing, grinding, polishing and painting edges. All this is the final stage of preparatory work before stitching.
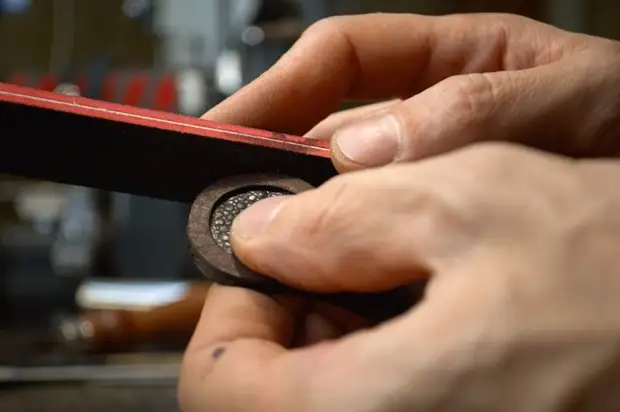
Coarse sandpaper + small sandpaper
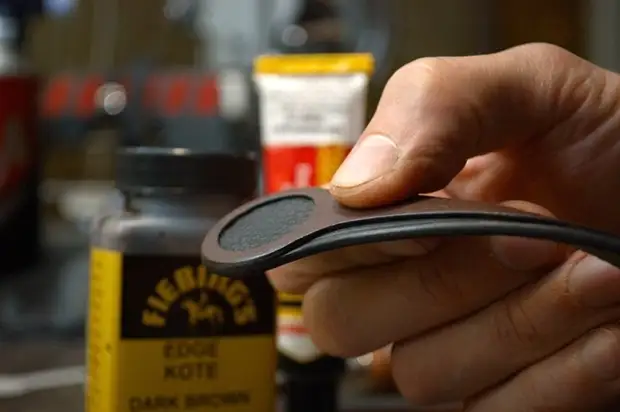
So the end looks before painting.
Part 5 - Concho
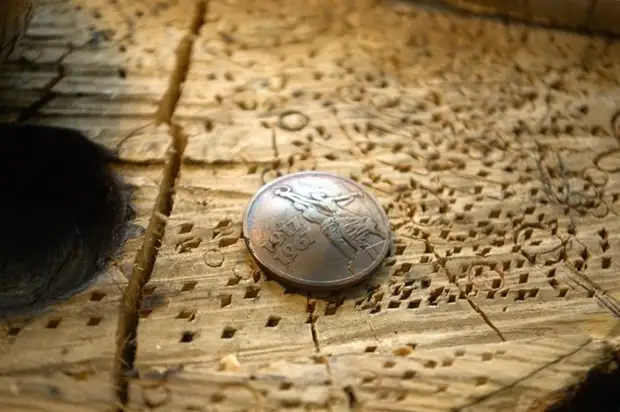
After the base of the skin dries before stitching, there is time to do directly the coin itself. What is needed for this:
- Village (in my case it is a deck from an unknown, but sufficient stinking tree of wood)
- burner
- a hammer
- Shary.
- Goe paste (can be replaced with soda with toothpaste)
- ferric chloride
- varnish
- Solder
- Soldering Acid
- fasteners (Chicago screw, holniten, button - it all depends on the tasks)
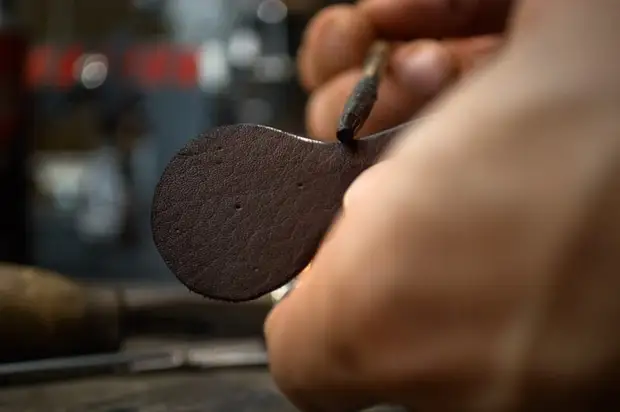
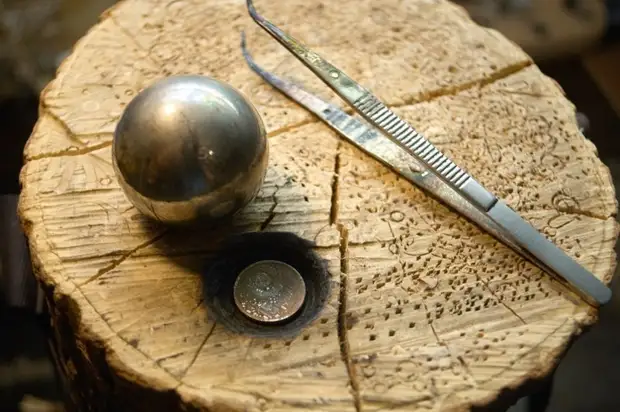
In the tree we make a deepening for future molding. So that it has a radius. I first chose a hole by a chisel, and then I placed the wood heated ball, which later worked on a coin.
You can encourage the KonCho on the cold. But I personally do not like this option. It's long. I prefer to heat the coin. Several shots and ready, but it is necessary to be extremely careful, making it at home. Carpets are sometimes sensitive to such operations. Yes, and the smell of a burning tree may inspire thoughts about the fire, forests, kebabs ... and you can accidentally forget what all this is and what is happening at all.
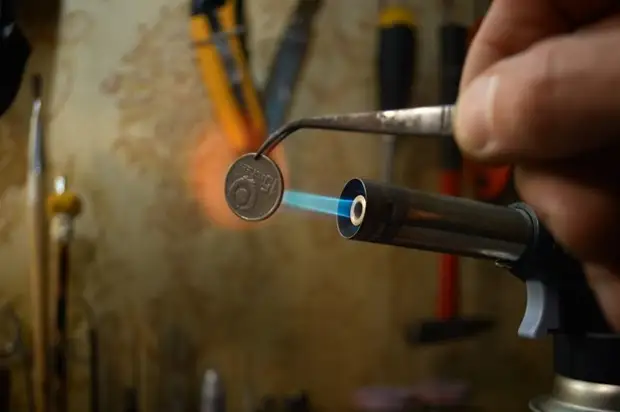
Primary forming a large diameter ball, after which the process with heating is repeated.
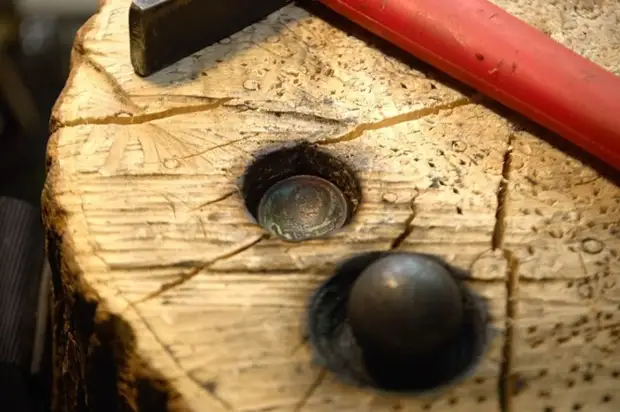
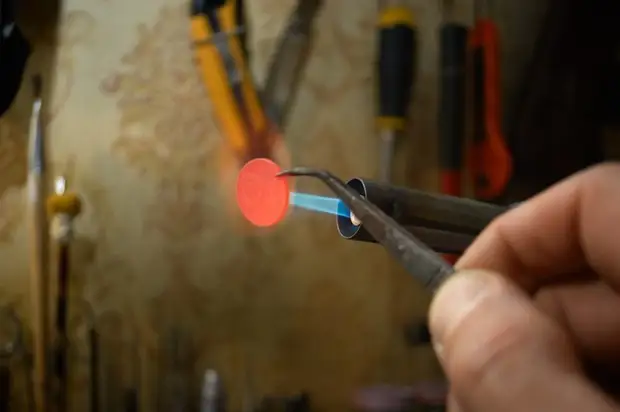
After the molding of a smaller diameter ball, the coin becomes more convex. But it is worth keeping in mind that it is good for small coins. With large coins, this will lead to excessive "stretching" of the front side.
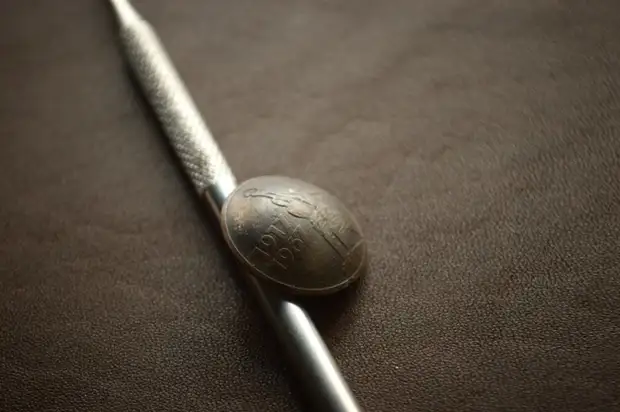
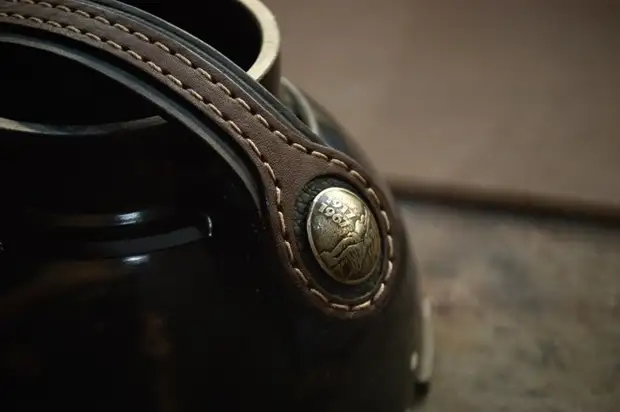
As you can see, the coin was very darkened after heating, and it is very good. The more uniform this dark layer, the better. Sometimes, it is necessary to revel it and give it to cool so that the scale covered the entire surface. Soldering is under the standard way.
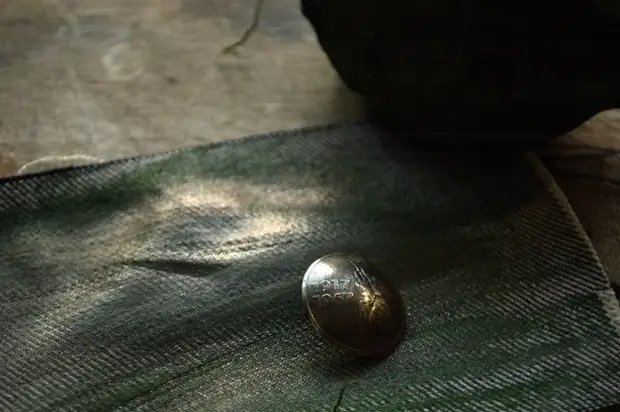
I turn over the coin, we apply a soldering acid to the surface, put pieces of solder, heating. Solder should evenly camline on the Don. Then I mount fasteners. In this case, it was a hat from the button 15mm. It must be cleaned and treated with acid. All, leave cool.
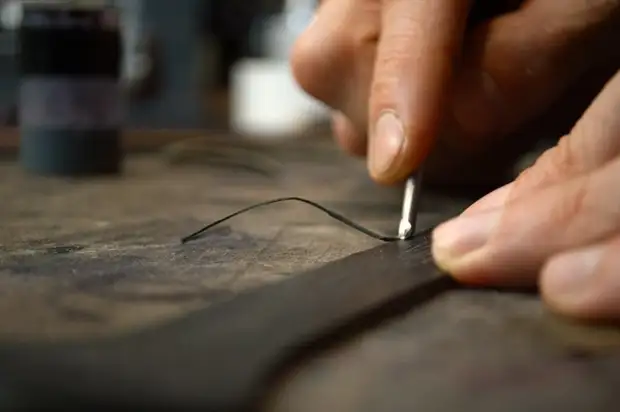
While the future, but already CONCO, cooled - I managed to flash the bracelet.

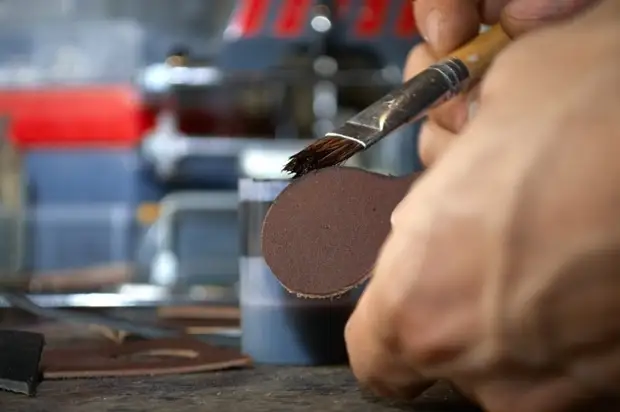
Now about the process of "actions" of the coin ... I do it as follows - on a flat surface I put a piece of jeans, slightly arrested paste from the state optical institution and start polishing.
If possible, only the protruding parts of the chasing are polished.
After this operation in the course there is a solution of chlorine iron. This, firstly, "manifests" the drawing, and secondly, due to the processes of etching, a crooked gloss is removed, which happens after pasta.
After chlorine iron there is a sink, a toothbrush, butt coins about a dry piece of fabric and varnish.
Six - assembly, assessment and work on errors.
So now the coin looks like:
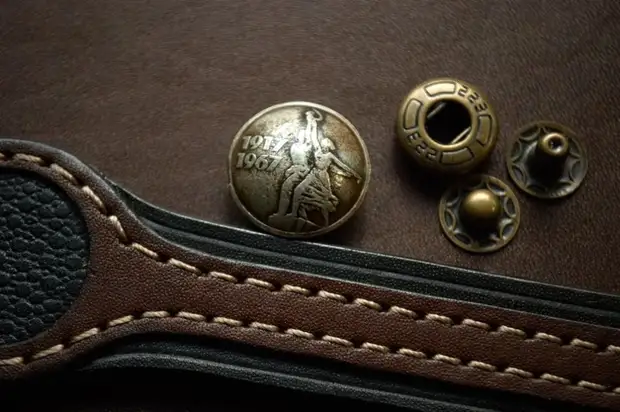
Installing the button of the button.
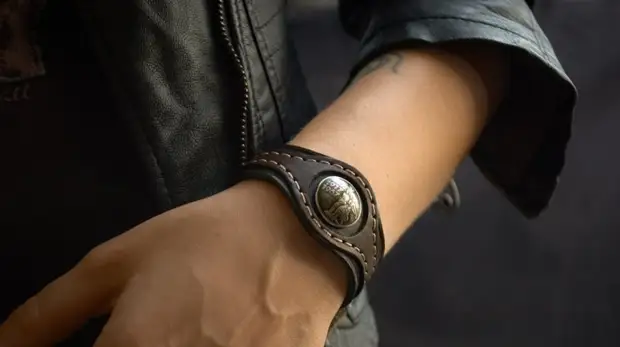
And ... Voila ... Final.

From the series "It was - became"
And now I will tell you about the most important mistake that the visual nerves passed into the brain already inflamed by the point ... The principle of the flares of the bracelet was not so beautiful, as it seemed originally. Why? Just imagine a spoon, and even better the scoop, wrapped around the wrist ... The fact that the radius of the coin is the end of the strap and positioned over the second part of it - it looks extremely strange. It will stray. They can be clinging for something. Yes, and it just infuriates.
Unfortunately, fascinated by such circumstances, I did not take a photo of how it sits on his hand. Submitting the primary product of the urinotherapy complex and giving Anathema, I decided to work on errors. As a result, it turned out that I was completely satisfied with: