
I decided to share small experience with women who are not to rely on, for whatever circumstances. Sit down more convenient and delve. Happy viewing. And let the experienced men be corrected if something did not write.
It is no secret that over time the interior of the apartments requires updates. Wallpapers are thrown out, the walls are aligned and the walls are painted, the floor covering changes, etc. And what to do with furniture? It also appears scratches over the years, polished polishing, small children leave their mark on it in the form of drawings or stickers, from which it is very difficult to get rid of. Buying new furniture after each repair can afford not everyone, so you need to find a way to restore it, or even upgrade. In this case, I used the method of pasting the facades of the furniture - self-flush. It not only helps to hide flaws, but also perfectly adapts the old furniture under the new interior design.
About 6-7 years ago, this headset looked something like this ...
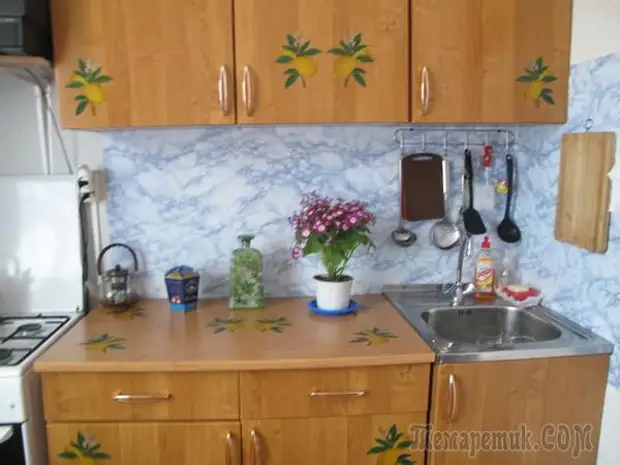
I was given it in this form ... The son-in-law said: "Take firewood."
All we need is old furniture,
Fittings (handles, legs),
White acrylic enamel,
Acrylic colorless varnish,
brushes, rollers,
chapel for wallpaper
Screwdriver, screws, screws
key hexagon
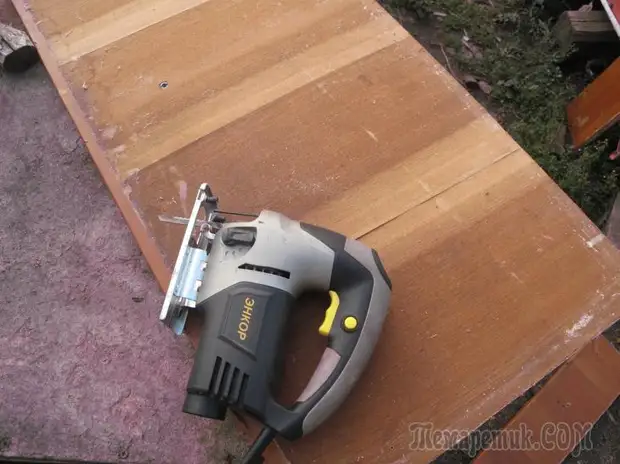
electric jigsik,
Fillet Selfclock
Spatley on wood
Plastic profile
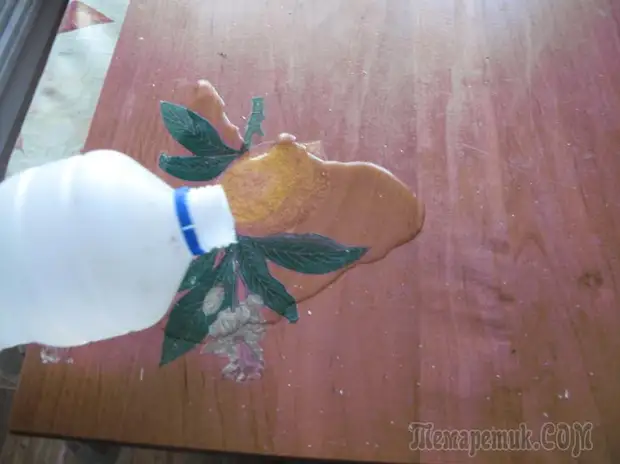
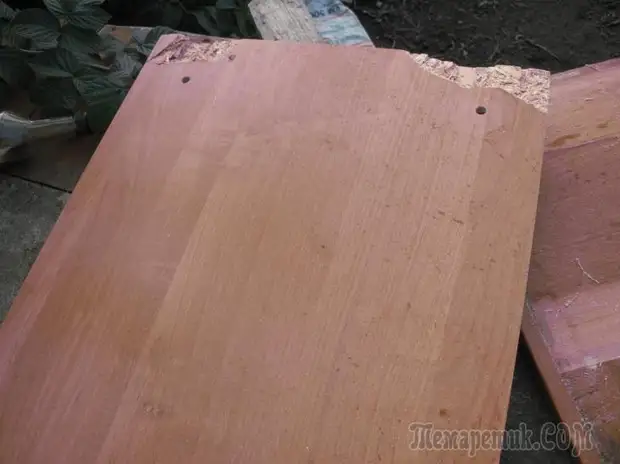
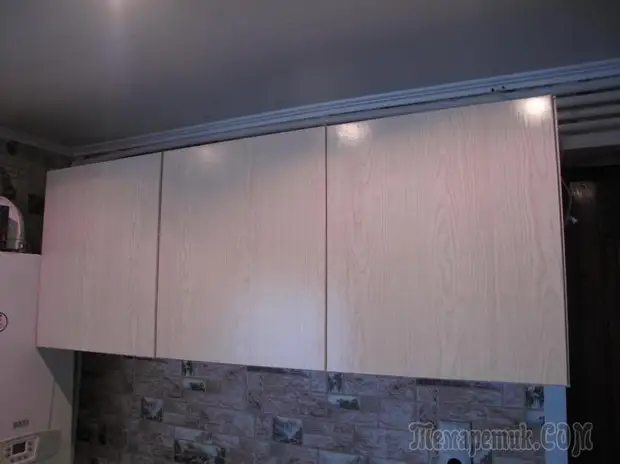
I first cleaned all the doors from acrylic varnish and decoupage "Lemon" ... poured the drawings with acetone, it is easier to clean the surface.

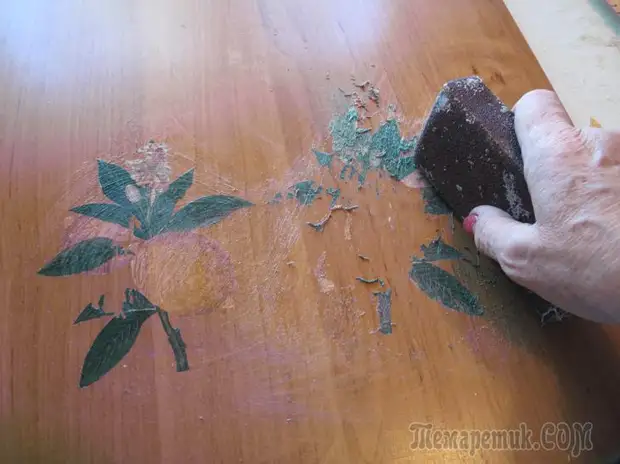
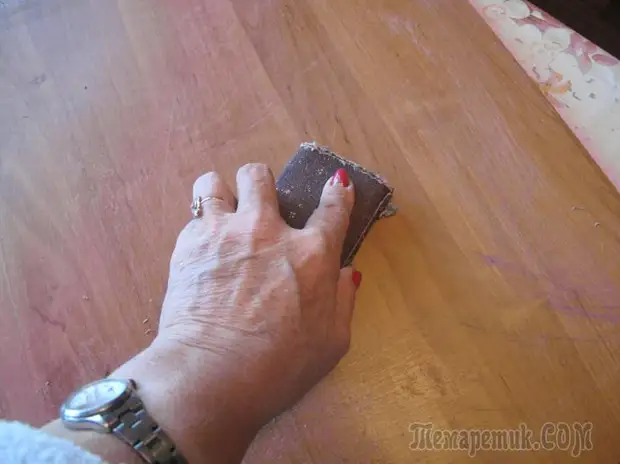
Then, with the help of a sandy bar, everything scraped ...
The surfaces of all facades have processed exactly, as well as for whisen.
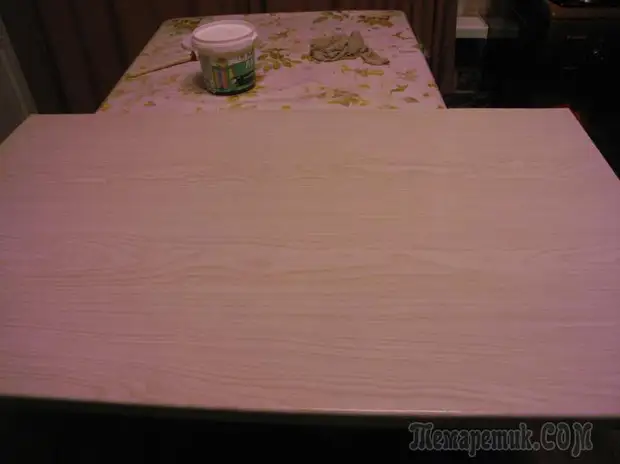
After that, degreased the countertop and covered it with a film, then acrylic varnish three times with a drying.
That's such a spatula for wallpaper, it is very convenient to smooth out a large area of the purple.

Just acted with all the door headset.

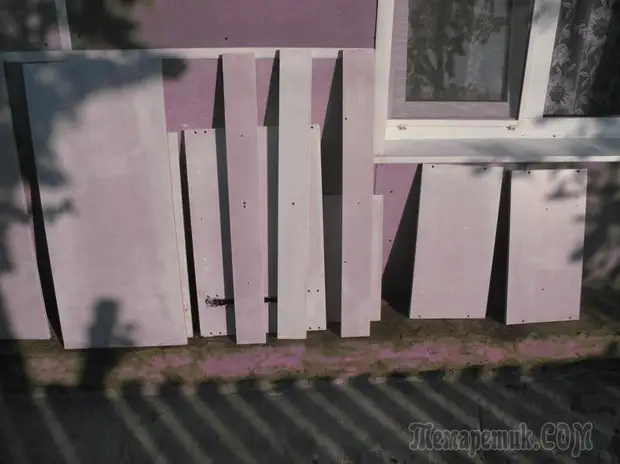
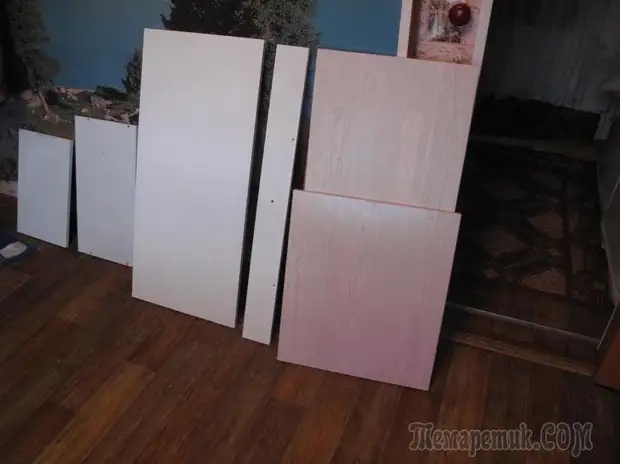
The remaining components from the cabinets, I painted with white acrylic paint three times with drying and also covered with varnish.
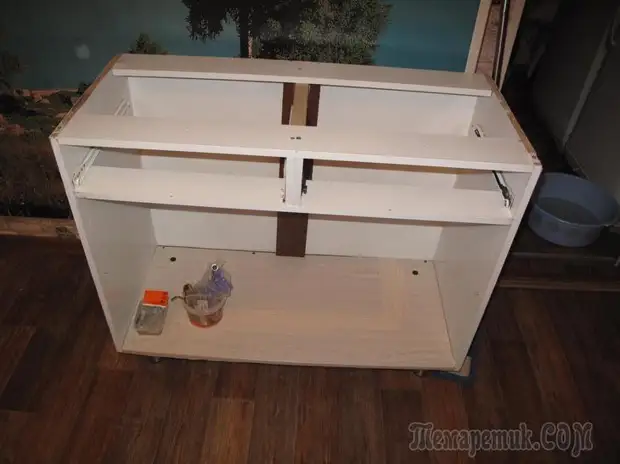
While I knew painting, I drank with an el.lobzika bottom from the chipboard, because the old one was in a hopeless state ...
And the bottom of the washing, I drank from the middle of this piece of this piece ...
Judging by the fact that before the restoration of the kitchen, the washing was on the right, and I need to the left, then the old holes had to collect the car wash for putting on the tree, for sanding after drying and painted. So, while my painted details will dry, I took up the assembly of drawers ...
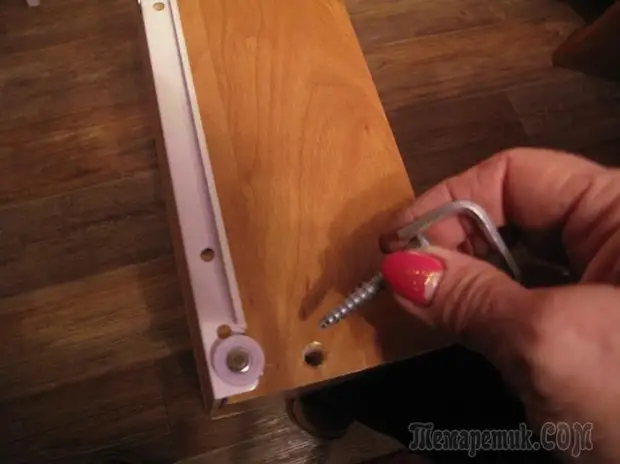
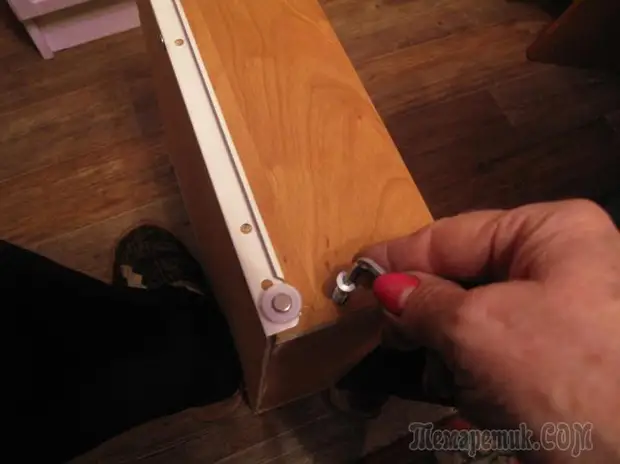
With the help of such a key with edges and large screws for furniture, I collected two drawers ...
Since I have a bit of film, I saved the inner and outdoor parts of the boxes.
Covered everything with acrylic varnish three times with a drying and screwed to them.
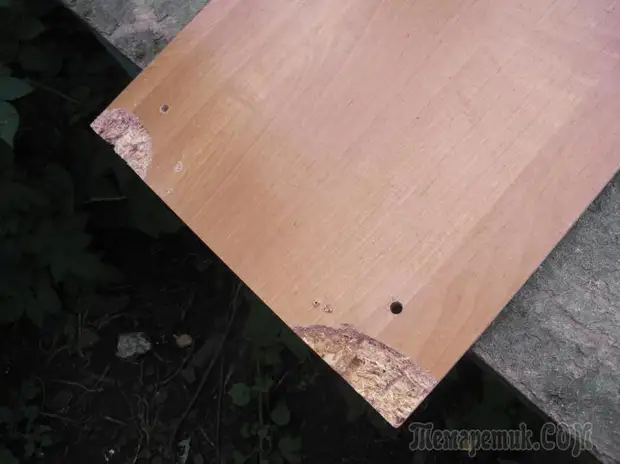
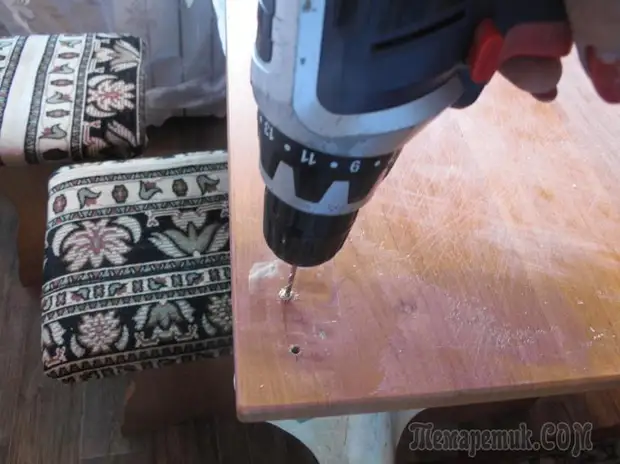
In order for the chipboard when drilling did not break, I was glued on two sides of the door, scotch.

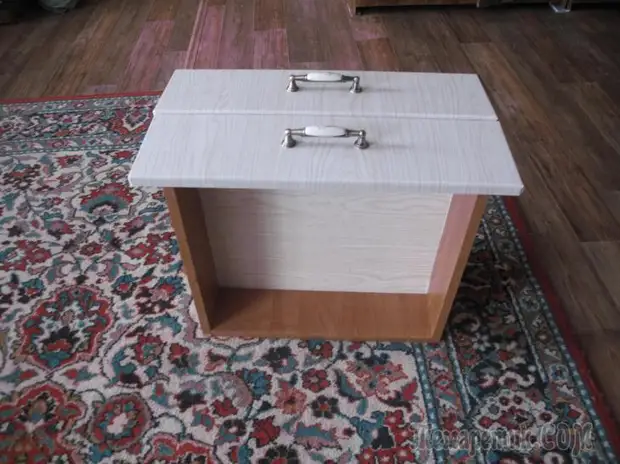
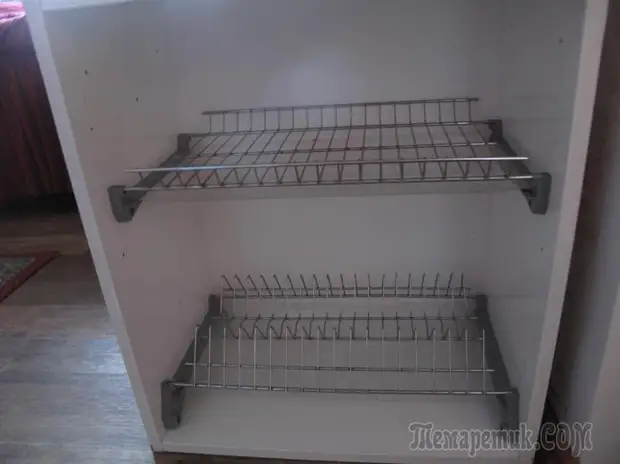
Collected the top cabinet drying (for dishes)
Then the high top cabinet. The back wall nailed with small nails and screwed the loop for fastening the box to the wall.
Screwd all loops to the doors.
The wall scored large nails (200mmm) and hung the cabinets on these nails. The shelves and doors are easy to hang them.
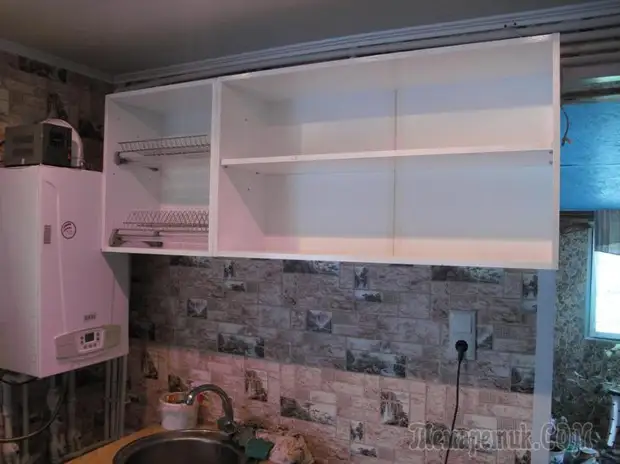
Then I installed the middle shelf and screwed the door ...
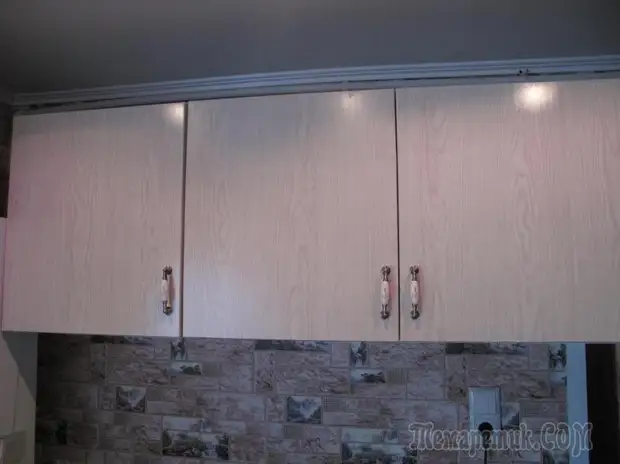
And only after that, screwed the handle.
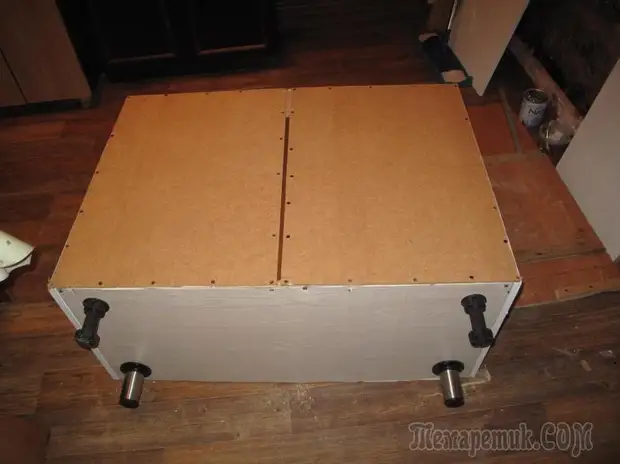
The bottom of the large cabinet was covered with a film, covered with acrylic varnish.
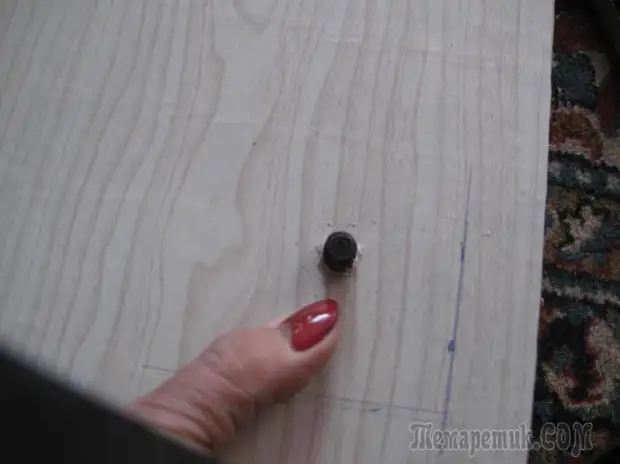
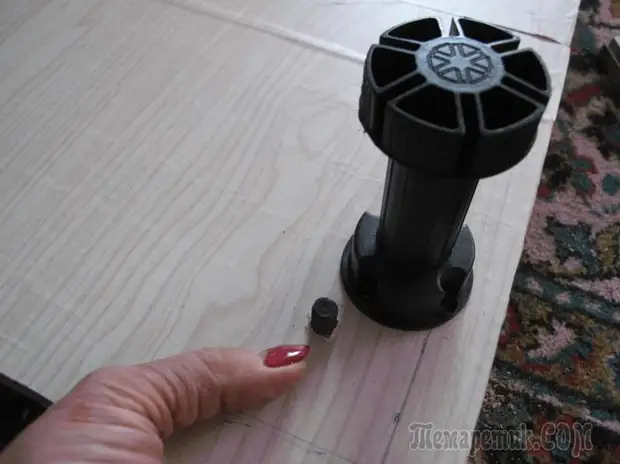
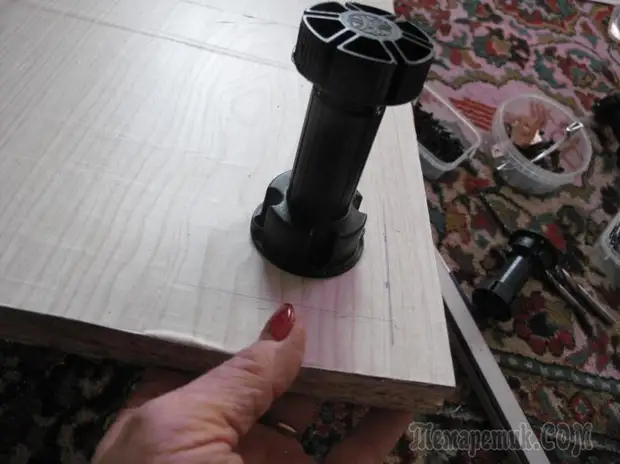
Drilled holes in the bottom and screwed the legs.

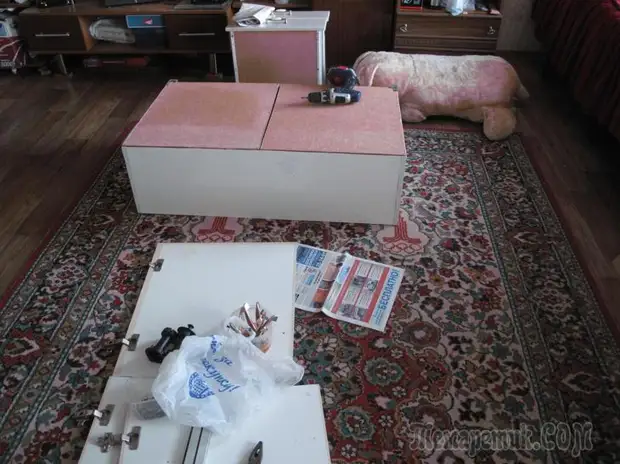
Then she began to collect the cabinet completely ...

To the back of the cabinet, I saw an additional plank from the chipboard so that there was no crack and for the elasticity of the design.
To install the wardrobe, I pre-prepared everything for the installation of washing and a cabinet.
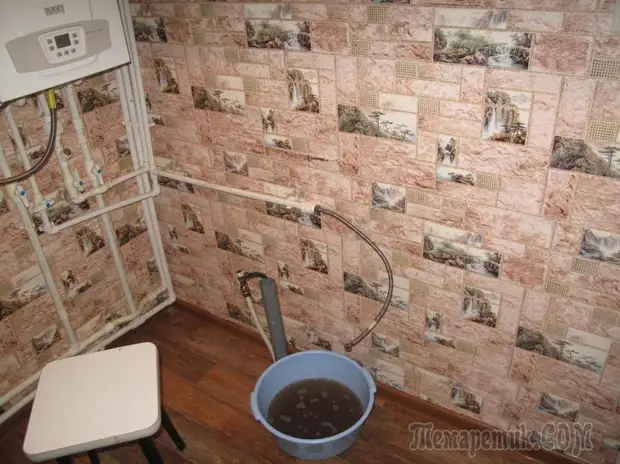
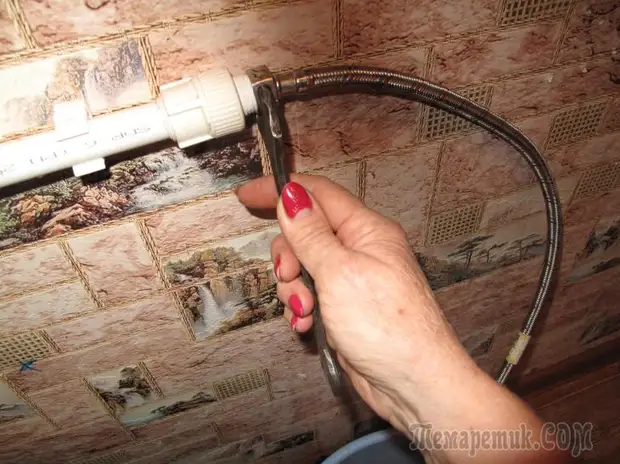
Connected a storm of cold and hot water to the mixer.
To the bottom of the sink screwed legs

Tried the cabinet to the wall
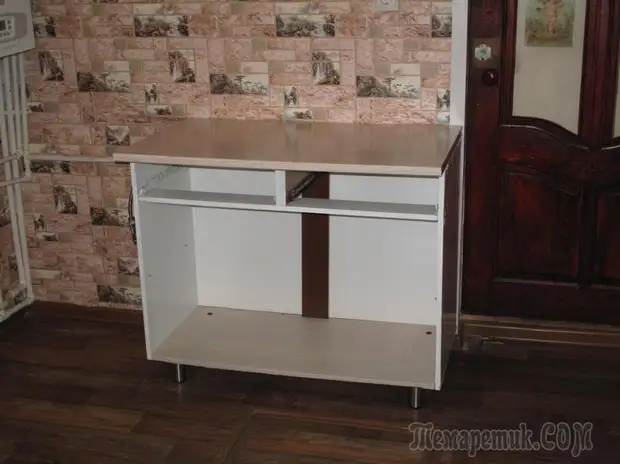
Gathered and installed washing, screwed up the countertop, dressed up the drawers, middle shelf
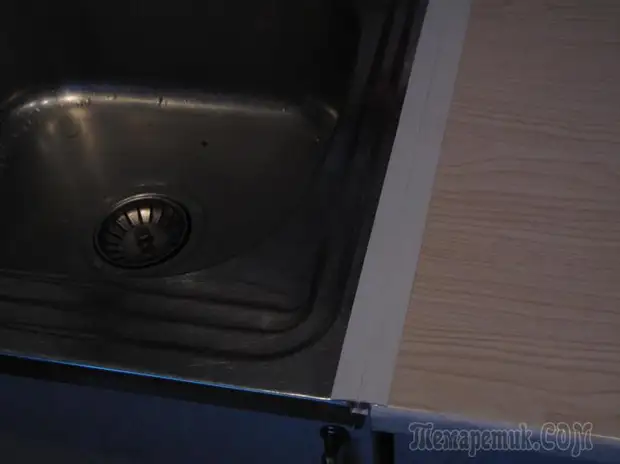
Between the washing and countertop, the gap remained and I invented how to close it ...
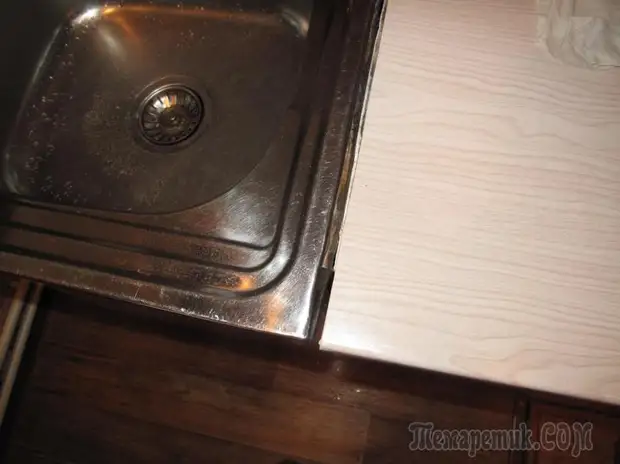
After repair, I had pieces of a plastic profile and I found it to use it. It cut it to the size of the countertops,
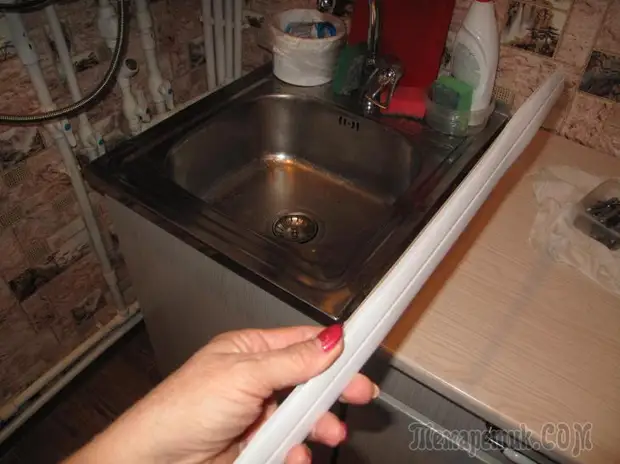
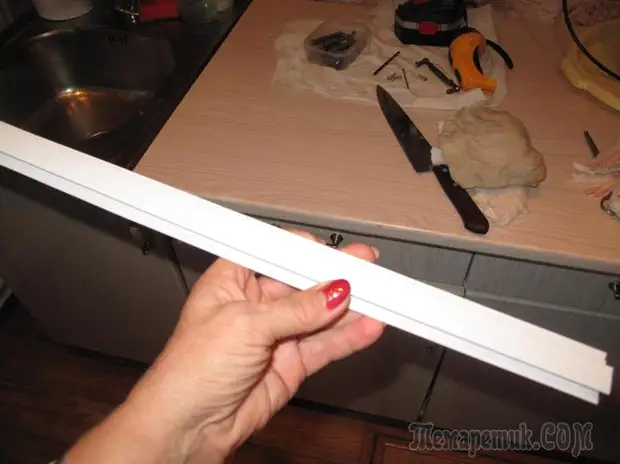
From a narrow part cut off the edges of the strip so that this part freely passed into the slot ...
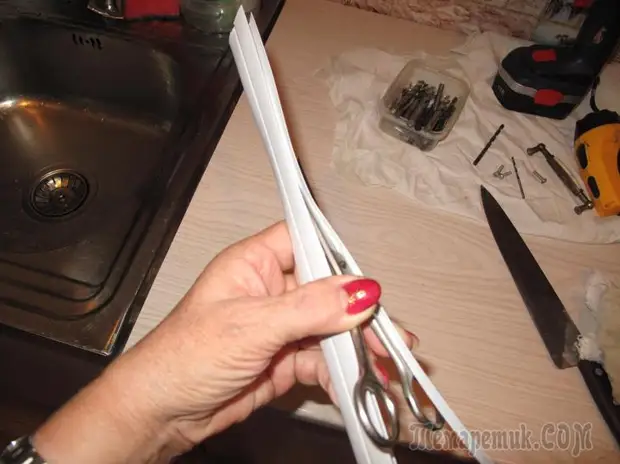
The gap itself filled with sealant silicone and the inner edges of the profile adjacent to the surface of the table, too.
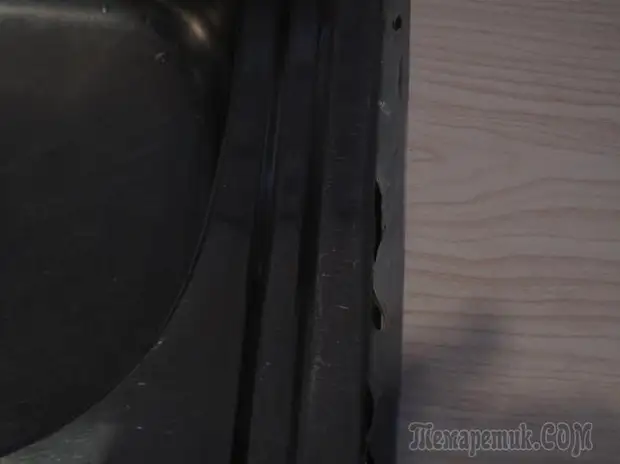
Invested the profile into this gap and strongly pressed, smoothing it with dry wind.
That's what I got out of it.
Then screwed all the lower doors and to them.
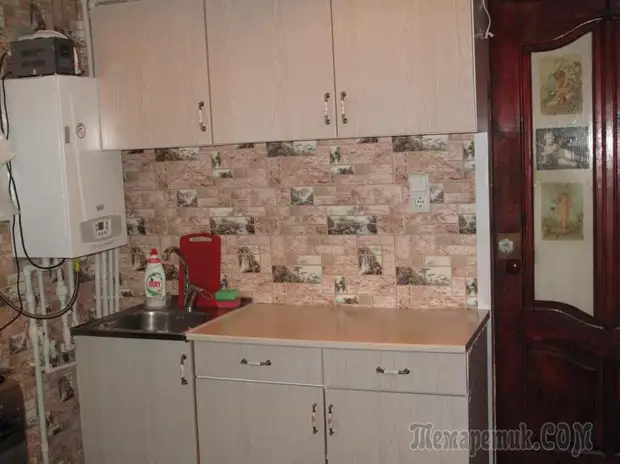
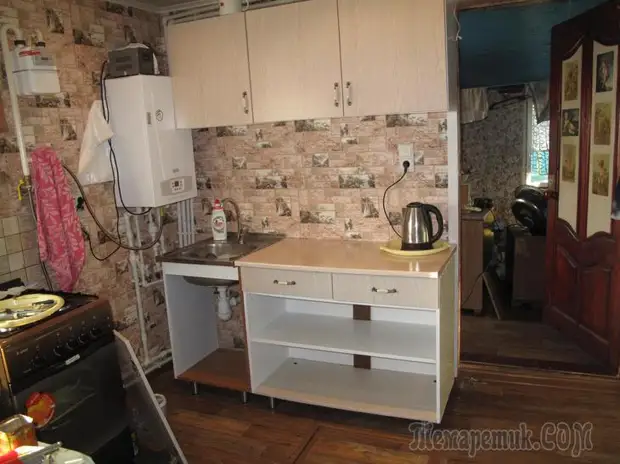
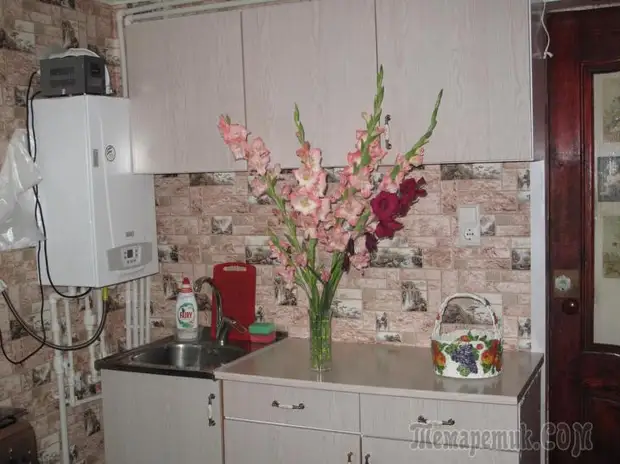
And here are such gladioluses in the country of the country !!! Holiday for the soul !!!
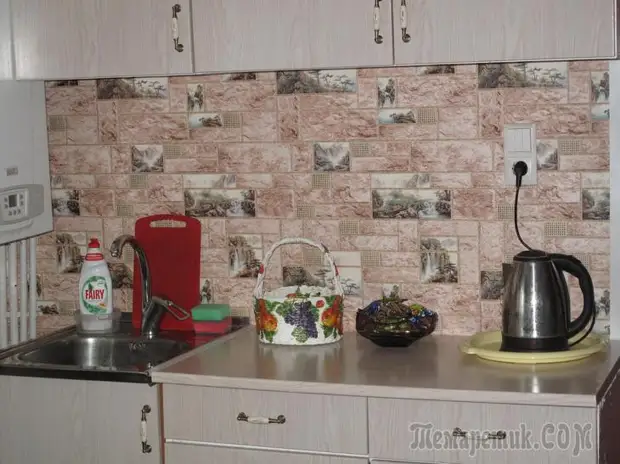
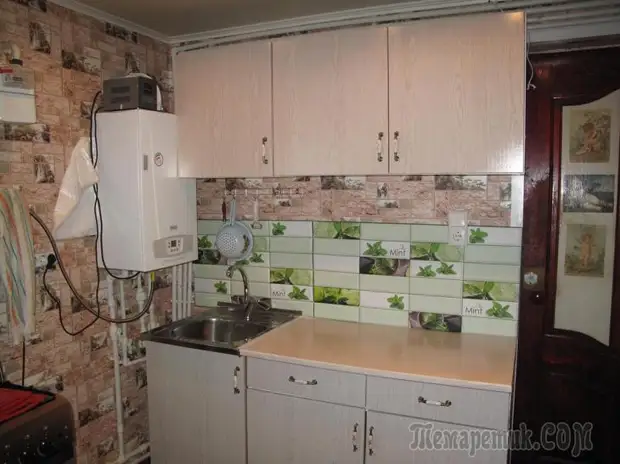
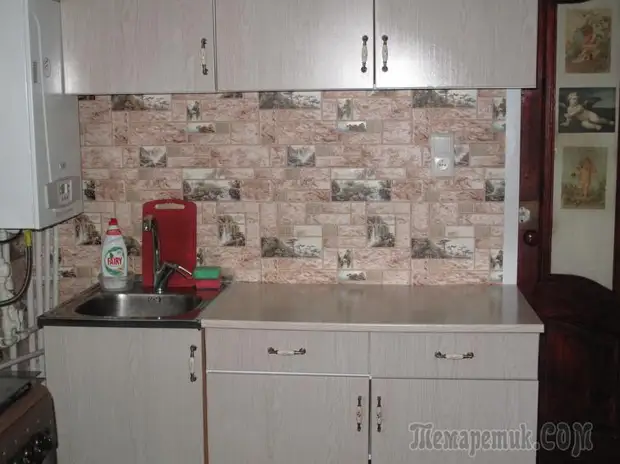
I thought that something was missing, it turned out - apron to the wall! I bought a ready-made layer. And adapted to the wall. Now everything seems to be.

Here is such a headset for giving me it turned out. And to judge you, my dear.
Lyudmila Timaeva.
A source