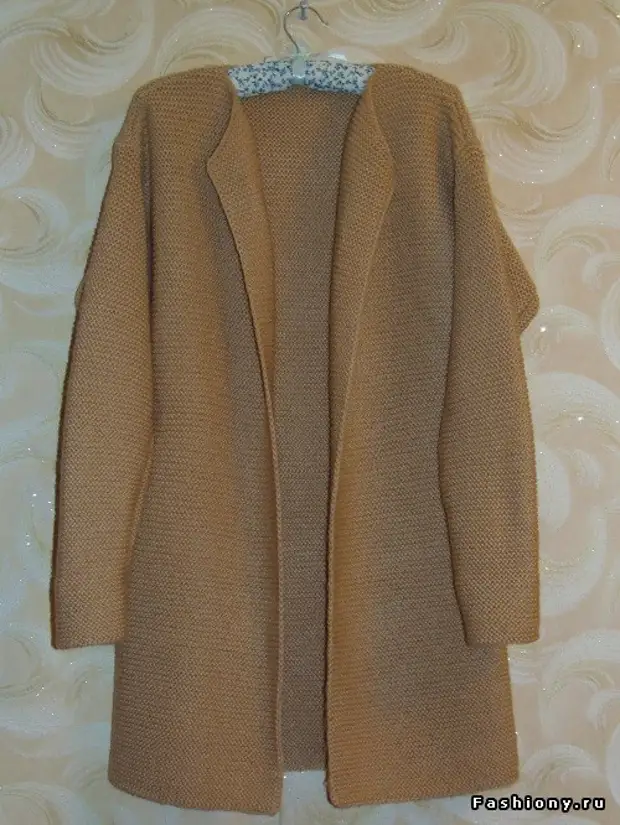
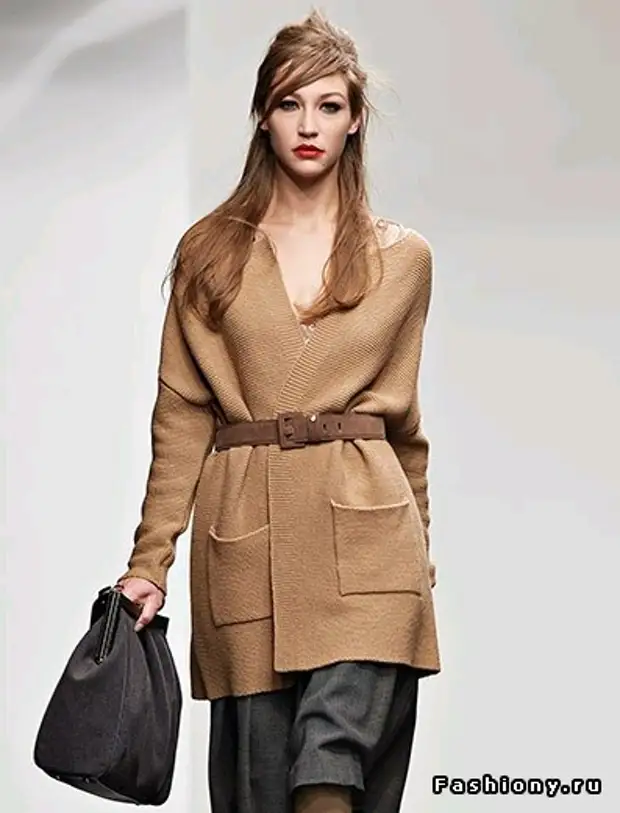
This fashion model of the year can be called as you like: coat, cardigan, long jacket.
What could be easier and at the same time relevant to the female wardrobe?
Clearly, in detail, the pattern is simple, as a result - an amazing factory thing! Sin does not take this job!
Next, the words of the author MK:
He was very inspired by this cardigan and decided to try to tie him herself. Found the site on which it is sold to study it in detail, and began to knit.
Because of my little experience in knitting, I encountered the fact that some elements did not know how to perform. Then I decided to simplify the task and removed the complex elements, and tied your cardigan, whose master class I want to share with you. Even the amateur will be able to associate such a cardigan, the most important thing is patience and free time.

For Knitting Cardigan, we will need threads and needles. Of course, the range of yarn is very big, and everyone can choose the one that will like it. I dreamed of Camel's color threads, this color is most close to the original cardigan.
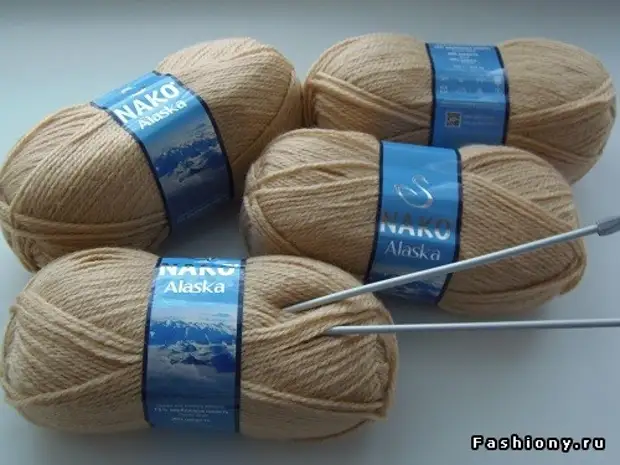
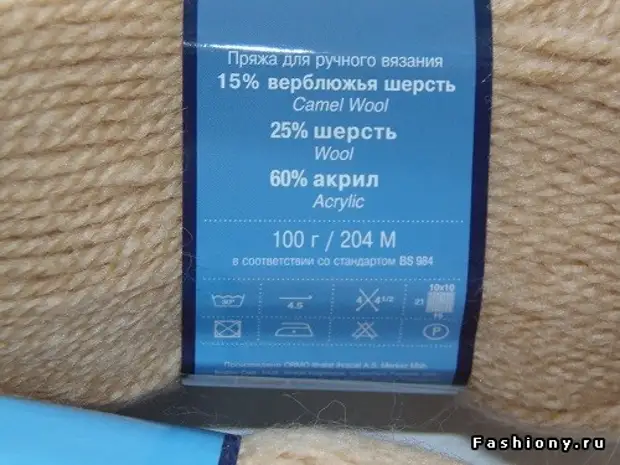
As part of the yarn acrylic and the addition of wool, and the recommended knitting needles are 4-4.5 mm. I have spent 7 sinks for the whole cardigan.
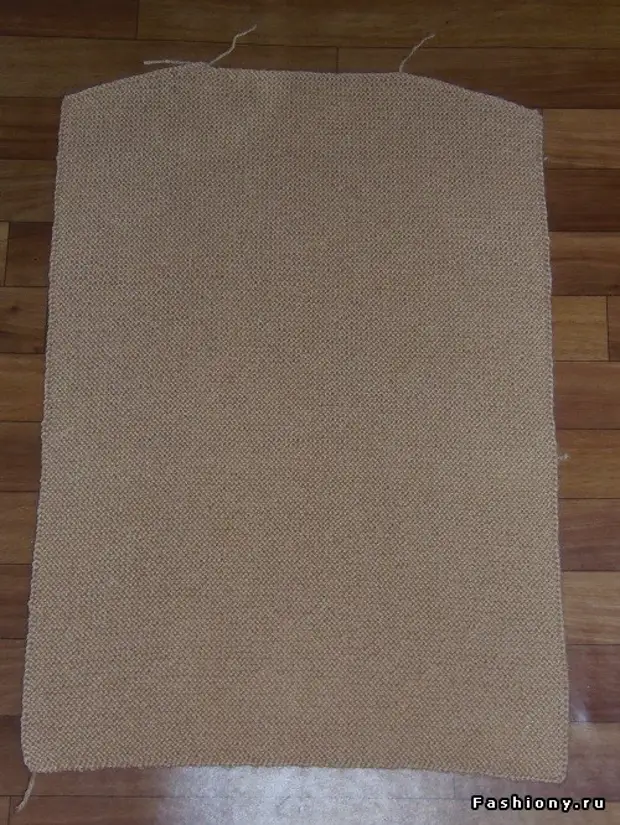
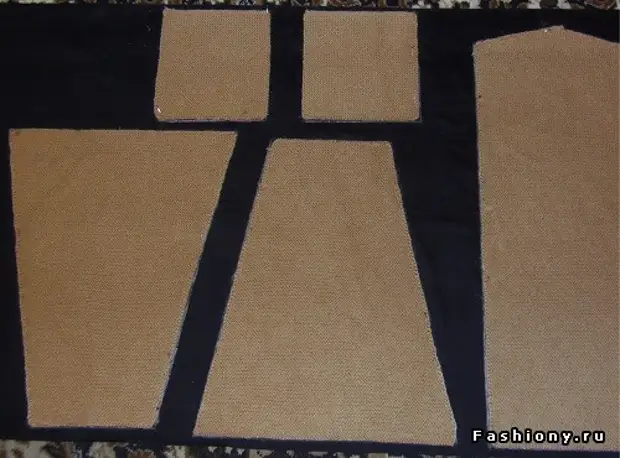
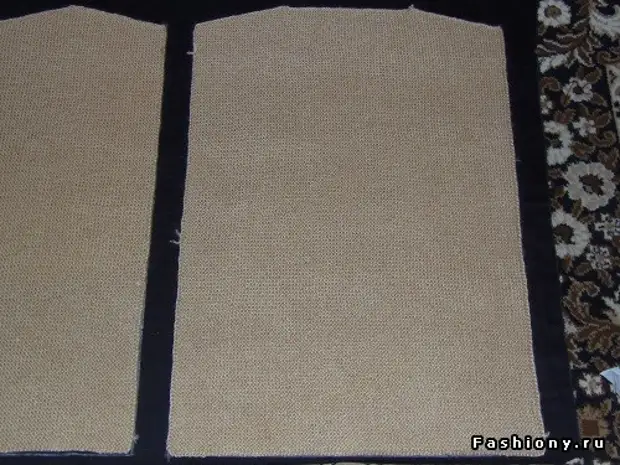
Our future cardigan will consist of 7 parts: back - 1 part, shelf - 2 parts, sleeves - 2 parts and pockets - 2 parts.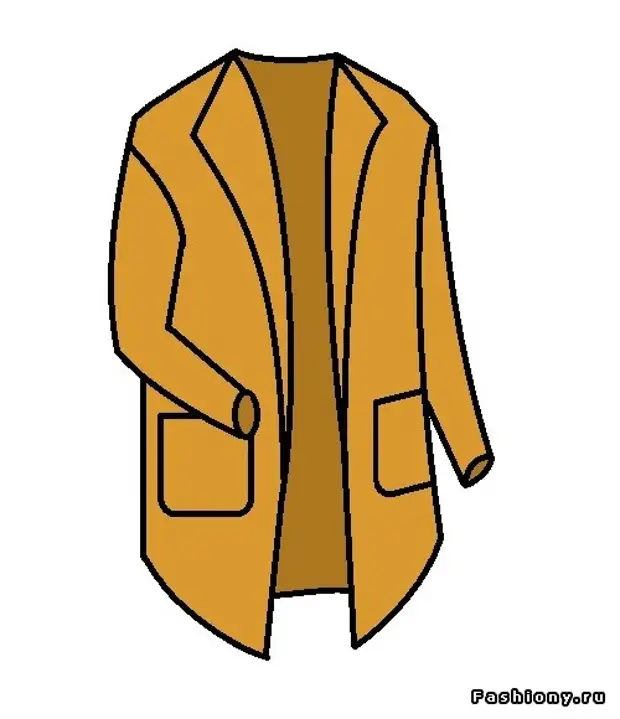
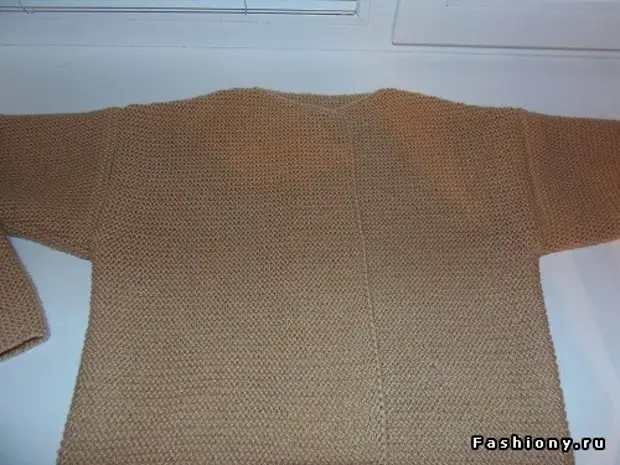
Back
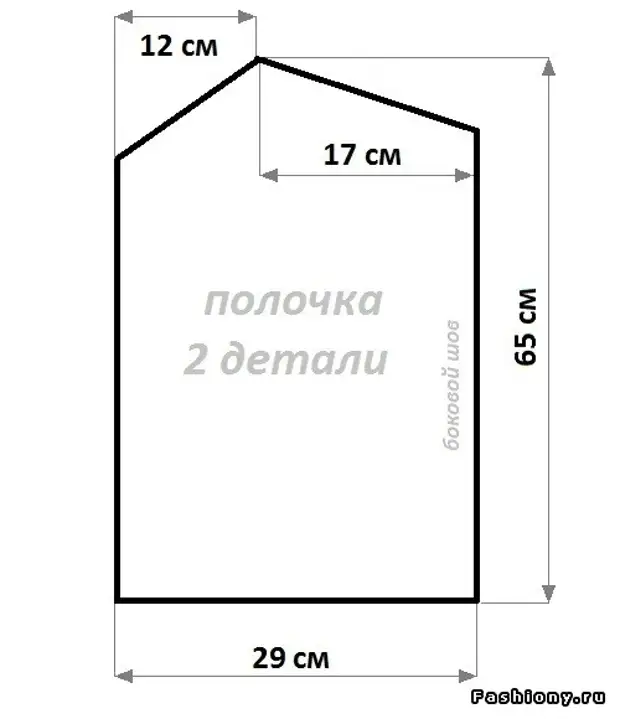
We start knitting our product with a back. Its pattern is calculated very simple: the width is a semi-clapbeat hips + 3 cm for free felting (45 + 3 = 48cm), length - the desired length of the future cardigan (65cm) and the neck width is 14cm. The length of the shoulder width will be large enough, because We will knit a style with a slosure of the shoulder, and we will have a straightforward neck. Since the cardigan model is free, therefore there will be no breakdown in our patterns.
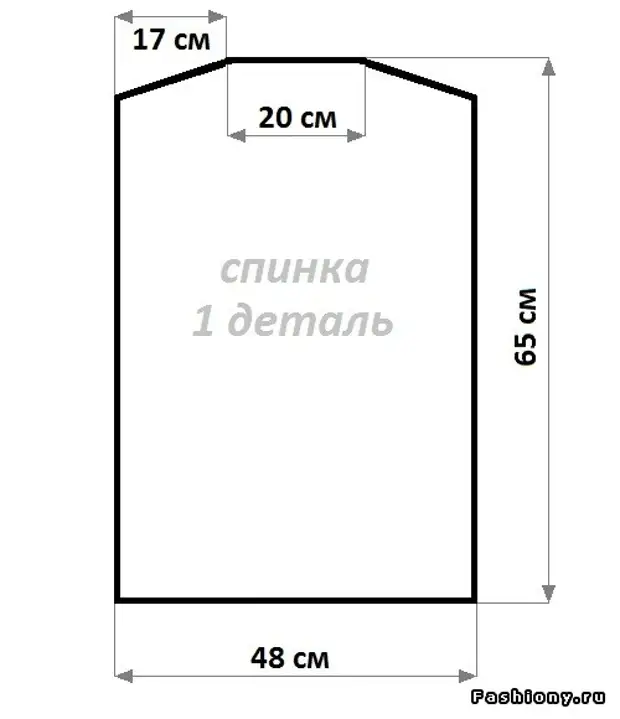
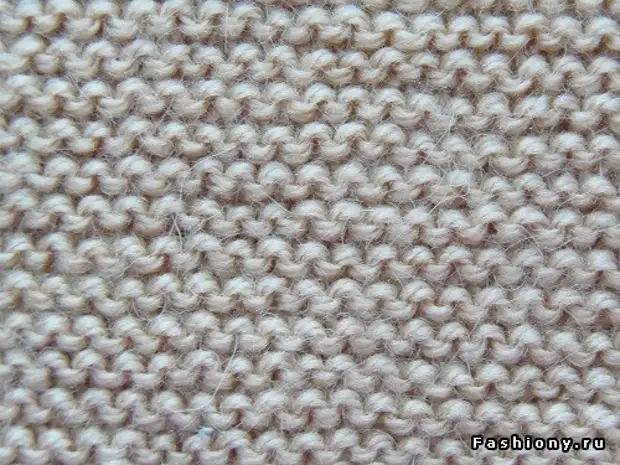
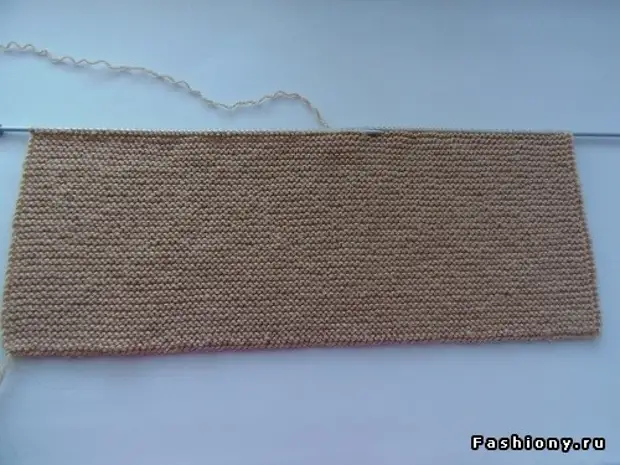
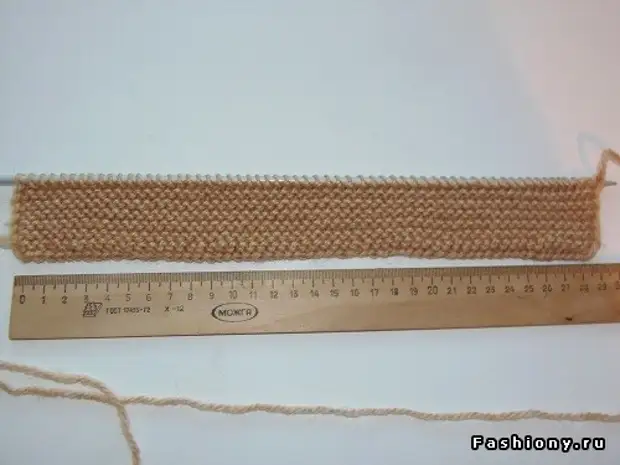
Before dialing a hinge for the back, we must learn how much loops we need for 48cm. To do this, we will connect a sample of 10 loops 10 rows of those drawing, which we will knit a cardigan. And we will be knitted with a sweating viscous - only facial loops.
In the sample you are connected, we can already calculate how many centimeters will be out of 10 loops, and then dividing these 10 loops to the obtained centimeters (for example 10 loops: 5cm = 2 loops per 1 cm), multiply the result on the width of the product (2 loops x 48cm = 96 loops You need to dial for 48cm). The thickness of yarn and spokes, as well as the nipper (tight or weak) itself, for each one, therefore, the number of loops will be different.
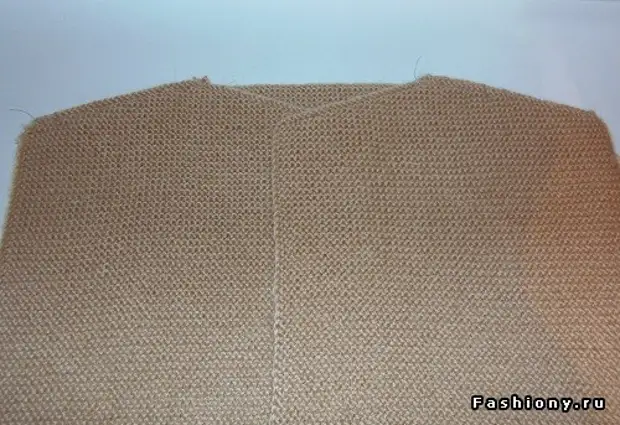
And so, by typing the desired number of hinges for the back, we will knit the facial loop our item to the shoulder bevel.
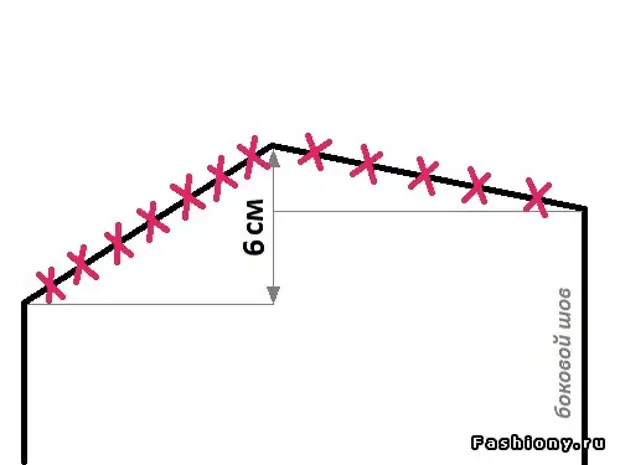
And the shoulder bevel will be performed by partial knitting. For those who do not know how to perform partial knitting, I will try to explain the technique of its implementation. The shoulder bevel obtained as a result of the dissonance of the several recent loops of the row. Inappropriateness is performed by each second row, and each time a certain amount of loops is not privileged.
It is necessary to make calculations for partial knitting. To begin with, we need to measure the length of the shoulder and find out how many loops are in this length. In my example, the length of the shoulder - 17cm, and 17cm consists of 24 loops. Now we measure the height of the shoulder bevel and find out how many rows are in this height. On the example, the height of the bevel is 3 cm, and these are 11 rows.

Since the dissatisfaction is performed every second row, we need to divide our ranks for 2, i.e. 11: 2 = 5 and 1 in the remainder. In other words, 5 times we will not take a certain amount of loops, and the remaining row will be smoothing next.
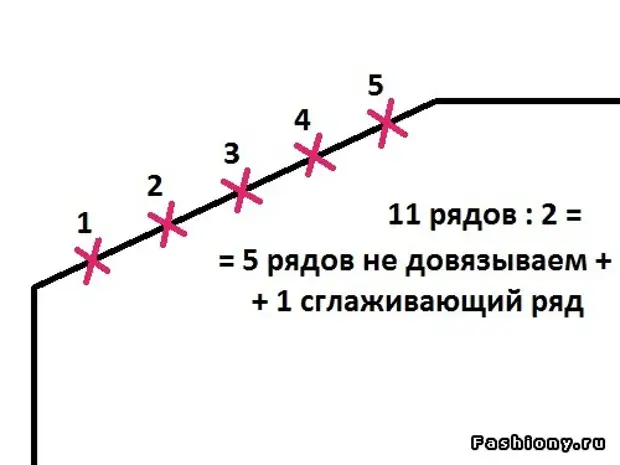
If you look at the drawing, we will see that five dissonuses form 6 sections from the same amount of unbound loops. To find out the amount of non-linkable loops, you need to share the length of the shoulder on the number of these sites. In my example 24 loops: 6 plots = 4 loops.
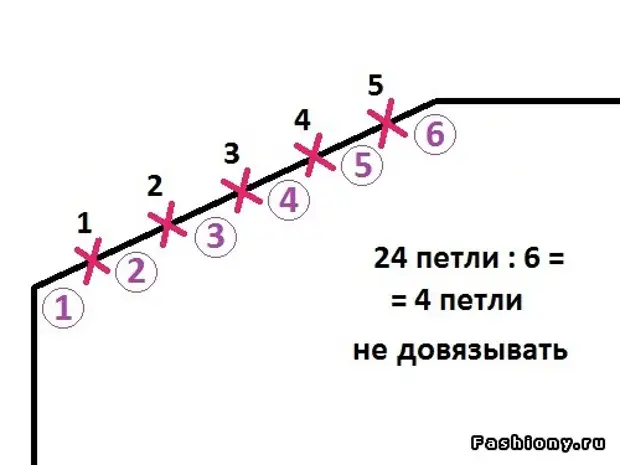
That is, every second row we will not take 4 loops 5 times. Since the brachial SCOS has on both sides, we will not be preparing each facial and the outstanding row five times each.
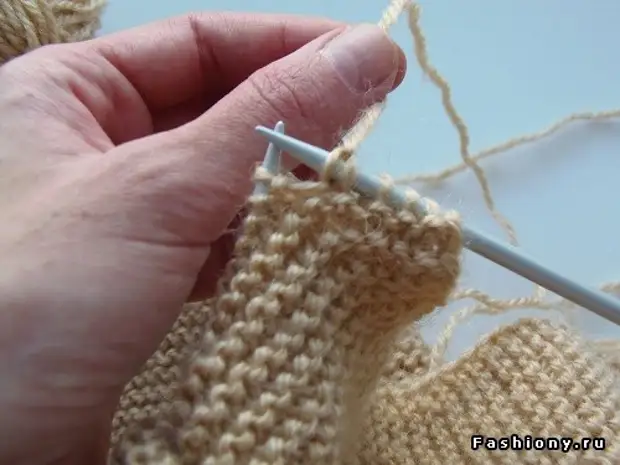
In practice, it looks like this. Sticking the entire face row and leaving 4 recent loops,
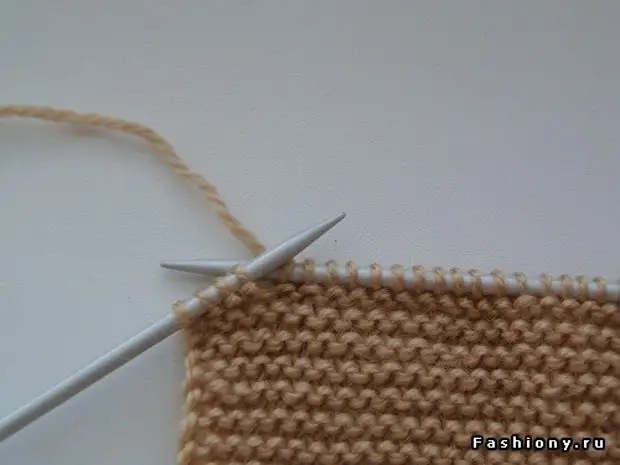
We deploy our knitting on the wrong side, leaving on the right spoke of 4 unbound loops. Now in the wrong row, we remove the first loop of an improved on the right spoke
And I pull it for the working thread so that both of its walls lay on the needle (this is a boomerang loop, which is necessary when digging a knitting so that holes are not formed)
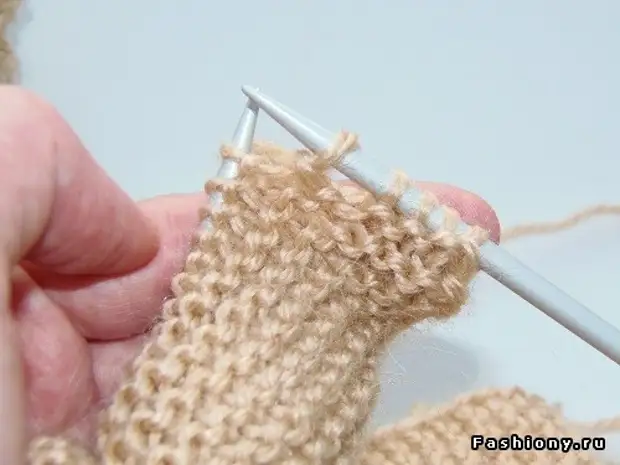
Now we continue to knit the outstanding row to the last 4 loops, which we also leave unbound and unfold knitting, make a loop-boomerang and continue to knit the face row. In the face row we will not again carry 4 loops, i.e. On the needle, we should have already 8 loops, while the boomerang loop, which lies on the knitting of two walls, is considered one.
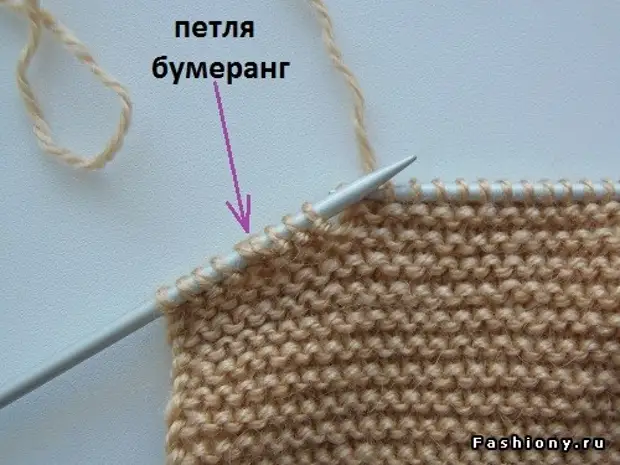
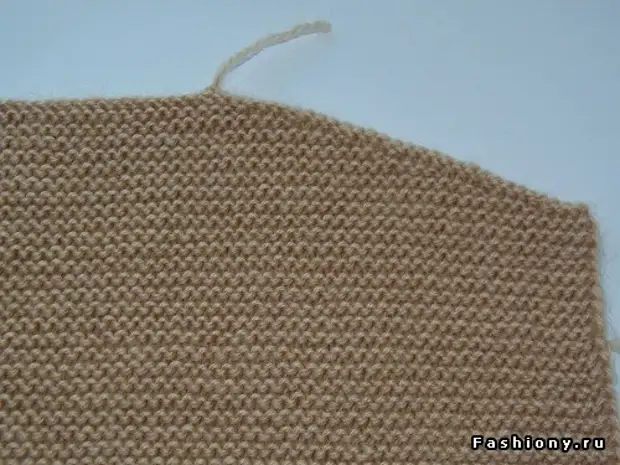
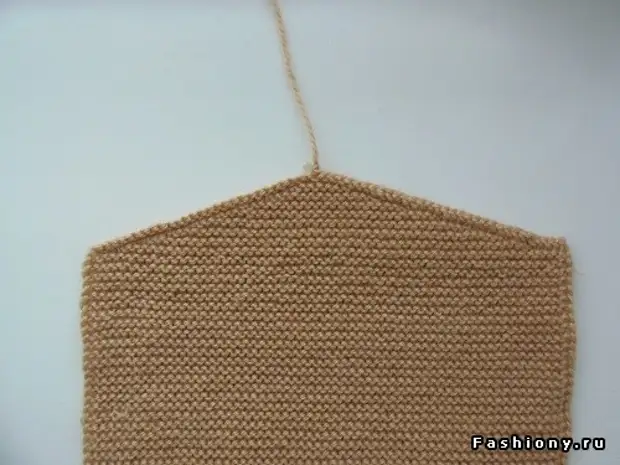
In this way, we will perform partial knitting for a shoulder bevel. After performing 5 dissonibilities on the left and right side of the part, we will prone to the last smoothing series. In this row, all the loops are pronounced, including those who have not previously disadvantaged. This series knits facial loops, and loops-boomerangs are also pronounced by facial loops for both walls as one. And now we close the loops and our detail of the back is ready!
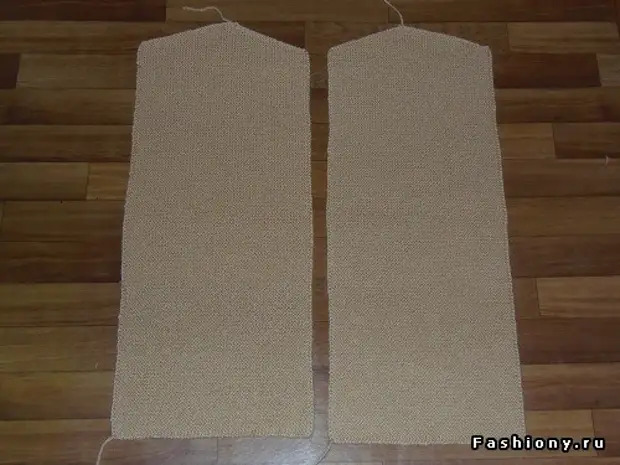
Shelf
Now we will knit the shelf, which consists of two identical details. The shelf pattern is very simple: the length remains the same, and the width is 1/4 of the thighs of the hips + 8-10cm for the ski (in my example 29cm). The width of the shoulder remains the same, but the neck in our head is moving to the lapel, so on the pattern it looks like a shoulder bevel with a difference in the height of the beam (6cm) and length (12 cm).
We recruit the required amount of loops for the width of our shelf and knit our part of the facial loops before the throat of the neck, which we will also perform partial knitting.
Since the sophisticated neck differs from the shoulder's bevel, it will be necessary to make new calculations for the neck, and the shoulder skeuses will be knitting on the calculations that we did for the back.
After the smoothing row, we close the loop and our shelf is ready. We will have exactly two such parts.
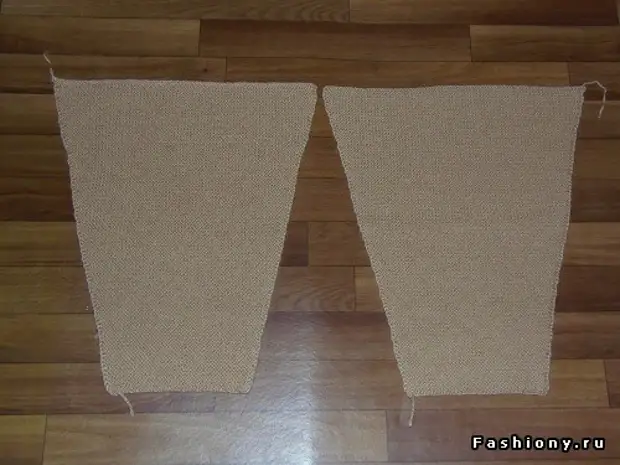
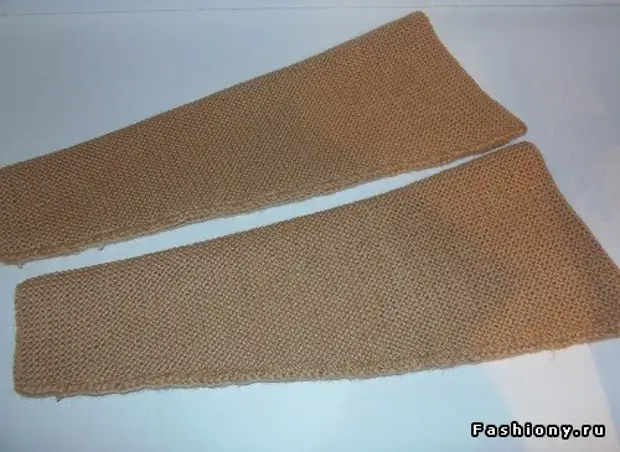
Sleeves and pockets
Go to knitting sleeves. But before take a look at the pattern and make the necessary calculations. The pattern of the sleeves is very simple, since there is no prummise in the front of our cardigan, which means there will not be a suture. The length of the sleeve is calculated by the length of the length of the hand minus the length of the shredded shoulder (in my example 50cm - 5cm = 45cm). Niza width: wrist girth + 2 cm on allowances + a few centimeters, depending on how wide the sleeve you want (16cm + 2 cm + 2 cm = 20cm). Top Pattern sleeves expands quite strongly to ensure freedom of movement in the cardigan. I took her length 40cm.
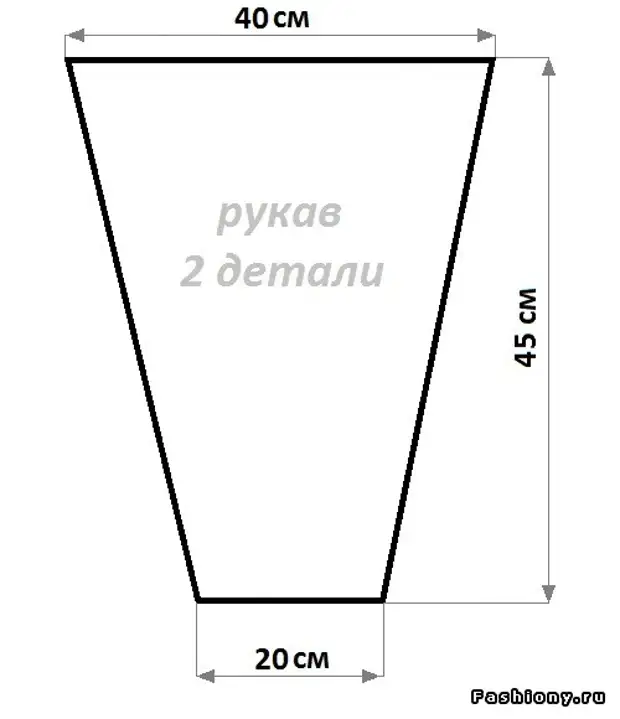
Now we calculate how many loops will be in 20 cm (28 loops), and how much in 40 cm (58 loops), and we will find the difference: 58-28 = 30 loops, that is, our knitting will increase by 30 loops that we will add at the beginning and At the end of the row so that our item increases symmetrically. Therefore, 30 loops we divide by 2 and get 15. This means that loops we will add from each side of the row during the knitting of the sleeves exactly 15 times. Now we will find out how many rows will be in our length of the sleeve (in my case, 165 rows are placed in 45 cm), and we divide these rows to the number of additions (165 rows: 15 times = 11 rows) and so, as a result, we learned how much to pricking the ranks To make the addition of loops. In other words, we will add loops at the beginning and at the end of the row every 11 row.
Now we recruit the loops for the width of the nose of the sleeves and knit the front loops of 10 rows, and in 11 row we will add one loop at the beginning and at the end of the row. You can add a loop with an attachment or a bleeding from one loop. Next, we will check again 10 rows and add on each side on one loop on each side. And so we will knit our item, while on the needker it will not be the desired number of loops for the width of the top of the sleeve. Then we close the loop and our sleeve is ready. We must associate such parts.
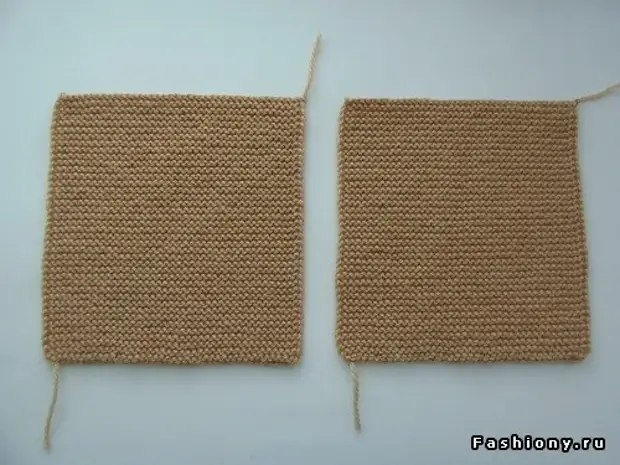
Pockets fit very easily, the length and width of which depends on your desire. Pockets are knit also face loops.
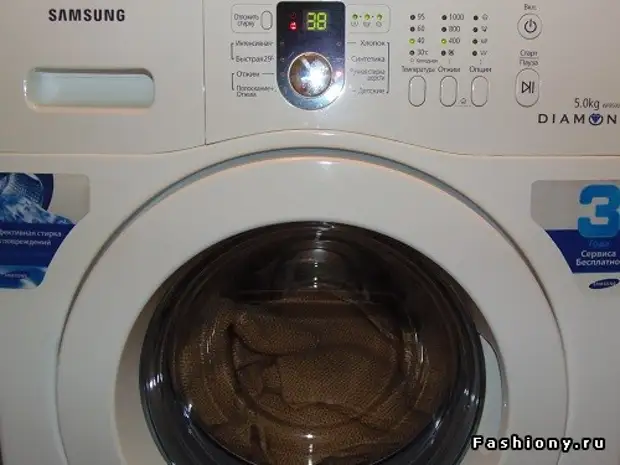
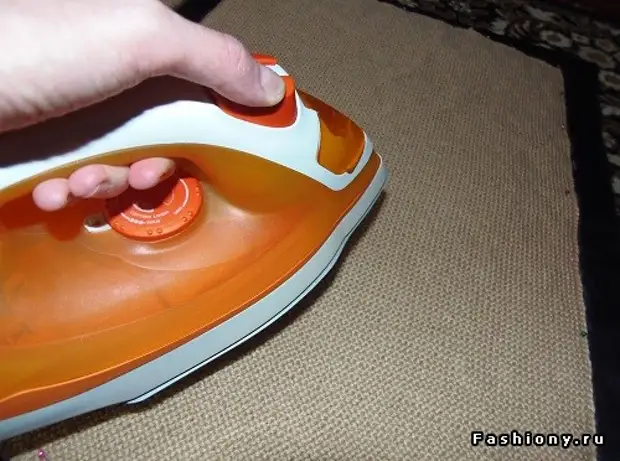
When all the details of the product are connected, before assembling the product, we will need to conduct a wet-thermal processing of our parts. But before you need to fill all threads.
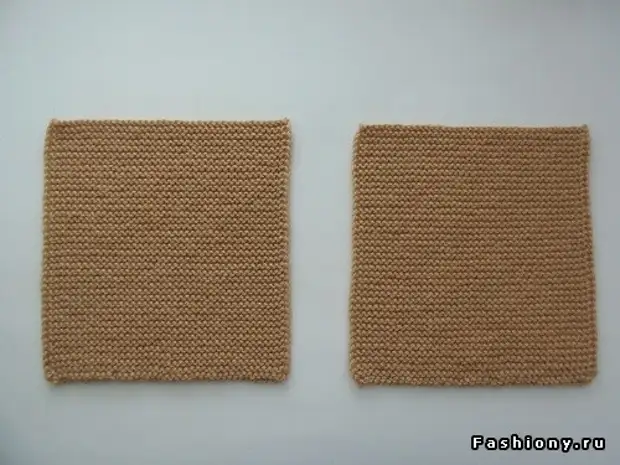
Wet processing Related details can be slightly moistened or wrapping so that the product is dealt with and gave the necessary shrinkage.
On the flat surface you need to decompose the dark fabric and circling the patterns of parts.
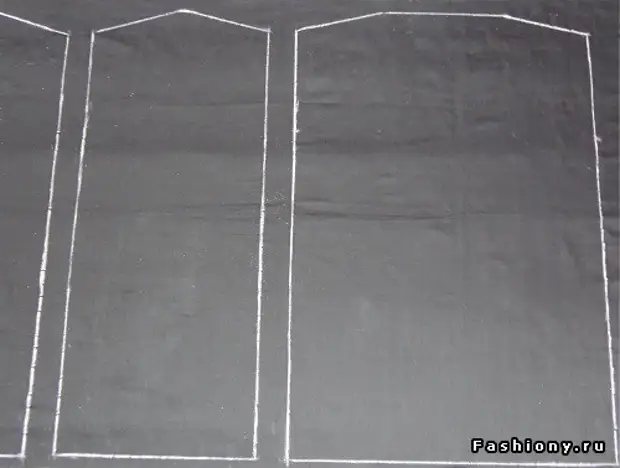
We decide the details of the product on the canvas, we rush and pins along the pattern of the model.
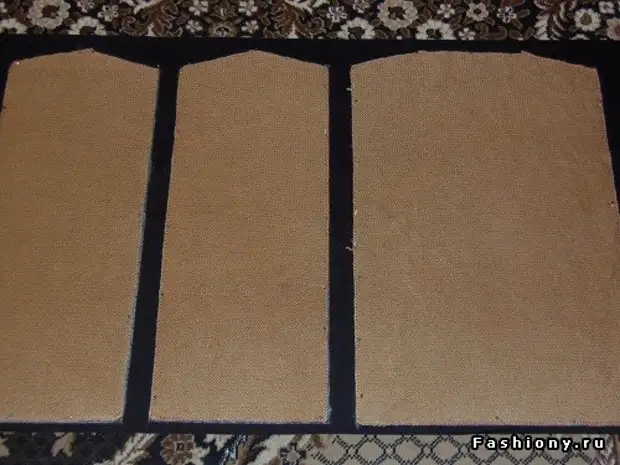
After the items can be dried, you can slightly sip the iron, while the weight of the iron remains in hand.
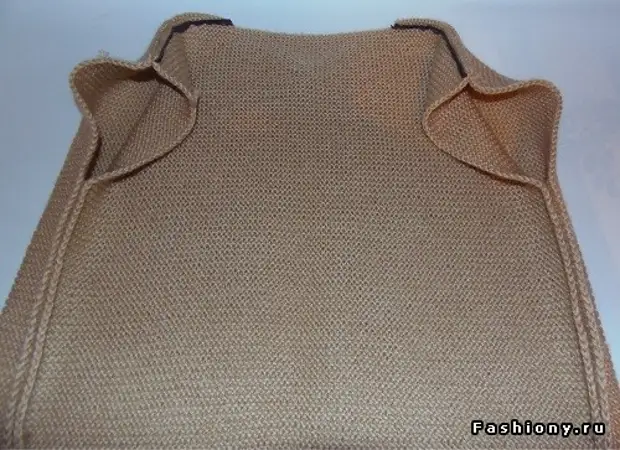
Build product
You can collect the knitted product in several ways, I stopped the sewing machine.
To begin with, we ley the shoulder seams,
And so that the shoulder seam in the process of socks does not stretch out, it is necessary to notify a small strip of tissue with a length of equal length of the shoulder, and 1 cm wide.
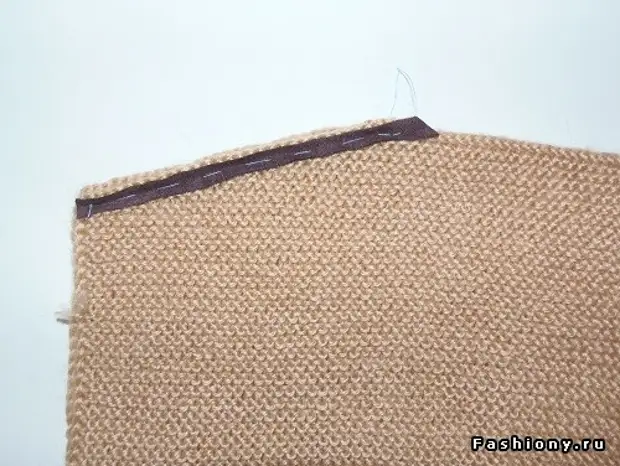
Before heating the seams on the typewriter, the paw machine must be loosen so that it does not stretch our product.
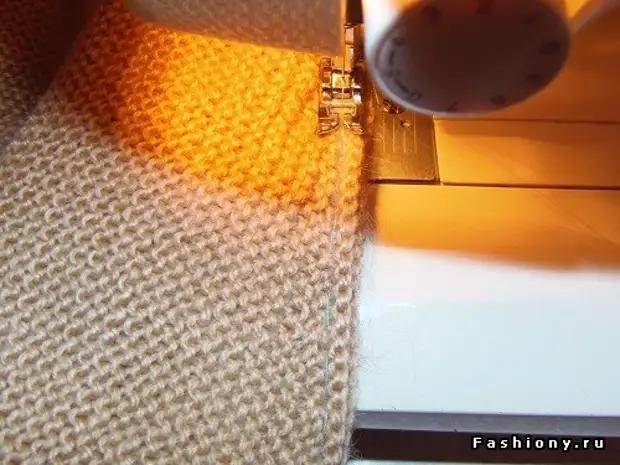
Then we sew lateral seams, leaving the length of the top of the top of the sleeve for the break.
Sleeves stepping on elbow seams
And we cover them in the premiers left by us.
We sew your pockets, but I decided to abandon the pockets, because because of the weak mating, they strongly pulled the product, so I removed them.
Our work is over! Cardigan ready!