
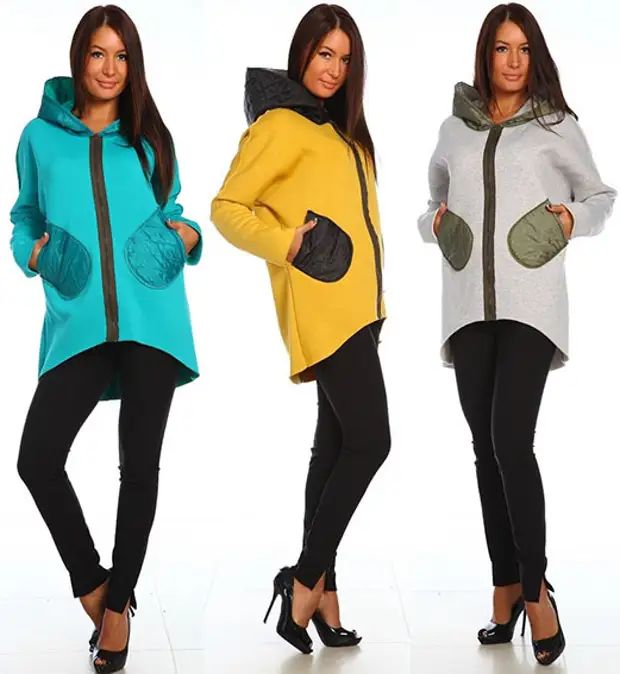
The level of complexity sewing: simple, pattern for beginners. The model is suitable for all types of slender shapes with a small breast.
The tissue consumption with a width of 150 cm will be from 140 to 150 cm, depending on the processing method and from the selected size.
The tissue consumption with a width of 180 cm will be 130-140 cm, and with a width of 140 cm you will need to sew this coat about 180 cm.
The flow of lining tissue is equal to the flow rate of the "top", but this coat can be sewed and without lining.
For sewing coat-Hoodies, it is desirable to choose simple in the processing of fabric, such as a footer, fleece or a tight thick knitwear with low tensions.
A good solution will be a knitwear on the fur - such a coat is sewn without a subflade, but still will require some sewing experience from you.
You can also use short artificial fur on a soft knitted basis as a lining.
If you have a sufficient sewing experience, then the coat can be sewed and palp fabrics.
Soft loose fabrics will suit for this style. For example, tweed, book or cashmere.
There are no special requirements to the lining tissues, except for wear-resistant and good slip.
The set of chopped-hoodie is included (Fig. 1): back, shelf, hood and pocket.

Craw details and sewing look below.
How to Cry and Sew Coat Hoody Open-Oil at Home
(Detailed description with the sequence)
This very simple style coat can be sewn even novice homemade couture, which has a sewing machine with a zigzag line and modern overlock.
The following describes simplified cutting technology and sewing, suitable for products from the simplest in the processing of knitted tissues (fleece, footer).
Cutting is performed without allowances on the seams, but with the observance of the equity direction.
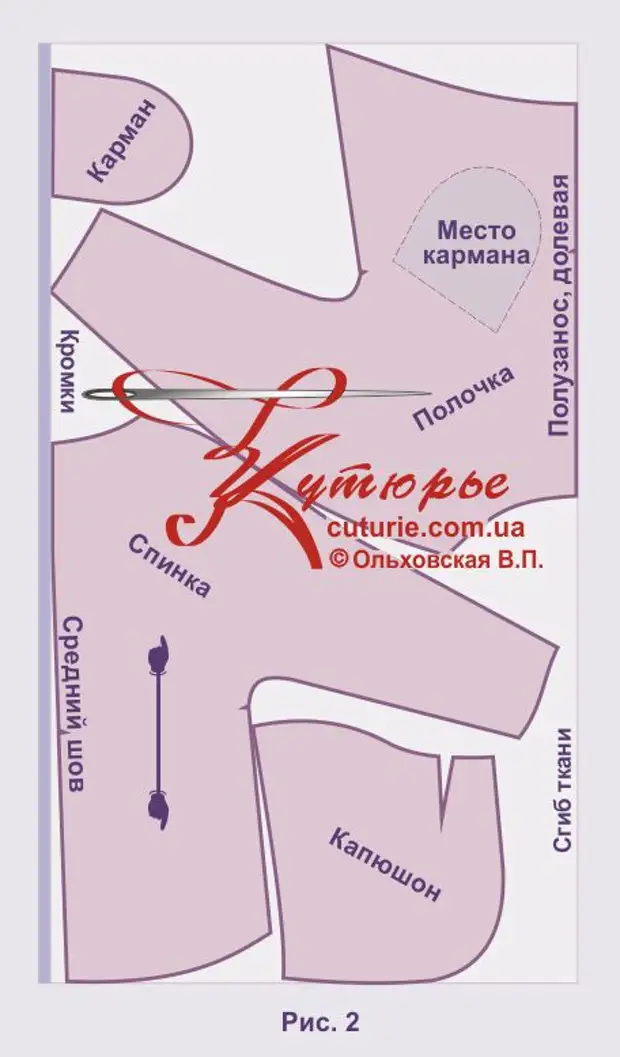
The fabric folds in a person to face, the edges are combined and placed parallel to the edge of the cutting table.
Details are laid out in the most economical way.
Pay attention to the fact that the shareback does not coincide with the average seam.
The hood can be laid arbitrarily, but it is desirable that the slice that turns out to be at the face does not coincide with the equity direction.
Do not forget to put the needles on the details of Croy in those places in which they are marked on the lekalach - these tags will help you correctly assemble the product.
In fig. 3 shows the cutting on the tissue 180 cm wide (footer). It is almost no different from the previous version. \
But the fabric is a width of 140 cm (possible width book) will require a little different approach - Fig. four.
In this case, the fabric is also twice as well, but across otherwise you will have to shorten the sleeve.
Sewing coat from scratch at home - the task is very difficult, but if you extremely simplify the sewing technology, then you have a good chance to handle, having minimal cutting skills and sewing.
If the coat is planned on the lining, it is easier to make it flying away and secure only to the neck and under the clasp, making a little shorter "top".
But, if this is your first product, it is better to do without lining.
So, we start sewing from scratch.

To prevent stretching in the shoulder area, stepping the shoulder seam, to put "edge" under it, you can literally use the edges of a thin knitted fabric or a special edge.
You can also pave a narrow strip (1 - 1.5 cm) dubbing from knitted doubles under the shoulder seam.
After that, we carefully start all the stitches we have.
If the lining is provided, we collect and lining with a straight line and carry out the steel cuts.
Now you can proceed to connect the hood with a coat.
First we spawn a hood and a coat along the middle seam, then, at the extreme points of Versere and distribute the halves of the hood along the neck, which brings him with pins.
Folding on the hood can be made or lay them in the form of soft folds.
And the second option is preferable.
Please note that it is desirable that the tops of the "top" started to the middle seam, and the dilated subdrance from it to avoid overlay.

When the seams are swollen, you can cover the hood with a narrow zigzag, put under the seam edge or duplicate a narrow strip of knitted doublerin and wipe on overlock.
Collecting the lining, do not forget about the loop, so that the coat can be hung on the hanger.
If the coat is on the lining, then you do not need to rotate the hooks of the hood. And, in the injection of the hood on the lining, roll it on the lining and the hood, and the side.
This is the easiest way, although it will be more correct to damage the lightning before.
But why is it better first lining, and then zipper?
Firstly, it will be easier to replace it, and secondly, it will be easier to finish a coat, wrapping the bottom of the same knitted seam or bayed it.
But here is still a nuance: your lining is flying away, it should be connected to the "riding" on the suture of the hood sweeping and try on the coat.
On the fitting lining in short by 2 - 3 cm than "top", then process the bottom "top" and lining on the overlock (this is the easiest way, but experienced tailors can choose something more complicated).
And at the end of sewing, connect on the bottom of the seams lining with a coat.
If you chose the easiest way to sewing, then you can only dangle with zipper.