
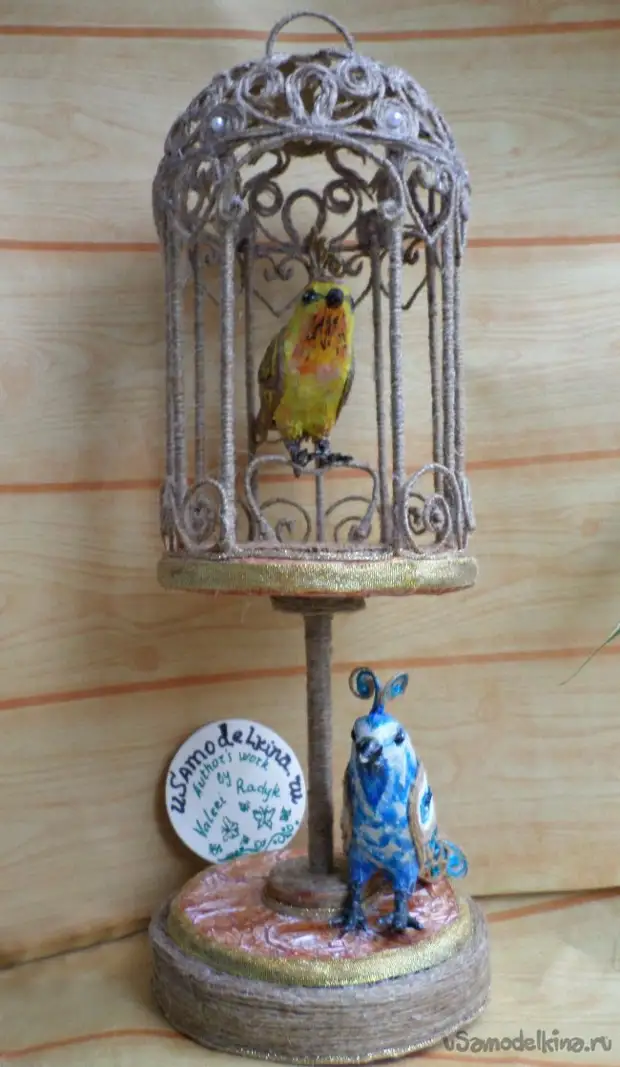
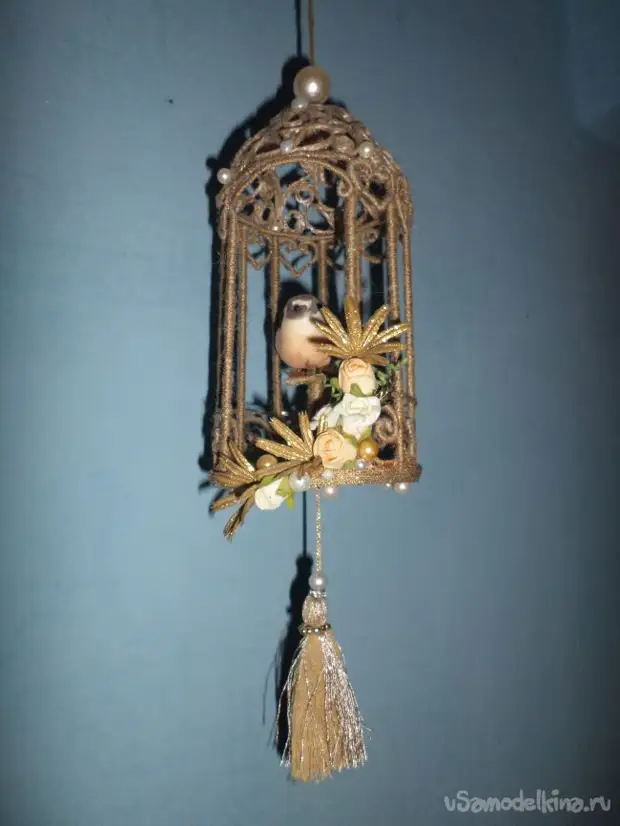
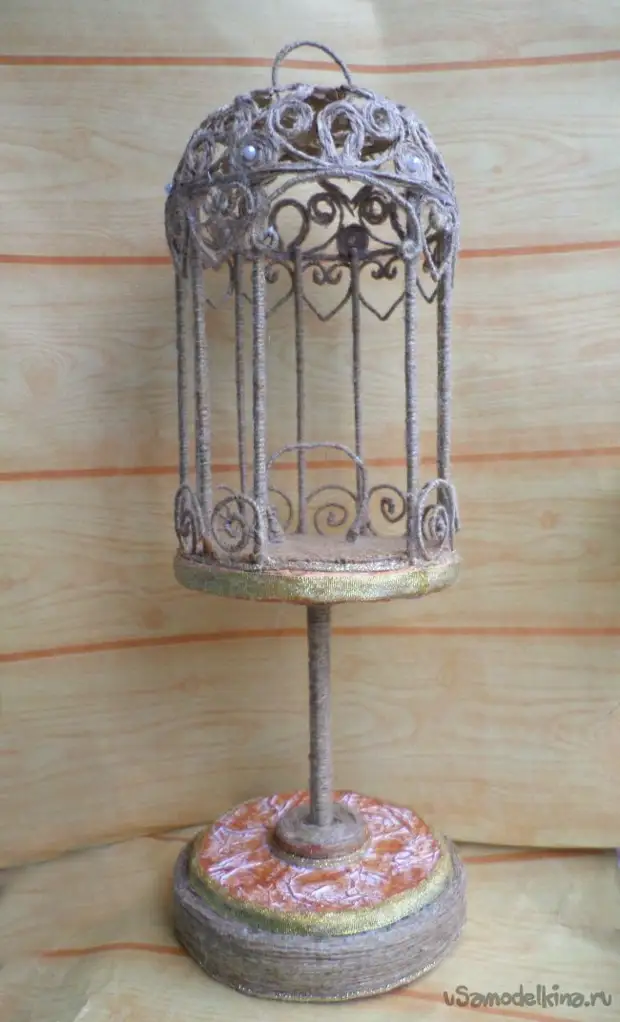
Good day to all lovers of homemade! Once I created a sparkling cell to the competition, after which a lot of letters came to me with a request to make a master class to create a similar cell and finally I filmed the promised material.
The cell will become an interesting element of the decor and will certainly decorate your home. I think that and give friends this work is not ashamed.
The work is painstaking, medium difficulty, but if you follow all the rules, then everything will turn out quite easily. The main desire!
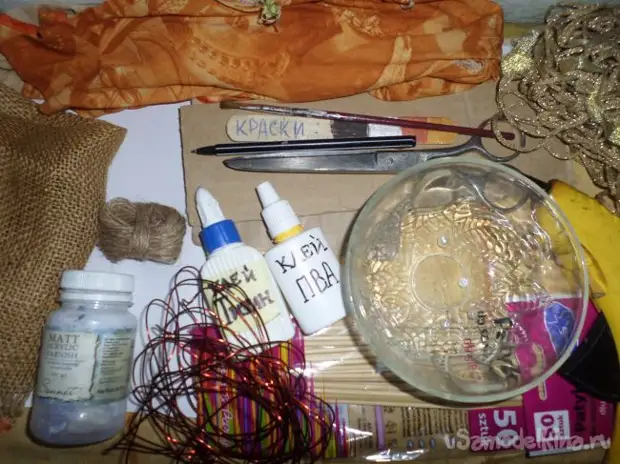
For work, we will need the following materials:
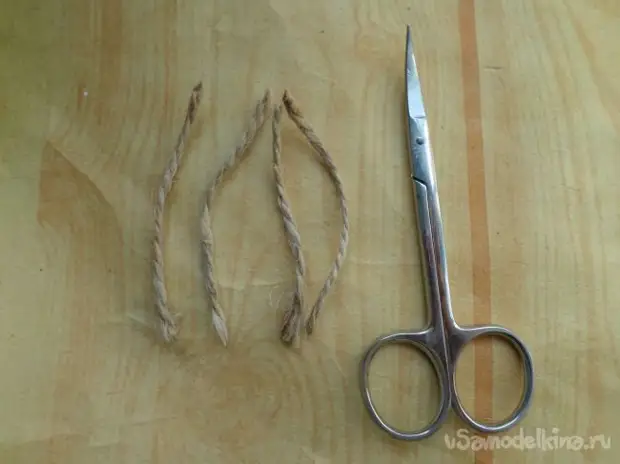
- twine;
- scissors;
- corrugated cardboard;
- PVA glue;
- thermo gun;
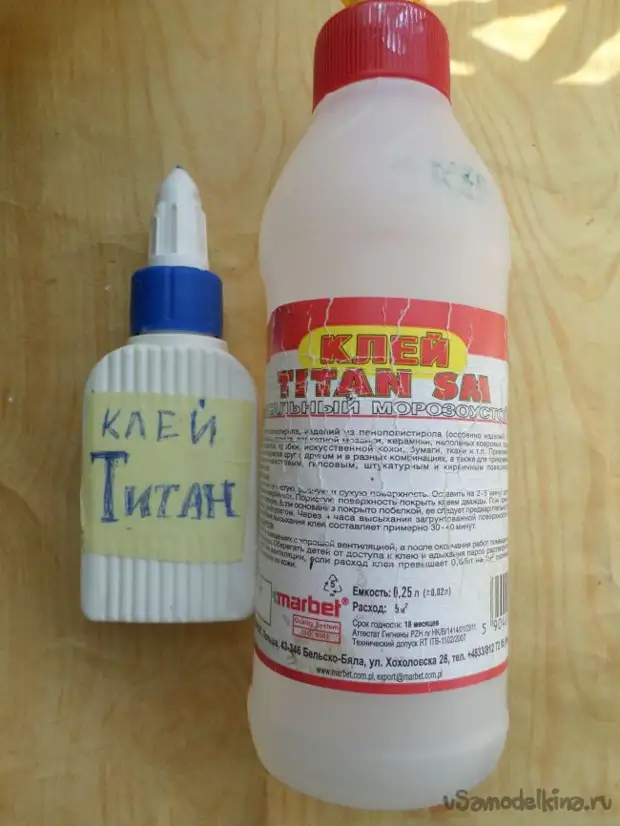
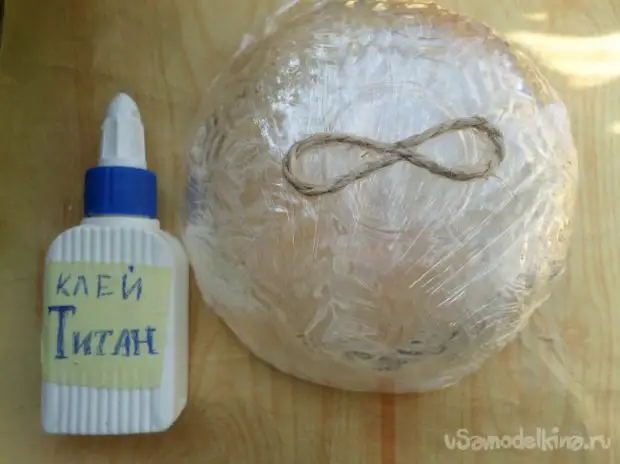
- glue "Titan";
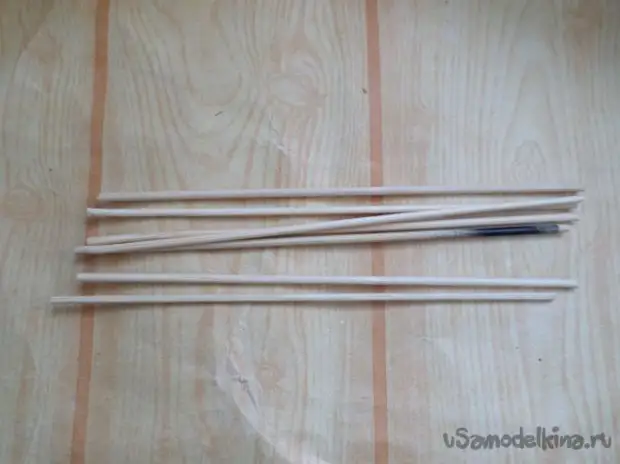
- ships wooden skewers;
- white painting paper;
- Golden cord;
- gold ribbon 1.5 centimeter width;
- a piece of burlap, additionally, you can take a dark cloth for the liner to the bottom of the rail;
- pen or pencil;
- round-rolls;
- Round salad bowl or bowl with a smooth edge;
- Food film;
- Wire;
- Acrylic varnish and brush;
- Paint acrylic gold and bronze and sponge;
- beads or semi-graysins for decor;
Getting to work:
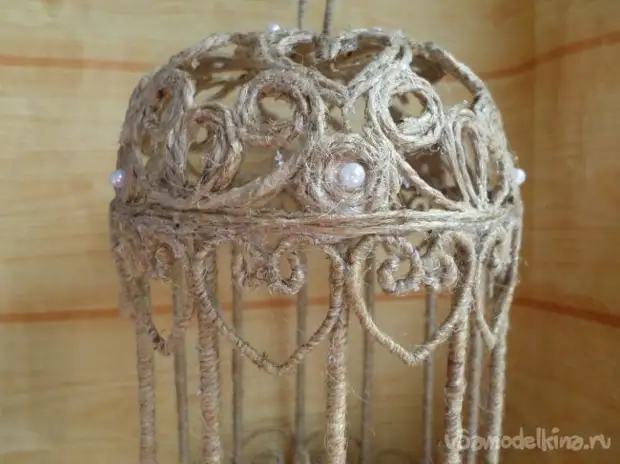
Step 1: Making the dome of the cell:
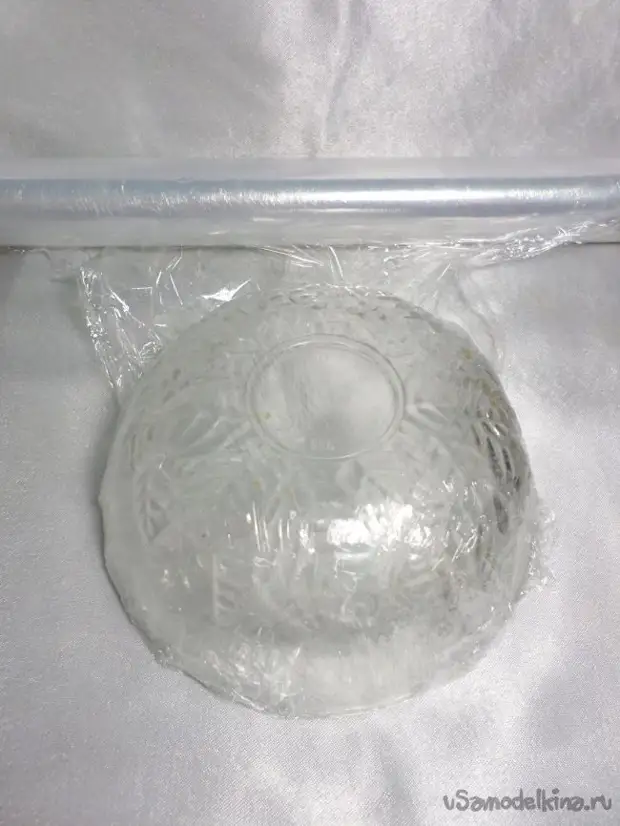
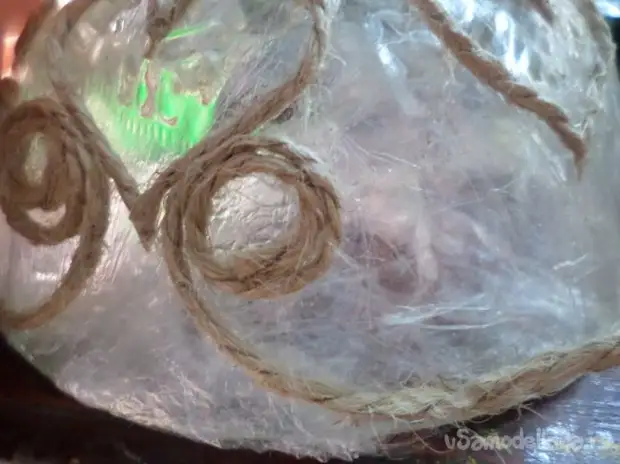
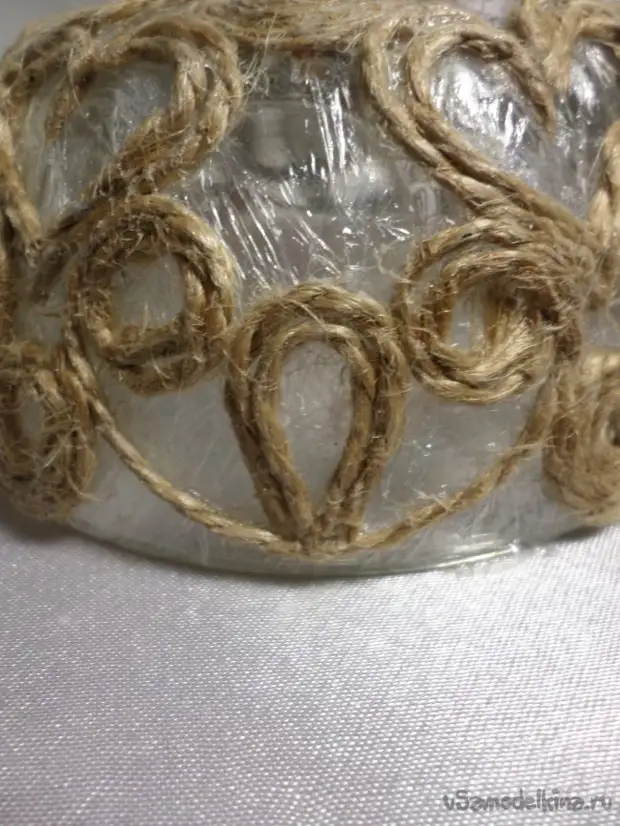
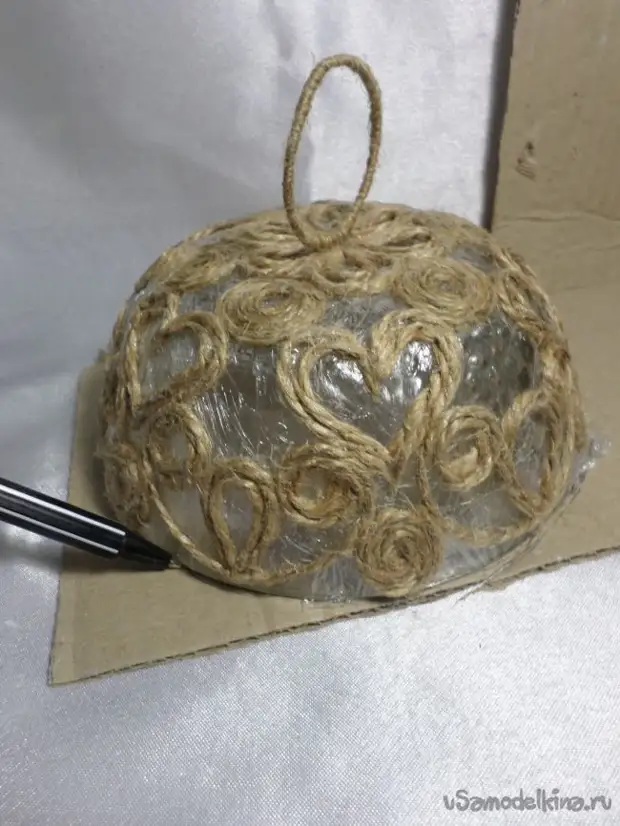
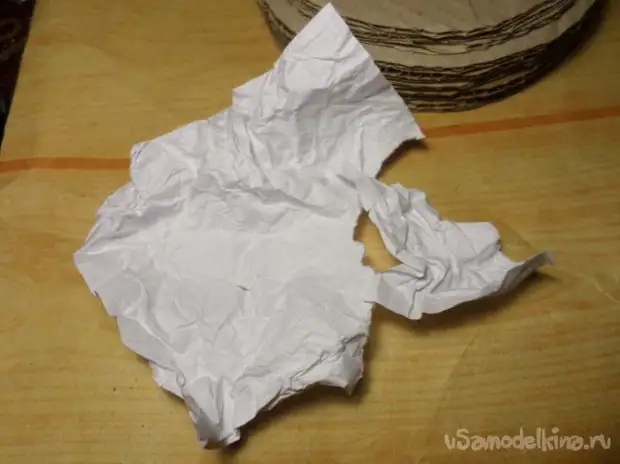
To do this, we need to take a deep salad bowl, a couple or a bowl, the edge of which should be smooth, without schology and roundings. Weaulting of food or packaging film:
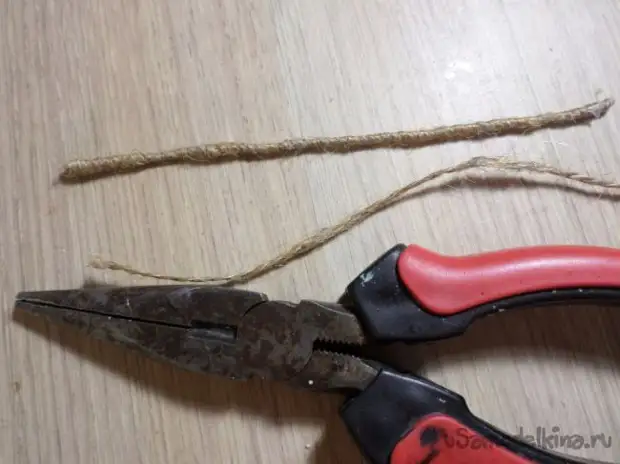
Glue "Titan" overflow into a tube with a narrow nose, it must be done necessarily, then the twine filigree will be obtained without difficulty.
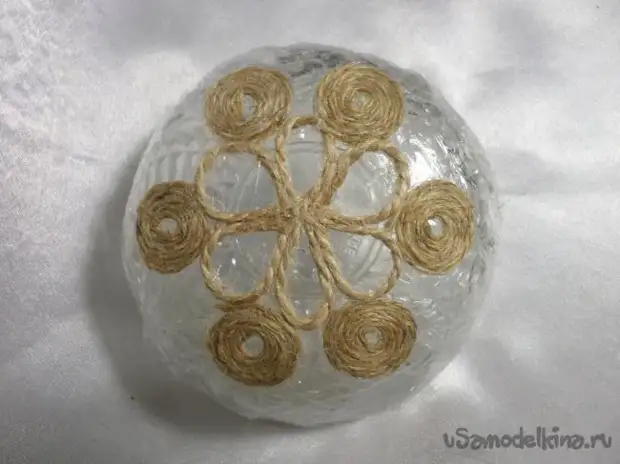
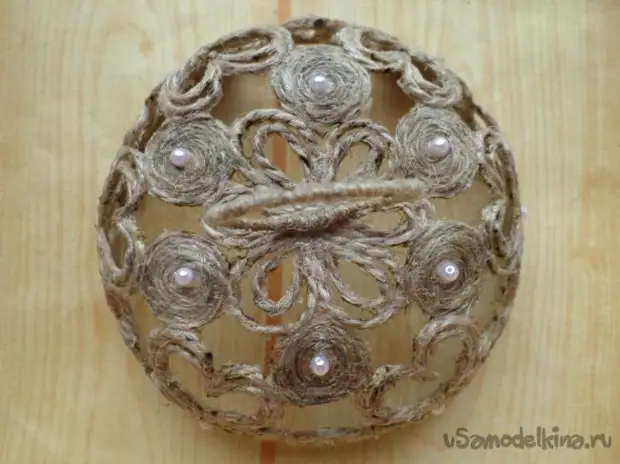
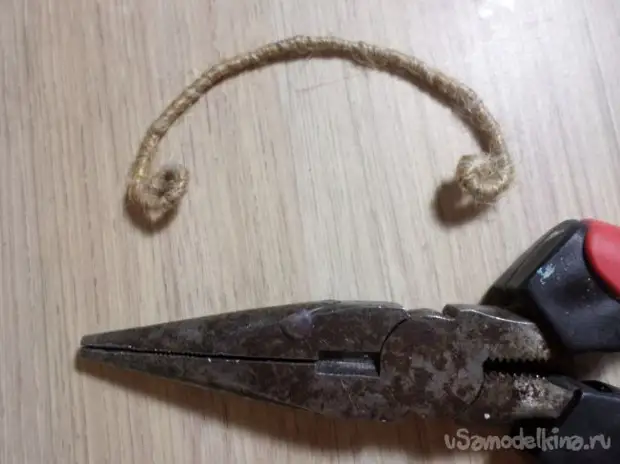
The twine is cut into the segments suitable to us, the sections make the painter, and slightly twist the tips between the fingers with the plow glue drops, thereby make them pointed. We glue the twine segments in the form of petals, on a gently squeezed with a thin strip glue, should turn out, as in the photo:
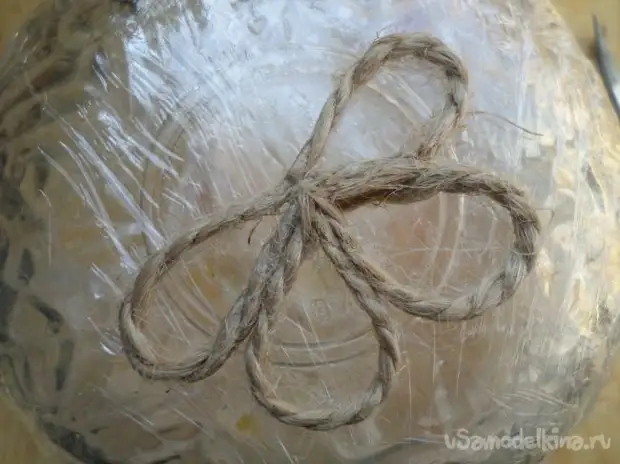
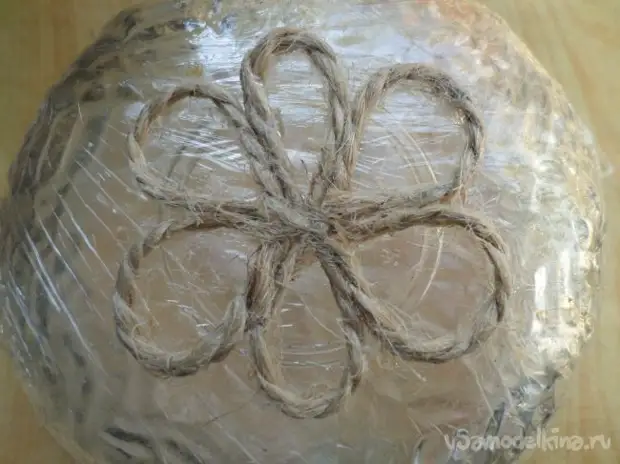
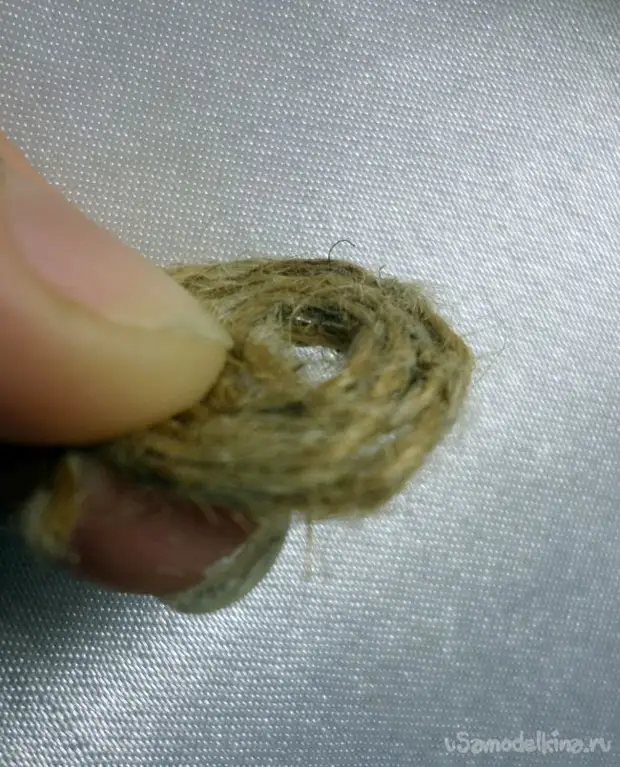
Then between the fingers we turn the "rolls" and glue the edge of the petals:
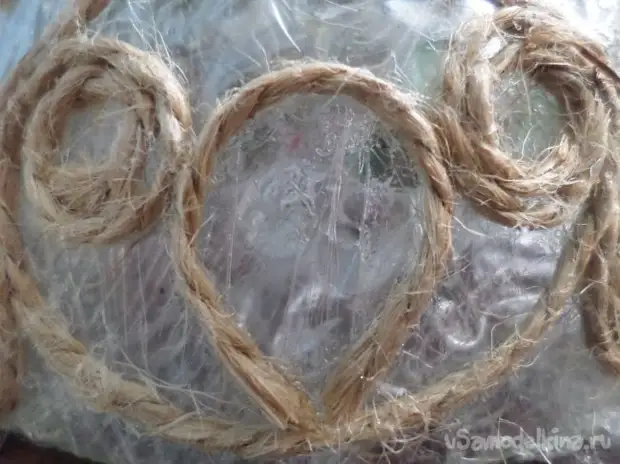
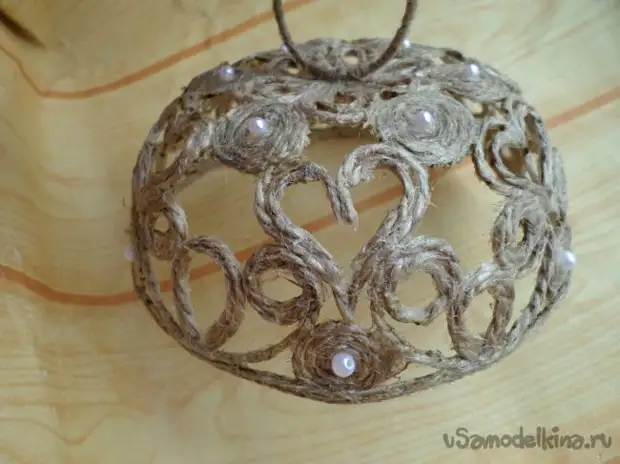
Next, cut small segments and make hearts:
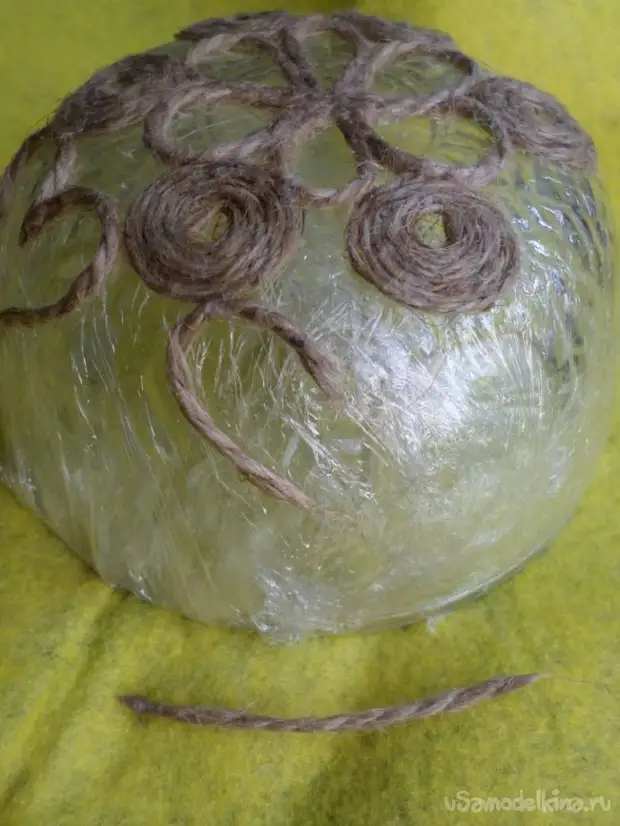
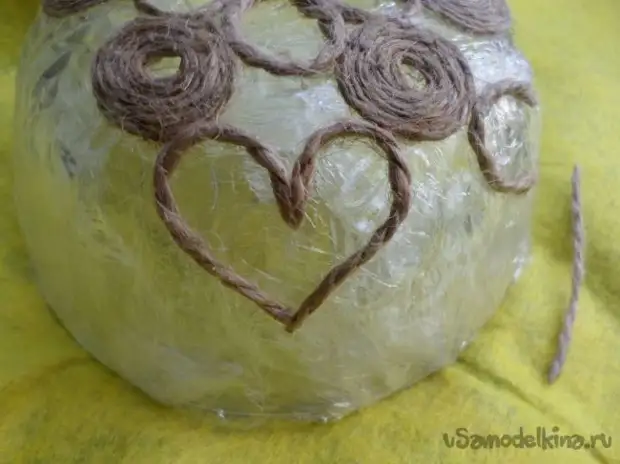
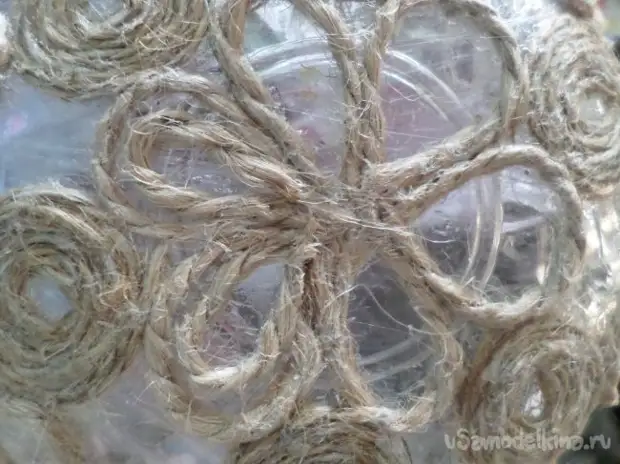
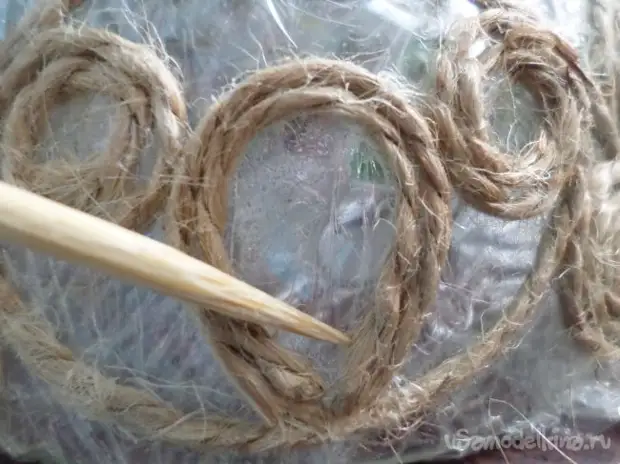
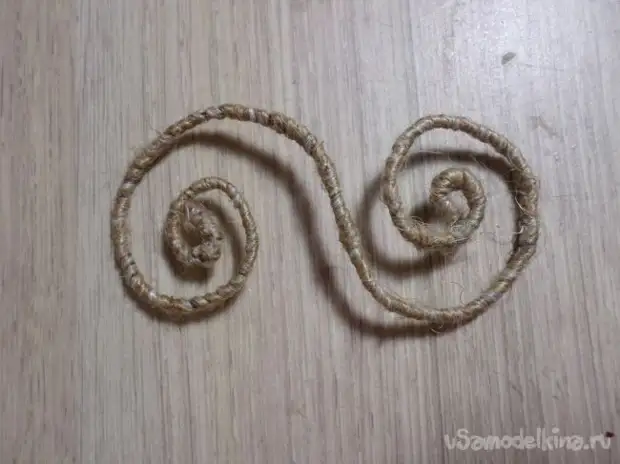
Then between the hearts, just below, do curls, as shown in the photo:
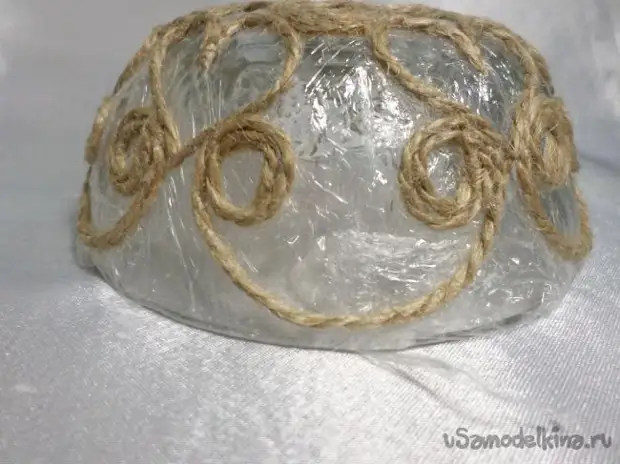
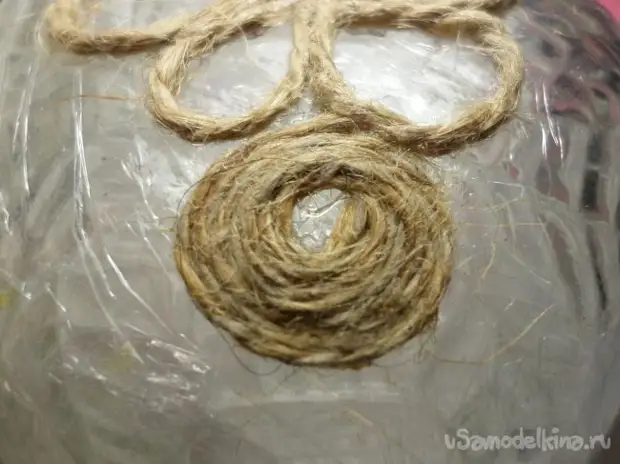
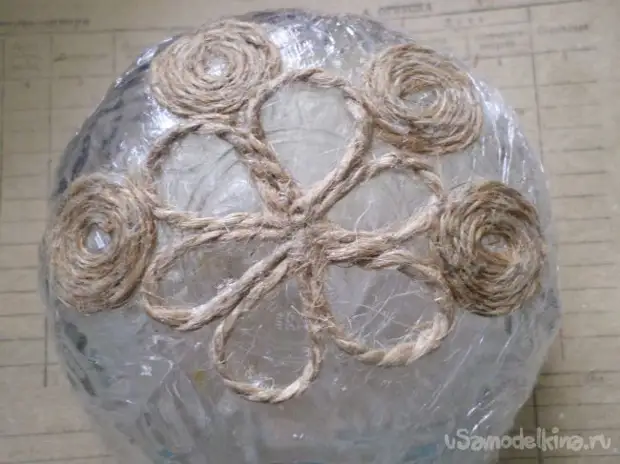
Further between curls glue "rolls":
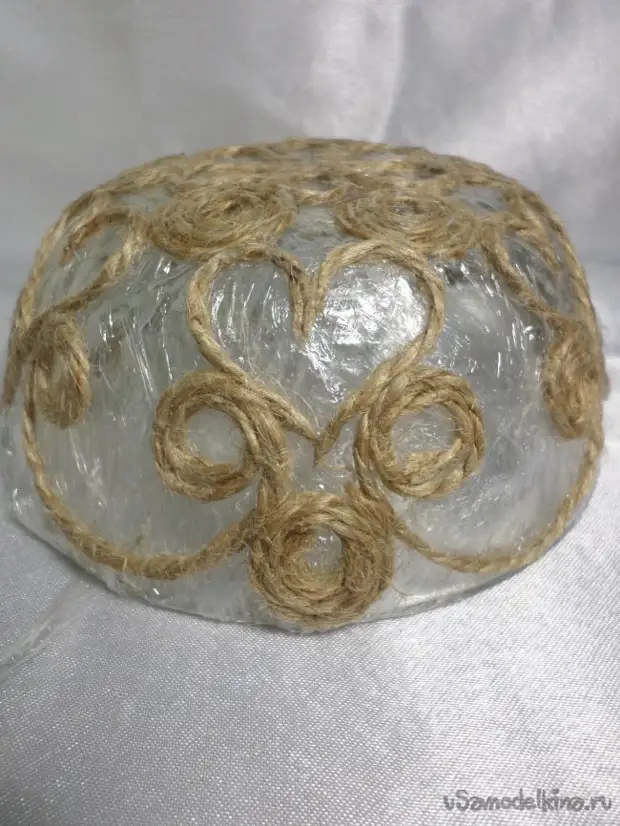
From above, in each petal, we stick to the segment of the twine:
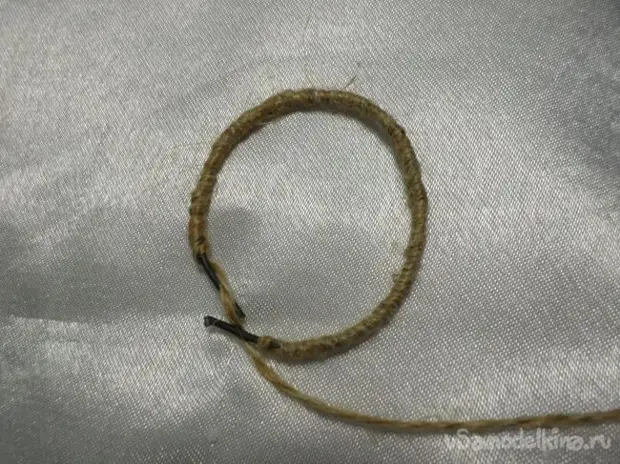
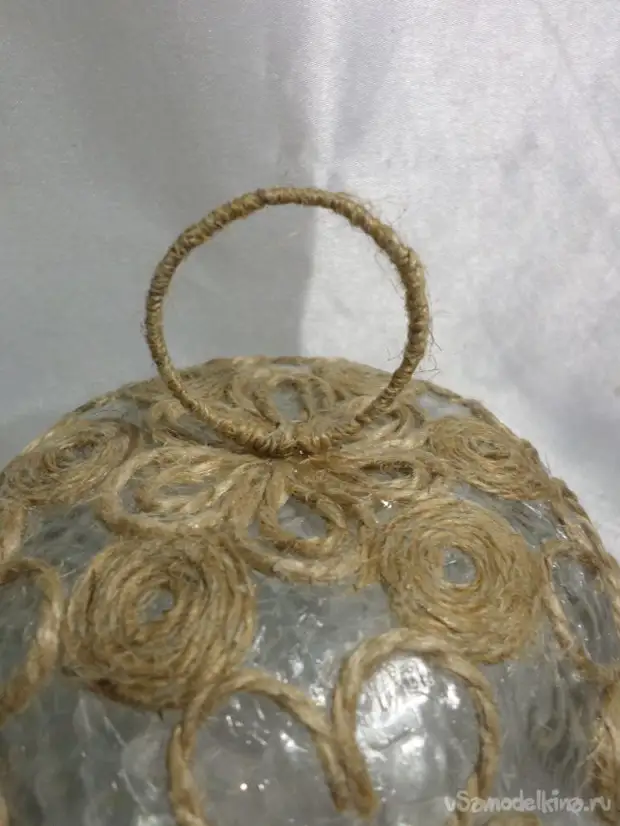
Cut off a piece of wire, wind by twine, fixing the thermo-glue, we turn into a ring, connect, the place of the gluing is winding with twine. Colepko glit from above in the center:
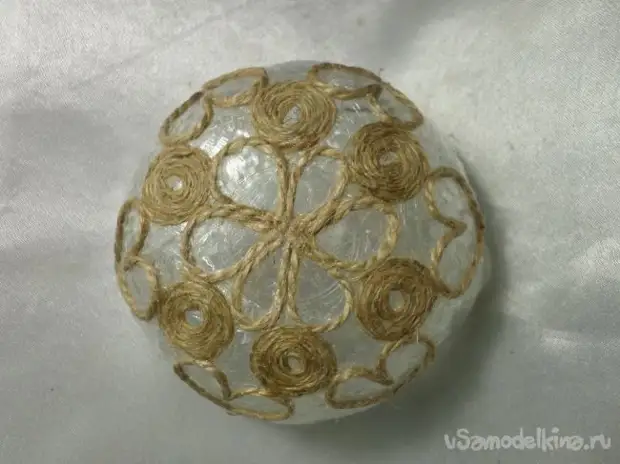
Returning to curls, insert double loops in them:
If something is moving, straighten with a skeleton or needle:
We repeat another one next inside the hearts:
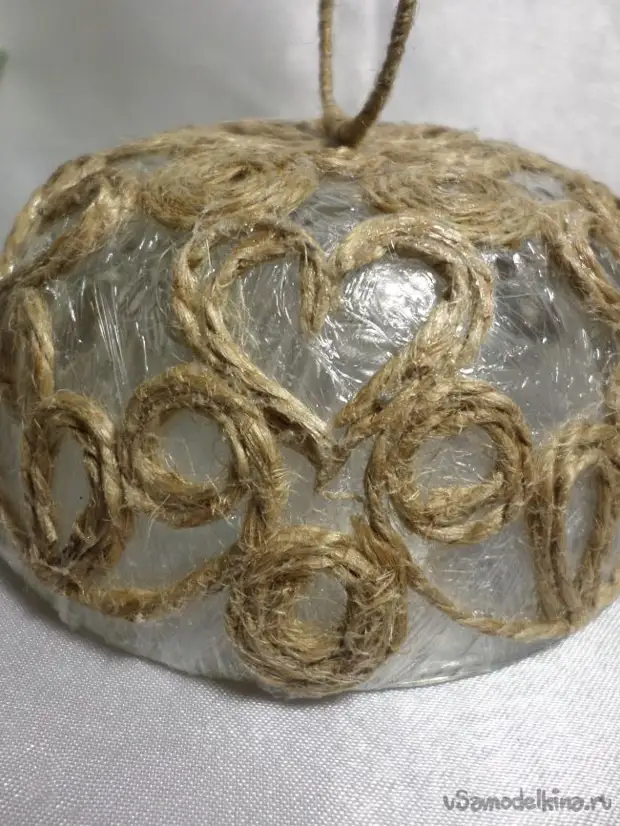
At the bottom edge in two or three rows we glue the twine:
All the work is additionally labeled with glue, we are waiting for complete drying, then removed from the base, we remove the film to burn out the film, or heated above the flame of a nail or a seboard, or simply cut the protruding adhesive with manicure scissors.
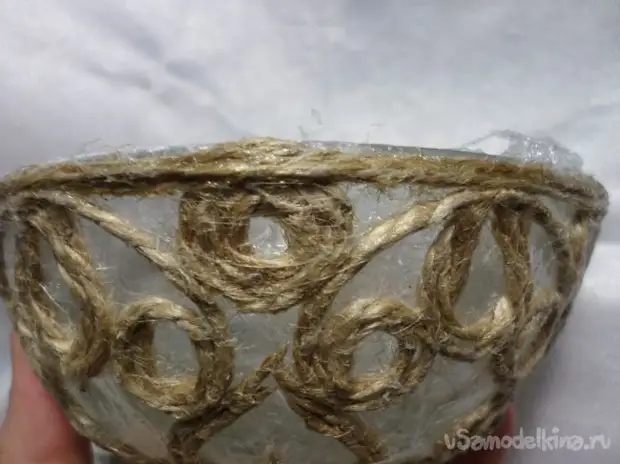
We glue semobusins:
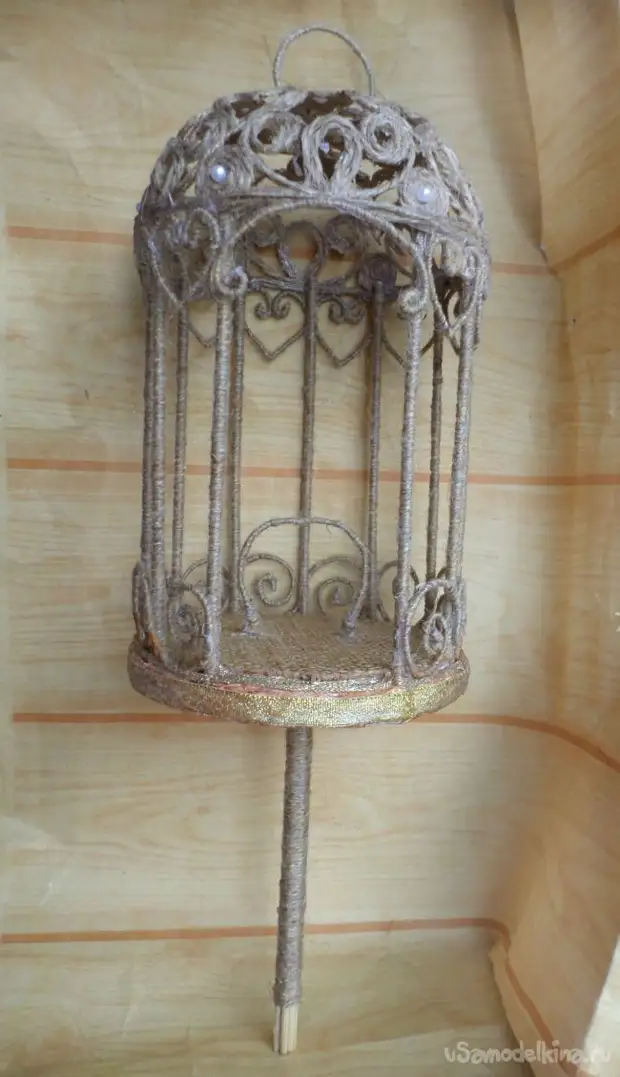
Step 2: We make the basis of the cell:
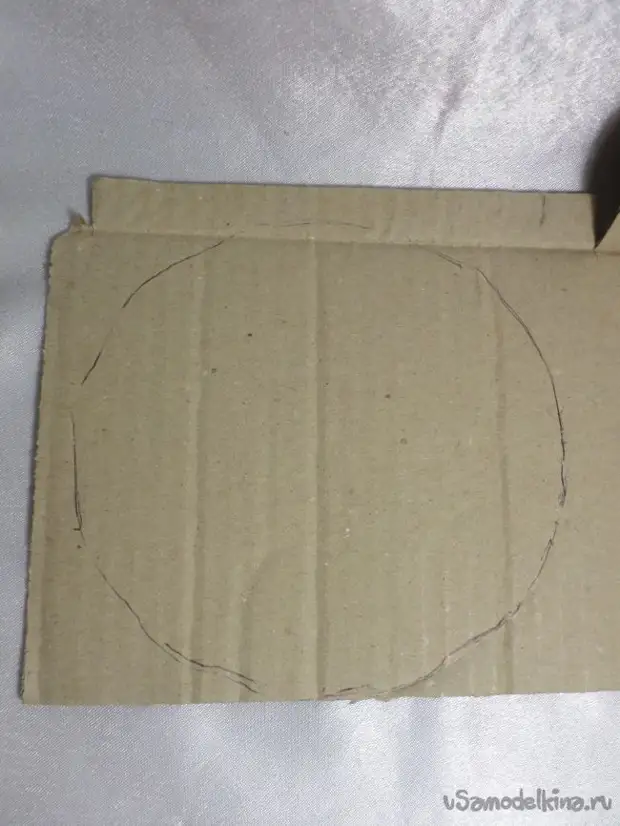
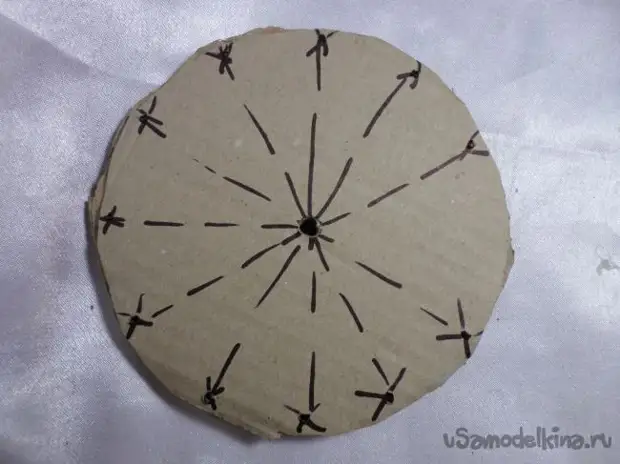
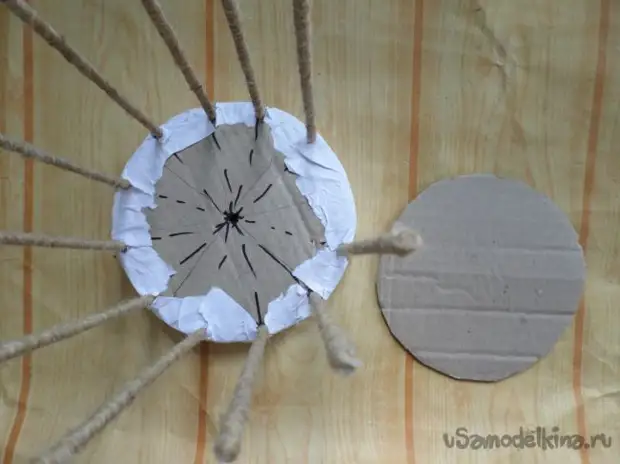
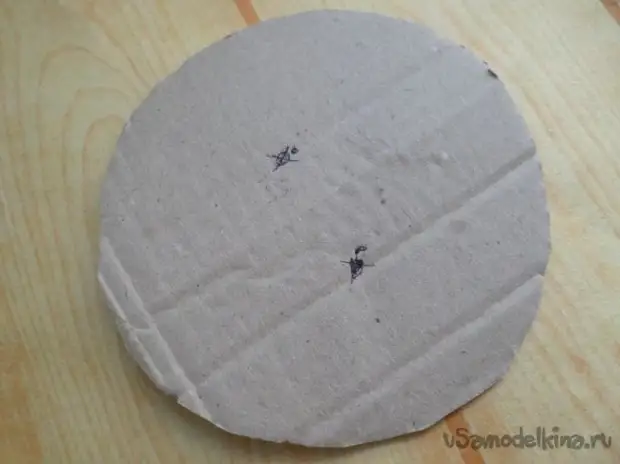
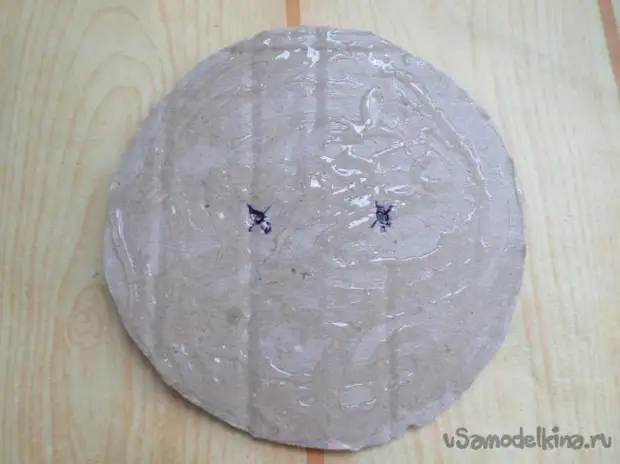
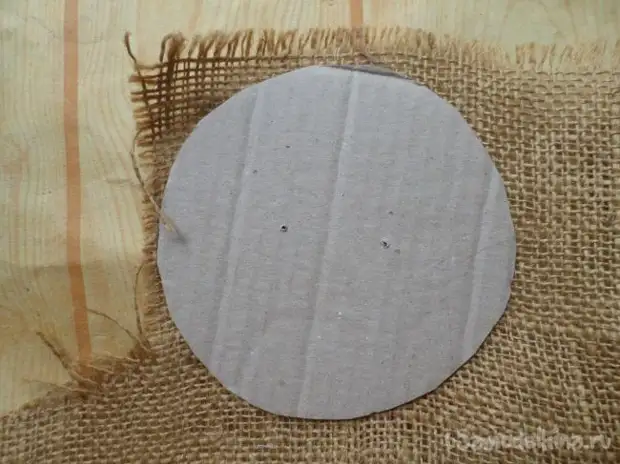
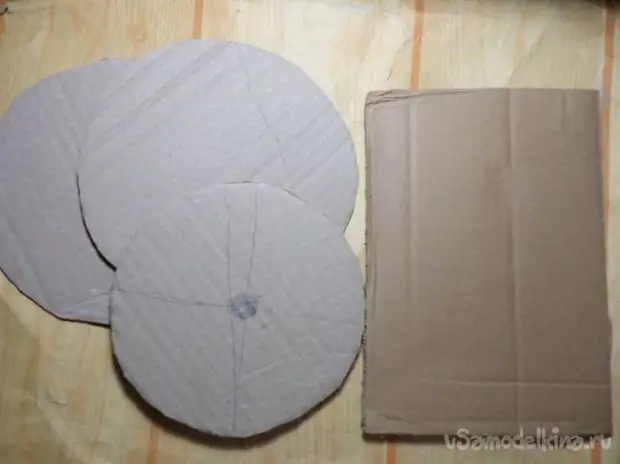
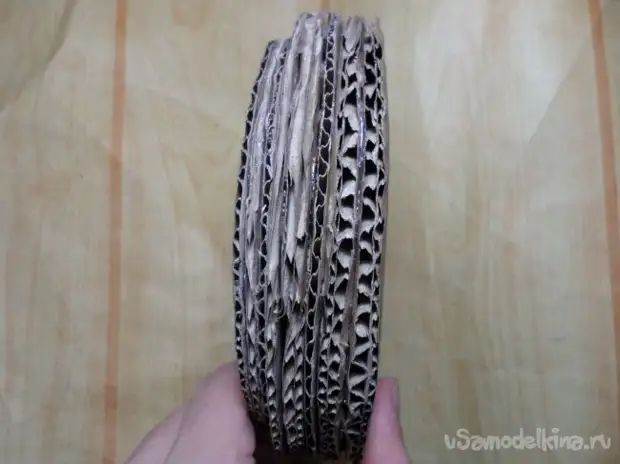
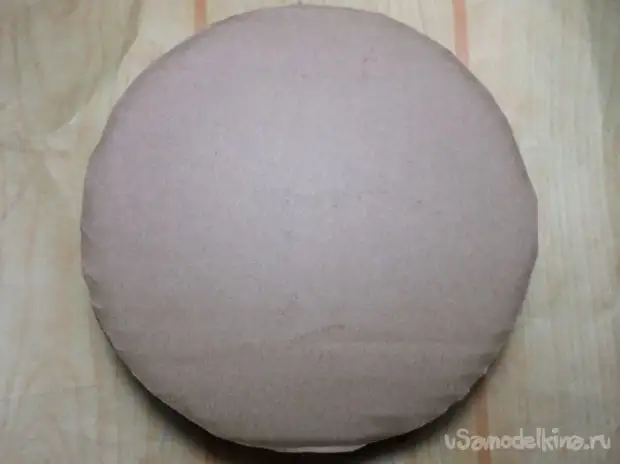
We take corrugated cardboard, we apply the salad bowl on which we did the dome, we supply around the handle and cut out two or three such circles:
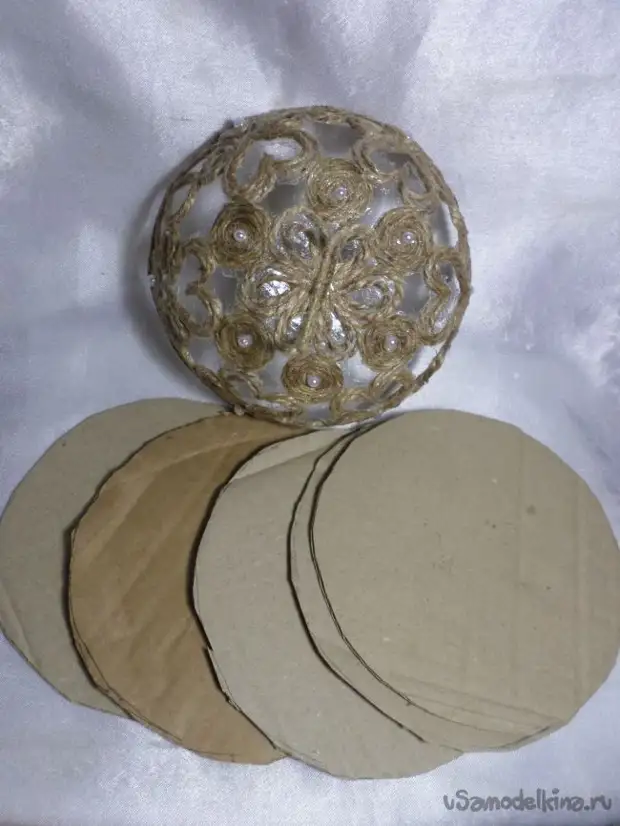
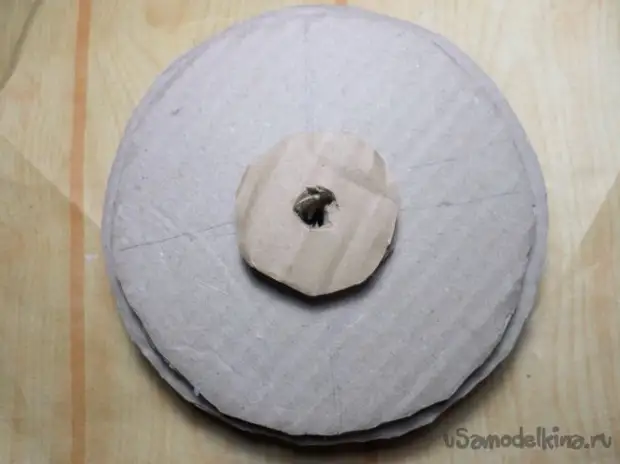
We glue the cut circles together, from the center evenly distribute 12 rays, we put a point, one skip-it will be the entrance to the cell:
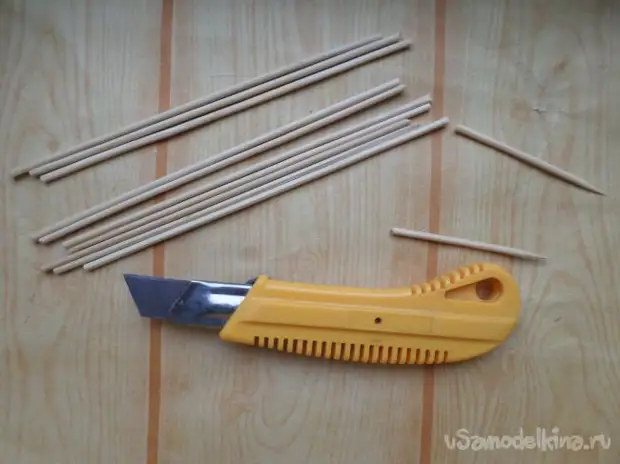
Step 3: Make Stoys:
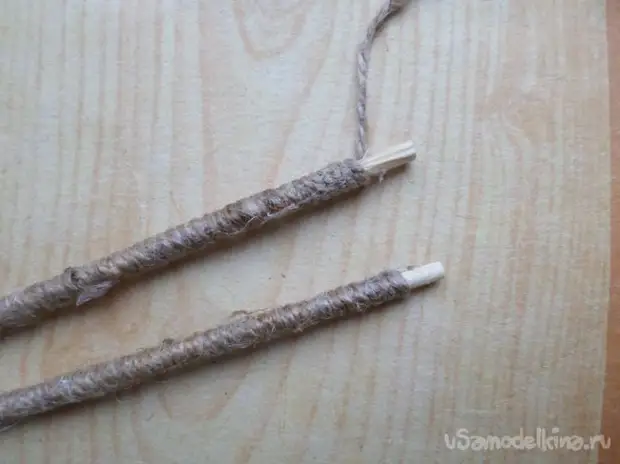
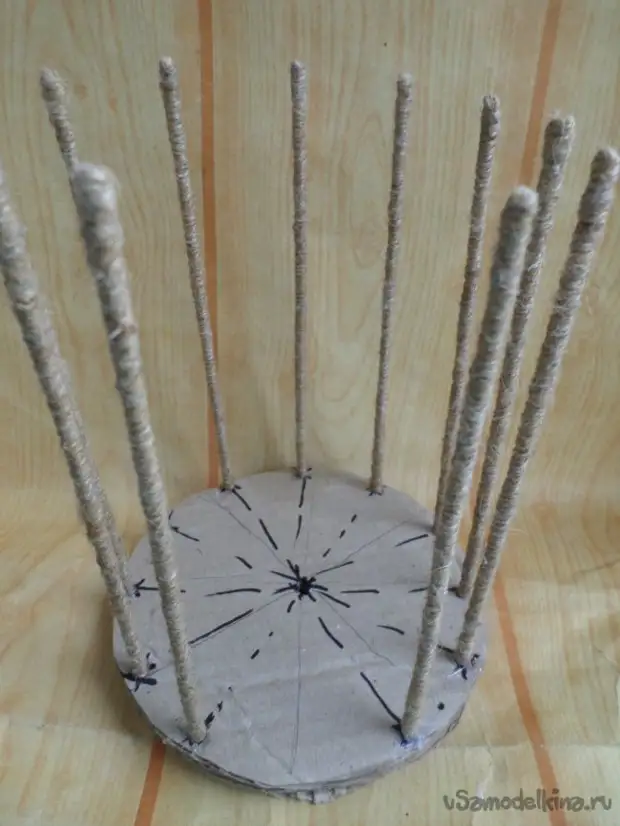
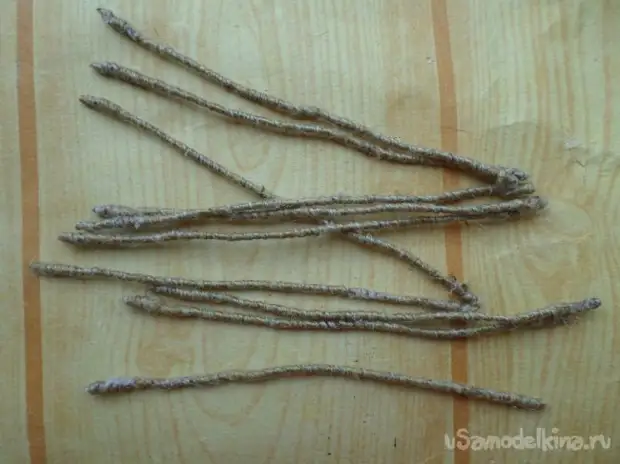
We take eleven wooden speakers and shorten them on the length you need, I have 17 centimeters. Tightly wind the spitches with twine, fixing glue, leaving no centimeter-one and a half.
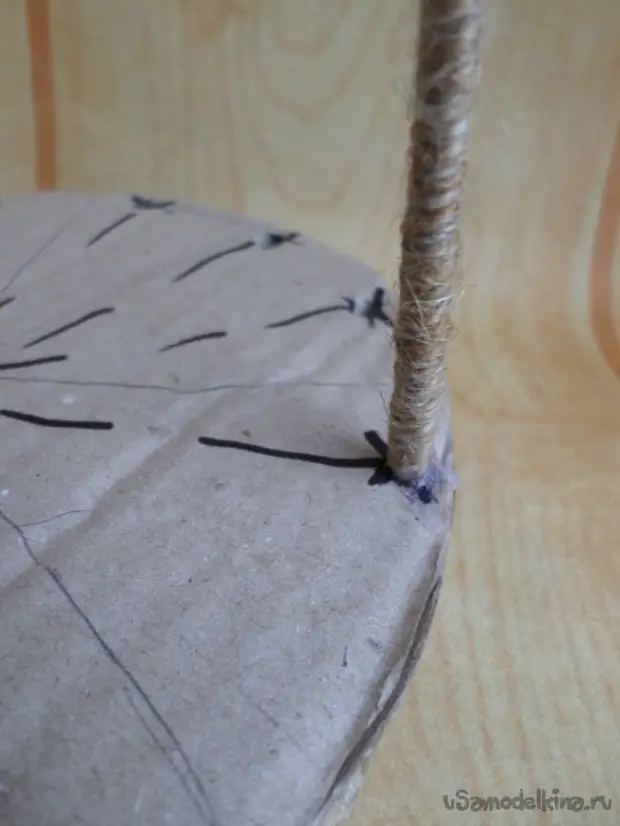
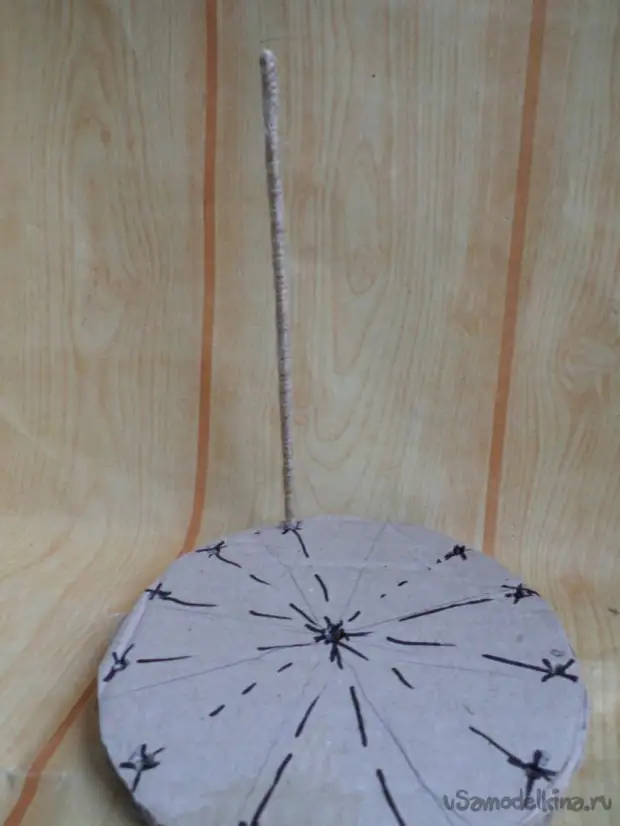

At the base, do holes and glue the racks:
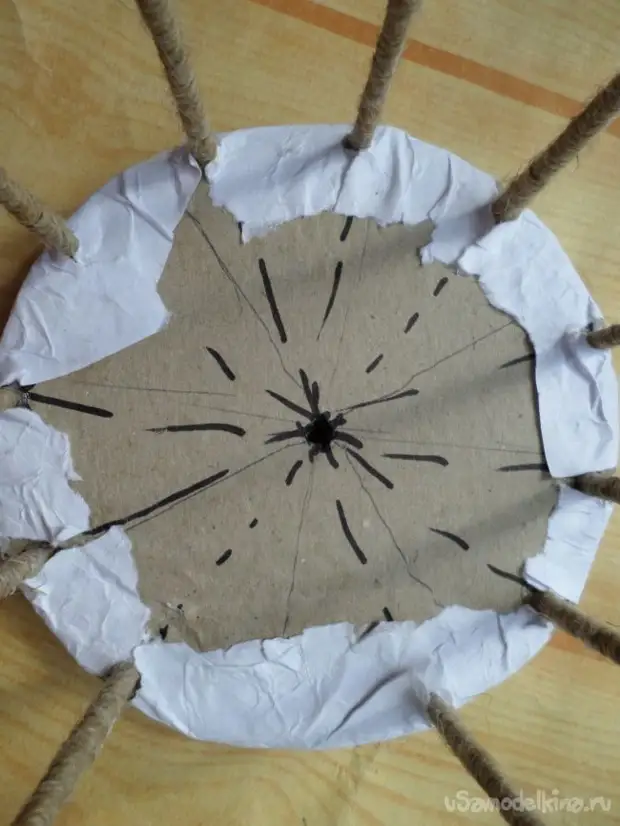
Step 4: We continue to make a bottom of the cells:
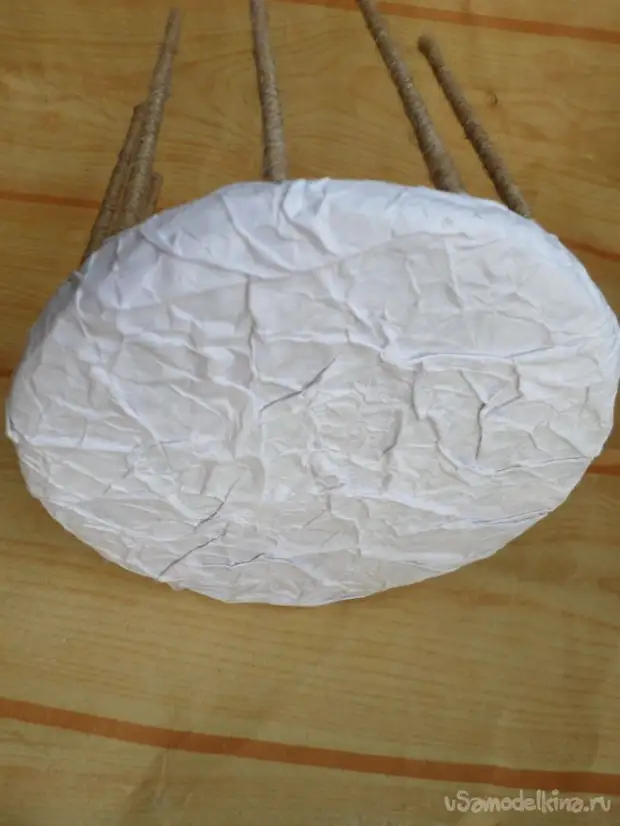
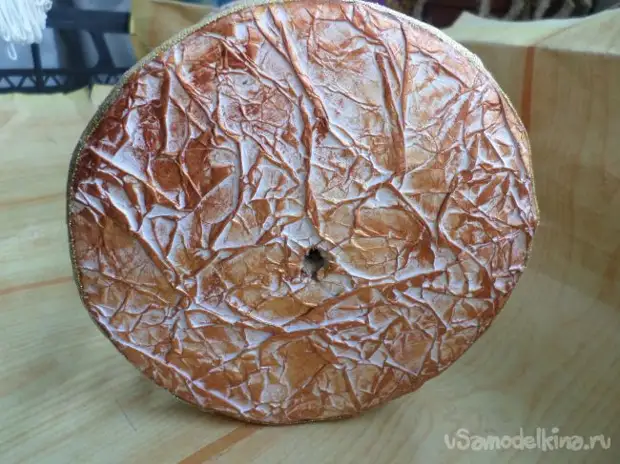
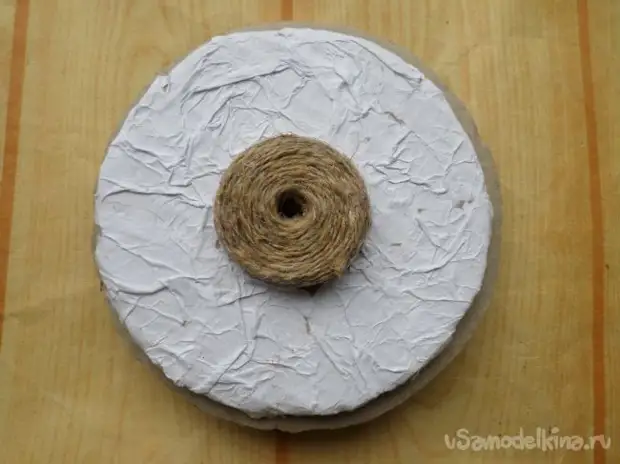
We take a white paper, ferment, we tear into pieces and take the bottom of the bottom, with the help of PVA glue, glue on the side and we get up for one and a half centimeters from above:

Step 5: Make Plot:
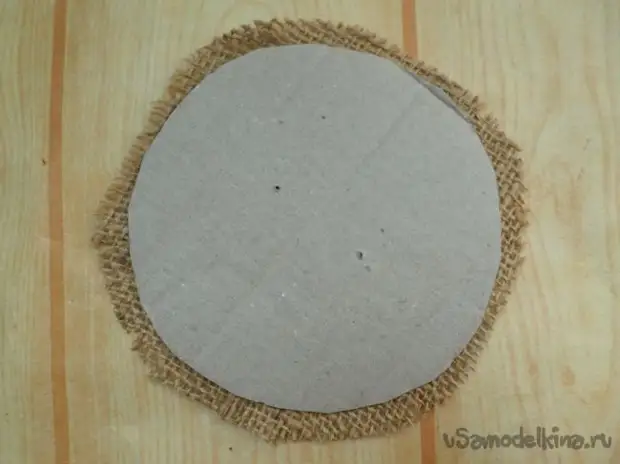
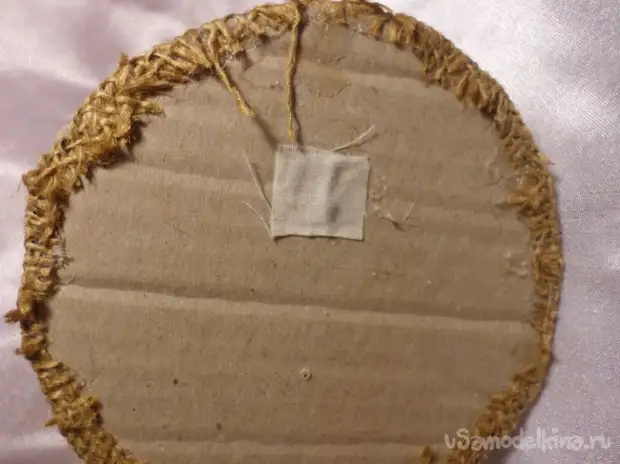
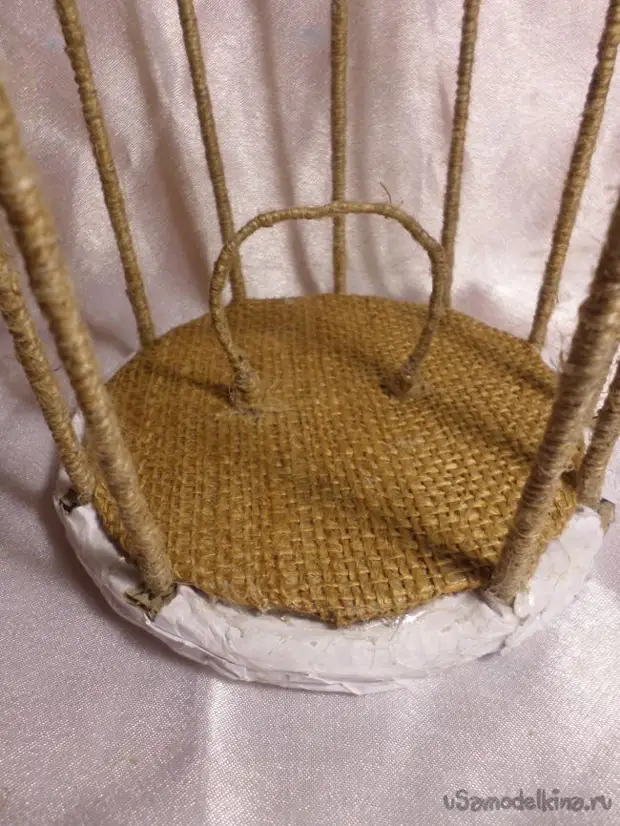
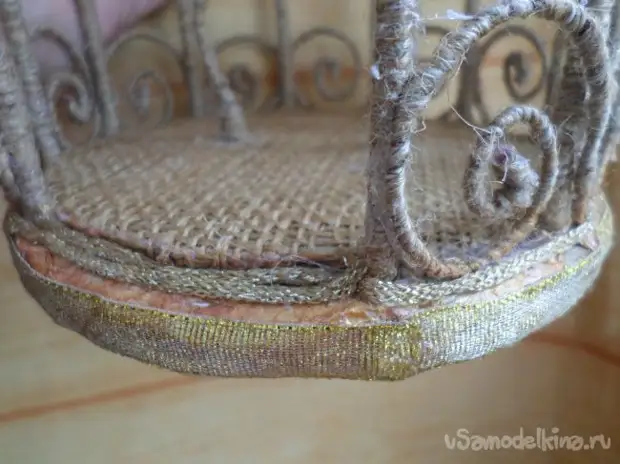
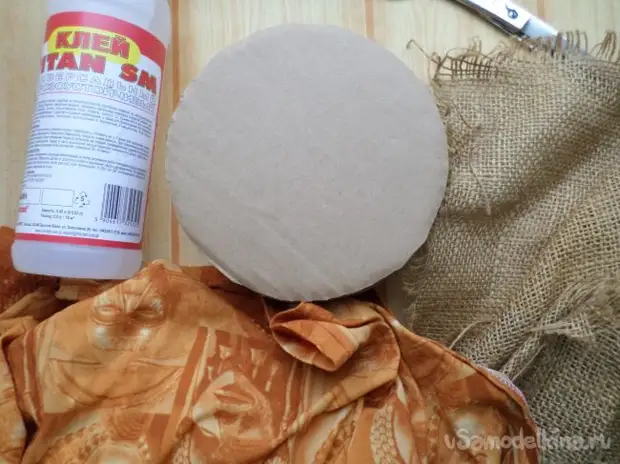
Cut the inner circle from the corrugated cardboard, the circle should freely enter into the cells. We plan two points on it:
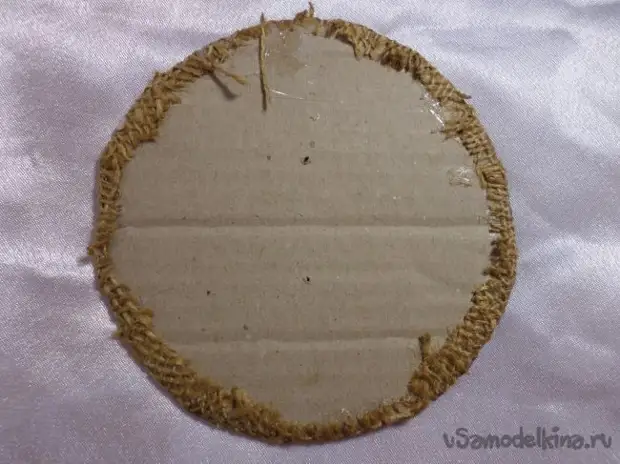
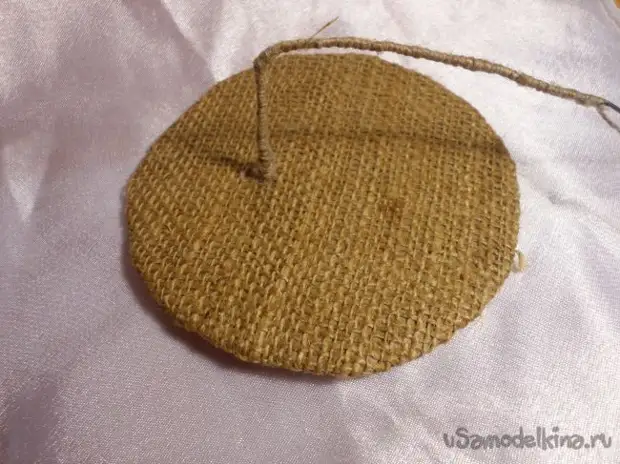
We apply glue "Titan", glit to the burlap, lay off one and a half or two centimeters for bending, excessively cut off:
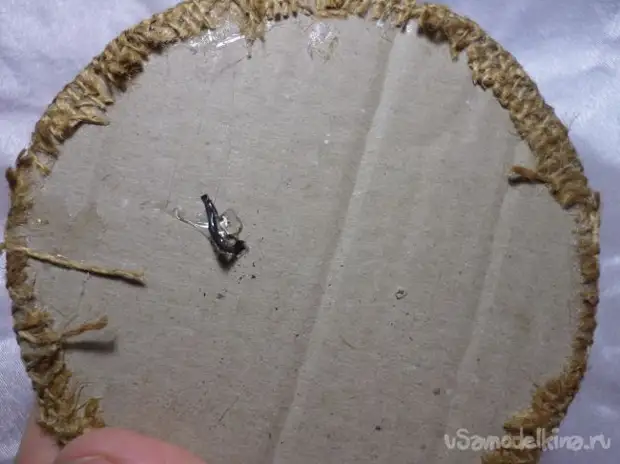
We admire the postponed burlap and make two holes for porching centers:
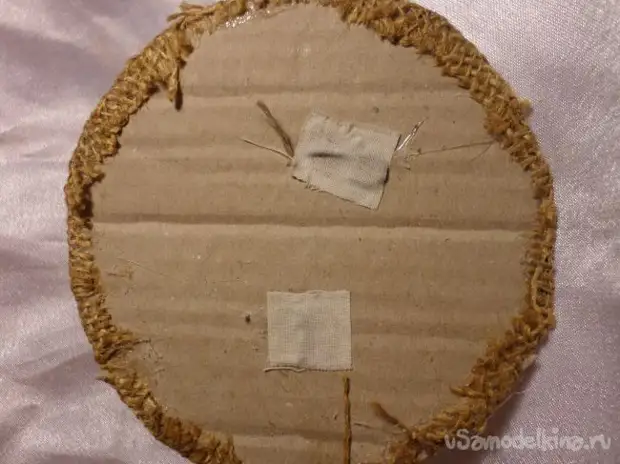
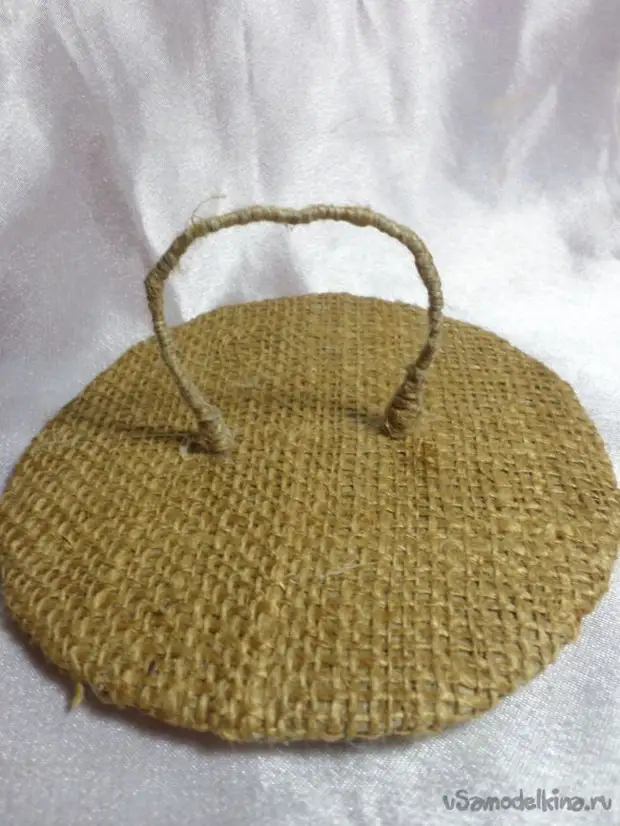
We glue a piece of wire into one of the holes, bend a little inside and we are lined, fix a piece of fabric:
The outer part of the wire is wrapped with twine fixing glue:
From the wrong side, we also bend, we liner and fix the cloth:
That should look from above:
Insert the circle of the thermo-gun inward the cells:
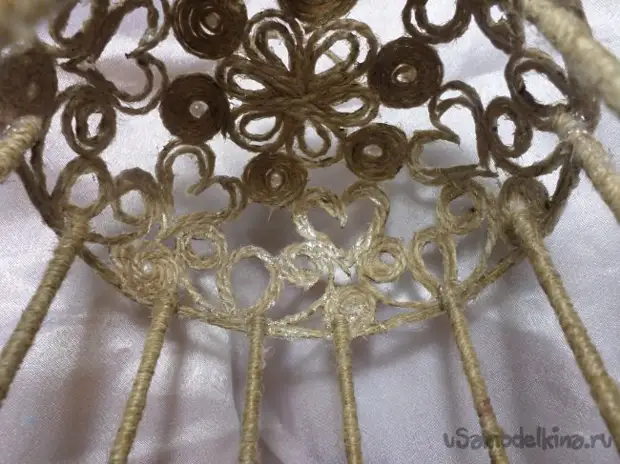
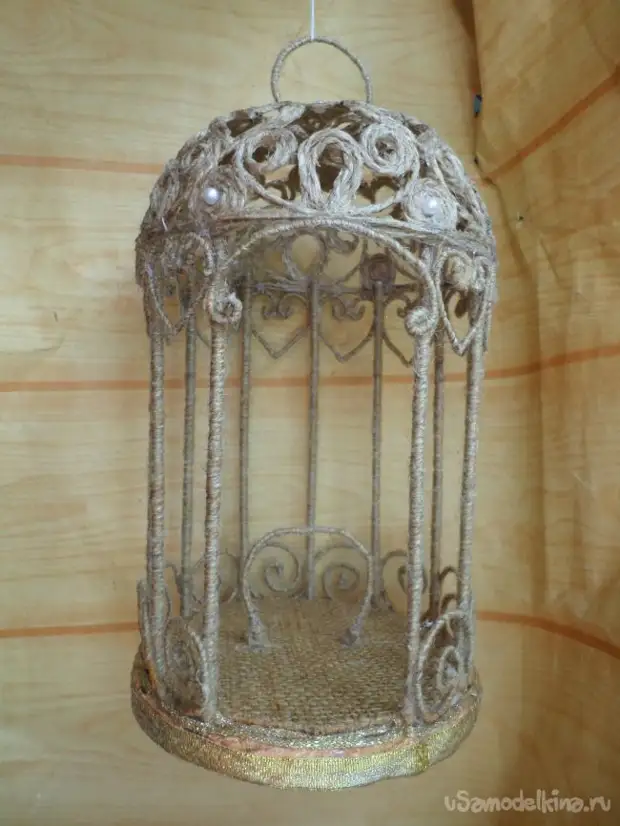
Step 6: Printed dome:
Gently with the thermo-gun glue the top, please note that the pattern above the entrance is located symmetrically. Stores must be twisted inward.

Step 7: decorate and stain a cell:
Cut off a piece of wire, wind by twine, fixing the thermo-glue, bending, and twisted the ends, as in the photo, we have a part over the entrance to the cell.
Cut off five longer pieces of wire (define the length individually, it depends on the distance between the racks and the size of the cell) and also be covered with twine. We begin as in the photo and glit to the bottom of the cell:
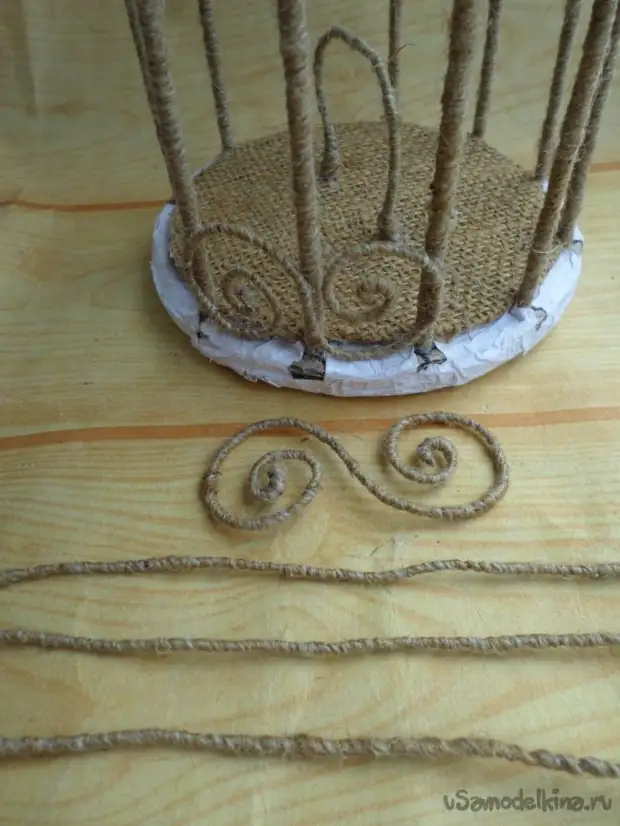

Then cut off for another ten pieces of wire and shut up with twine:
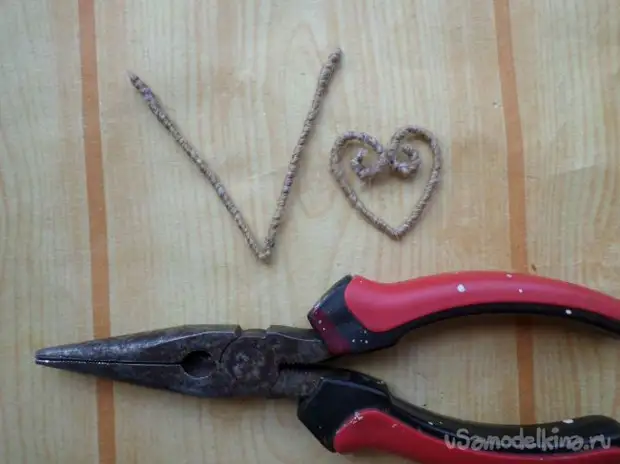
Bend in half and wrap the edges in the shape of a heart:
We glue the detail under the dome:
Dysyshko Krasim Golden and Bronze Metalik:
Frames are covered with a gold ribbon, the place of the junction of the wage and the bottom can be hidden by salave the golden cord:
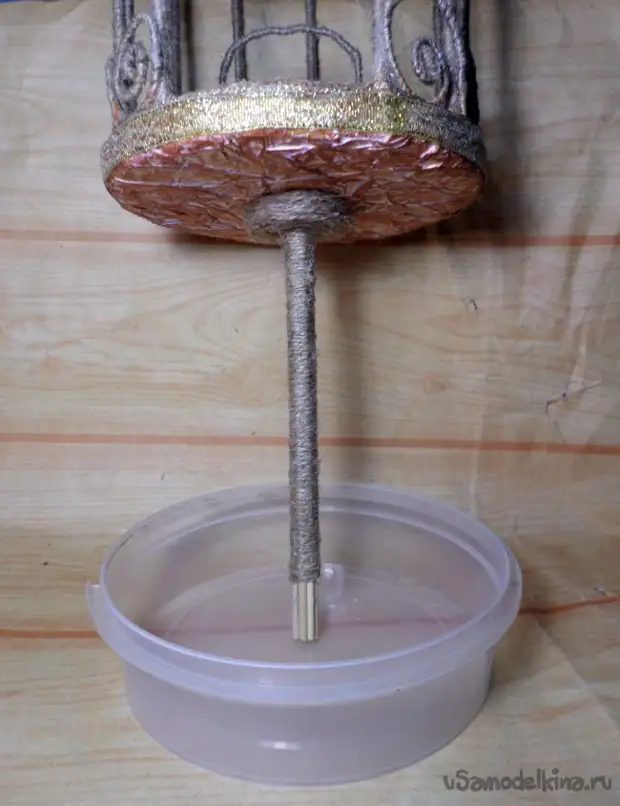
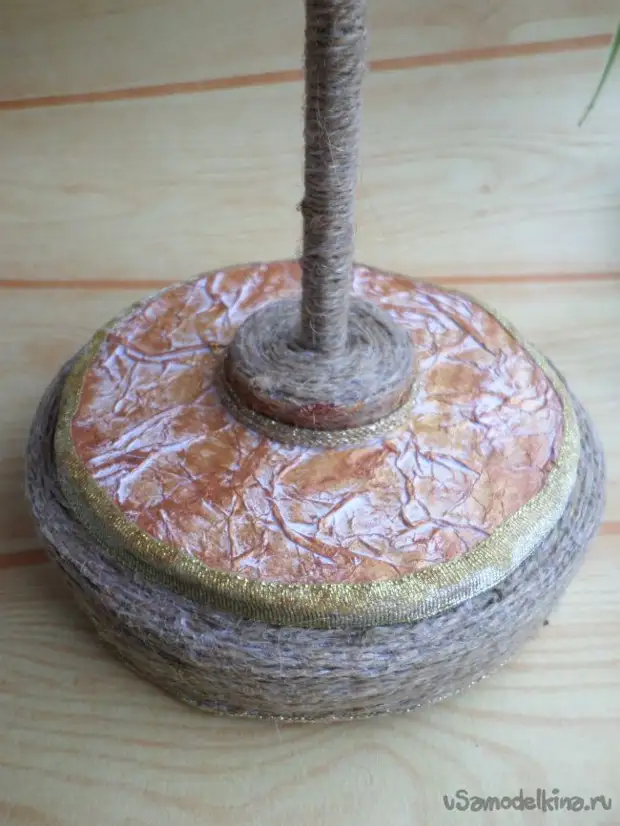
Step 8: We make a rack:
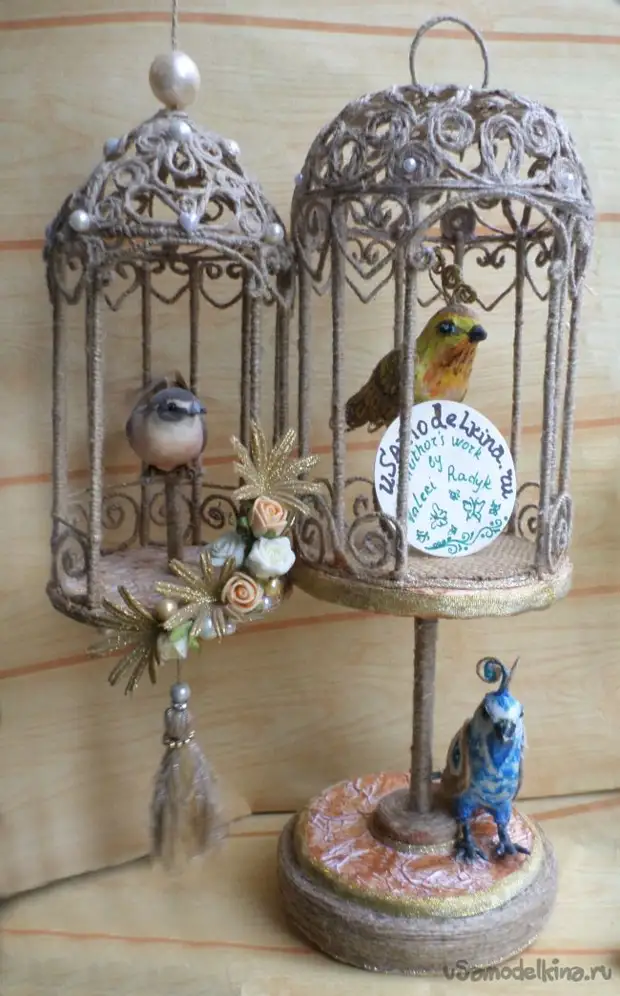
The cell itself is already fully ready and if you want to hang it, and not to put, then skip the next stage. For example, I will show another job that was initially done for a suspended state:
We take seven wooden spedes, cut them on the length of the length of us (I have 18 centimeters), which choose individually, wrapped with twine fixing glue. We make a hole in the bottom of the cage and glue the rack:
At the request, the bottom can be made of two small circles of corrugated cardboard, saving them with twine:
The bottom of the rack can be made in two ways: the first, it is easy to pour the plaster in the selected form, for example, this form:
I chose the second way:
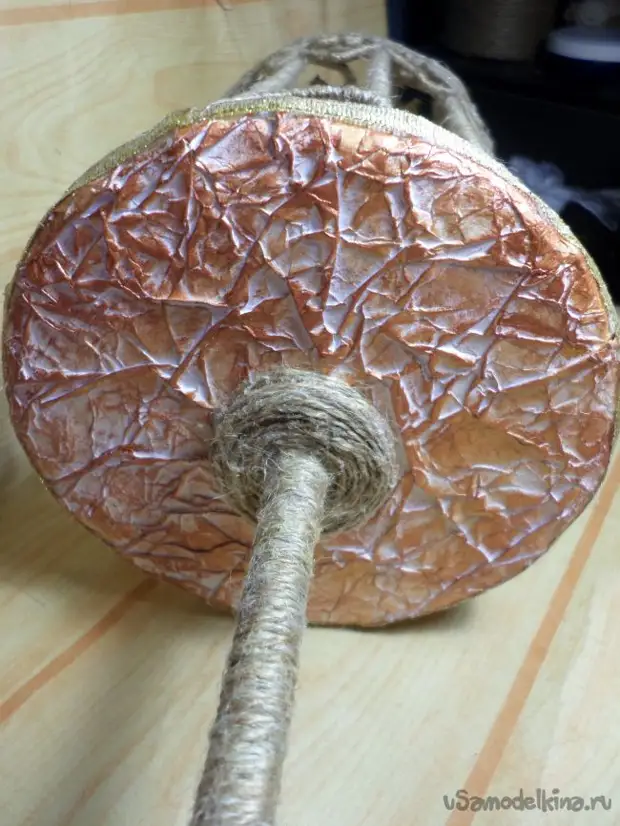
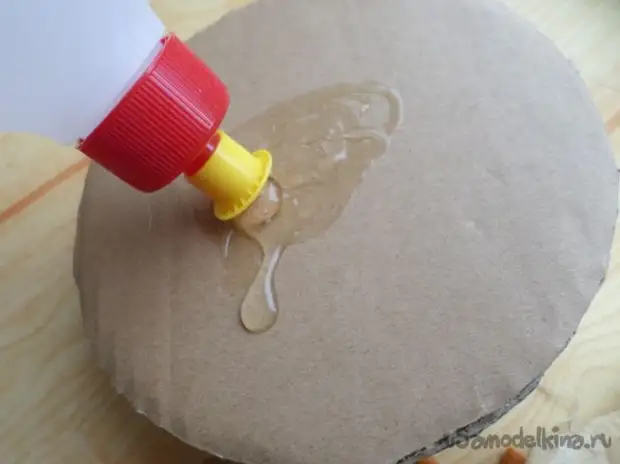
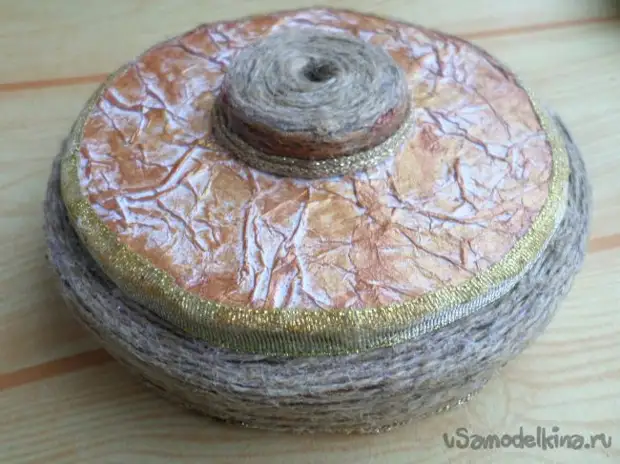
From the corrugated cardboard, cut out six or seven large circles, three smaller and two very small. We glue all the circles, except for one big together, in the center we do the hole, then we are lining the remaining large circle below.
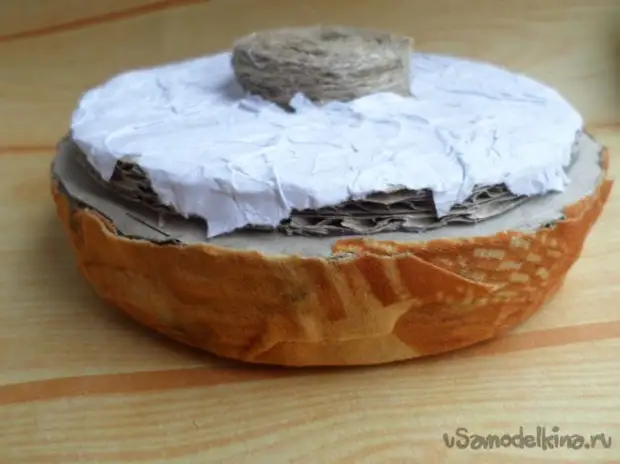
Fliminate white paper and look at the PVA part of the rack, and the upper small mugs are wrapped with twine:
The bottom of the railway can be saved by a burlap or other suitable fabric, it is better to choose a dark non-mark thin cloth:
Adhesive "Titan":
The same cloth can be saved on the side:
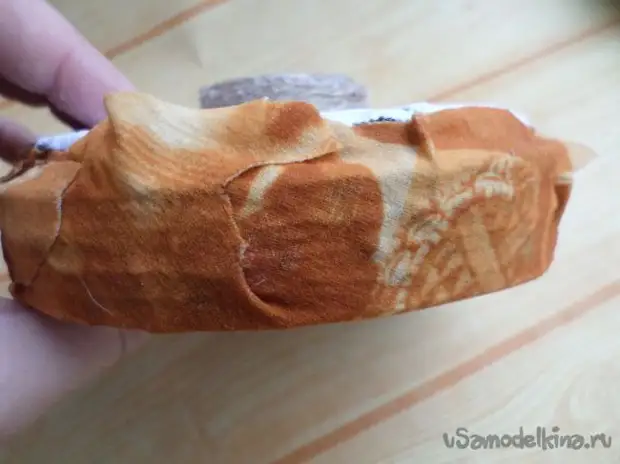
Cutting superior:
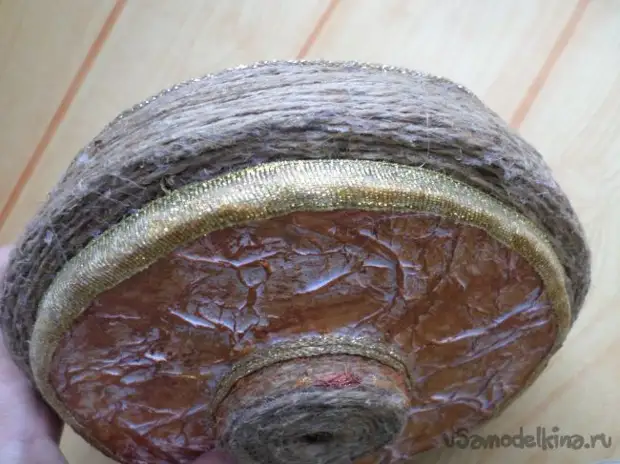
Top paint gold and copper acrylic:
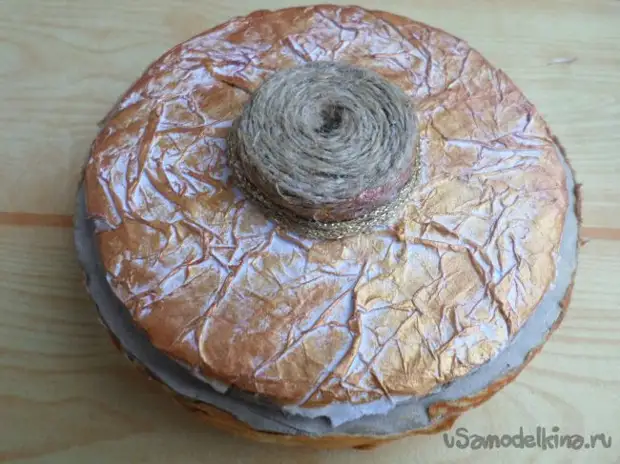
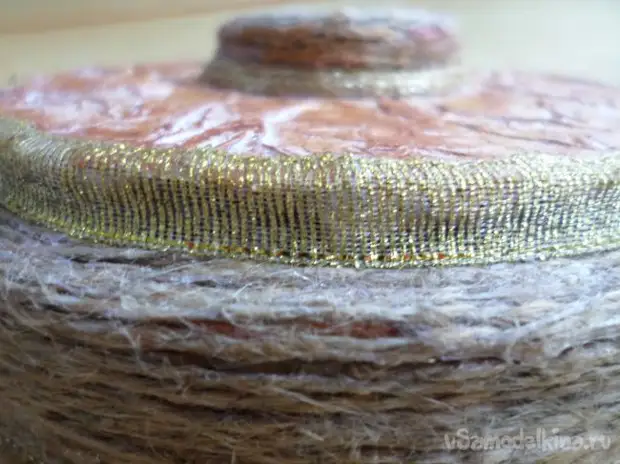
On the side of glue the gold ribbon, empty gaps and a side rush with twine, and the place of the joint and the lower edge of the golden cord:
Insert the top of the design:
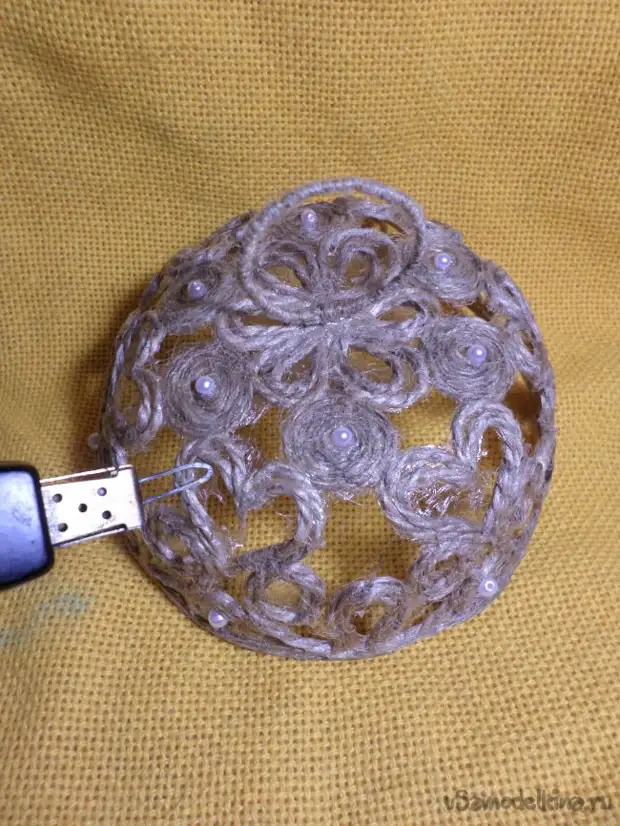
Step 9: Cover the operation of acrylic varnish:
I use construction glossy acrylic varnish for facade works, it will quickly dry and does not have a sharply unpleasant odor. It is necessary to cover the work of varnish almost completely, leaving not only the bottom and the inner part of the cells from burlap.
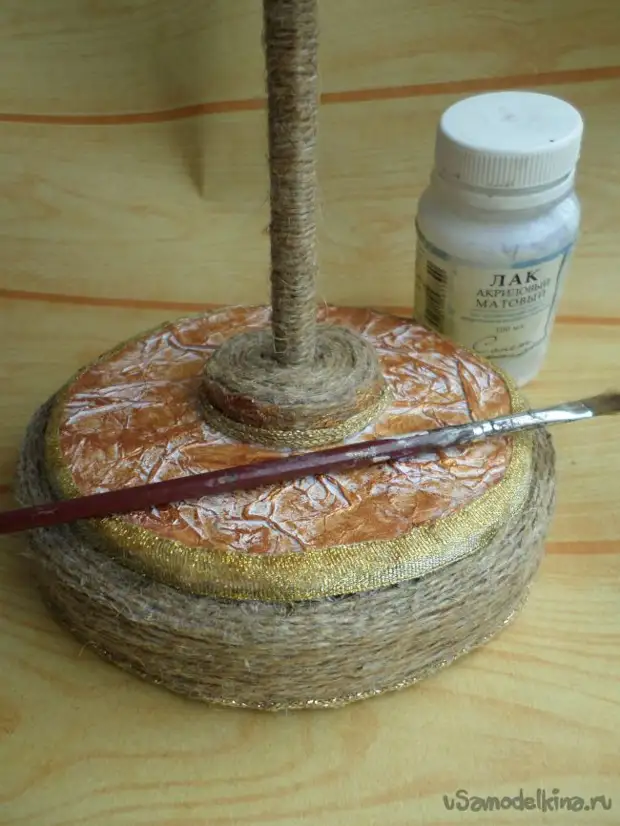
We are waiting for complete drying, work can be covered with varnish several times, with a complete drying of each previous layer.
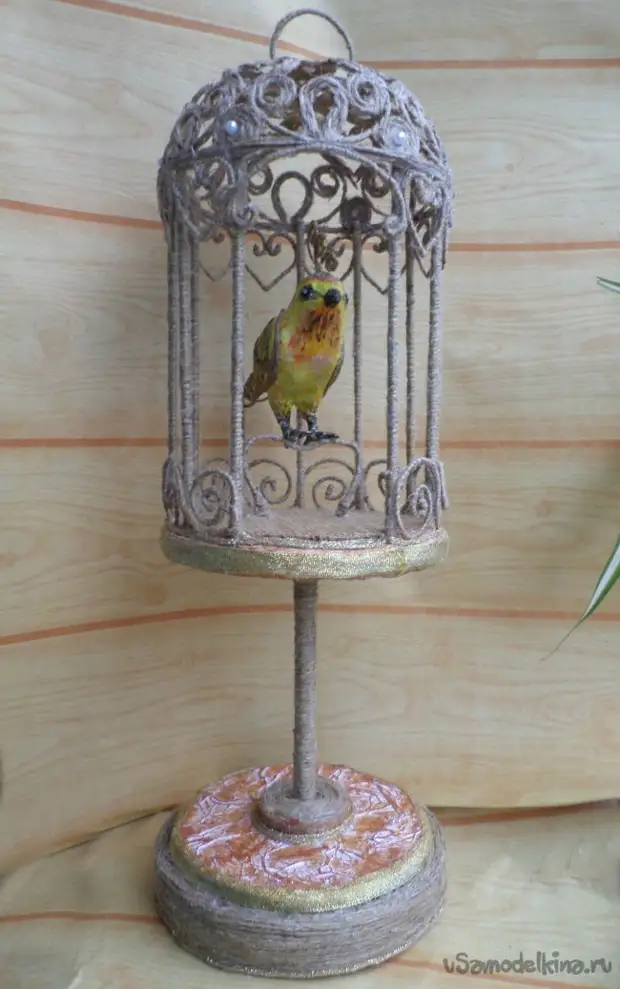
Cell is ready, you can leake artificial birds, decorate with decorative colors, leaves and beads.
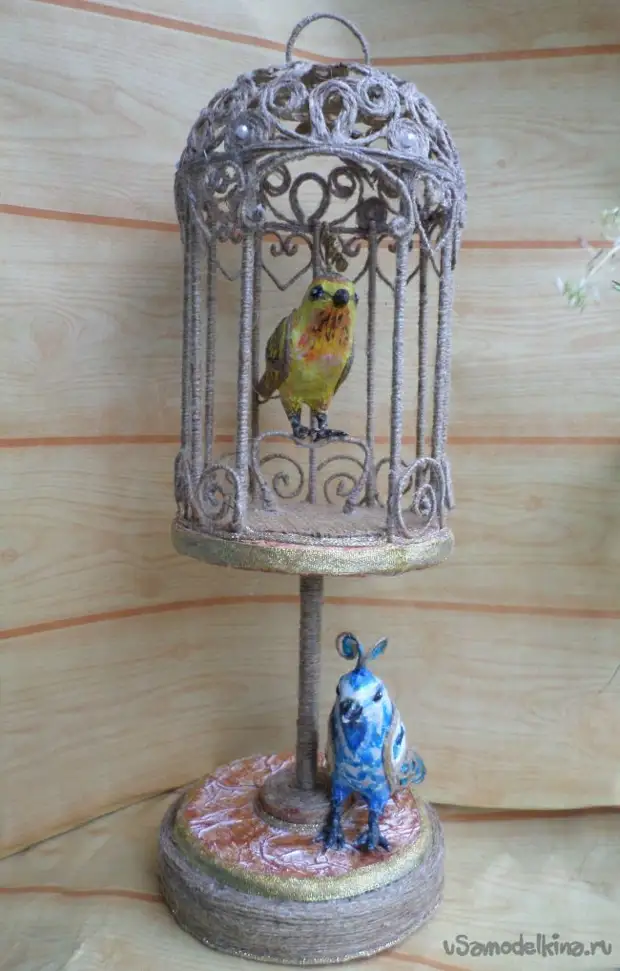
I wish you creative inspiration and fantasy flight, inspire and create!