
Such defects include manipulations with extracts. Since the construction of the base is based on the formulas of the average figure, the emergence of landing misunderstandings is not excluded. And this often leads to the despondency of self-taught patterns.
Routes in the field of
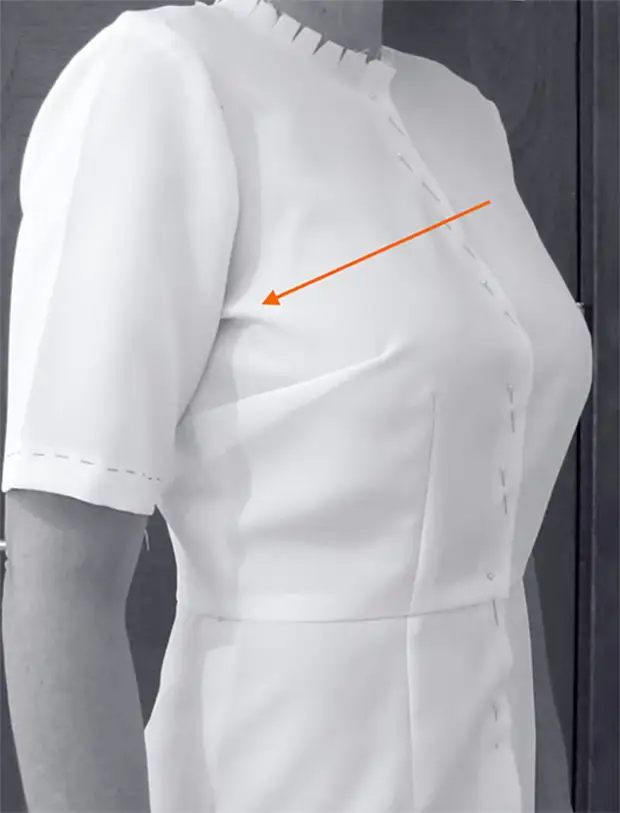
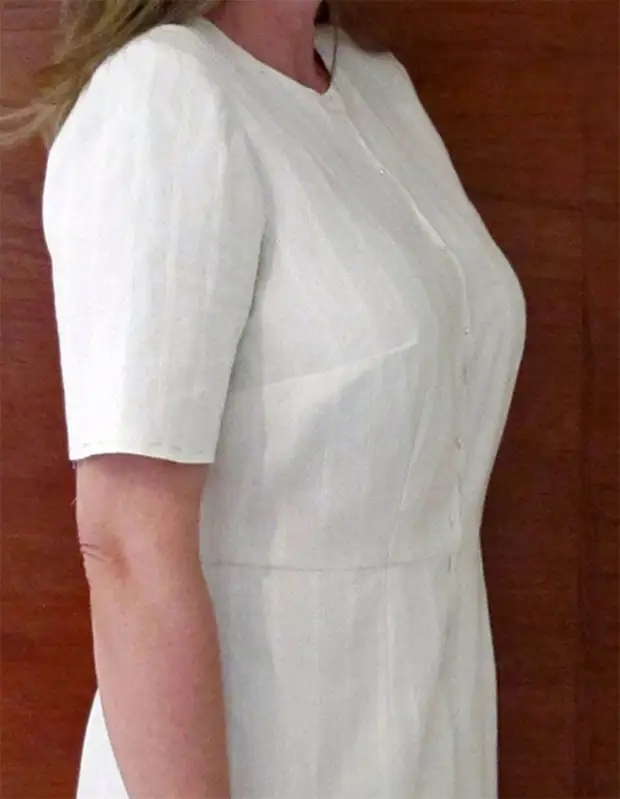
Such defects include chances in the area of the Prum. And in the absence of a sleeve - a loose fit of the armor to hand.
The reason for this defect is insufficient solution of ditch . It is clear that the depth of the outlet is laid in the drawing. For this reason, it is not always possible to correctly correct the defect in the already burnt product. Consider the impact of the impact of the defect in the artem, consider below.
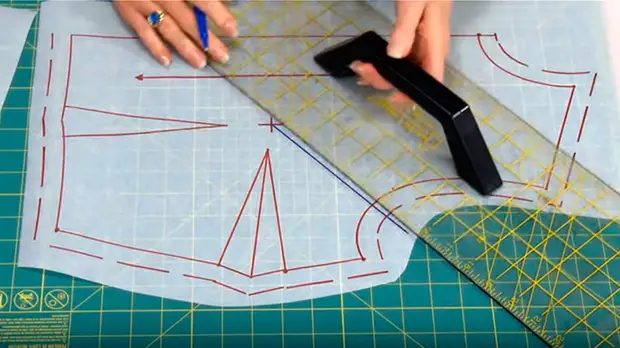
And now, it is important for us to change the shelf's drawing. Maybe with the help of the adjusted pattern, we will be able to block the product. It would be the perfect option.
How to change the extractive solution
To change the extract solution, in this case, increase, you need to carry out the following manipulations.
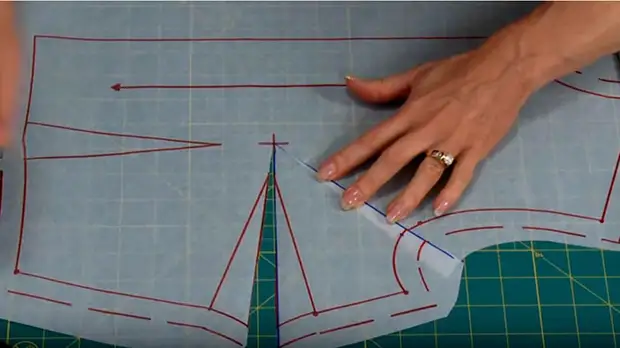
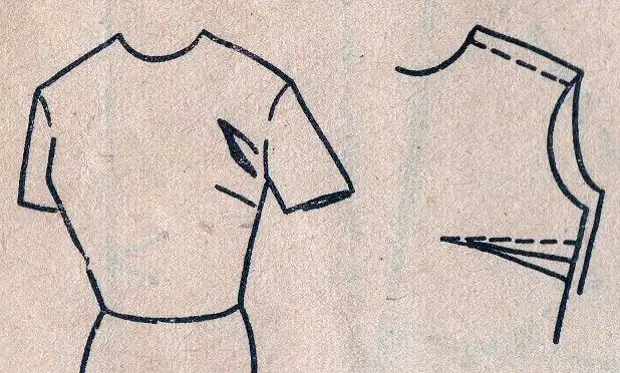
1. On the drawing of the pattern of the shelf to apply a line from the armor where there was a hall, to the highest point of the chest
2. Extend the middle line of breast paddock to the center of the chest
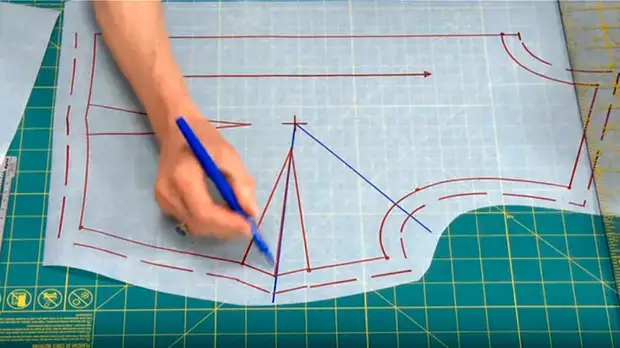
3. Note, as shown in the figure, the depth of the hall at the premium, then the cut on the outlet will reveal. This will be an additional, missing solution.

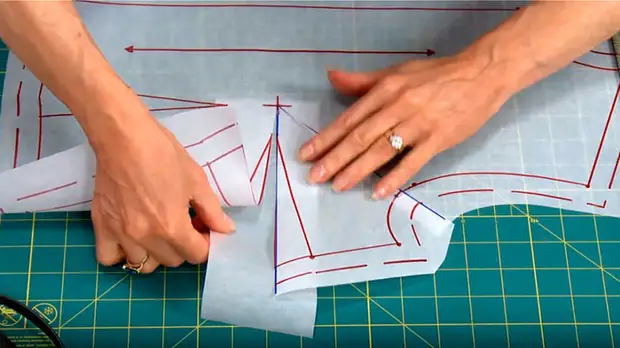
4. Cut the pattern on the previously scheduled lines do not renew to the highest point of the breast several millimeters.
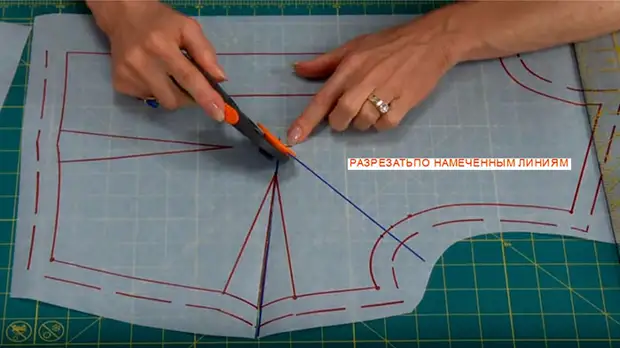
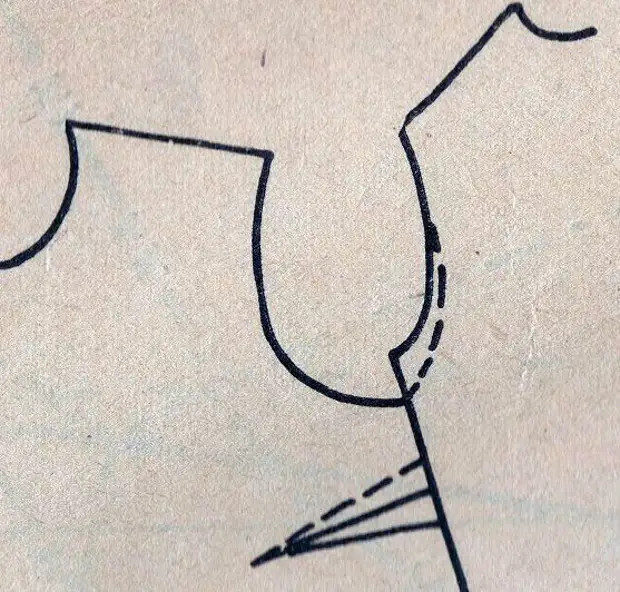
5. Close Outtage at the Proucy
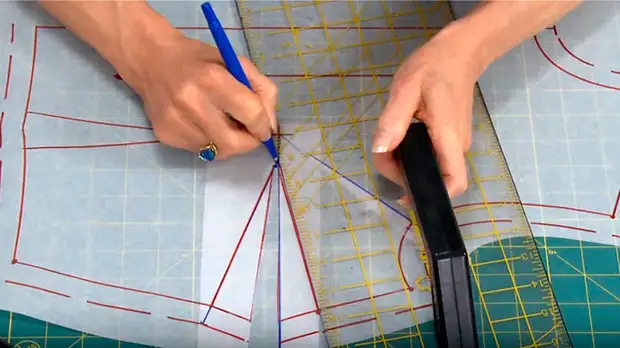
6. Under the chest extract to put and put the extra sheet of paper.
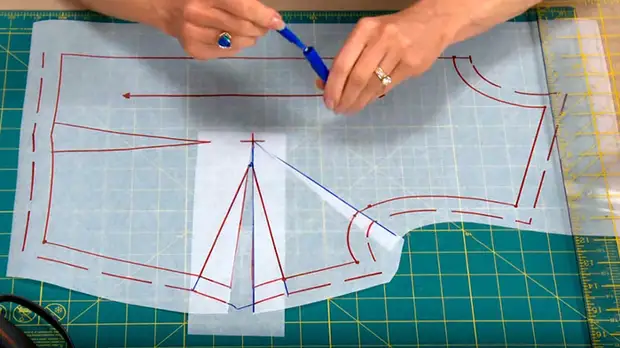
7. Straighten the new latching solution
8. Pattern ready. Now you need to translate the pattern on the traction and block the shelf
With the correct execution of operation, the hall must disappear
The dress is saved.
No matter how you work above the perfect pattern, planting the product is very dependent on the material from which you sew. Work on increasing the molding on your basic pattern should be done if you feel that the ladder is still small for you. However, there are emerging ambulances.
Other options to make a deeper deeper
What needs to be done when the defect is seen in the ready-made product ...
Provided that the bodice is not narrow and the prumma is not large Repair
- Proucy armchair under the sleeve
- side seams slightly below the chest.
- lay a deeper outtage.
The excess excessions on the armor are inserted (cut), and the spacing of the sleeve is cut into the armor again.
If Prumum is deep enough and freely fits the hand T.
- Split side seam;
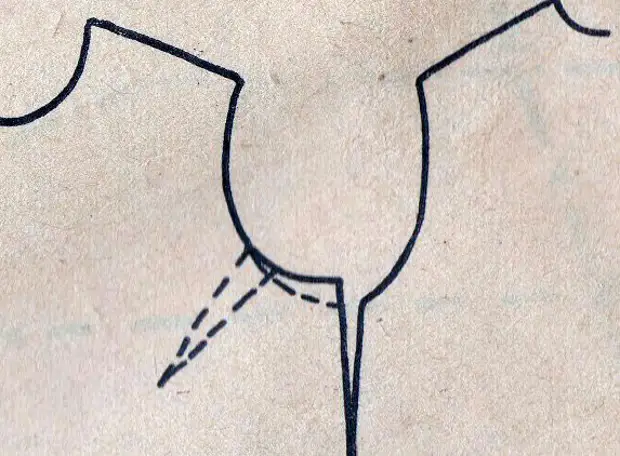
- Will spawn on the chest:
- Sewing the outlet in the new direction - from the armor to the highest point of the chest;
- Surplus the length of the side seam to cut down.
Alternatively and out of position, the wrapper from the armible may be additional
Enjoy your impressions from the crosslot dress!

Let it be correctly selected accessories will give a dress exquisite, and you have a great mood! Successes in Sewing!