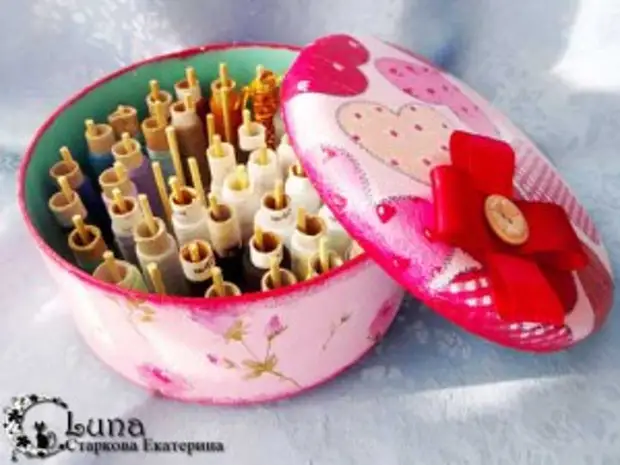
So that the threads are not confused and were always at hand, it is useful to make a box for threads. Our box is made in the technique of decoupage.
To do this, you will need materials and tools:
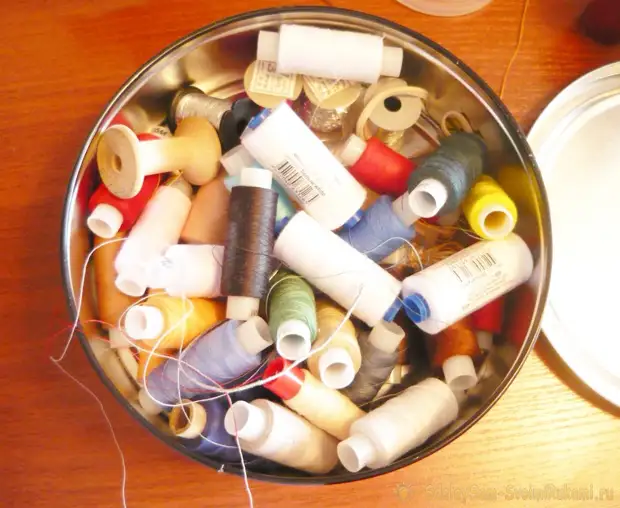
- Tin or plastic box
- Wooden spanks
- Soil for decoupage or white acrylic paint
- Acrylic Crane Color Paint
- Red satin ribbon
- Beige buttons
- three-layer napkin with a suitable pattern
- PVA glue
- varnish for decoupage
- sponge or slice of sponge
- Brush
- file
- Small sandpaper
- Maketonian knife
- scissors
- Vata.
- alcohol
Completing of the work
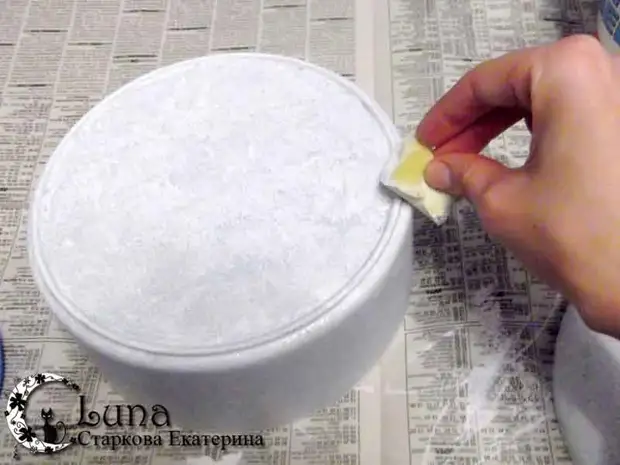
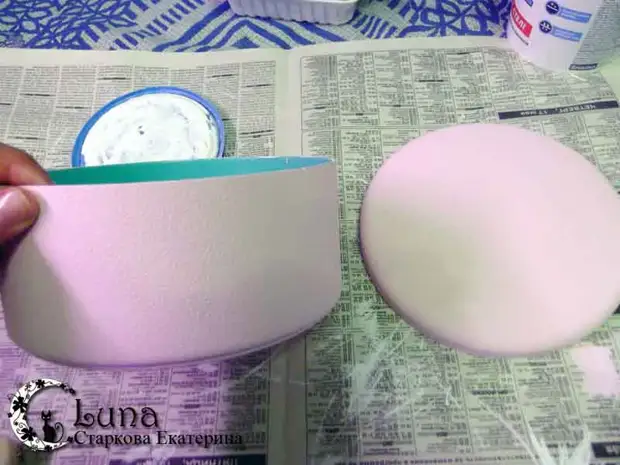
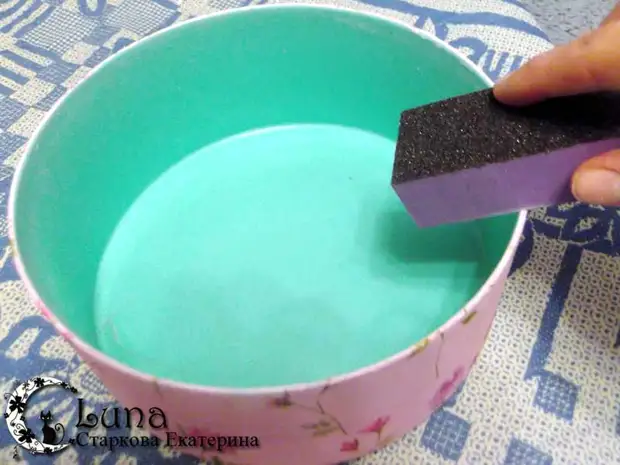
Dimel your box and thoroughly wipe your box and cover from it from all sides to degrease the surface. Next, with a special sponge, either a piece of sponge apply to the outer side of the box and the covers of the ground for decoupage or white acrylic paint. If you are planning to paint and the inner side of the box, then do it when the paint on the outside will dry. But I decided the box inside not to paint.
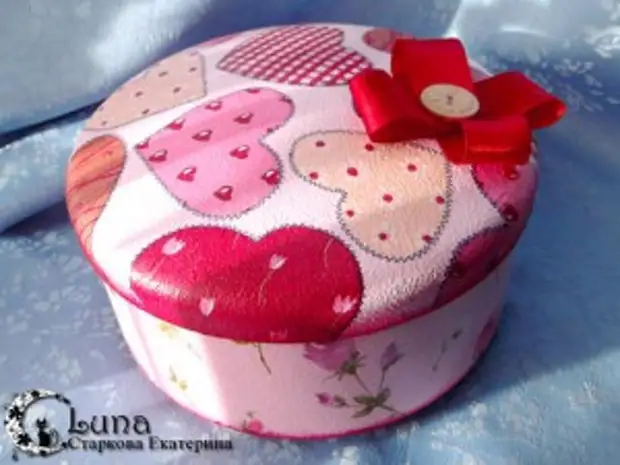
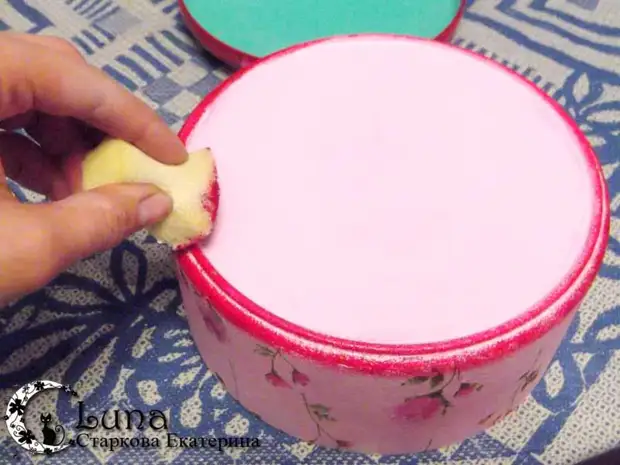
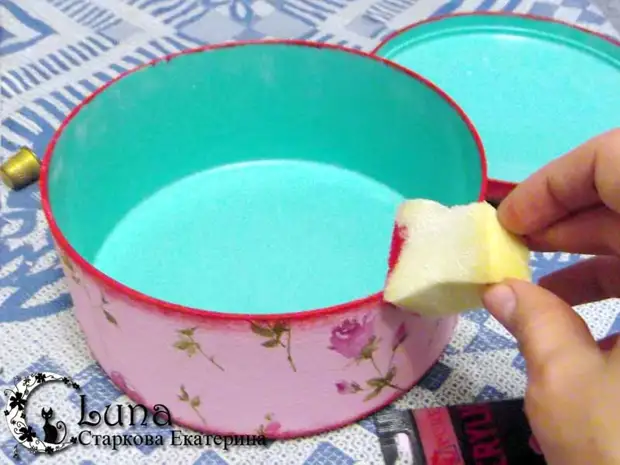
The second stage of the color can be skipped if you stick the whole napkin, and not separate pieces. But, as I will cut out of my heart cloth and stick them on the cover, like individual items, I kept the lid itself painted paint light pink (mixed white paint with a small amount of red). So how paint remained, I painted it and the box Because her sides I will decorate the napkin too pink.
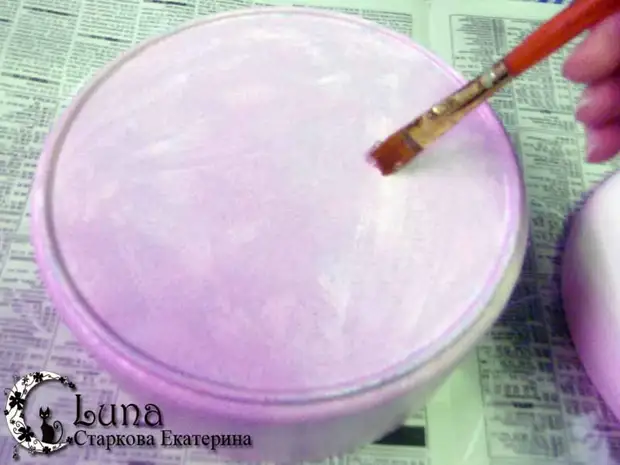
When the paint on the lid and on the box itself will dry out, cover it with varnish for decoupage. Due to the lacquer, the surface will become smoother, so the napkins during the decoupage will be easier to ram.
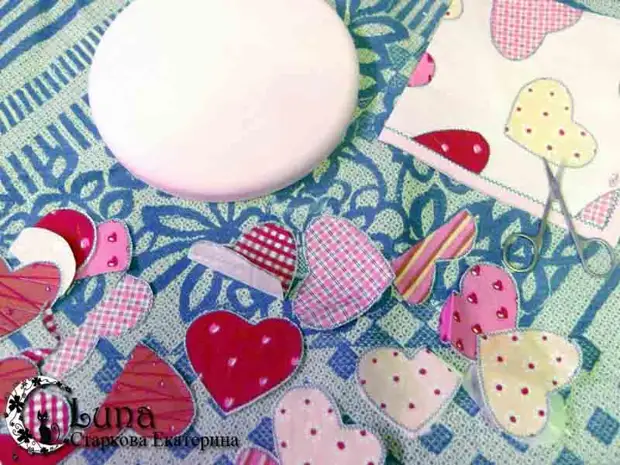
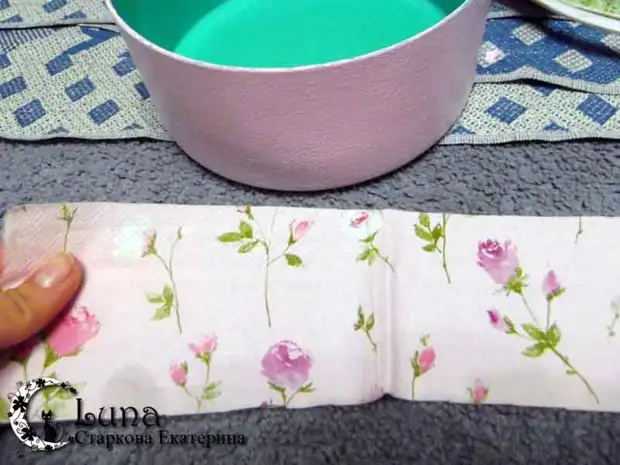
While lacquer dries, you can prepare a napkin. Remove the bottom two layers from the napkin and separate the part from it with the pattern, which you will stick onto the lid. I cut hearts from my napkin with scissors.
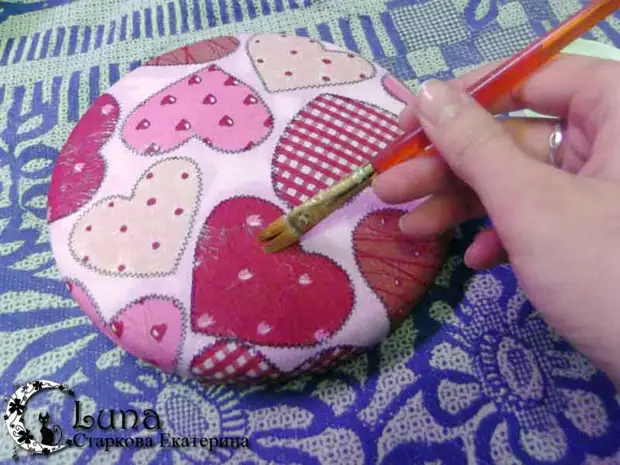
Divide PVA glue with water in 1K1 proportions. Attach the prepared part of the napkin on the lid and taste the glue diluted with water, while trying to the tassel quickly, but carefully, smooth out all the formed folds.
For decoupage side of the box, cut the napkin on the strips of the same width as the wall width of the box.
Print large napkins more difficult than small pieces, and to facilitate this process, I suggest using the so-called file method. To do this, place the file to the tray, and put the napkin on the front side down (!). Abundantly spray the napkin with a spray with a sprayer or just paint the cup. It is necessary that the napkin literally swam in the water. And now carefully dissolve it so that there is no folding on it.
Raise the file with a napkin and drain all the water from it. Now very carefully attach a napkin to the wall of the box so that the file is from above.
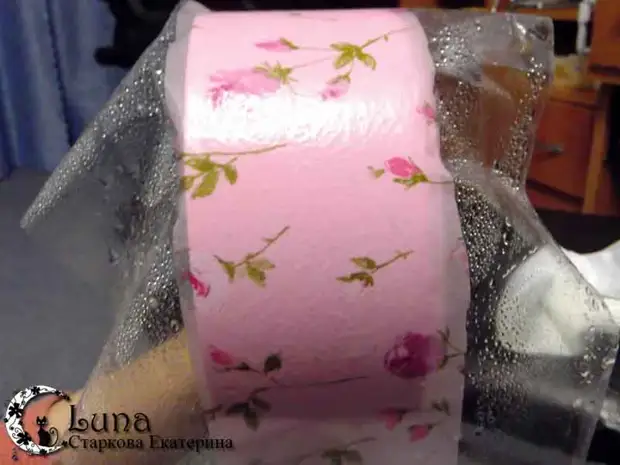
Next, smooth the file from above with a cloth and then carefully remove it so that the napkin remains on the box surface. Similarly, glue the second napkin strip to the remaining non-stuck side of the box. You can stick to the napkin and on the bottom, but I decided that it would be good without it. So that the napkins are well glued, we immediately bring dilute glue on their surface and leave to dry.
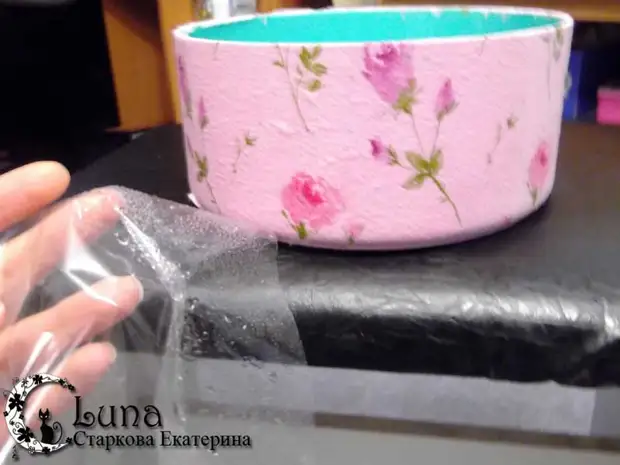
When the box is completely dry, treat its edges with fine-grained emery paper to remove excess wipes that can go beyond the limits of the edges of the box.
We sponut apply the acrylic paint of red on the edge of the bottom of the box tapping movements.
Similarly, apply paint to the top edge of the box and on the edge of its covers.
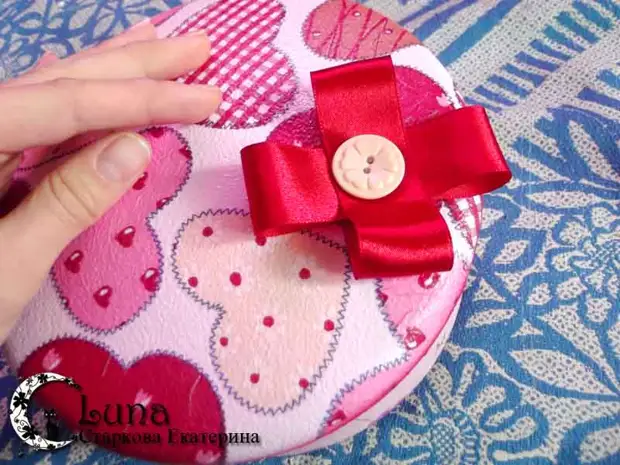
The lid can be decorated with a bow of red satin ribbon and glue a button on top. It is best to use for gluing the decor of a glue gun.
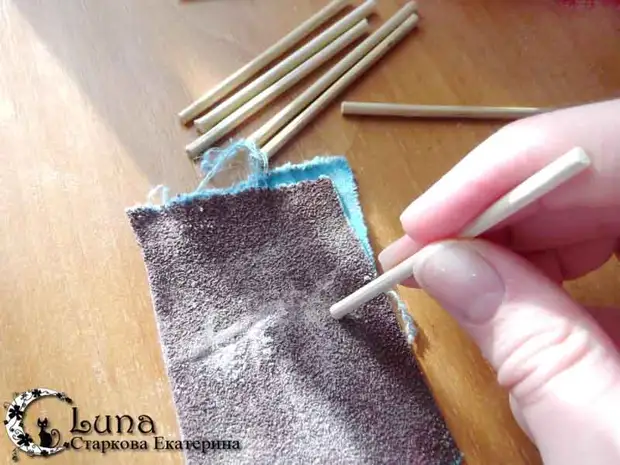
Take the wooden pots with a thickness of 5mm and cut them into segments, the length of which should be the same as the height of your jar or half a hundred-meter. For cutting, you can use a maquet knife (I cut the sticks and then laid out in this place with your hands). The edges of the segments are slightly ground using sandpaper.
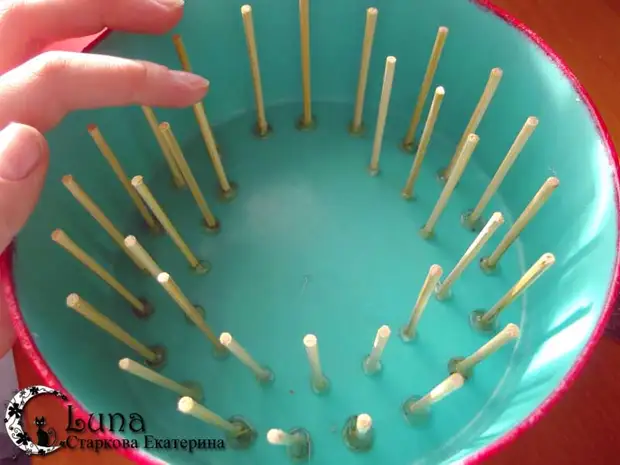
Now all these segments need to be glued to the bottom of the box. To do this, apply for one end of the stick a large amount of glue from the adhesive gun and immediately depitted a wand to the bottom of the box. Place all sticks at the same distance from each other (approximately 2 cm.). It is important to glue sticks with a large amount of glue, then they will be securely secured and will be firmly held in their places.
That's all, a box for threads Hand Made is ready!