
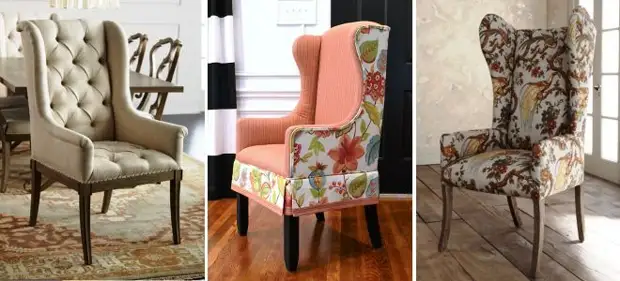
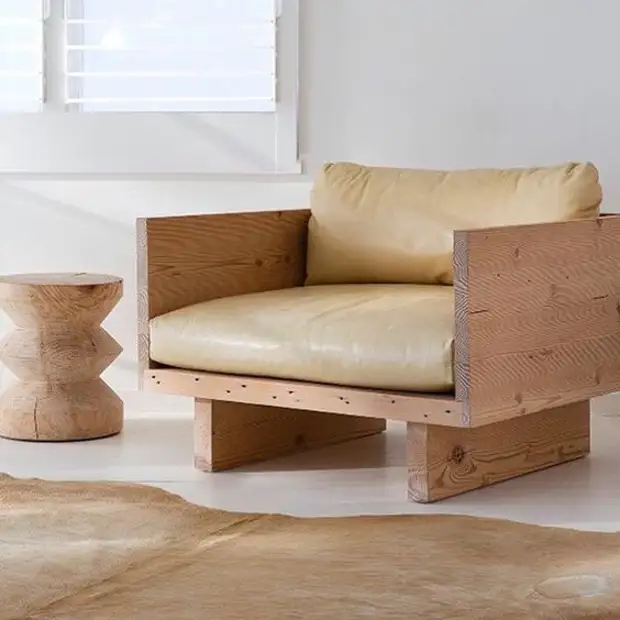
In this article, consider the topic of manufacturing classical furniture of almost all apartments and houses - with your own hands. This chair from the wood array with armrests will not be bulky and the best use of such a product is canteens. According to this instruction, it can be done at home.
The manufacture of the chair will take place in several stages. All of them will be presented below and you can easily make it in a few evenings in the presence of tools and materials, because all the schemes will be presented below. The finished drawings in this article will not be, since everything is done from the primary means: from the boards, bars of plywood, which is in stock.
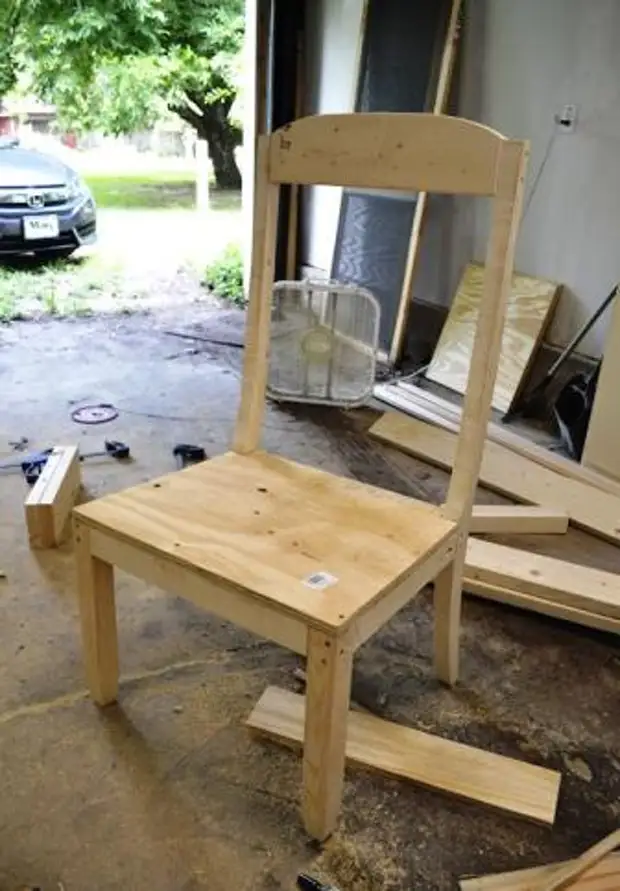
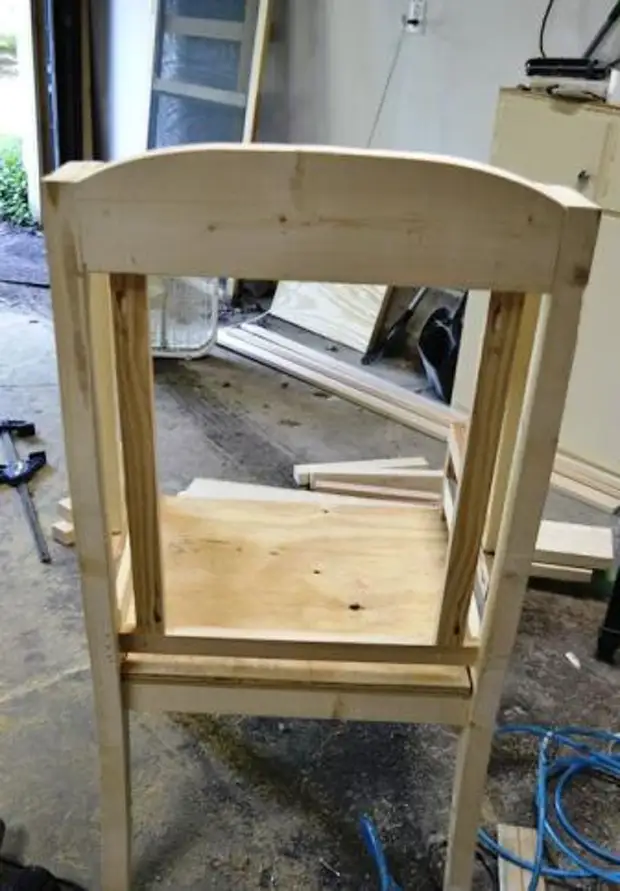
Frame
Let's call this stage - the skeleton frame.
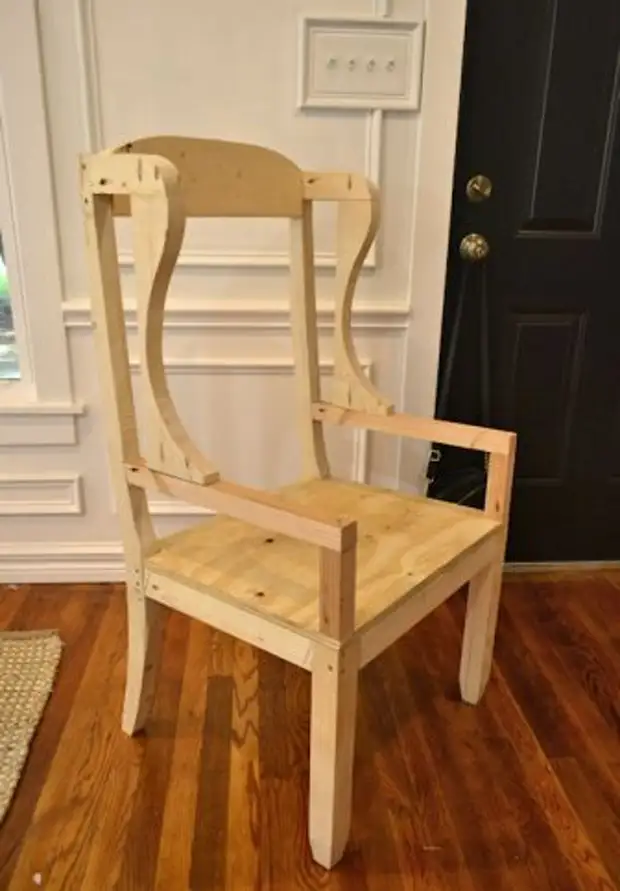
Of course, almost the entire skeleton will be covered with foam rubber, cloth. Only part of the legs will be visible.
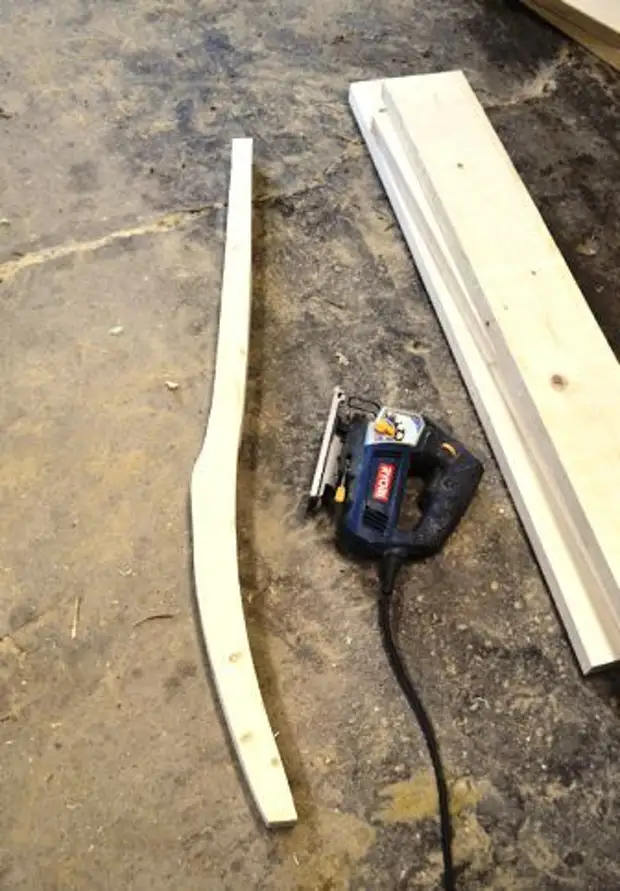
The rear legs are the most important parts of the tree chair, because it is necessary to make them at some angle.
Without thinking for a long time, for the manufacture of the back of the chair's design, we took the usual dining chair, which was available, although he was without a seat. But he went well for the role of the template. You can take some old grandmother's chair.
On the board 50x150 made marking.
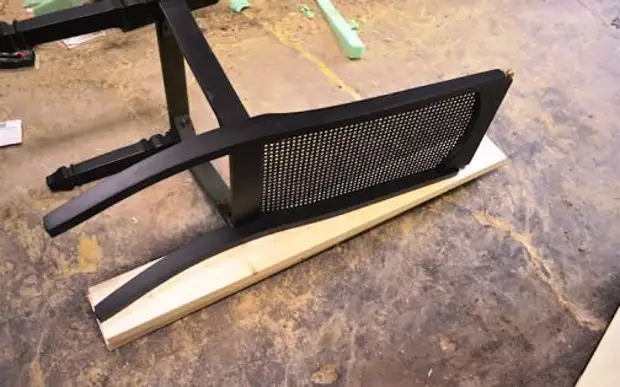
Be sure to make the level of the seat of the seat of the seat, make it the same as at the stool. In this case it was about 410 mm from the floor.
To cut the legs of the homemade fireplace armchair, use the electrolovka.
Then we used the finished part as a template to make three more legs, because we are doing two chairs at once with your own hands from girlfriend.
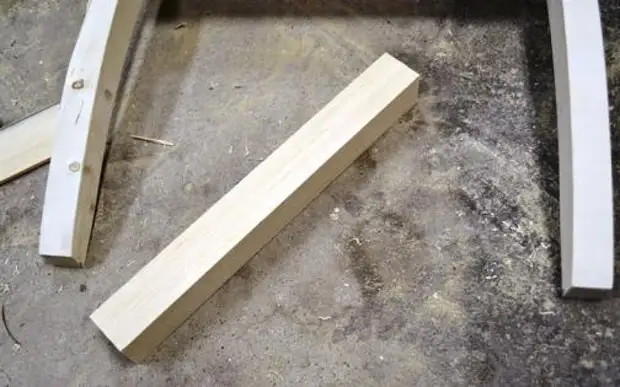
The front legs will be straight and square sections - 55 × 55 mm. To obtain such a section, you can glue the boards between themselves, and then sculpt them to the required size. We glued 2 pairs of 2 boards width 120 and a thickness of 30 mm.
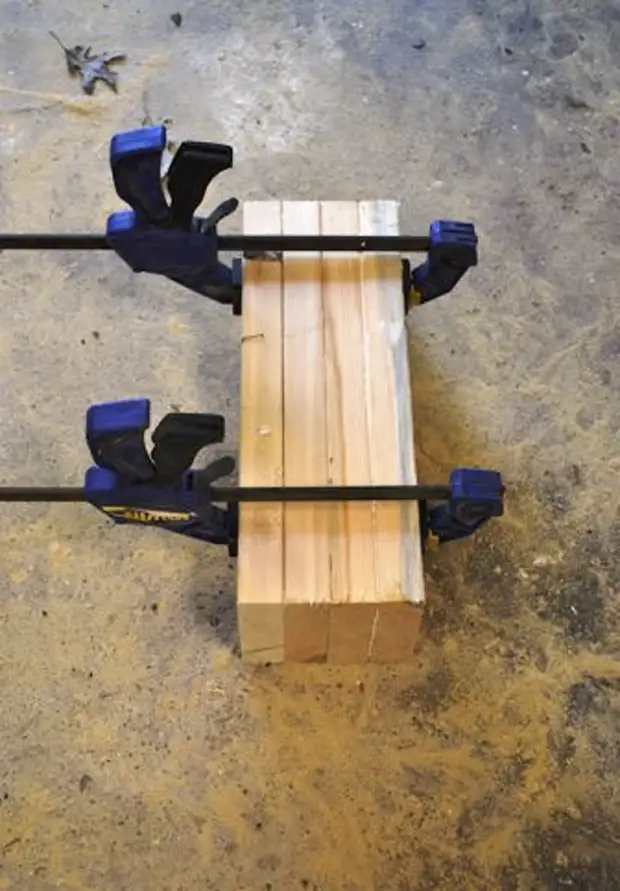
Between 2 and 3 there is no glue
Note. The chair having a solid design is called a frame chair.
While the front legs are dried, we finished assembling the backrest frame - made the top part, in which the upper part has a slight rounding. Then they made the rear crossbar of the seat support.
It will be interesting for you: do it yourself the father-in-law - a multifunctional small subject of the interior
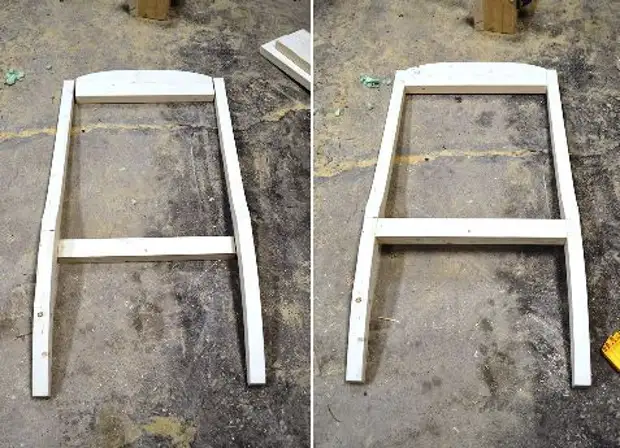
Assembled all parts of the back using a 60 mm self-tapping screw. Before screwing the screws, you need to apply joinery for all connections, drill mounting holes.
The mounting holes are also called with auxiliary or guides. They are necessarily drilled so that the self-tapping screws do not go to the side and that the billet does not give a crack. The diameter of this opening is approximately equal to the diameter of the self-press, screw.
We continue to make our wood chair with their own hands. Billets for the front legs glued together and dried. I will describe them to the required size of 55 × 55 mm.
Put them on the design of the back and check the length of the legs and whether they lie on the same surface so that the chair does not fall when used. If different lengths, align them.
The ends of the front legs need to be pressed. To do this, make small sites from all four sides.
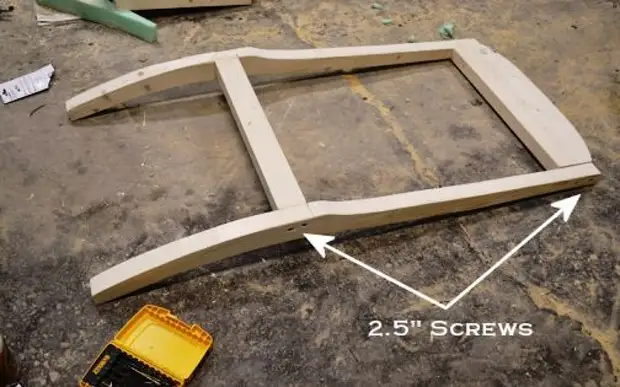
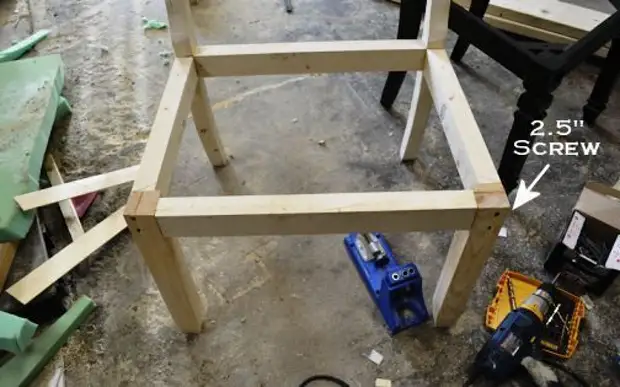
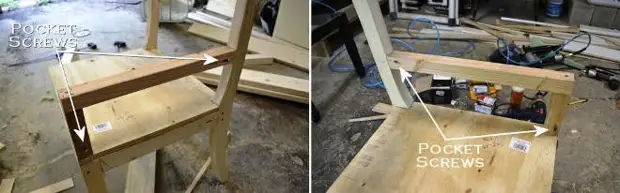
Make side crossbars with a length of 400 mm and secure them as shown in the figure below. For better fixation, it is desirable to use screwing screws at an angle, pre-manufacture auxiliary holes.
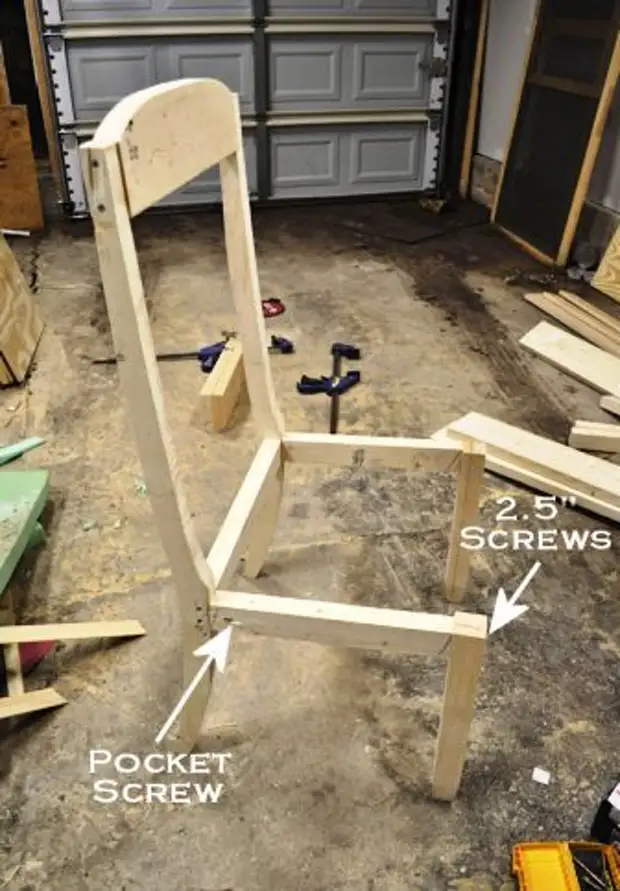
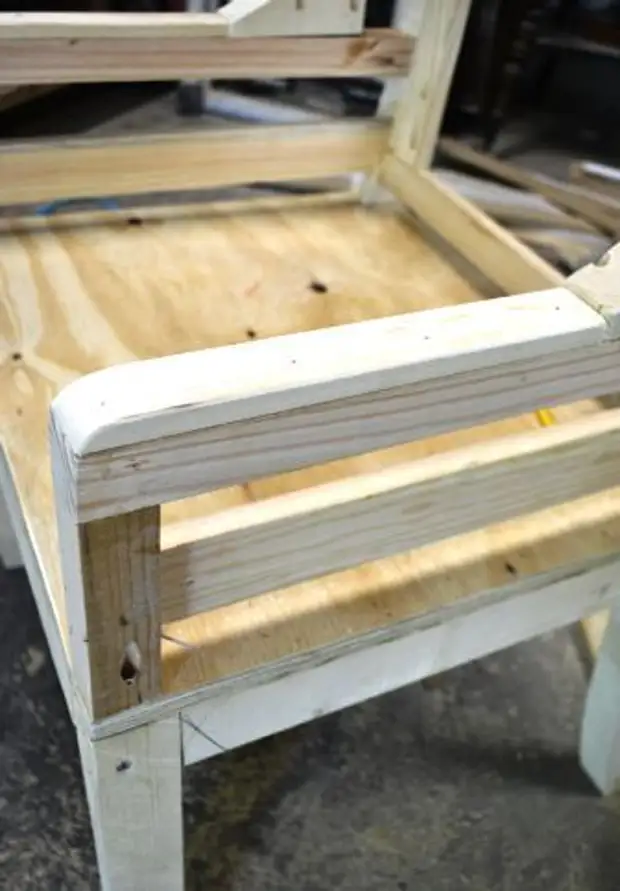
Install the front seat of the seat support. It is the same length as the rear crossbar.
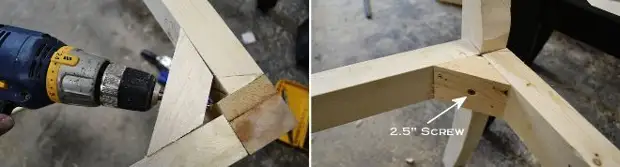
In order for the English chair with the ears strong, we prepared four details, the ends of which were cut at an angle of 45 degrees. We glued and secured them with self-draws in the corners of the frame.
Then they dug a piece of plywood under the size of the seat. Plywood thickness 18 mm. They secured them with self-draws, applying the glue.
If you want to make the seat softer, then instead of plywood you need to use furniture textile tapes. We will use such tapes in the manufacture of the back.
The chair must be with armrests, otherwise it will be a chair. Consider the stages of their manufacture.
The front rack and crossbind of the armrest must be installed at right angles. The height of the armrest is determined by itself, it will be equal to 200-300 mm. Section of square bars - 50 × 50 mm.You will be interested in: what furniture can be made from pallets
Secure them with self-draws by screwing them at an angle.
The classic armchair should be with the "ears". For their manufacture, prepare for each side the board and the bar of the same thickness. Examine all photos of the process of manufacturing "ear". Connect the blanks with self-drawers, then draw the rounding and cut down the lines. Fix the finished assembly to the back and armrest.
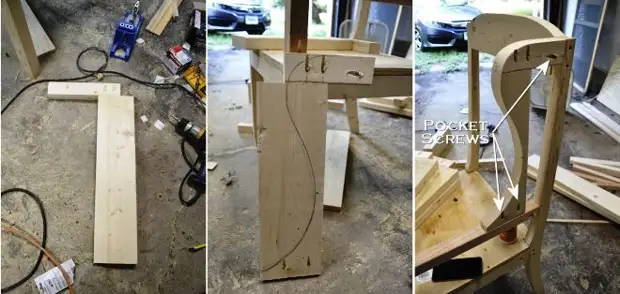
For the right side, use as a template, left "ear"
You might think that make a chair with your own hands is not such a simple task, but I want to assure you that the most difficult is left behind.
Before proceeding with the upholstery, a slightly strengthened the frame - add crossbars on the back and armrests, as shown in the photo.
We will add a bar aligning the surface of the armrest, the raffled it and soda.
Upholstery
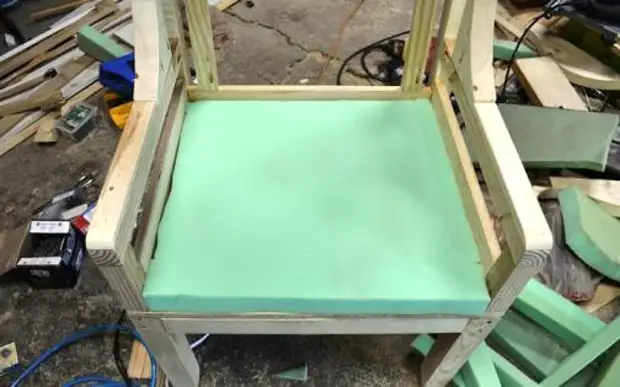
Now you can start the upholstery process.
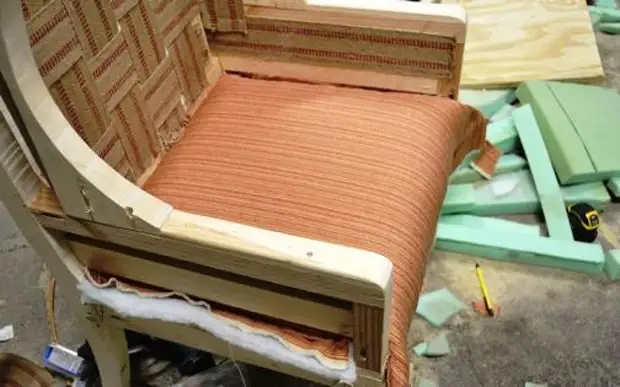
Cut in the size of the seat foam rubber 50 mm thick, glue it to the surface of plywood.
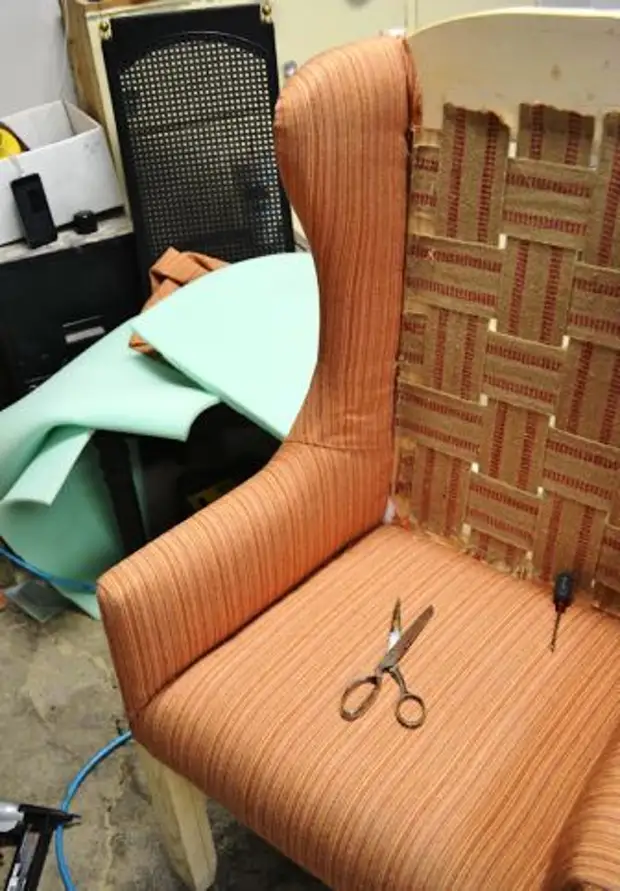
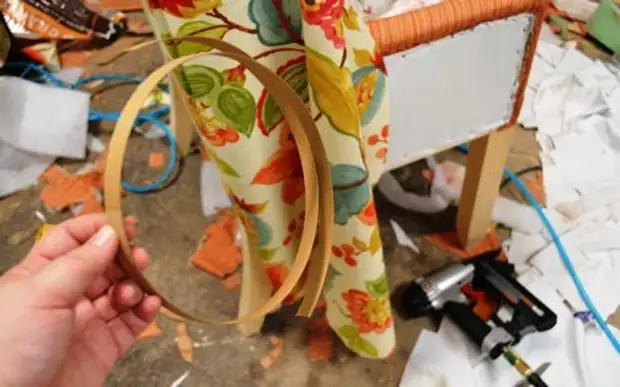
Secure horizontal textile straps on the back of the chair using a construction stapler, and then vertical.

We also added straps on the inner side of armrests and sidewalls.

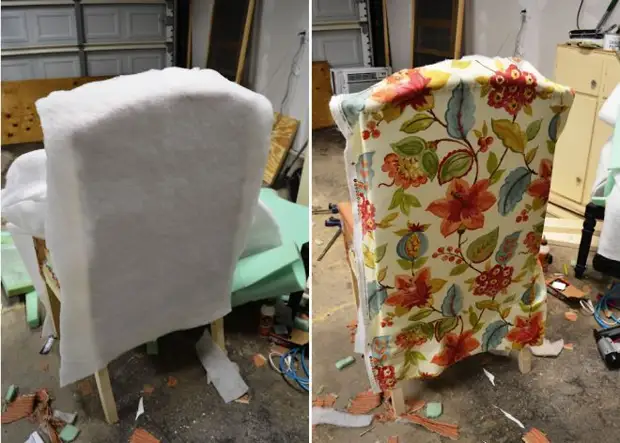
Take a 10 millimeter foam rubber cut from it a piece that will be more than the seat area by 40-50 mm.
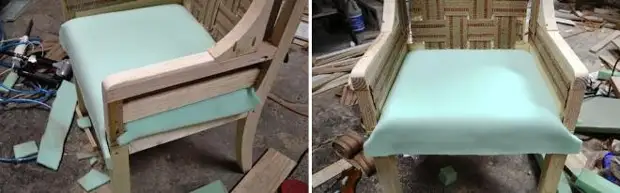
Next, take the syntheps of the same size that the upper foam. All make a longer front part.
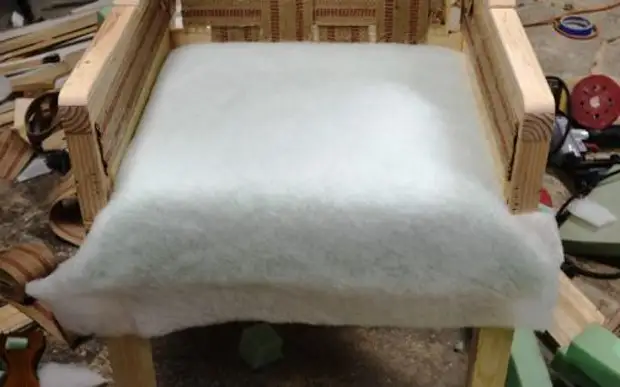
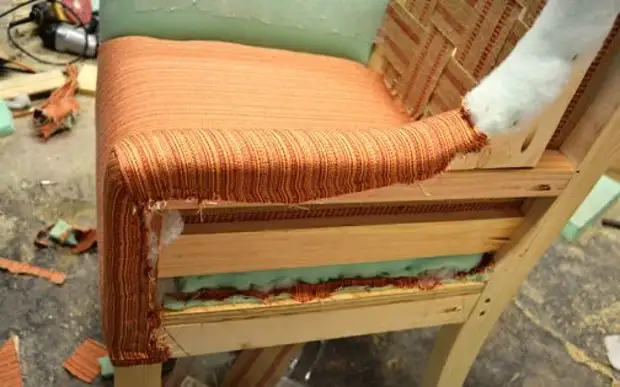
Now cover the furniture cloth on top. Then using the furniture stapler, fasten the case, syntheps and foam rubber to the design of the seat seat on all four sides.
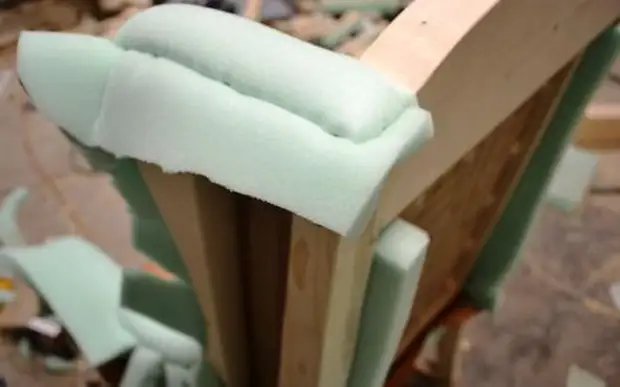
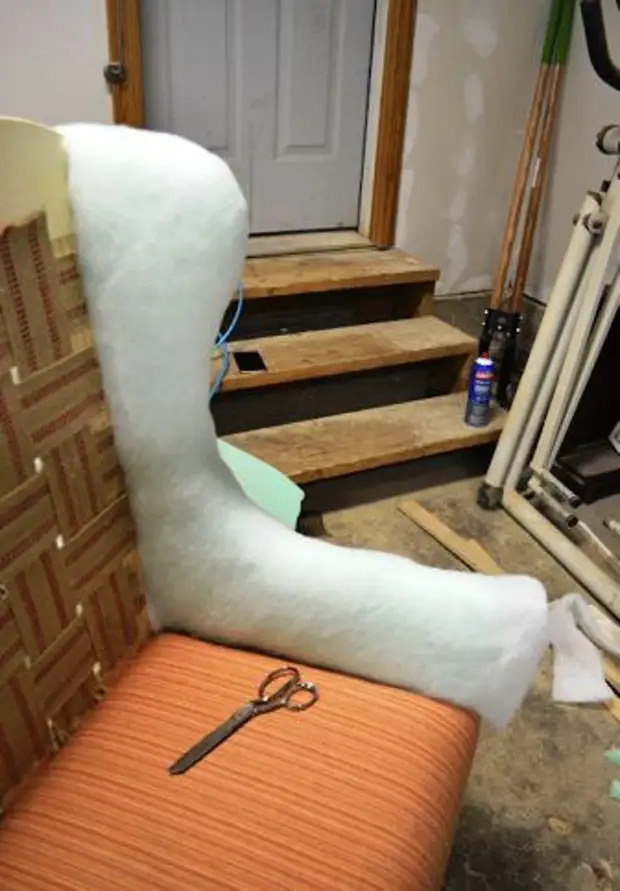
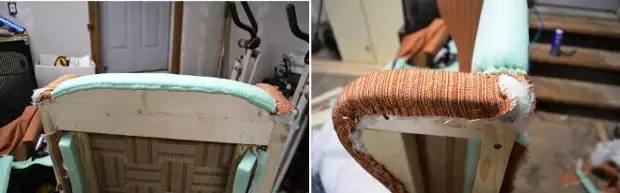
Burry the foam rubber with a thickness of 25 mm on the sidewalls and armrests of the chair. To bypass rounders, make several cuts as shown in the photos below.
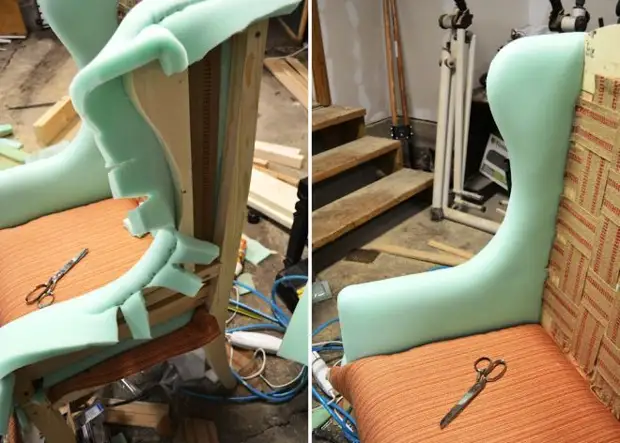
Then remove everything too much.
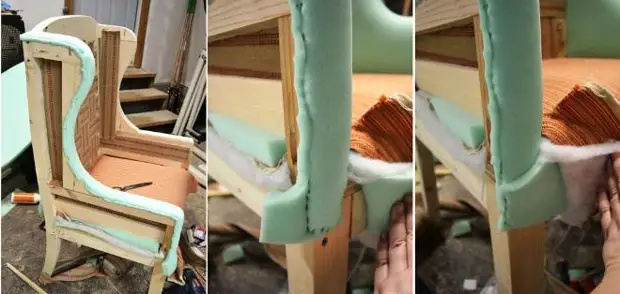
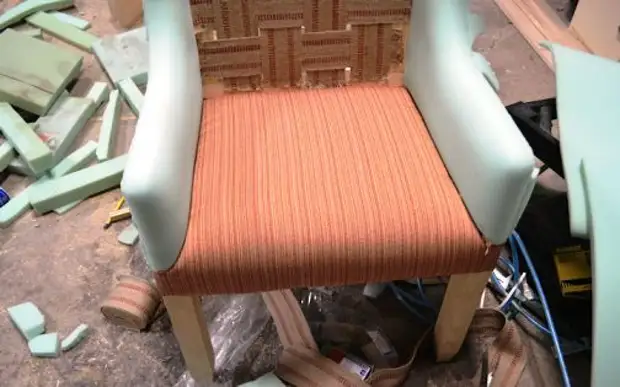
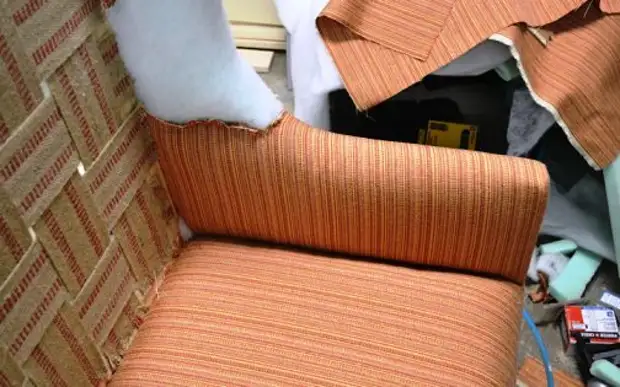
We continue the consideration of the topic how to make a chair the mantel with your own hands. Furniture fabric rear need to secure, as shown in the photo.
In the front of the seat, we made a cut so that the cloth could be beatered and secured.
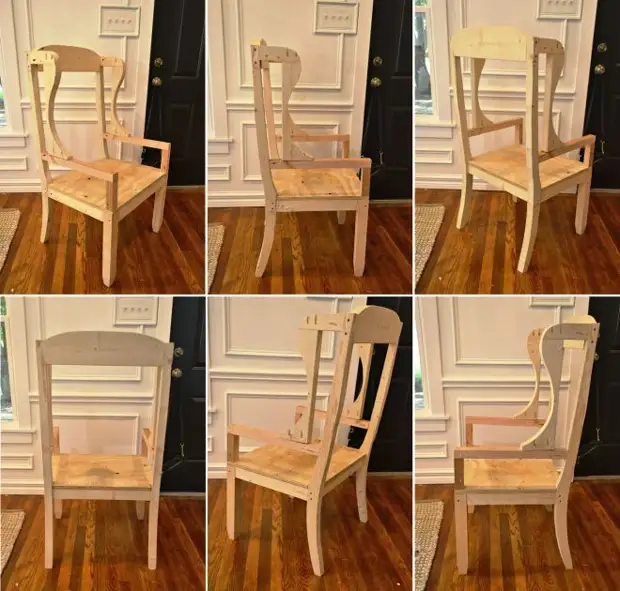
Overview of the intermediate stage of the manufacture of a chair without drawings.
Then we covered the sidelines and armrests. To secure the synthet board, it is better to apply an aerosol glue to the bonding occurred throughout the surface.
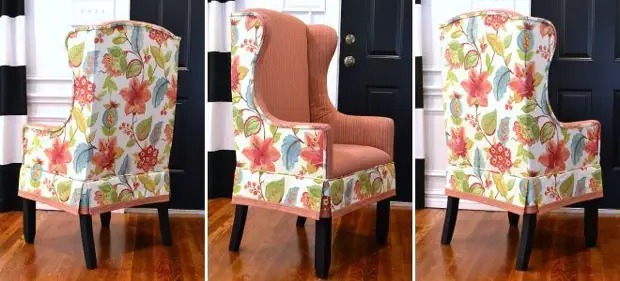
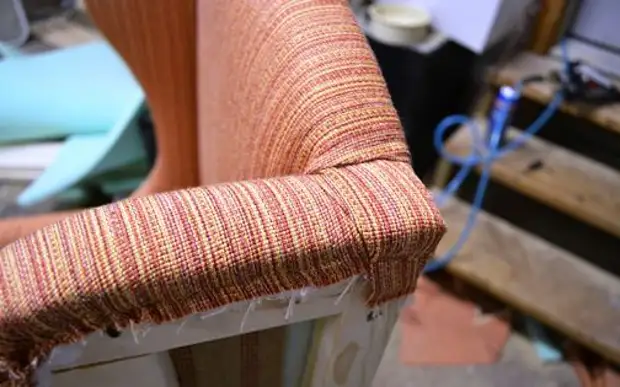
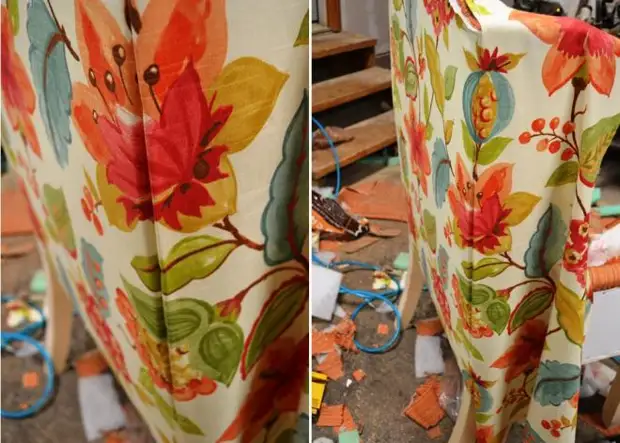
Wrap a cloth almost the finished chair with armrests.
You will be interested: a comfortable ottt bed do it yourself
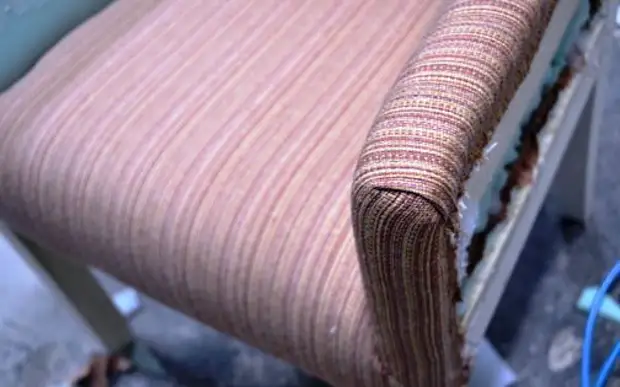
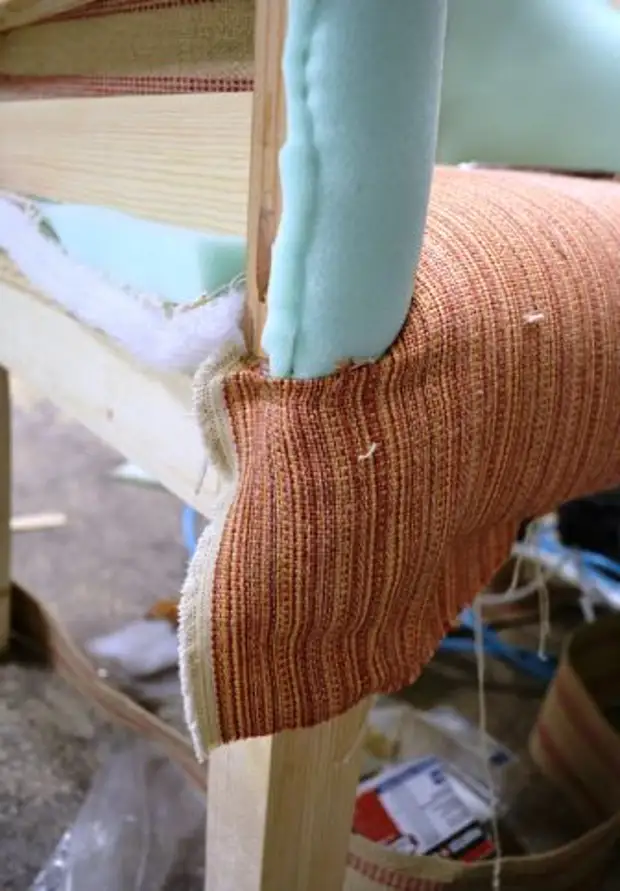
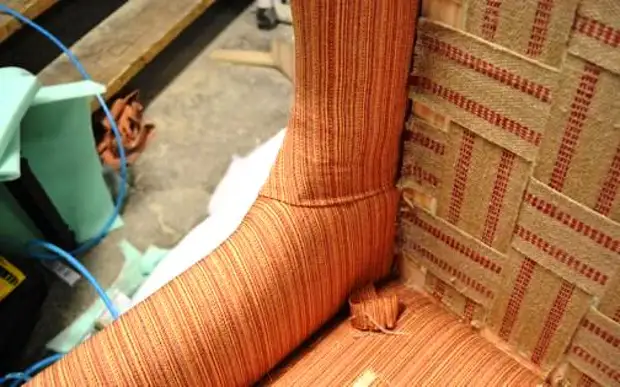
And on the front, in the junction of the armrest with the seat, we make pot at an angle.
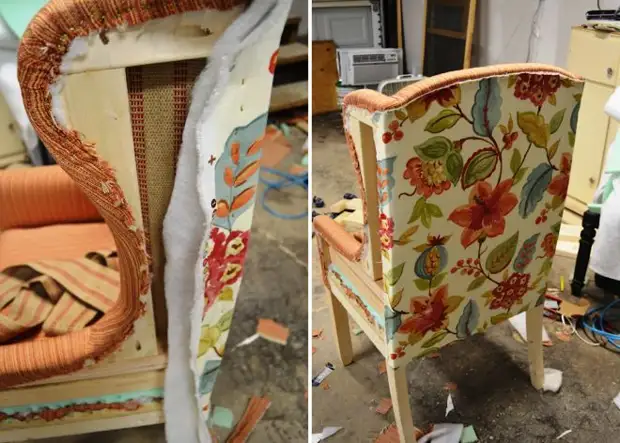
See how fastening the casing with the inner invisible part is excessively cut off.
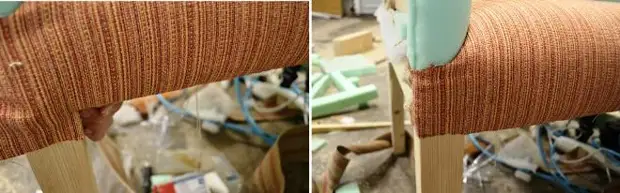
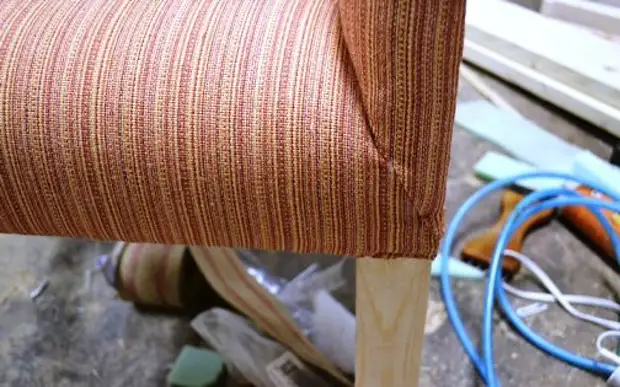
Most likely noticed that the sidewall itself was not covered. Because for this we will use a separate piece of fabric, it is easier to adjust all the bends and roundings - we are all doing this at home.
But the appearance outside and what will remain in the invisible part.
Finally, we got to the back. We use the same foam rubber (25 mm thick), syntheps and pass all the steps that were made with armrests, sidewalls.
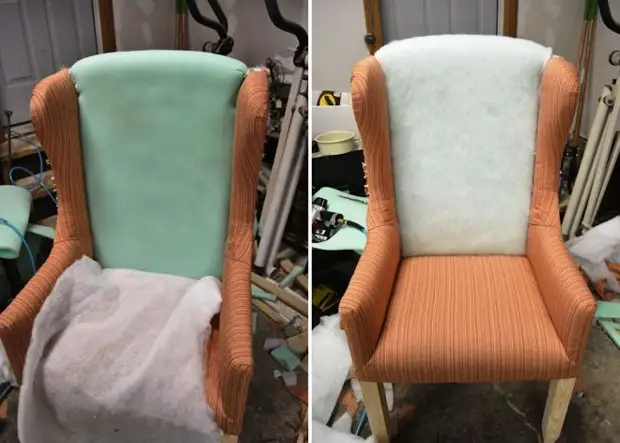
We close everything neatly cloth.
Video about how to make a chair Chester with her skin coated hands
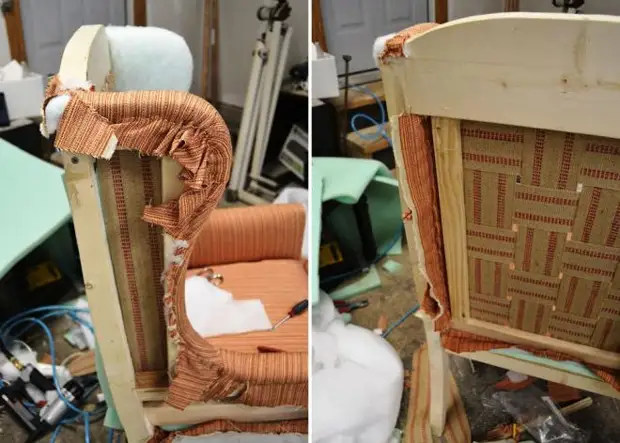
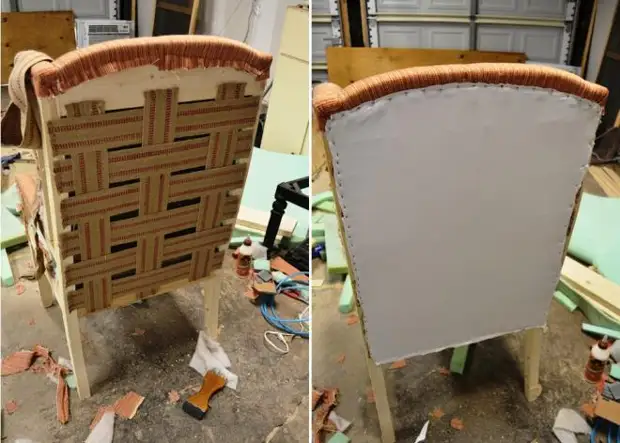
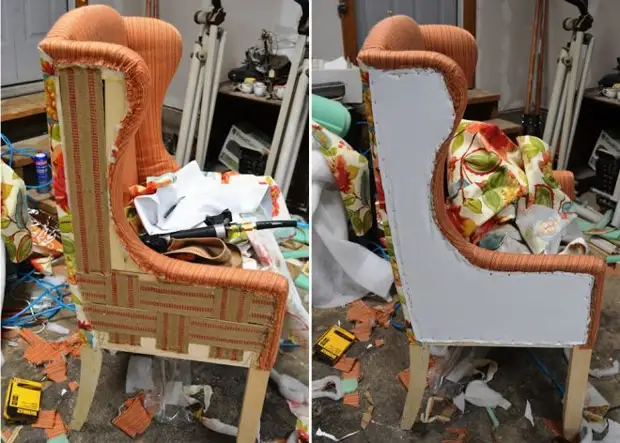
Before sheeling the back, remove all the excess, cut the fabric, thread. Nothing should remain advocating for the framing.
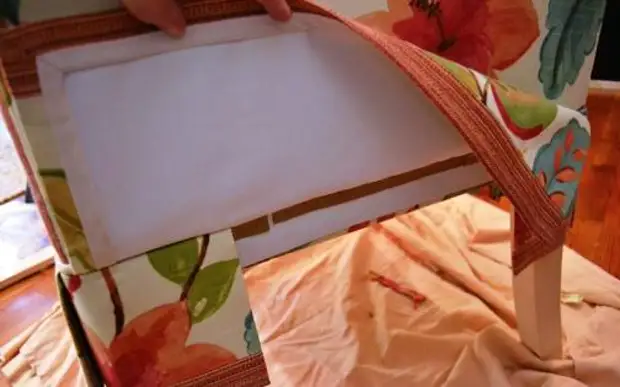
To give the volume and completed look, we need the back of the wooden chair to be beautiful and smooth, for this I will fix straps and on top of them lining fabric, as shown in the photo.
In the manufacture, we do not use the drawing of the chair with the exact dimensions, we all do in place. But if you do 2 or more products and want everyone to be the same, then on the basis of the first chairs, do all the necessary measurements and transfer them to paper.
Secure the syntheps and then cloth on it.
Closeup back of the top of the back.
We offer to watch videos with different chips and useful tips. Video in a foreign language, but it is understandable.
Sofa chair do it yourself master class
Fix textile straps from the outside of the sidewalls and armrests. Then close the cloth.
Then we attach the cloth along the back edge.
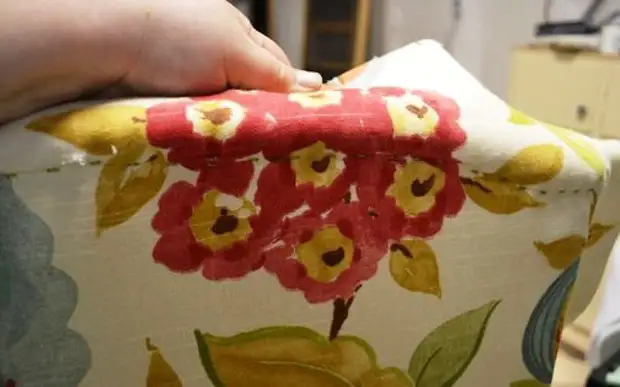
Catch the picture of the fabric so that the picture is in the place of folding did not have any overlay.
Next, we will make a skirt.
Examples of seats
Make a circular chair with your own hands you can also
Wooden sofa