
If you are a creative person and love to create unique things with your own hands, certainly try to master the embroidery of satin and silk ribbons.
A bit of history
For the first time, decorative embroidery with silk ribbons gained popularity in France in the 21st century, when a detailed and elegant finish of rich clothes were in fashion. Silk ribbons were usually fitted in the form of flowers and ruffles. Although it was known to be an antique era.
Recently, the embroidery with silk ribbons again became loved. And it is not surprising, because it has so many benefits! It is performed much faster than other types of embroidery, does not require high accuracy. In addition, the embroidery of silk ribbons can be called truly artistic work, as it implies complete freedom of fantasy.Embroidery technique
Embroidery technique with ribbons is quite simple.
Method number 1.
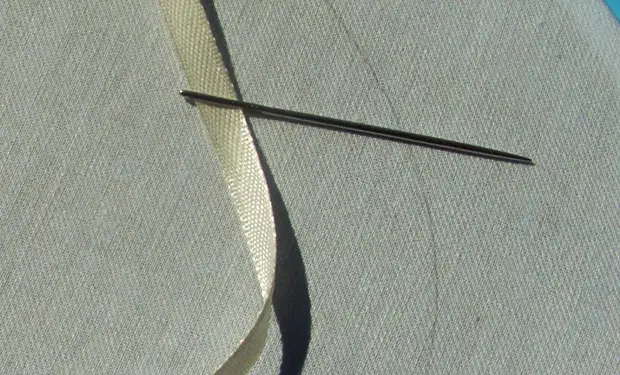
Ribbons are inhabited in needles with a big ear and embroidered on the fabric as ordinary threads.
Method number 2.
Ribbons are placed in the form of sockets, bows and other shapes and sewed with tissue for embroidery or for sewing.
Advice
1. Silk ribbons are well combined with glittering merserized x / b or silk threads for embroidery, as well as with beads, beads, sparkles, rhinestones. Litters or beads can be embroidered not only on fabric, but also on the ribbons themselves.
2. Embroidery with silk ribbons will perfectly complement any patchwork work or help combine different fabrics in one product.You will need:
• The cloth
• Ribbons• Frame for embroidery or hoop
• Embroidery scissors and for cutting fabric
• Thrust
• Circul
• Simple pencil
• Markers
• Portnovsky chalk
• Rhunt
• Triangle
• Measuring tape
• Devices for translation Motive on fabric
• Threads and sewing needles
• Fabric adhesive tape
• Candle or lighter
• At the request of beads, beads or other decorative materials
Choose a fabric
For embroidery with ribbons you can take any dense fabric: Moir, velvet, silk taffet, felt, jersey, cotton, flax, canvas. For thinner and lung tapes, it is better to take a thinner fabric. Gentle transparent fabrics, such as silk, tulle or chiffon, before embroidery should be strengthened with gasket. The most important rule when choosing a fabric - it must keep the embroidery well.
Choose needles
Choose needles from corkscale, tapestry, quilt, knitwear needles, wool embroidery needles or beads. There are also special sets of needles for embroidery with silk ribbons.
Ribbons for embroidery
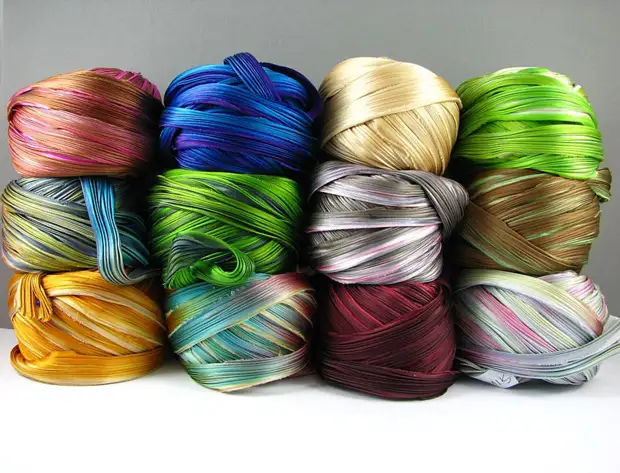
Silk ribbons for embroidery can be of different widths and density. Only those ribbons are suitable for embroidery, which are easily bent and wrapped on the right form.
Ribbons can be made of silk, organza or polyester. It is interesting to embroidery from velvet tapes, from lace braid. You can also make the original embroidery from the nanent bands from different tissues, with a fantasy using their colorful prints or structure. At the same time, the sections of the fabric can not burn and do not coach, but on the contrary, to last a short bachrom. But still traditionally embroidered with silk ribbons of different widths and colors.Main Terms of Work with Ribbons
1. Narrow ribbons that are easily inhabited in the eyelet needles, use to perform traditional embroidery stitches. Wider ribbons can also be hurried in the needle by folding them in half, three times or four times, but most often out of them are made outlets: they will sit on one edge, and then sewn to the tissue with threads to sewing suitable color.
2. Do not work with too long silk ribbons. The optimal length is 35-50 cm. Cut the embroidery ribbons with special embroidery scissors. So that the sections do not appear, slightly burn them on the flame candles or lighters.3. On accountable tissues, such as canvas or strym, it is better to embroider with polyester satin ribbons, and it is necessary to take into account that these tapes are rather tough, do not fit soft folds and do not form petals causing the impression of tenderness and airiness
4. An interesting effect can be achieved if you add several elements embroidered with knitted ribbons in the embroidery of silk ribbons, or tape yarn. Initially, such ribbons were designed for knitting, but now they use in embroidery. The ribbon yarn is sold in the tangles, its assortment also has a melange and sectional painted yarn, including with the addition of metal threads.
Tip: For embroidery on dense materials (denim, leather or sheepskin) or very wide ribbons, you will need a seer for piercing holes. They can also be made by holes with acute ends of small scissors.
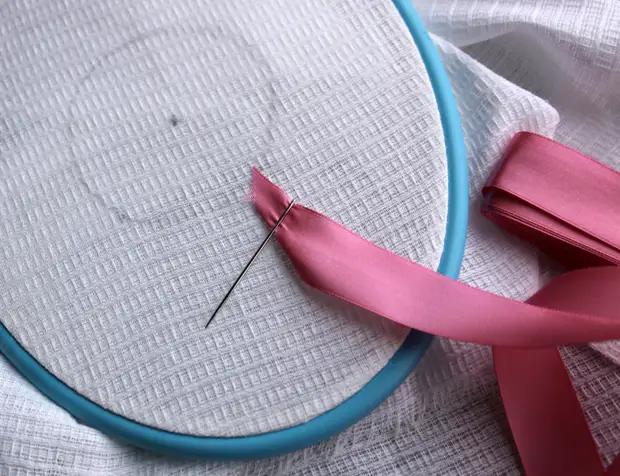
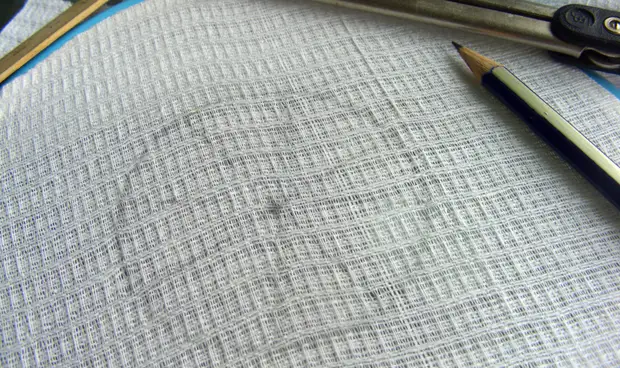
Fabric Motive Translation
Method number 1.
Translate the motive first on the floor sheet, then laying a tracing on the front of the fabric for embroidery and flash on the lines of the motive with mertic stitches, delete traction.
Method number 2.
Draw on fabric or translate the motif on the fabric with a marker with an endungeneled paint, a portno small or simple pencil.
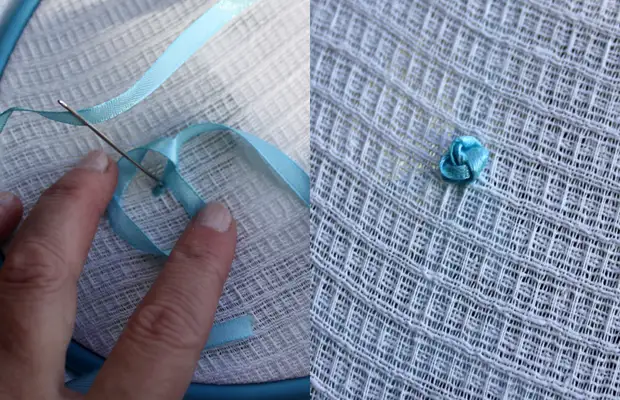
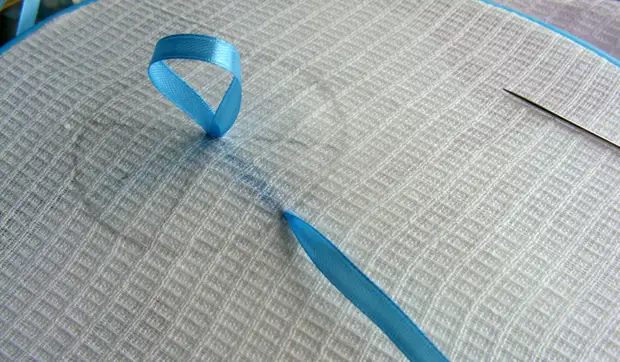
Fastening the beginning and end of silk tape on the wrong side
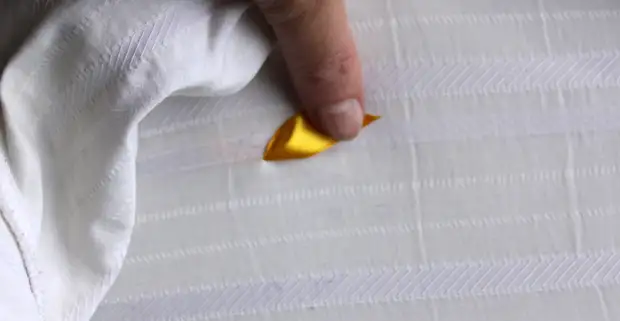
In order to start the embroidery, you can make a neat nodule at the end of the silk tape. However, it is preferable to avoid nodules that can cause the appearance of ugly "tubercles" on the front side of the embroidery. The "tail" of the silk tape on the involving side of the embroidery can be held the tip of the finger until it is fixed by several initial stitches. The tape tip can also be fixed with a pair of secret stitches with threads for sewing suitable color, without piercing the needle on the front side of the embroidery.
Main stitches
When you can perform a few stitches with silk ribbons, you can already embroider motifs on clothes and even paintings.
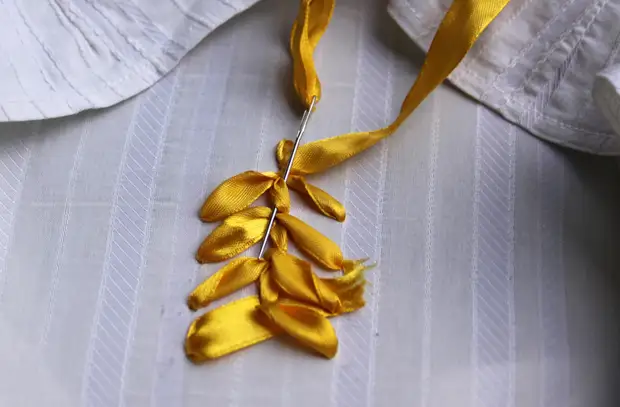
Chinese nodes
This stitch is performed to fill the core of the sockets, as well as for the middle of the colors with embroidered silk ribbons with petals. In addition, with this stitch, you can create interesting pictures. The Chinese nodule resembles a stitch with a nodule with simple threads, but it turns out more rounded and volumetric.
Double Chinese nodule
For several centimeters to the point of output of the ribbon on the front side of the embroidery to fold the tape several times "accordion", spend the needle with a ribbon through this "accordion" and only after that, laying a loop, as described above, enter the needle into the fabric in the middle of the loop near the output location Needles with ribbon on the front side.
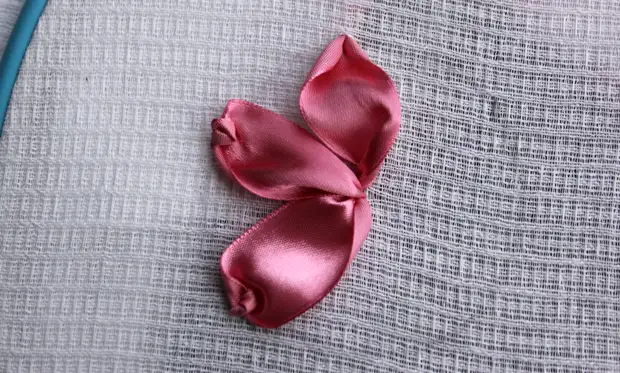
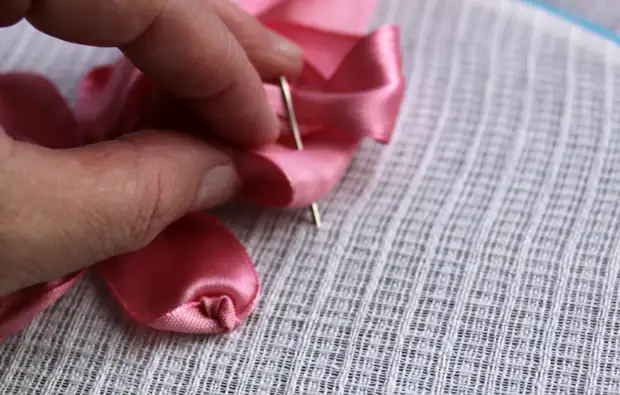
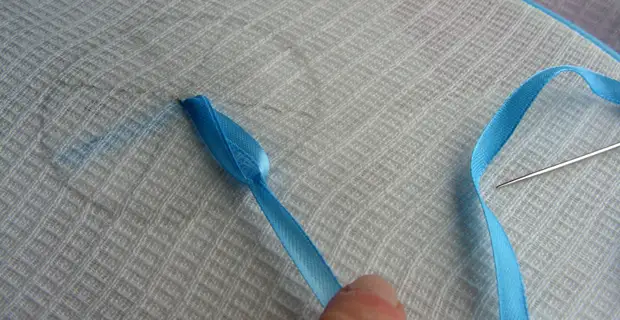
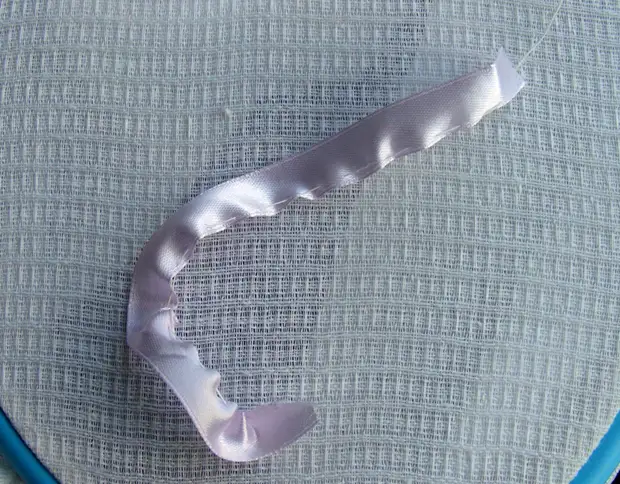
Right stitch
The rigorous stitch is most famous and most often used in embroidery with silk ribbons, especially when performing leaves and petals. Stitch is performed in several ways. His difference from other direct stitches is that the external ends of the petal are bent or repaired upwards and inside. We will show this on the example of a classic flower embroidered with rigible stitches.
Step 1
Step 2.
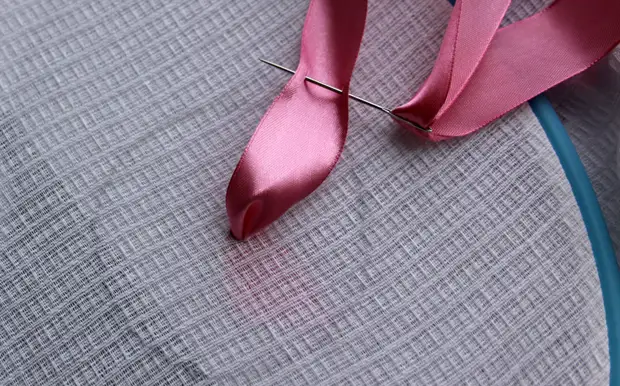
Out up the needle with a ribbon with an invalid on the front side in the center of the circle. Spend a silk ribbon face up to the circumference line, spread beautifully folds at the output point of the ribbon on the front side - in this place the tape should be more or less deployed or concave. A needle with silk ribbon Connect the edges of the ribbon by about 5-10 mm further line of the circle - depending on how the convex you want to see your petal. Cut the needle with a ribbon from the wrong side to the front side of one edge and then from the front side to the wrong side of the other edge.
Step 3.
Step 4.
Step 5.
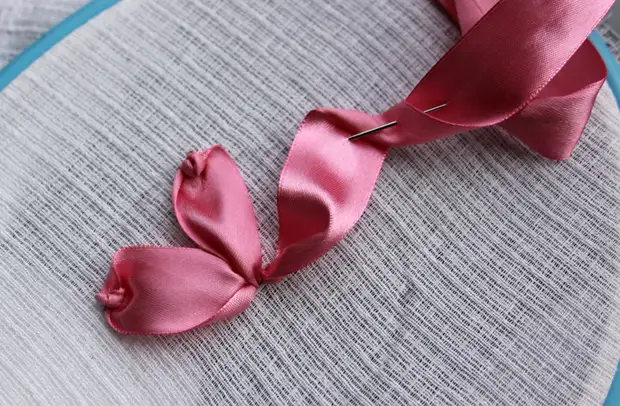
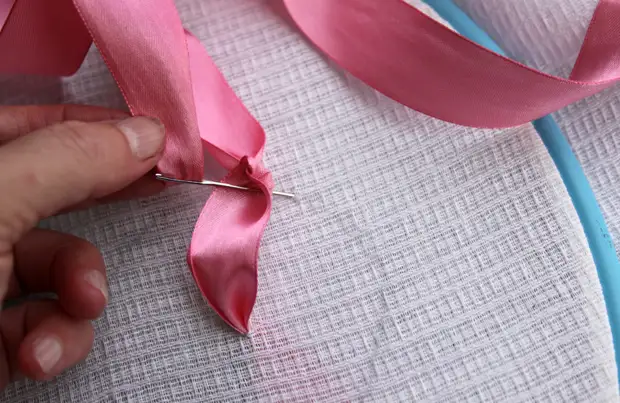
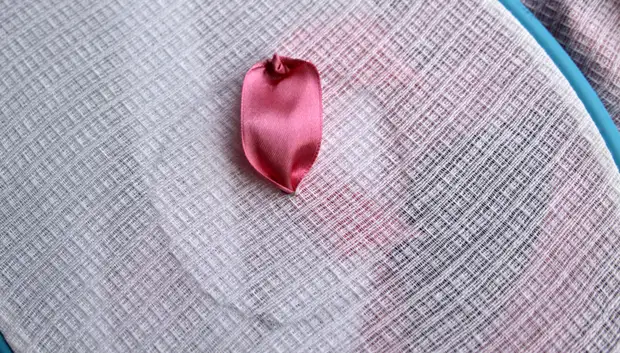
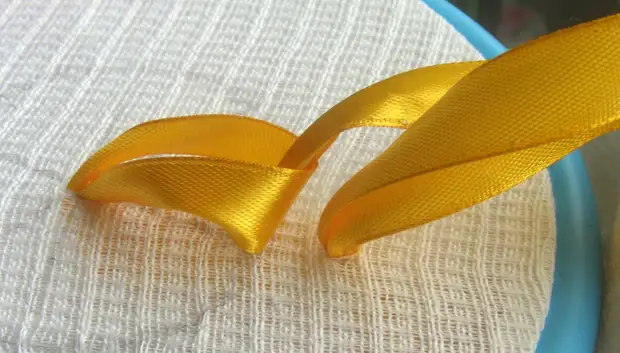
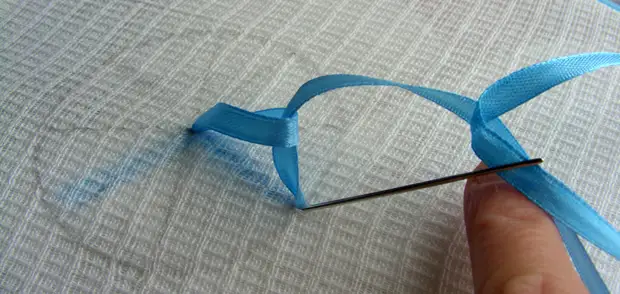
We will fly with a rigible stitch in a different way: output the needle with a ribbon on the front side in the center of the circle, spend the tape to the circumference line and go beyond the circumference line by about 5 mm, twist the tape as shown in the photo. Then enter the needle with a ribbon through several layers of the twisted tape and simultaneously display the needle with a ribbon through the top side of the petal on the wrong side of the embroidery.
Council
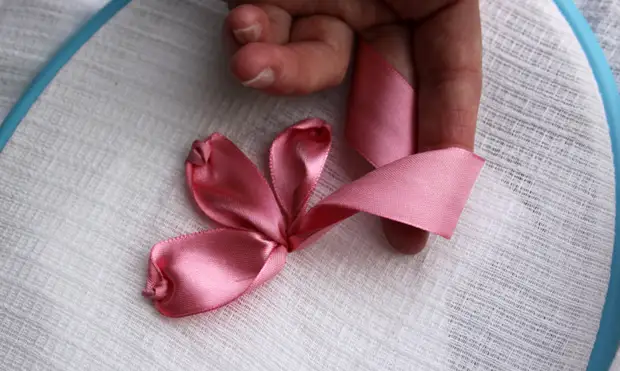
You can twist the ribbon as around the finger ...
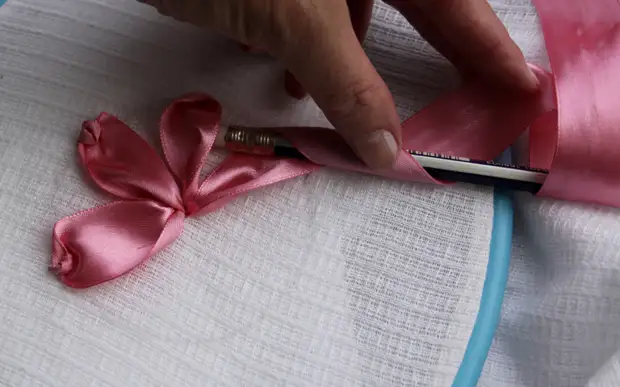
Step 6.
Another way to embroider the petal with a rigible stitch: Display the tape in the center point and put it face up towards the circumference. Complete the end of the tape up and then on the tape so that the fold is turned out, and enter the needle with a ribbon from the wrong side of the folding ribbon in this fold ...
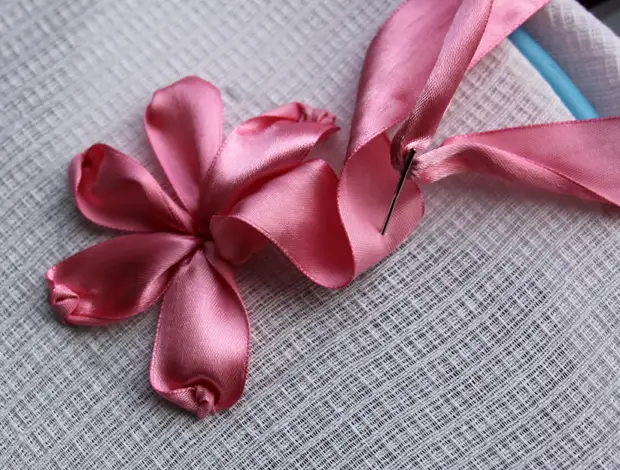
Tambour stitch right
Step 1
Step 2.

Step 3.
Step 4.
Step 5.
Step 6.
Display the needle with a ribbon on the wrong side and tighten the second, short loop on the circle line. The dragging loop will be almost not visible, but if you embroider a wider ribbon, it forms a marked nodule at the end of the resulting petal. Putting a petal tape beautifully.
Step 7.
Now print the needle with a ribbon with an invalible on the front side again at the point of the center and repeat the above tambour stitch away.
Step 8.
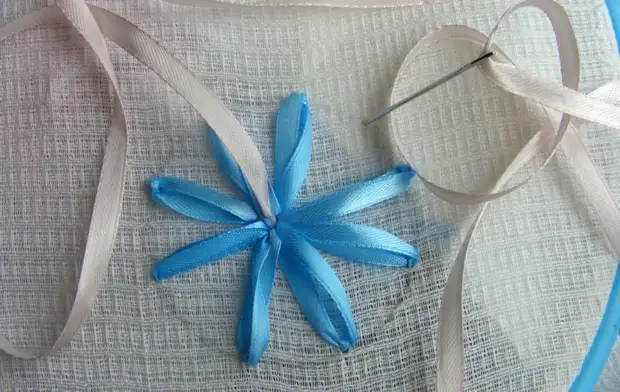
For the training pattern, we took ribbons that differ from each other in color. But if you use ribbons of close shades, then as a result you can get a beautiful flower with a brighter top, that is, to depict the transition from the shade to the light.
Tip: When executing a cam stitch, try to always put the loop ribbons so that the embroidery fabric is not visible between them.
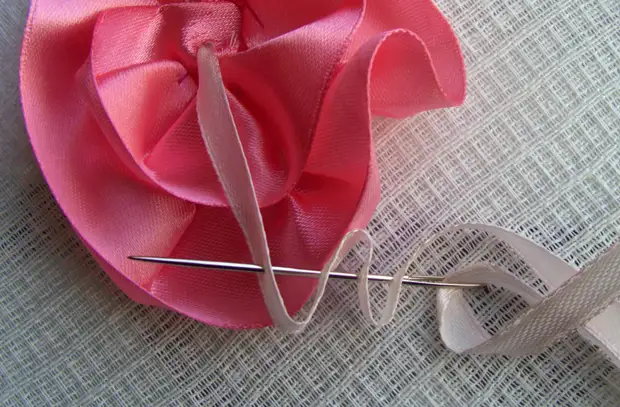
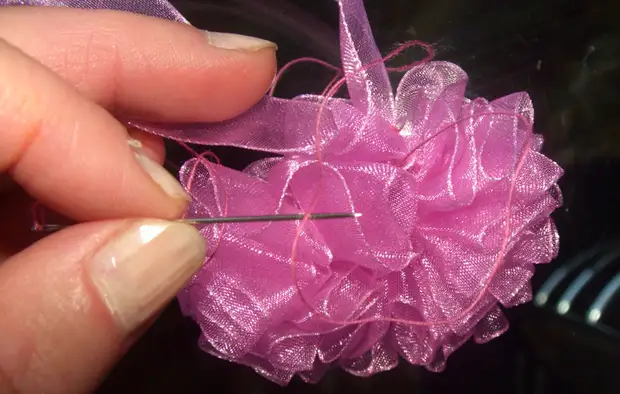
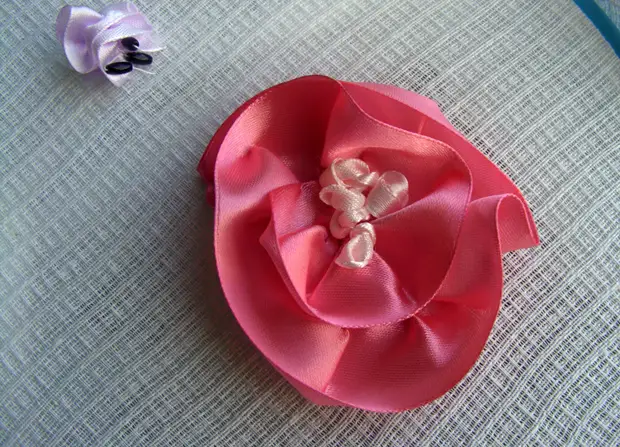
Socket
Step 1
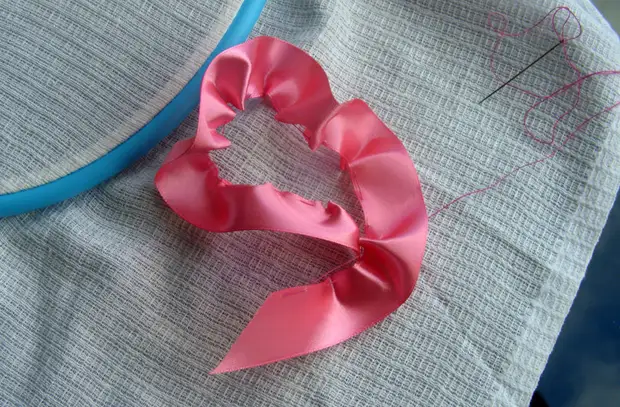
Step 2.
Excellence the bezed end of the tape and start launching the tape on the cloth along the width of the spiral, ranging from the center.
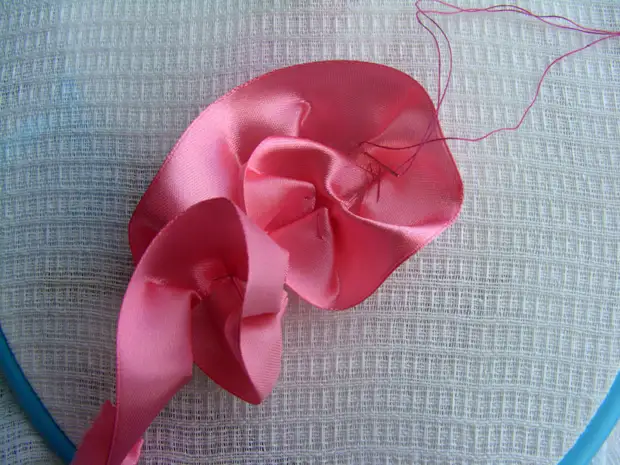
Step 3.
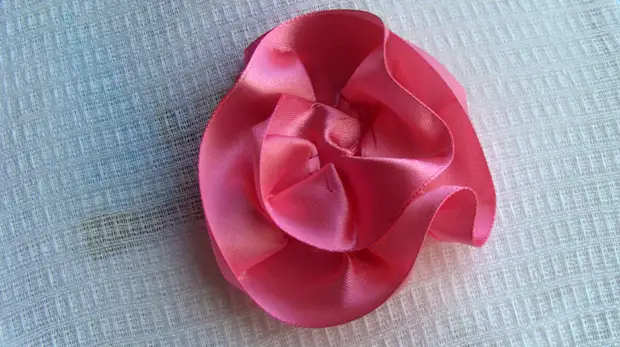
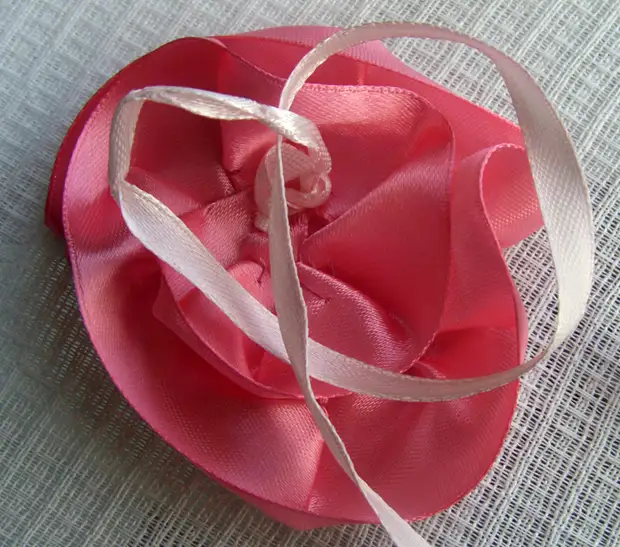
Tape socket
A socket from a narrow tape is made in a similar way, and it often looks more elegantly and makes embroidery more elegant.
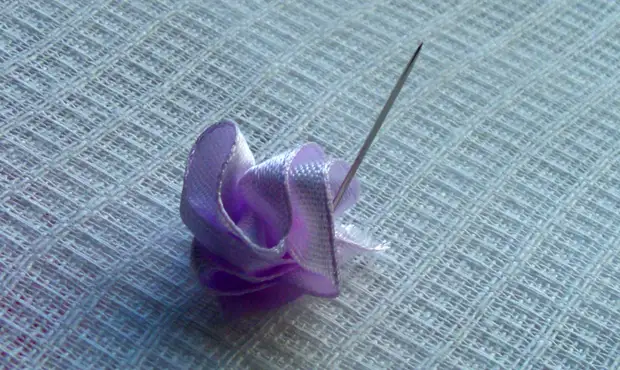
Step 4.
Advice
1. Do not pull the ribbons too tight.
2. For embroidery on top clothes, do not use the stitches in the form of loops - they will cling to the surrounding items, embroidery will be easily damaged.3. Tapes tend to twisted during operation, so you must ensure that they lay on the surface of the fabric face up.
Caring for embroidery
Never iron the embroidery with silk ribbons! Give it into dry cleaning. Best of all after the head of the edges, pull the embroidery into the frame with glass - so the tapes will not fade. Do not exhibit embroidery under the sun rays.
For storage, embroidery is best twisted into a roll (do not fold it - then you will not be able to smoke jammed folds).