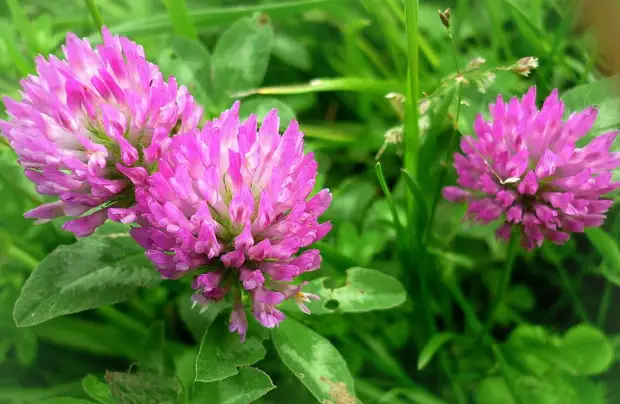
-The care than to start work, we will study the real clover flower to portray it as realistic. At the base of each petal of the flower bowl there is a light green color, then the white and tip of the lilac-pink. (photo1.2.)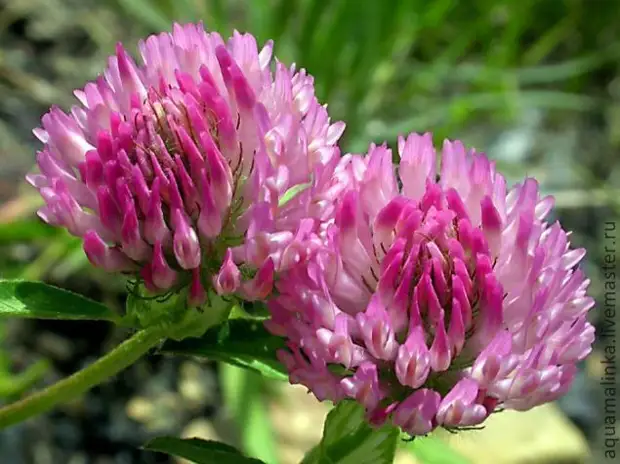
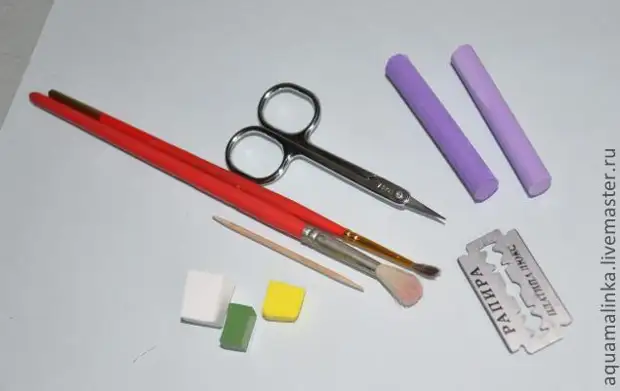
- Actually when working tools and materials: plastic white, green, yellow and can be pink, chalk dry pastels, blade, manicure scissors with rounded ends, brush. (photo 2)
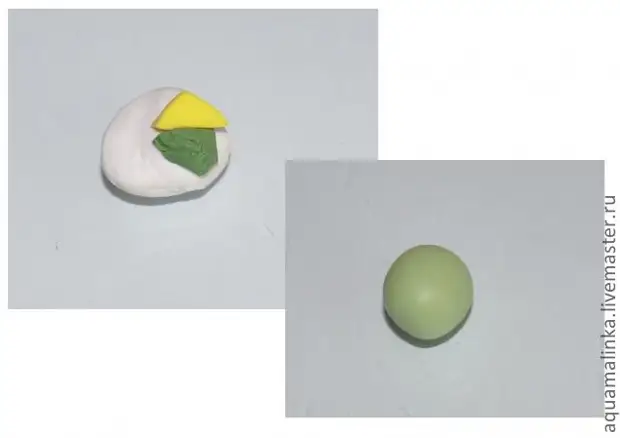
-First layer in the flower bowl is a light green. White and slightly green and yellow will help achieve this color. Roll into the ball. (photo 3)
- White plastic is thinly rolling, approximately 1-2 mm. Gently wrap our green ball into it. And cut the extra plastic scissors. (photo 4 and 5)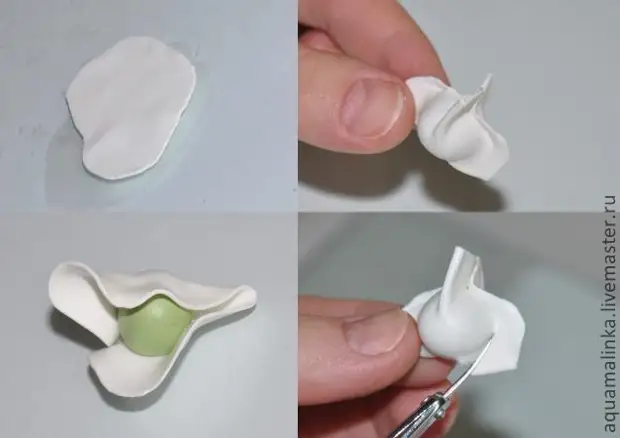
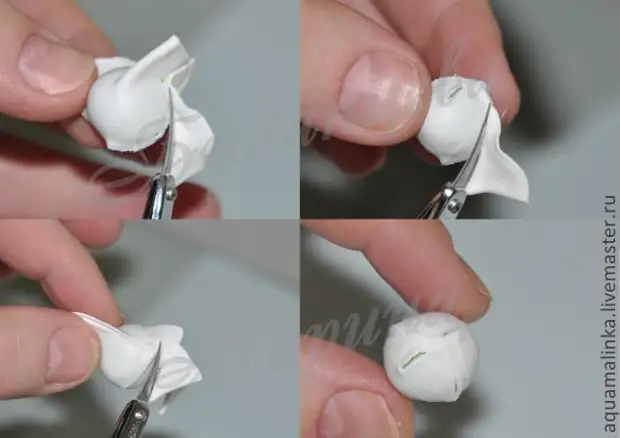
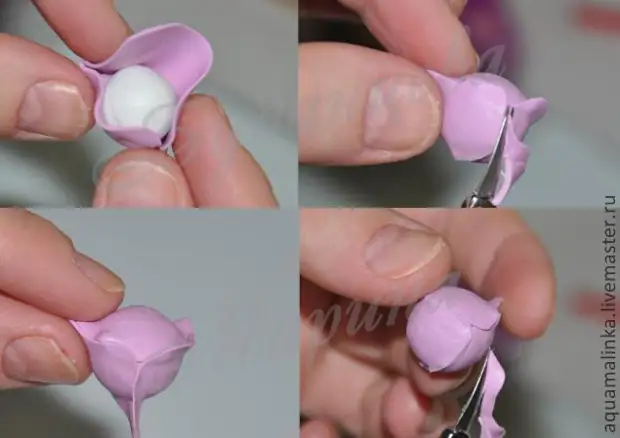
-Ber the pink plastic and roll up, just like this white. Watch our white ball in pink plastic and carry out the same manipulations with circumcision, as in the above photo. (photo 6 and 7)

- We get a pink ball. Pastel (I took a lilac and alway, so that the color was not bright and artificial) with the help of the blade crumbling into the powder and put on the ball with a tassel, preferably soft and with a natural pile, otherwise traces of the brush will remain, to give a realistic color. Pastelle can replace the step With pink plastic - this is the taste and desire of each wizard. (photo 8)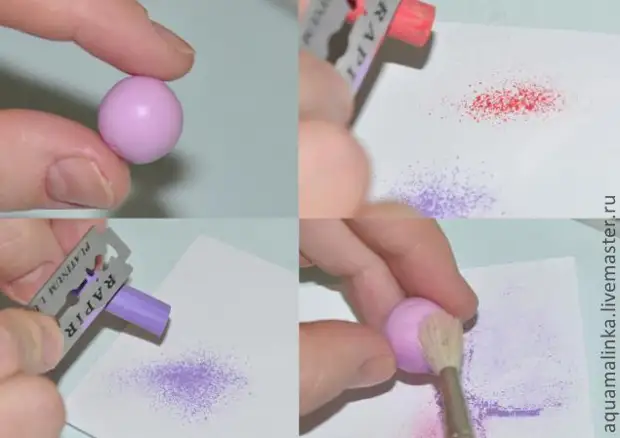
- We have that pink-lilac ball, which will be our future clover. It is not a pronounced dear form, in order to form a tail-holder. (photo 9)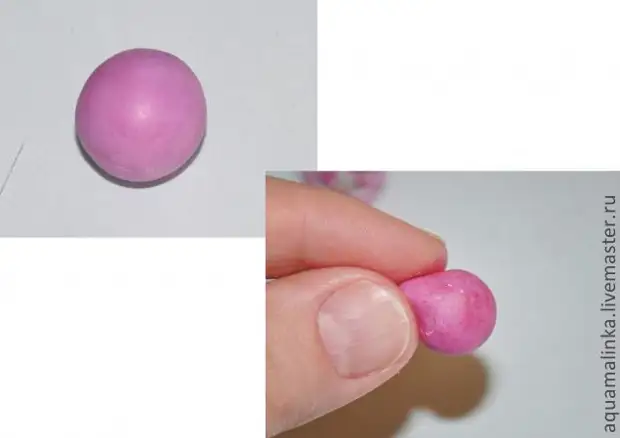
-Terine proceed to the most responsible and practically jewelry step. Scissors so that the rounding of the blades look inside, make cuts, starting at the base of the holder's tail. Carefully scrolling, cut through the second row, etc. in a checkerboard. The Little Council is to practice on the plastic of a homogeneous color (photo 10)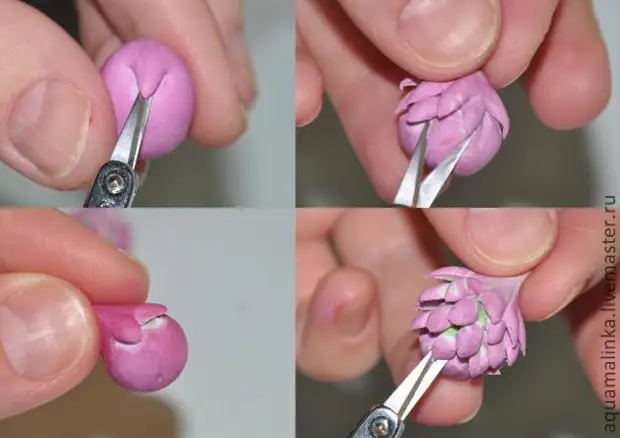
-Hell can stop at this stage, as the flower is ready. But if the so-called cuts-cuts turned out to be too broad, each such petal can be cut once or two. (Photo 11)
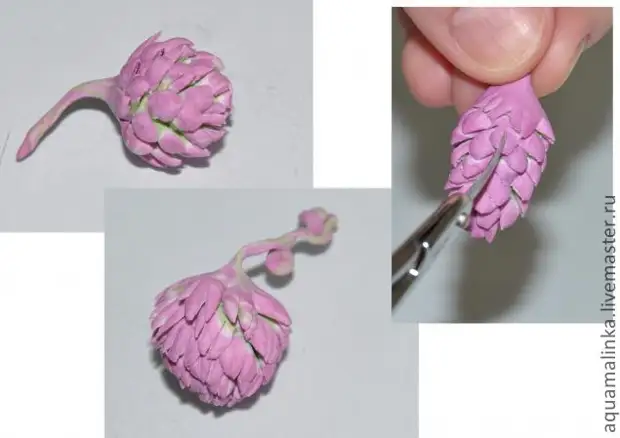
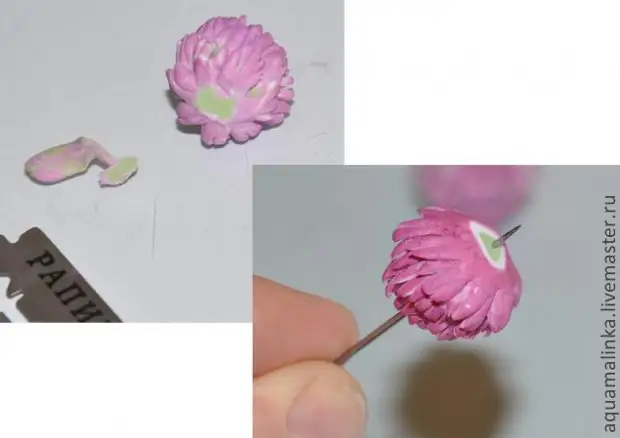
-Next action depend on what you expect from your clover. I needed beads, so we remove the tail-holder to the blade, so that the slice was smooth and neat. Then pierce. I use a needle, a little thicker of the usual sewing needle for a neat hole (I do not use toothpicks in such cases, because the hole is too much and does not give miniature). (Photo 12)
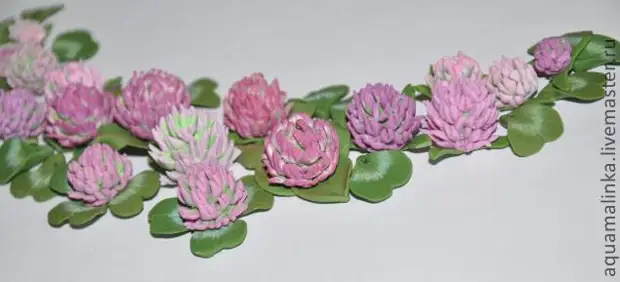
- To give completeness and some realistic, add leaves at the base. (photo 13)
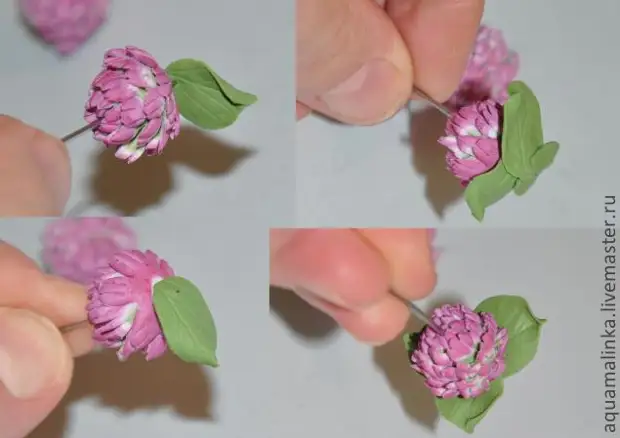
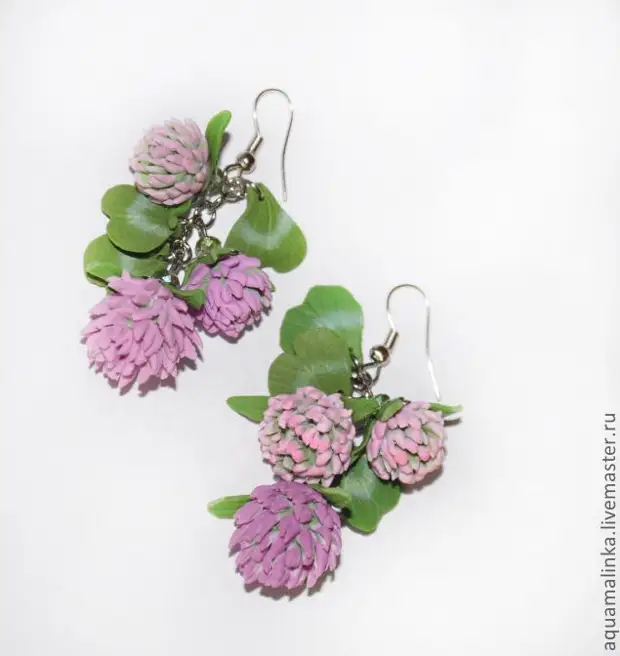
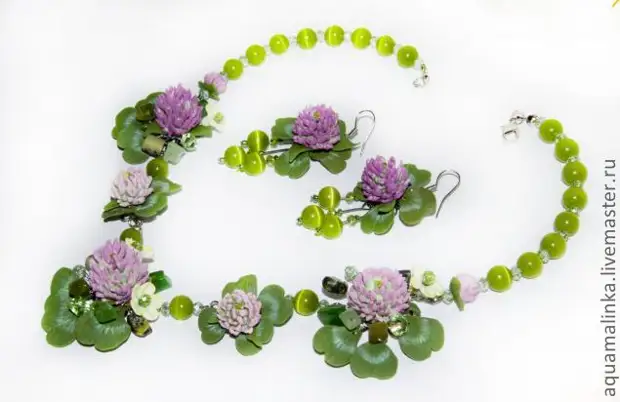
- Makes such beads, and then leaflets I got here such products. (photo 14 and 15). I wish you all success and creative inspirations!