
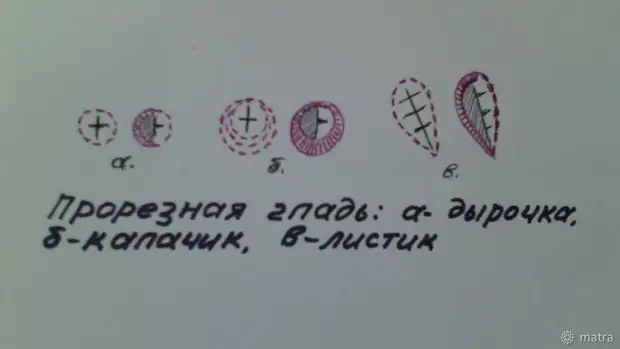
In this master class, I present you the kind of embroidery "Promotional Glitter". The slit surface is a cross-cutting embroidery that consists of punctured or sloping holes of different sizes and shapes: "hole", "Kalachik", "Lisk" or "Shule", "Coupling". This type of embroidery is used for decoration of canteens and linen products, a slit stroy can be decorated with a dress, blouse.
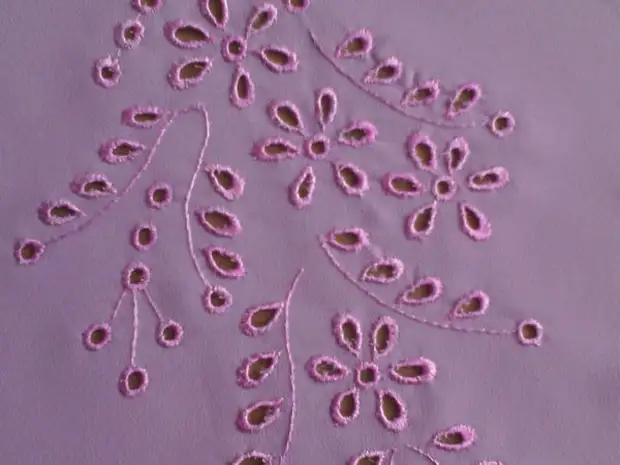
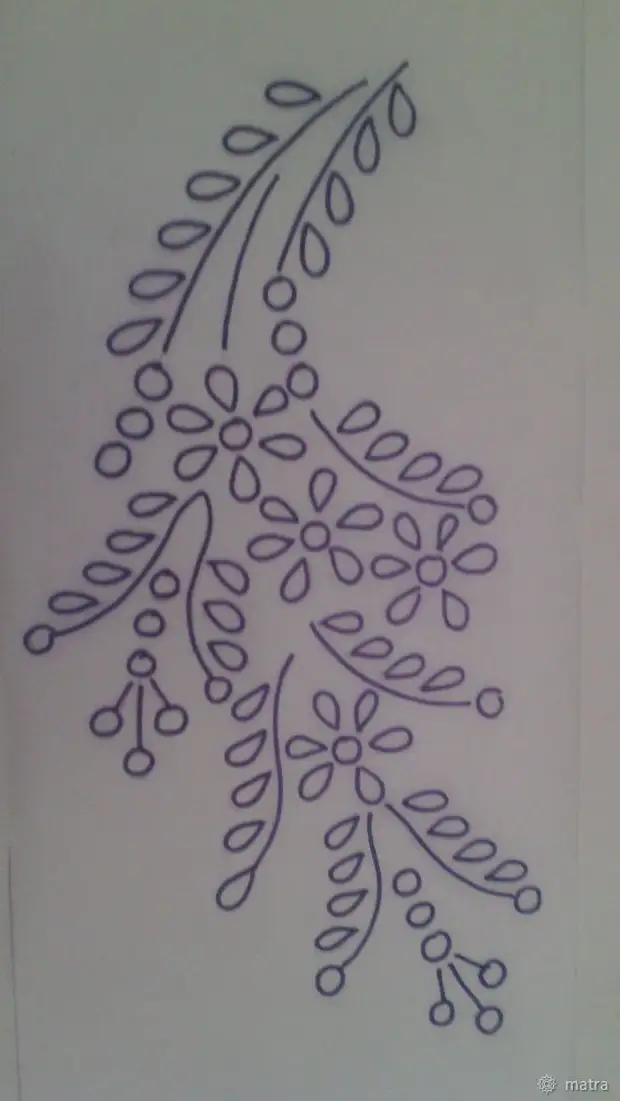
The pattern that I took for this embroidery is not complicated in performance and consists of such parts - "hole" and "leaf". The fabric for this embroidery is needed fine and not loose. For example, thin crepe, thin dense silk, thin cotton.
1. Transfer pattern to fabric.
In my case, the fabric is light, thin, so I translated the drawing by the "On Luxury" method. For this, the drawing must be put on a light surface, you can use a white sheet of paper. Top to the drawing put the fabric, we attach it in several places to the pattern with pins and supply the contour of the drawing with a pencil.
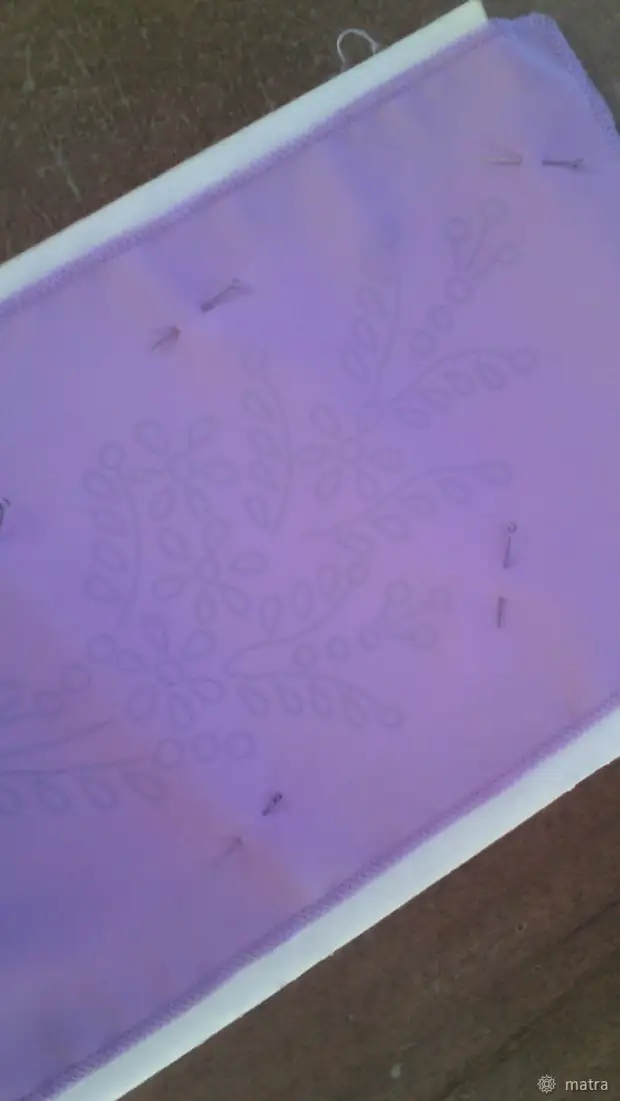
2. The fabric we sing in the chamber, carefully, evenly pulling up from all sides so that there is no skew pattern.
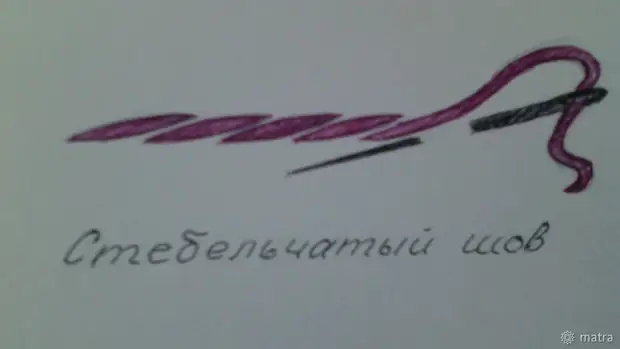
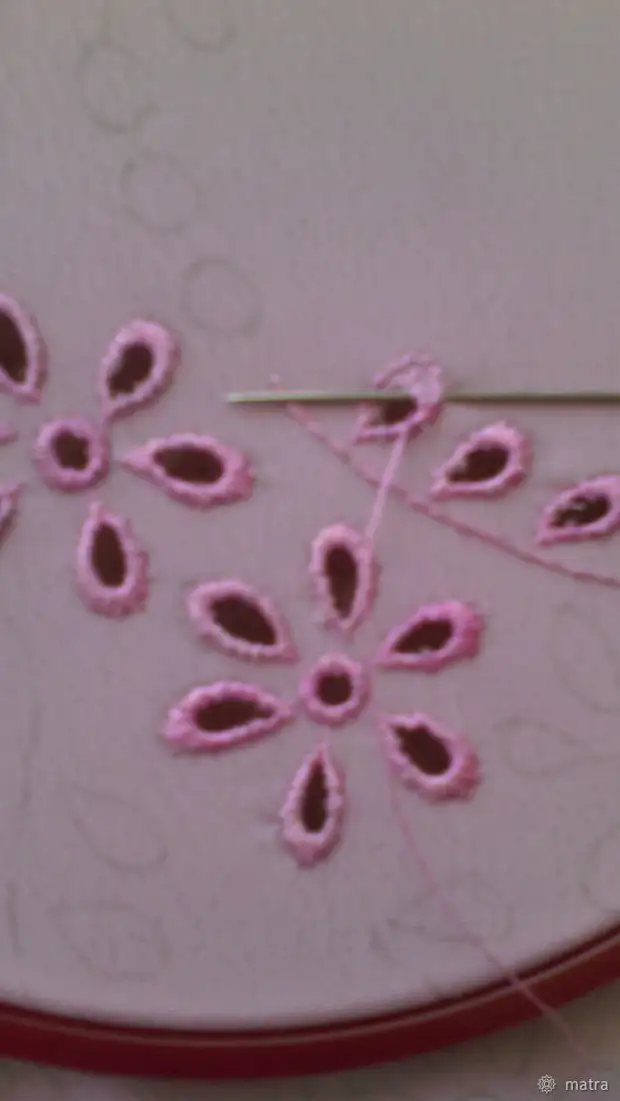
3. For embroidery, I used a thread for embroidery "viscose" in one addition. For through and openwork embroidery, I recommend the color of the thread to choose the tone of the fabric. Figure stalks embroider with a stalking seam.
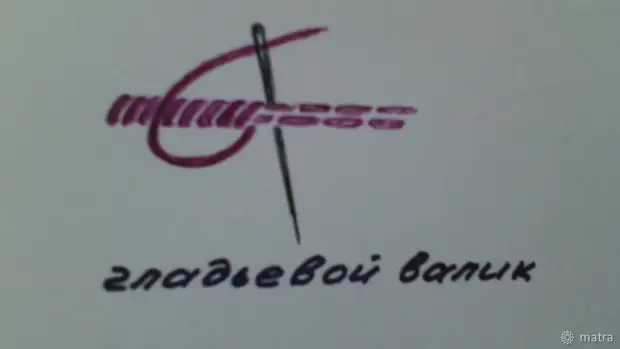
The holes first we flash on the contour with a stalk or seam "Forward needle", then with manicure scissors with curved ends, we make a cut cross inhibit and we are sutured by the "smooth roller". Leafs are also wearing the contour in 2-3 rows of a stalking seam or a "forward needle" suture, then cut along and we are cutting with a smooth roller.
4. After the embroidery is completed, it must be rejuvenated. Welting on a soft litter from the wrong side.
5. From the wrong side, the embroidery must be neat, without nodules. At the beginning of the work, the working thread is fixed by several stitches, holding the end of the thread 3-4 cm. Length from the inside, make several stitch stitches and the end of the thread cut. Finishing the work, the thread is fixed under the embroidery from the inside, stretching it between the stitches and the end is cut.
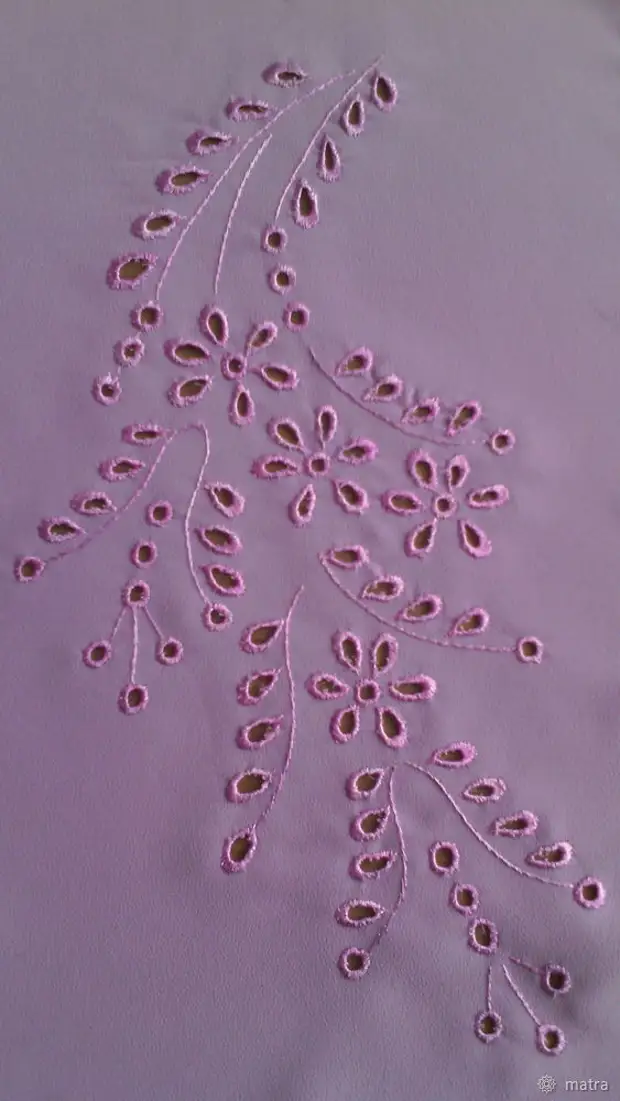
The slit surface is well combined with the "white glady", "Richelieu", openwork and decorative grids, various finishing seams.
Success in creative work!