

New Years is soon! The most impatiently draw calendars with a countdown until the last day of December, the most far-sighted already bought gifts, the most intelligent in conversations with loved ones very freely build offers with transparent hints for the desired gift, the smallests are not quite completely oriented in time, but by elusive signs, Mysterious overloads of mom and dad, on the strange questions of grandmothers, are well the whole year, they already feel that the favorite holiday of children and adults is soon.
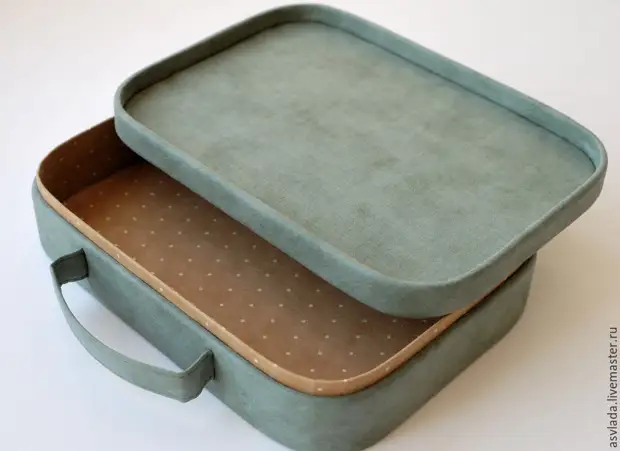
And since the holiday is planned, then there will be gifts. Gifts will be different, and it is possible that you want to give decorations on the New Year tree. And so smoothly, as in well-sharpened skates, the figure skater slides on the ice, approached the topic of this master class: a lesson will tell about the method of making a gift box for especially valuable toys. It is also considered to give only a box, shifting the responsibility of filling at the recipient of such a gift.
Before proceeding, read the short thoughts of the author of the master class about the described process:
* The master class is divided into chapters. Such a division allows you to interrupt work at some completed stage to start it at another time;
* The list of necessary materials is printed at the beginning of the chapter in which these materials are used. Bresh a little forward - you will not need to buy a special cardboard machine or a line with a markup of 0.001 mm - everything that we used will certainly have at home or sold in the nearest bar of the stationery goods;
* For the best result you will need patience and accuracy;
* Photos and Description of the process are focused on right-handers, "Grand Pardon" to those who are granted the ability to write only with his left hand;
* The author does not claim the originality of the idea, as a consequence of the lack of such a concept across the space laws.
You can start.
Chapter first.
Materials: scissors, stationery knife, metal line, pencil, feet or sawn, PVA glue, dry adhesive pencil, greasy tape, gloves, sprayer, slim sheet of paper size A4, cardboard 2 mm, cardboard 1 mm. Cardboard dimensions 2 mm thick: two pieces of 19x26 cm and two strips 4x85 cm and 2x85 cm. Cardboard dimensions with a thickness of 1 mm: two pieces of 19x26 cm.
Recommendations for the first chapter: Do not be afraid to be a perfectionist.
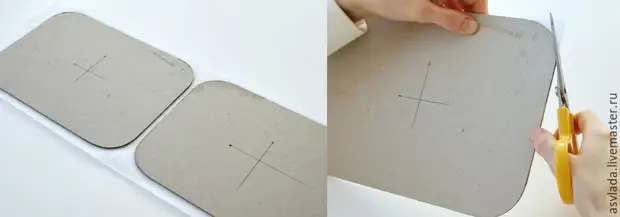
Stripping from the recommendation prescribed above, cut four identical sides of binding cardboard. Perfection is the main task for the next 10 minutes. To do this, take a thin sheet of paper with a size of 18x25 cm, fold in half and once again in half. From the angle of the open cut, folded 4 cm in two sides. Make a rounding on the labels. Smooth and beautiful. Corner cut, origami expand. The simple pattern is glued to 1 mm thick cardboard.

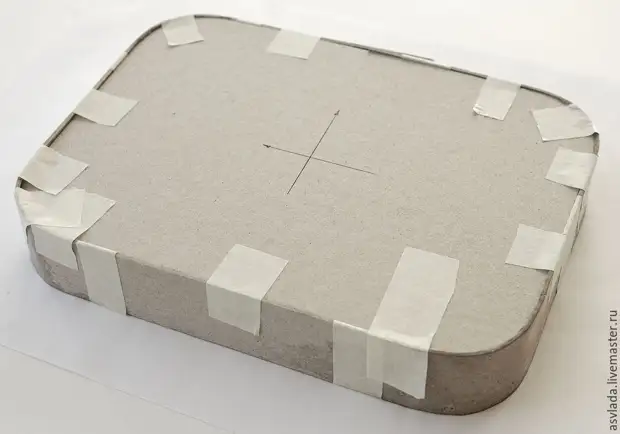
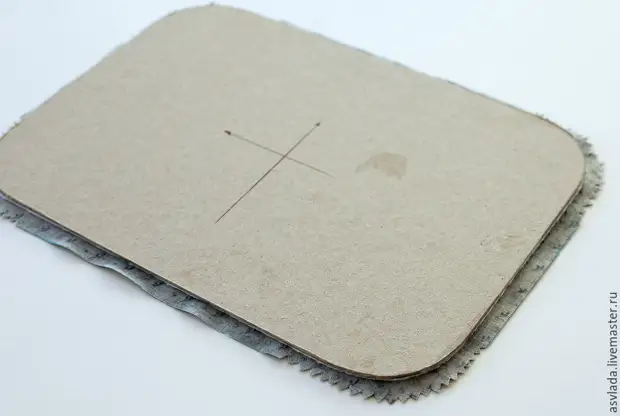
Exactly along the edge of the template, diligently and diligently cut the first reference detail. Find the center for the details and apply the Top-Leo tags. Circle this item to get the remaining three side. On each side, put the same arrows before cutting parts. The scheme is this: the detail circled, put the arrows, cut out, circled the item .. and so three times.

On four sides of the same directions and, if folded them with a crook or a stack of pancakes (a matter of taste), then the edges will coincide in a perfect way. Not enough completely? Perfectionist advises to glue the details of paper scotch with each other and subflink the nail and nail file.

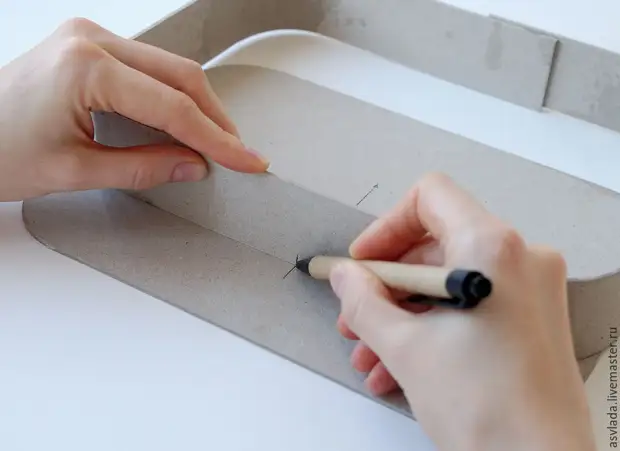
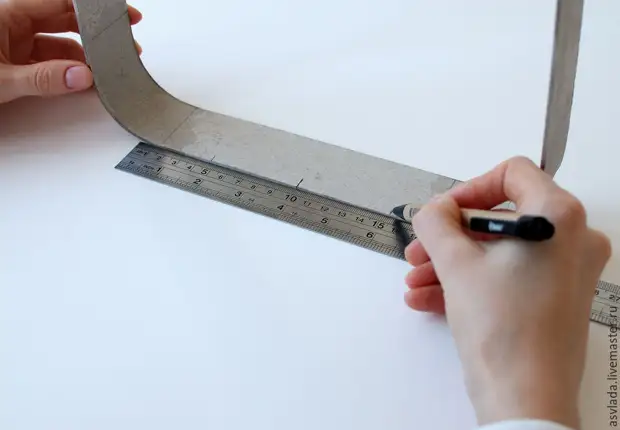
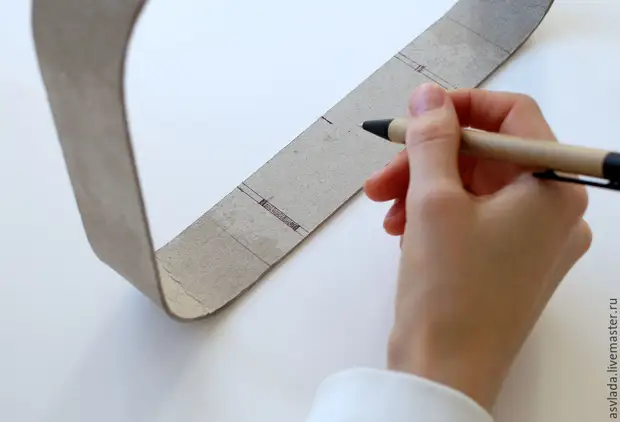
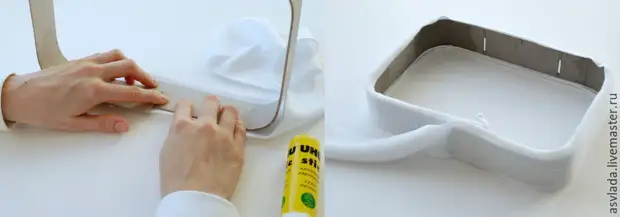
The next stage requires training. Put the Cardboard with a thickness of 2 mm and a cardboard strip 90x4 cm. On the cardboard strip Take the labels, laying out the distances: 8 - 16 - 25 - 32 - 50 - 58 - 67 - 75 cm. Sections of 8 cm Indicate a cross, check mark or fluffy snowflake - These are places of rounding corners. Also indicate the beginning and bottom of the cardboard strip. Cut long stripes of paper scotch, centimeters to thirteen, Move the PVA glue solution with water in a 1: 1 ratio, shield the table with paper or newspapers, put on gloves.

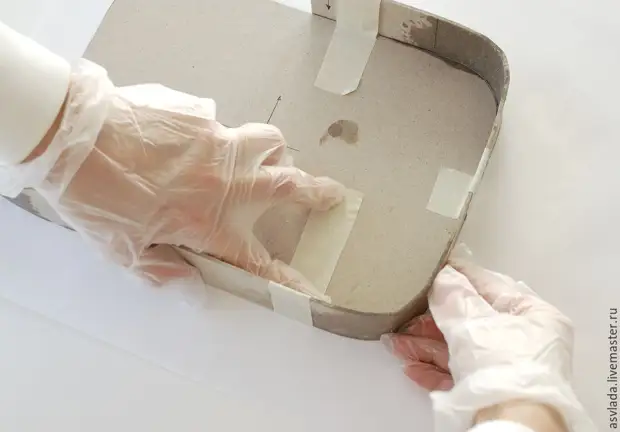
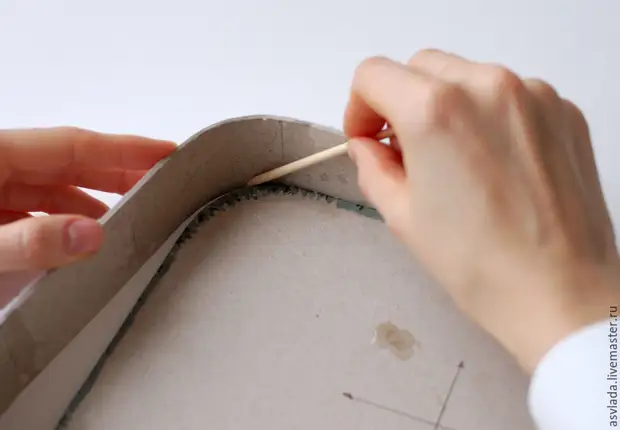
With the help of a flattener, strictly speaking, spray the solution on the site marked with a special way. You need to wet cardboard moderately and on both sides. Everyone will understand the word "moderately" in his own way. That's how to explain? Cardboard should not be fascinated or declining, but it should be well fed, to be plastic. A couple of "PSHIKS", if you allow it to be expressed, on each site on one side will be enough. In any case, you can pre-train on trimming cardboard and reveal your "moderately".
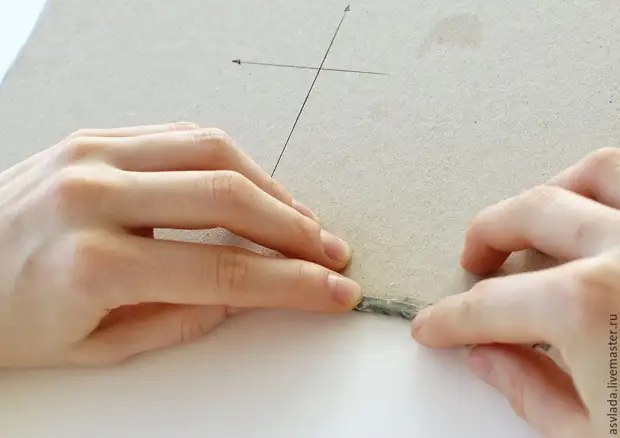
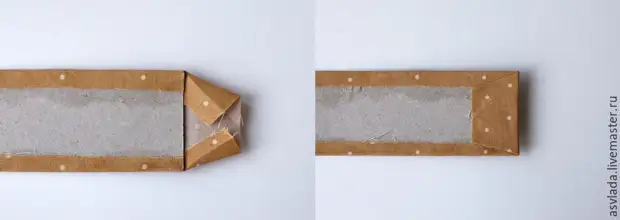
Find a label "Start-bottom" and connect with a middle cardboard side. Thumb holds the side, envelope the strip of moistened cardboard corners.


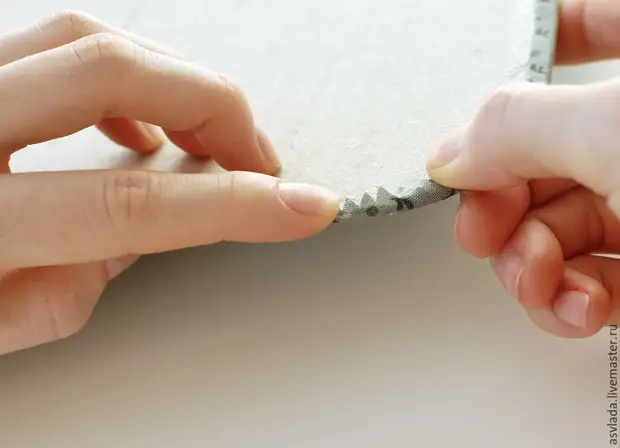
After all the corners accepted a semicircular look, repeat the operation, but already gluing a scotch band to the sideline.
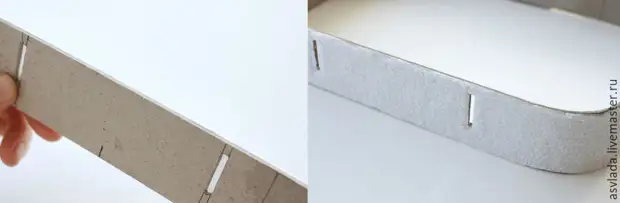
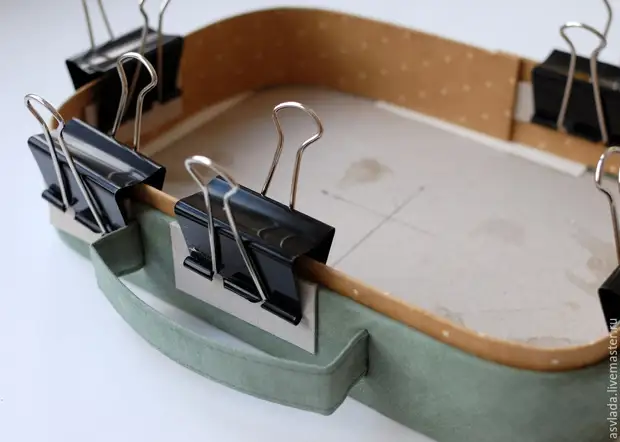
Additional heading "Perfectionist on a note". So that the box shape was still perfect, take care of the beautiful rounding of the upper edges of the side. To do this, put a book in a box, in the height of equal to a slightly less height of the side, on the book a second cardboard side, press the upper edge of the side to the edges of the side and fix the tape to the complete drying of the glue.
Repeat all items for the second cardboard band. This time it will be easier for you, because it has already been the previous one, the skill and skill appeared - the hands of deftly cope with this task.
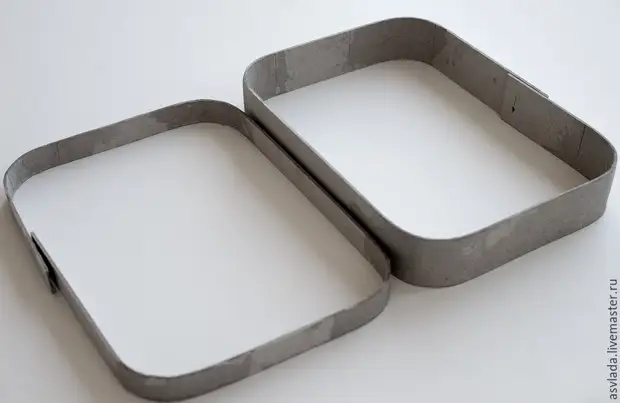
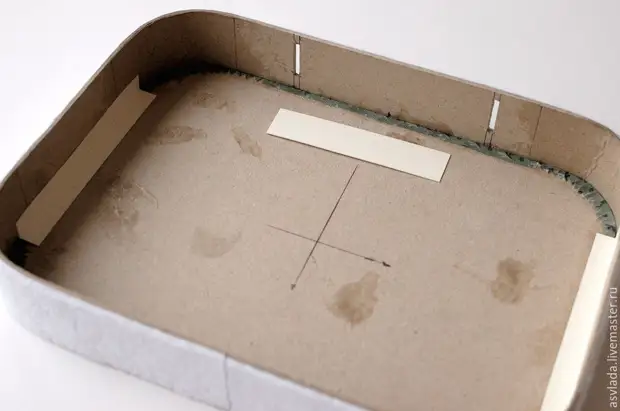
When the glue dries, remove the scotch and the sidelines. Now you have such two details. And you should be joyful.
Chapter Second.
Materials: 25x60 cm elegant fabric (size with a margin on a neat trimming fabric), fleece, a stationery knife, self-describing marker, ruler, scissors, dry adhesive pencil, glue that is quickly grasped, a piece of tight paper.
Recommendations to the second chapter: What is your life credo? Accuracy!
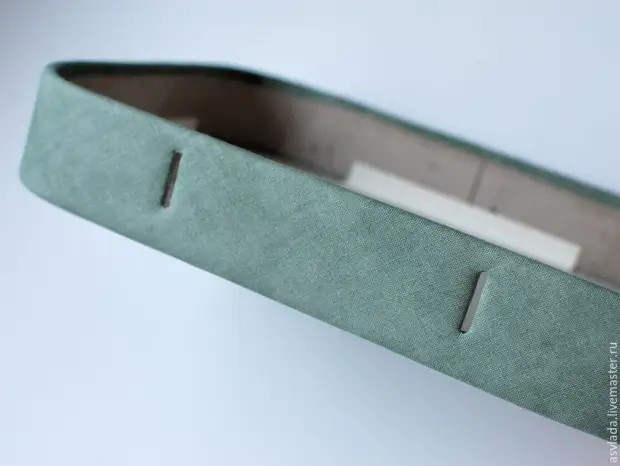
First of all, prepare holes for the box handle. To do this, put the side on the sideline, so that the long sides coincide. With the help of the arrows, it is easy to find the middle on the side.
From the label to post 5.3 cm in right and left.
From each new label to postpone 3 mm to the center. From the bottom of the side of 1.3 cm, the hole itself is 2 cm in size, then 0.7 mm remains to the upper edge.
The result of the calculations must be neatly cut through the stationery knife.
Walls and sides will be soft and comfortable as freshlywalked snow, thanks to Fleas. Sides first stick to a piece of fleece, and when the glue will dry out, cut out the form of the workpiece.
For sides, it is more convenient to first cut off the fleece strip with allowances on one centimeter on each side, and then glue and cut down too much.
When you finish, do thin scissors cut the surplus of the fleece and cut out the lumeges for the handle. In both cases, try to trim exactly around the edge so that there are no "snowdrifts".
Before moving on, cover the elegant matter side of the future box. Until the end of the second chapter, we are talking about this.
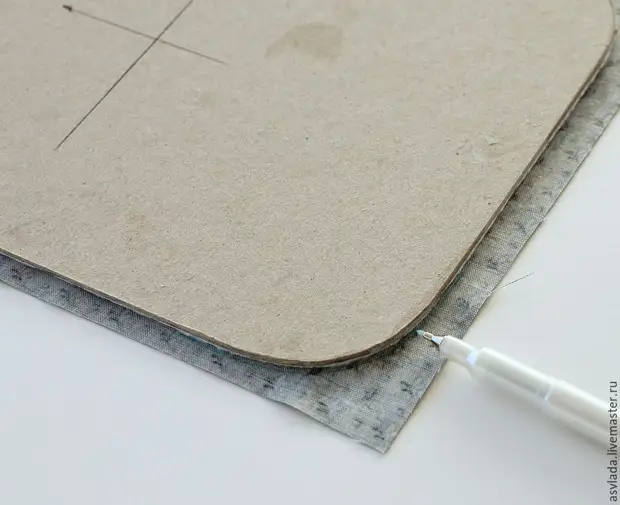
The selected fabric is pre-laughing and positioned according to the direction of the pattern face down. Top of fabric Place the carton of soft fleece down. From the edge of the cardboard, retreat 0.8 mm and apply tags.
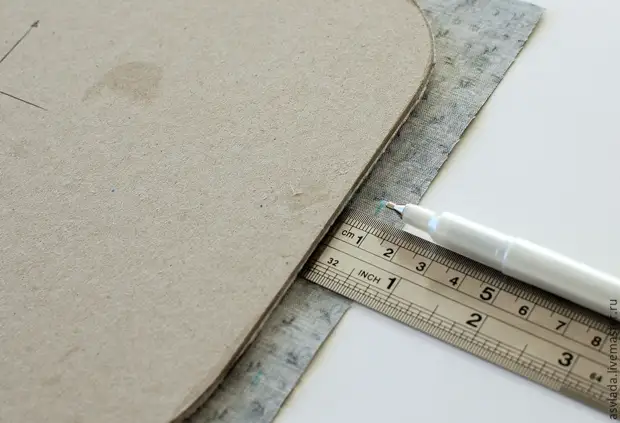
In the labels, draw a rectangle with rounded corners, putting cardboard to the labels and adjusting the corners.
Cut the resulting figure with scissors. If you have fester scissors - lucky if there are no such scissors, take some time to cut the tiny triangles on the corners of the figure.
Start gluing the tissue of the fabric from long sides, then short sides, and after - every corner in the same time.
Similarly, wrap the cloth and the second blank of the cardboard.
Now you need to glue the side to the side of the box. Do not confuse: Blender the bottom of the box with a high side. Before gluing, cut the excess sidebar in length. To do this, tension well the cardboard band around the perimeter side and put the label where the edges converge.

Printed better glue, which is quickly grasped. Apply a strip of glue 2-3 mm wide on the bottom of the side and immediately press the side to the edge.
Go further as glue drying.
Tight press the strip to the edge side and the side itself to the table surface.
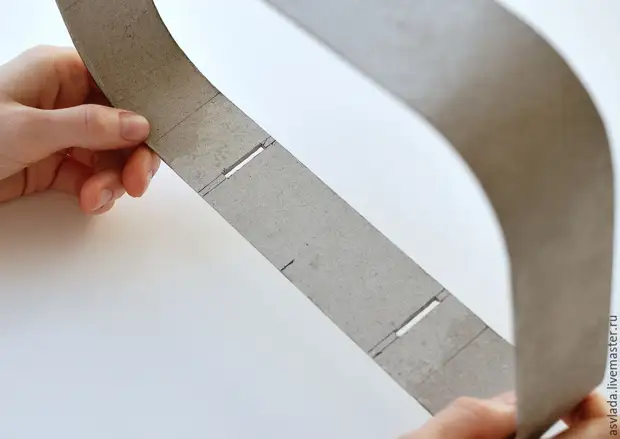
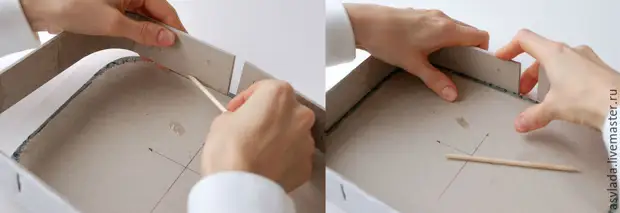
Strengthen the walls of the box with strips of dense paper, peculiar in the middle.
CHAPTER THREE.
Materials: one meter of fabric for oblique bey, tailor pins, thin needle, threads in tone tone, Dublerin glue, decoil or hard felt, self-describing marker, scissors, ruler.
Recommendations for the third chapter: If you do not own knowledge about how to choose the oblique bay, please look on the Internet.
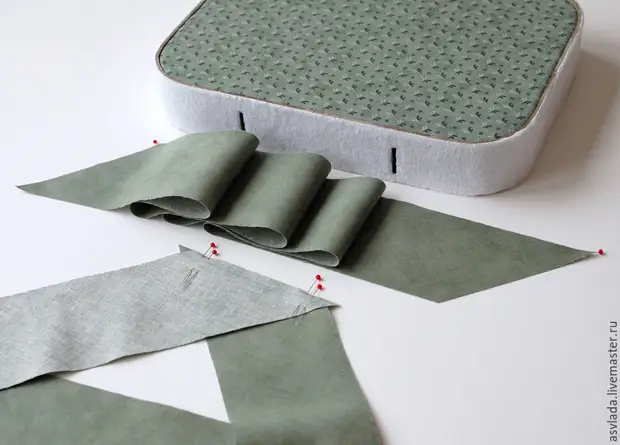
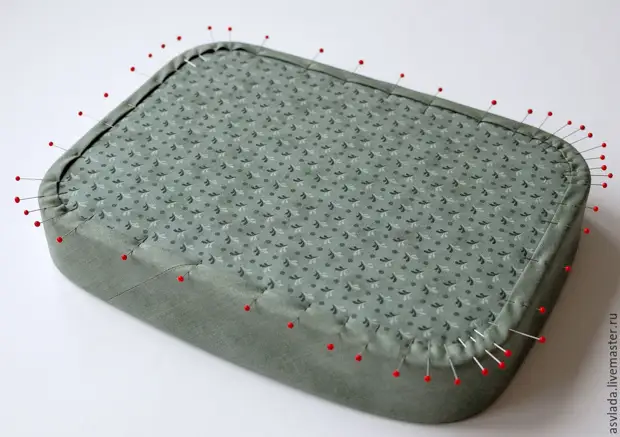
And here you have two details: cover and bottom box. The top details are covered with elegant matter, and the sides are saved by fleece.
You can leave so much - the work is done not small, it looks good, and the fleece is very cozy to keep in your hands. But no. Make a little more and close the fleece sides and the wall joint with the side of the oblique baker. For both parts, there will be a bit of 79.5 cm long, nor less. Sections should be directed exactly as shown in the photo, and the length is measured from extreme points on one straight fairych. Baika fold the front sides with a 5 mm allowance, scroll the pins and laid the line on the typewriter. Sow disappear, protruding corners cut.
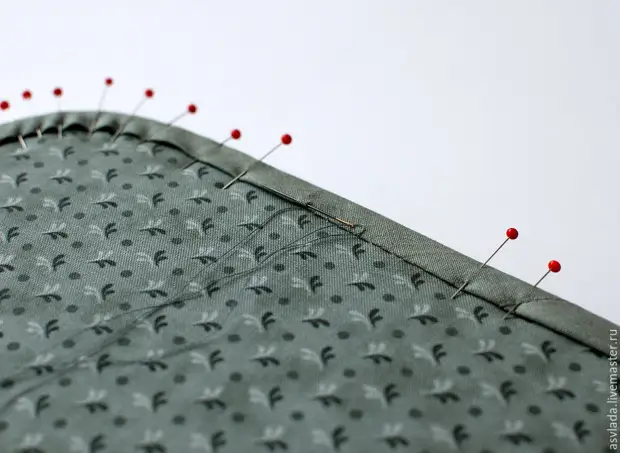
Pull the ring of oblique bey on one of the parts of the box, leave the allowance of 1.8 cm. Open cut is cleared inside and scalp the pin.
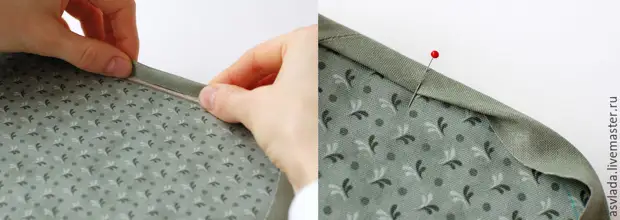
Purchase and brand on the entire perimeter of the part, the fabric is slightly slightly in the corners.
Then the admittance of bay secret seam.
Baika is well revealed by paying special attention to rounded corners. After that, the excess faces of the bottom of the box are sticking to the inner wall, and the remains of the fabric on the lid gently put, cutting the triangles in the places of rounded corners.

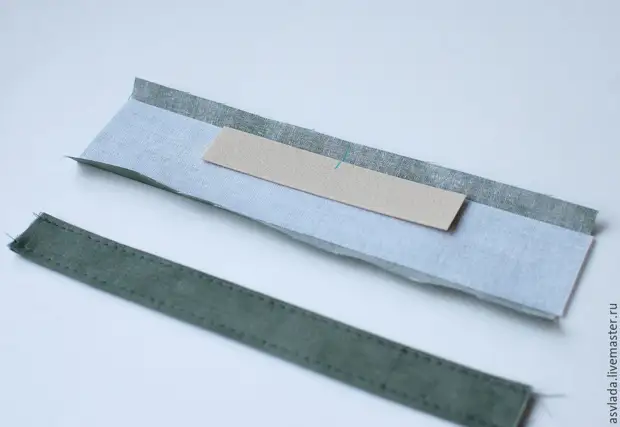
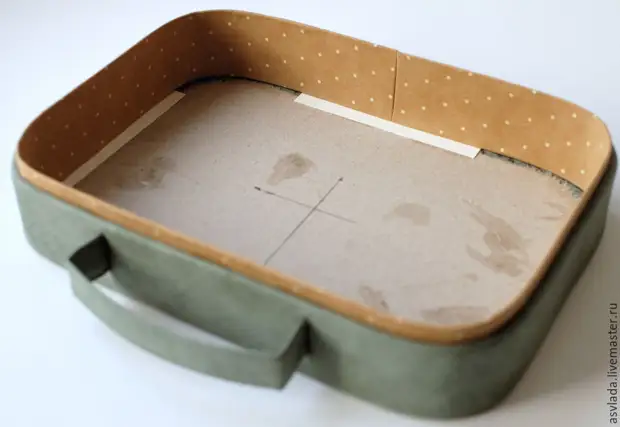
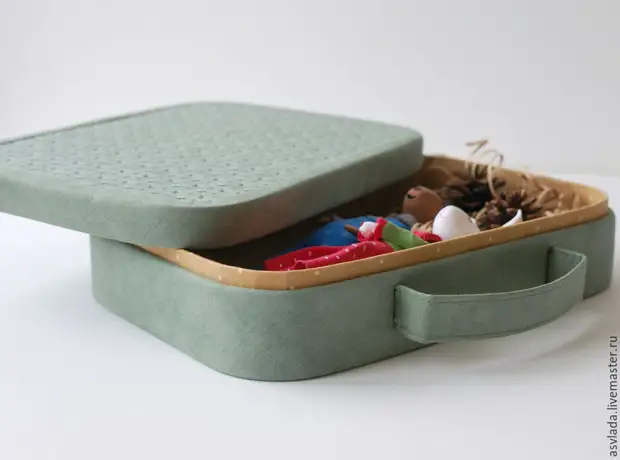
It's time to make a handle for a suitcase. Pour a piece of cloth with a size of 6x20 cm, a thin adhesive doubler size of 4x20 cm, decoil or hard felt with a size of 2x10.5 cm. On the tissue, retreat 1 cm from the long slice and at this distance, lock the o'grain. Introduce the allowances to the inner side and press the iron slightly, but do not make a sharp fold - in the process it is adjusted. Then find the middle of the middle, the middle of the middle, the middle, decoil it on the segment of the fabric and on the piece of decoration. Fold the detail in half and finally start the allowance inside. Lay the line on both long sides of the handle.
Before inserting the handle into the sideline of the bottom of the box, rub the fabric with sharp thin scissors in the places of holes for the handles. With these millimeters of the resulting points, carefully wrap the walls of the hole before lubricated the thin layer of glue.
Pitch grind into the hole, and the protruding tails are glued to the walls on a reliable quick-drying glue.
Part fourth.
Materials: Barlet Card Strip 1mm 4.3x85 cm thick, stationery clamps, fabric for internal design box 30x90 cm, glue, dry adhesive pencil, fleece, any long tape, not for beauty, and for business.
Recommendations for the fourth, final chapter: Take patience, there are quite a few operations to complete the work on creating a suitcase and go on New Year's ball.
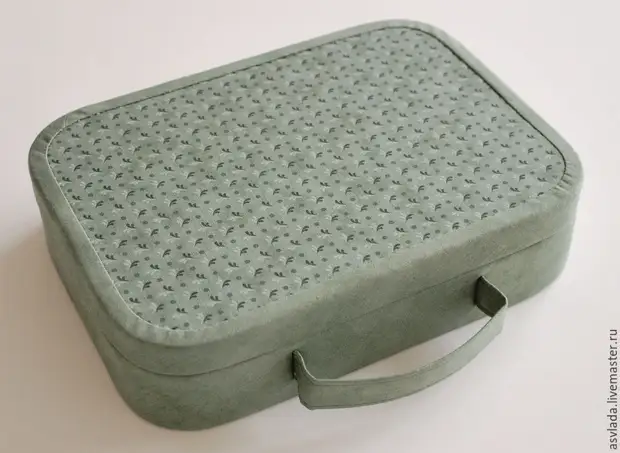
We think that you have repeatedly applied the cover on the bottom of the box to make sure that it came out perfectly - the reward for accuracy and accuracy. A small part remained, with the help of which the cover and bottom of the box will be friends truly.
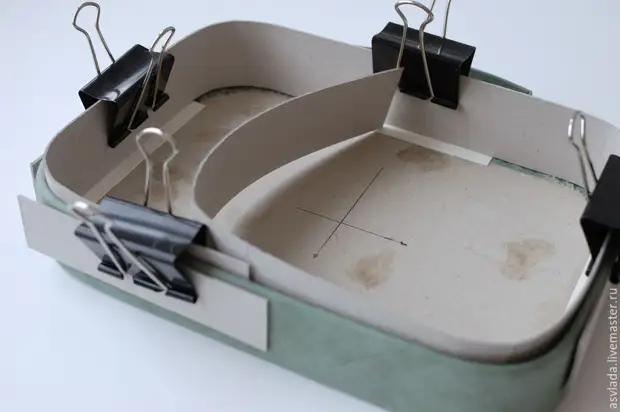
To make such an item, you will need a strip of thin cardboard 4.3 mm wide and a length of 85 cm. First make the fitting: repeat the wall shape of the cardboard strip box. Especially tightly press cardboard in the corners and pass the stationery clips. From how high-quality you press the cardboard strip, whether cuts will be dependent. Having reached to the end, make a label where you need to cut off the surplus of cardboard, and add another millimeter to this label.
Disassemble the design. Cut from the fabric strip 7 cm wide and the length of the length of the already sliced cardboard with the allowances of 1.5-2 cm on each side. One side of the cardboard is caught with a cloth with a dry adhesive pencil. Long-side allowances in advance distribute in such a way that the upper part accounted for at least 1.5 cm from the width of the tissue laid on the allowance.
Now glue these points and form the corners. So that the corners are neat, follow the simple instructions.
Soles of a warm iron Press the fabric area that protrudes for the cardboard to make the bends more clearly.

Bend the corner and again segue the iron.
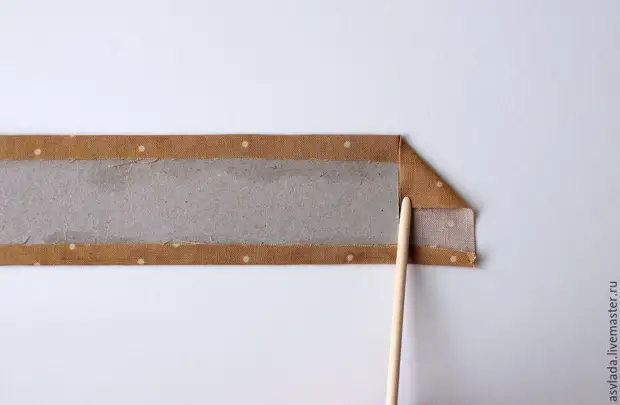
Relieve the fabric along the fold line, not reaching the top edge. The second slice is on the edge of the cardboard, also without reaching the end.
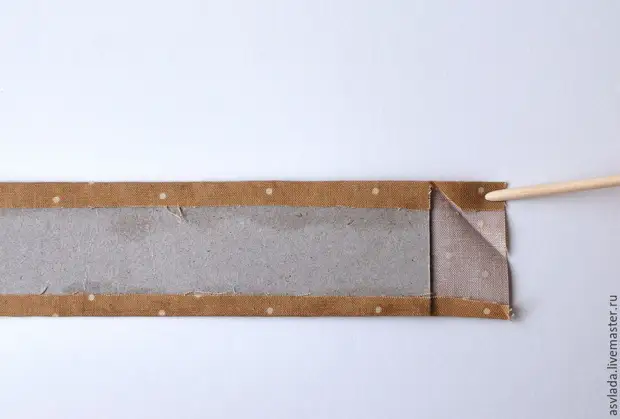
Expand the allowance, and fold so that the renowned oblique slice comes into contact with the edge of the cardboard.

Repeat for the bottom corner and wrap the cardboard with the intake, before applying glue to cardboard.
When you create four corners, glue the inner side of the box to the wall of the box. Apply glue for small sections and, before promoting further, fix the parts of the clamp.
If I properly held the calculations, you will fit the ends of the side.
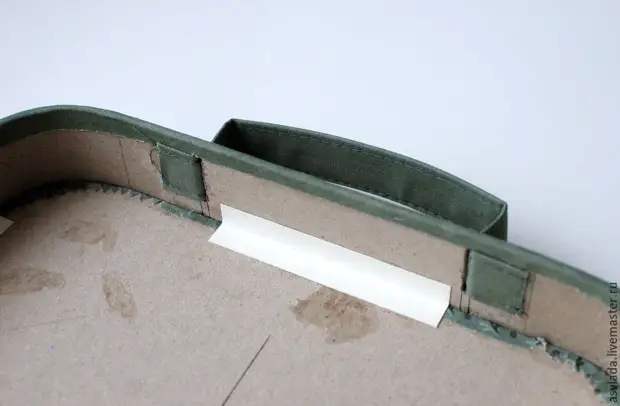
The last operation of this master class is to glue the details from thin binding cardboard to the bottom of the box and the lid of the box. At the box cover, the detail will become good, but the detail for the bottom of the box will have to be trimmed. Before investing the item for fitting, put the tape, with which it can be easily delivered.
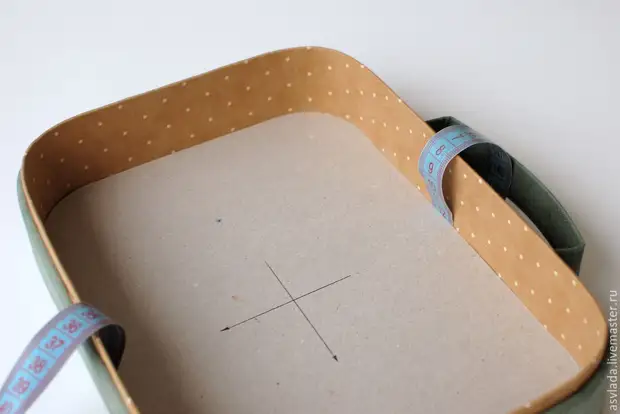
Crop and try on until the result is completely satisfied. After fitting, cover both parts of the fleece, then the cloth, as you already know how.
Before finally glued, try again, whether it docked well. If not, disassemble the entire box and start from the first chapter. Just, of course, soon the holiday is still, fun.
Congratulations! You worked on fame. We are confident, you got a very beautiful box. Of course, we are curious to know how you were issued and for which the box was useful. Talk about it in the comments, ask clarifying issues, make rational proposals for improving or simplifying the process of manufacturing a box with rounded corners.
Thank you for your attention! All the best to you and your home!
The author of the Text of Angelina Skyrovakova.
Photographer Vlad Danilov.
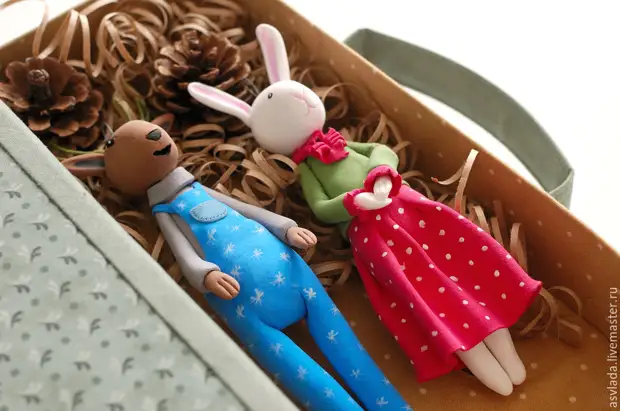
Separate thanks for the New Year's mood Anna Shatukova and its magic toy store on the tree.
A source