Today I propose to make a small and spectacular decoration with me. The master class is designed for minimal basic knowledge of polymer clay and its properties, as well as a small experience in the modeling.
I really love to create exactly the moths, the whole process seems to be enveloped by magic and magic :)
So, let's begin ...
We need:
- Sketch.
- Baked polymer clay light color.
- Liquid plastic (gel).
- Surface for baking.
- Needles.
- Thin stacks.
- Knife or blade.
- Texture rug.
- Dry pastel.
- Acrylic black paint.
- Protective varnish.
- Little piece of fishing line (for mustache).
- Accessories (to create a coil).
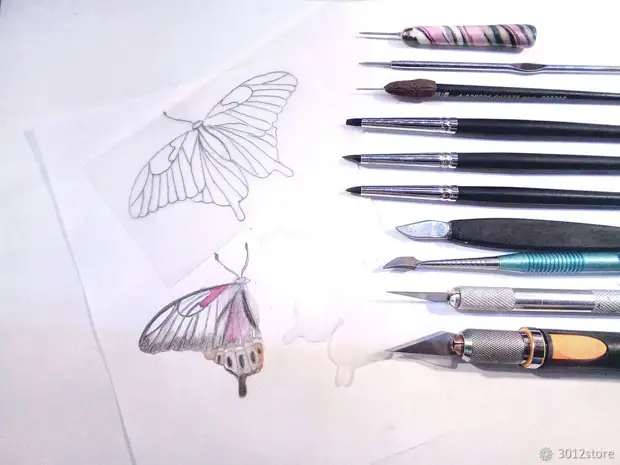
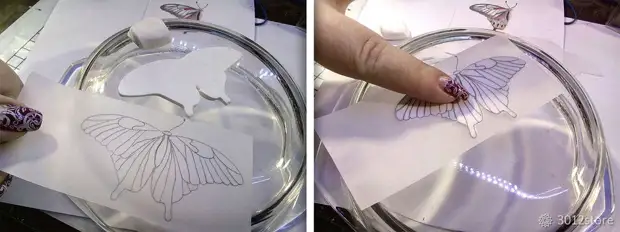
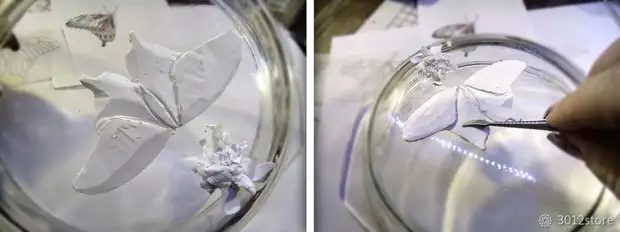
I have previously made a small sketch, then redesigned the image of the moth on the track. Calca is very convenient to carry the drawing on the "raw" clay.
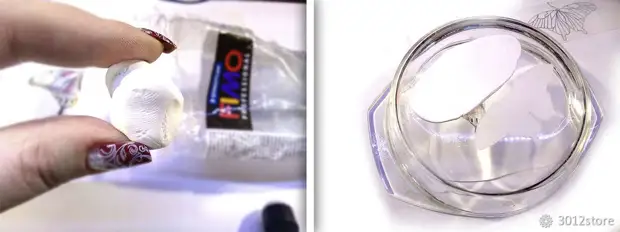
For a moth I will use a white polymer clay "FIMO".
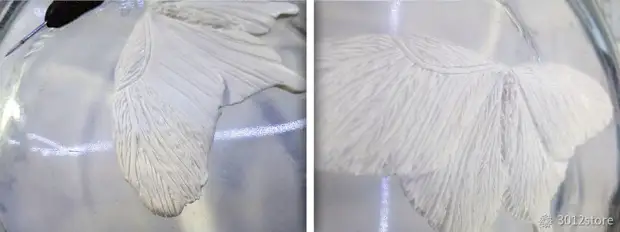
The clay is well smearing and rolling in the reservoir 4-5 mm, the "pattern" of the moth must be fully fit.
I have another workpiece with a more accurate pattern of the wings with a pencil, gently apply it on the carved moth, slightly pressed, to transfer the drawing, get the wingsprint.
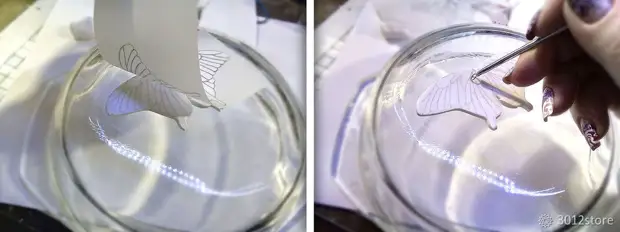
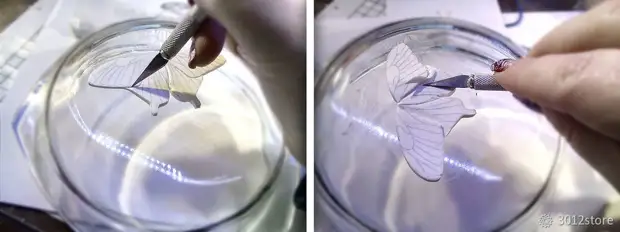
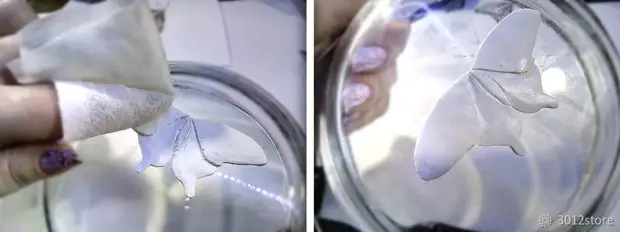
I clarified the basic form, now you can take a sharp knife and gradually give the shape of the wings, cutting everything too much.
After the moth will be ready, I flew all the irregularities with a flat stack and wipe the wet napkin, it removes all possible dust and villi.
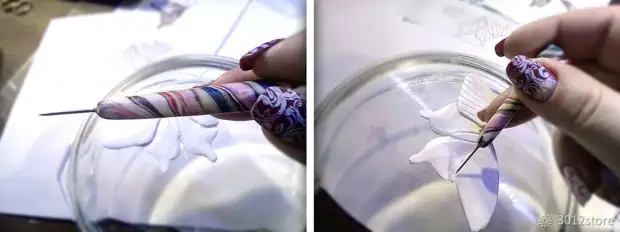
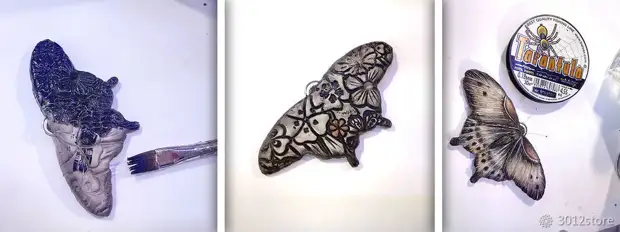
And now my favorite process begins - applying texture on the wings. For this, we need needles of different thickness, it is desirable to fasten them a little with the help of sandpaper. For your needles, I made comfortable handles from clay residues, but the needles are the most ordinary (for manual sewing).
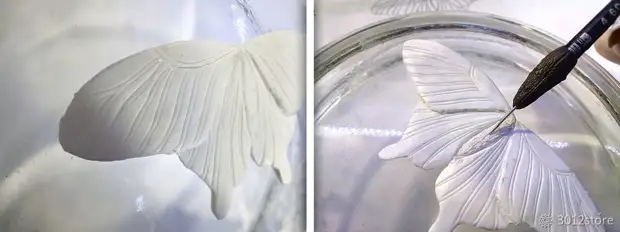
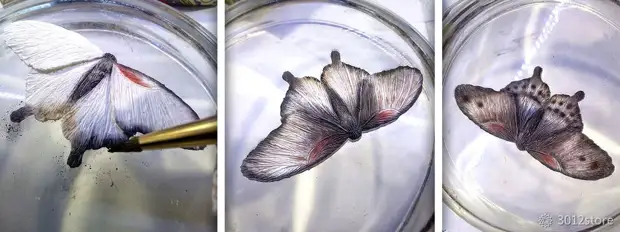
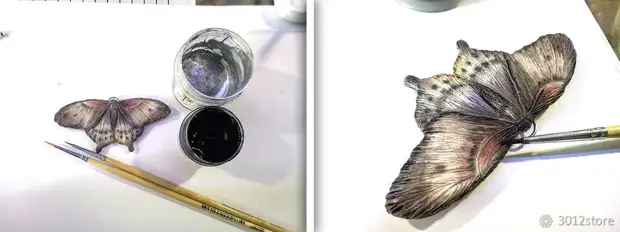
When everything is ready, go to tint with dry pastel. With the help of various brushes in the thickness, we give a moth color, starting from the edge and gradually we decide the pastel to the center of the wing, it turns out a smooth transition of color. Toning is completed and the workpiece can be sent to be baked according to the instructions on the package.
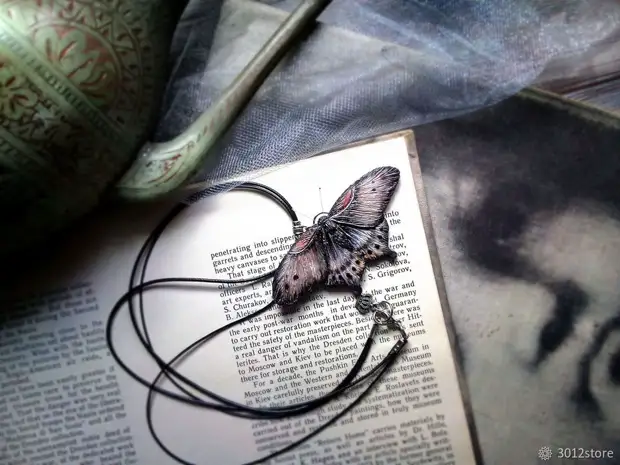
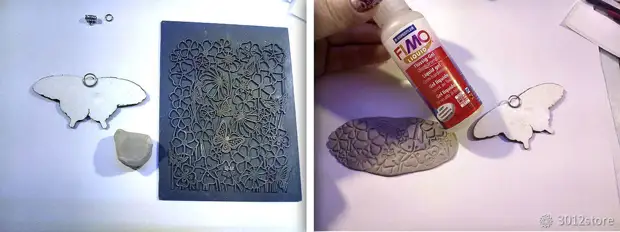
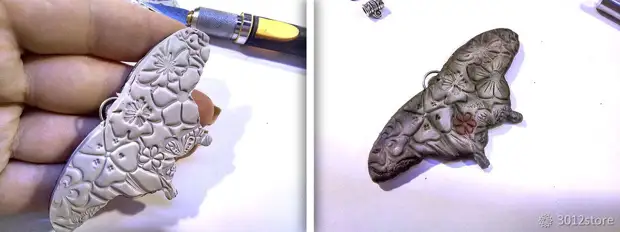
When the moth will be cooled with picking mount for the coast. You can use a simple pin with a loop, but I more like steel rings. A small piece of gray clay rolled 2-3 mm into the reservoir, print the texture. All the insanity of the moth is covering the FIMO-gel (liquid plastic), carefully put the clay with the texture, we cut off the sharp knife all too much and smooth the edge. You can slightly "swim" pastels.
We send a moth to the furnace.
Left just a little bit:)
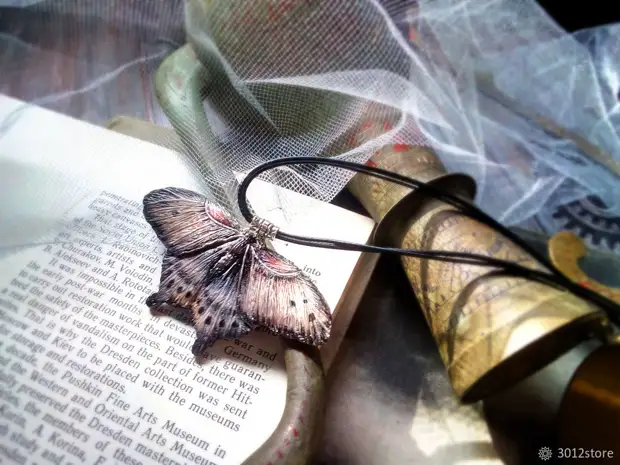
I will additionally run on black acrylic paint, so the moth will be brighter.
The cotton wand must be dipped into the solvent (the liquid for removing the varnish) and unleash the paint only from the residences on the wings, to highlight even more, I covered them with silver acrylic.
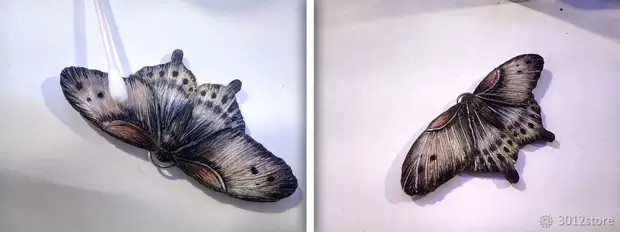
It is not overwhelming, the technique is very simple and familiar with almost all craftsmen, paint with a black color, after drying, we wash an excess paint from all volume parts of the ornament. Stayed one small nuance - mustache. I made them out of a thin fishing line, the tip of the fishing line must be melted a little, before the appearance of the droplets, so the mustache will look natural.
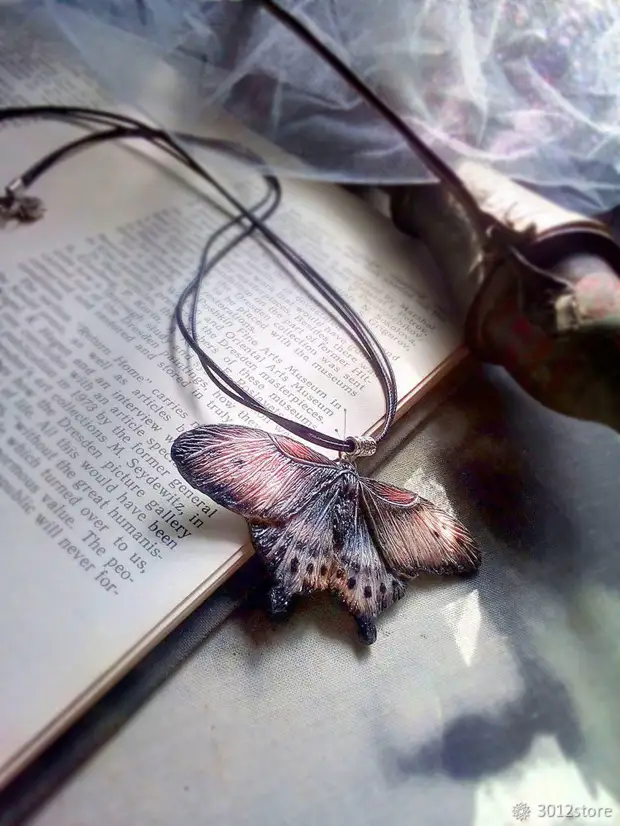
Everything! It remains to cover the entire moth varnish, add accessories and can be worn!
Thus, you can make a brooch or "plant" a moth on the bracelet. If you make a lot of such moths, you can decorate some interior composition, wall clock or vase. Everything is limited here only by your fantasy!