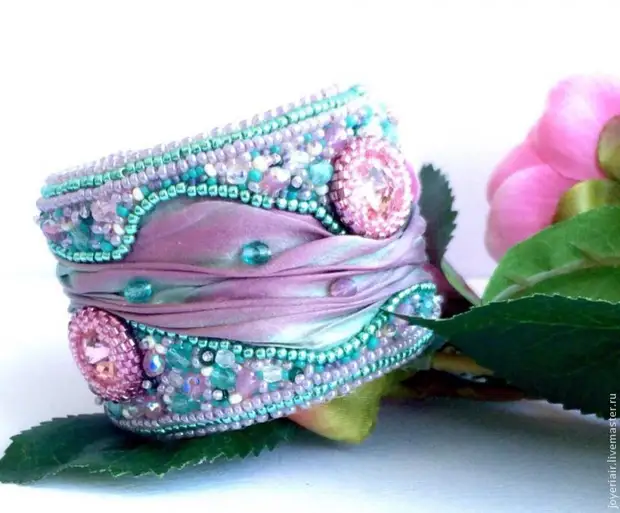
Let me present to your attention the process of creating a bracelet with a ribbon chibori. The color of the tape reminded me of spring Spain.
So, let's begin.
For work, we need the following materials:
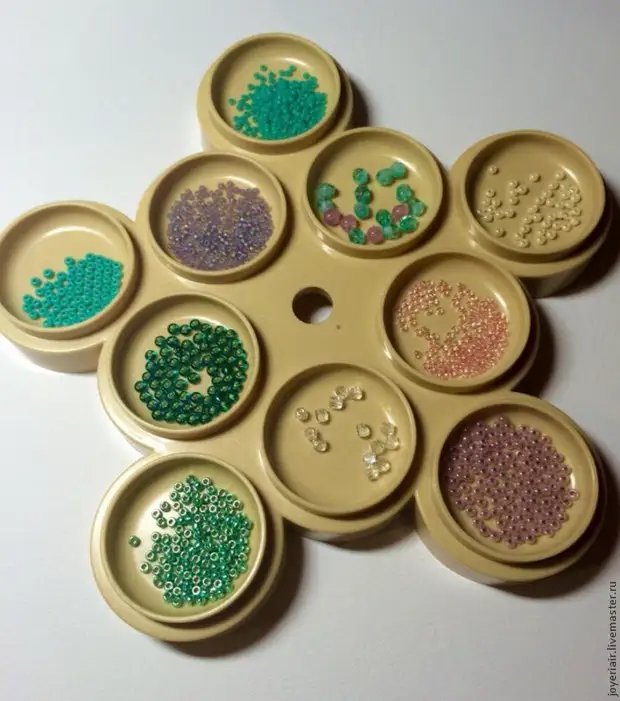
- Beads Delica 11/0;
- Beads Round Czech N9.10;
- Beaded Round Japanese N11,15;
- thread lavsanny, monofilament, bead needle;
- Beads were faceted different sizes (from 2 to 4 mm);
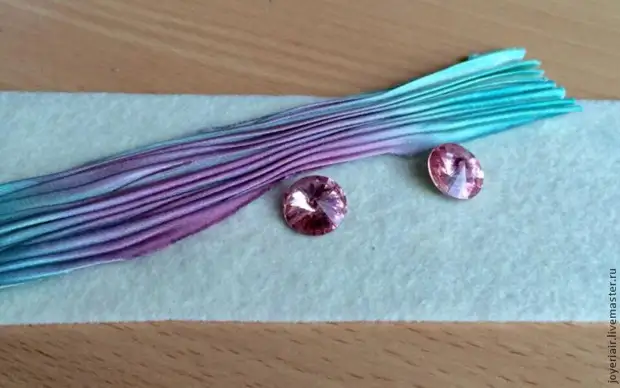
- tape chibori 20 cm;
- Crystals Swarovski Rivoli 14mm - 2 pcs;
- Felt 1 mm;
- Genuine Leather;
- Metal base for the bracelet;
- scissors;
- glue.
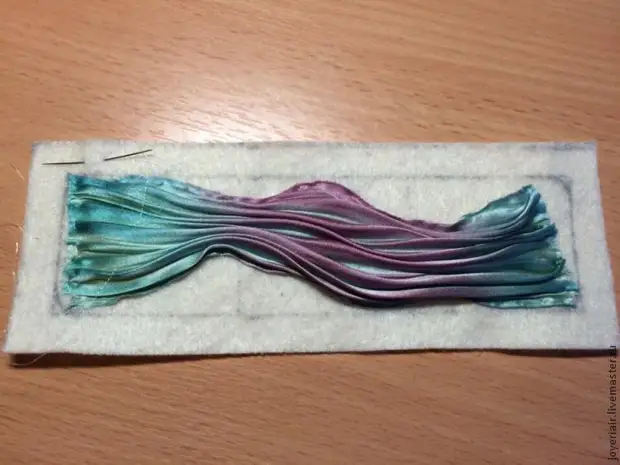
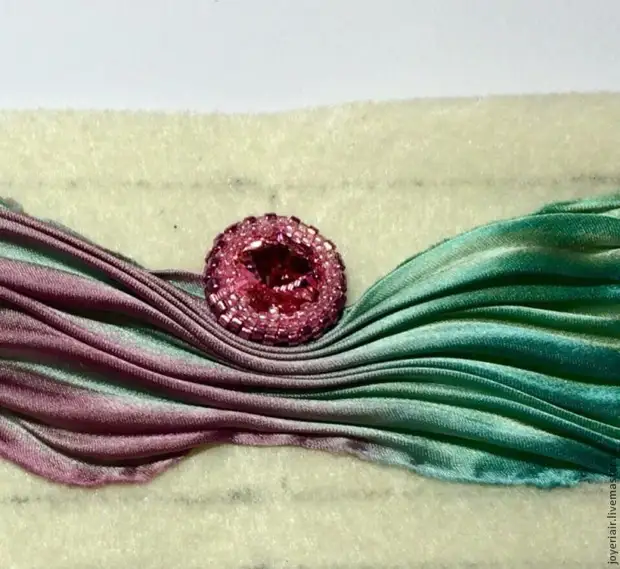
We take the basis for embroidery (felt) and apply the size of our future bracelet on it (I have 15x4cm). Then you sew the chibori tape.
Next we will be tired by the beads of Rivoli. At the Fair of Masters there are a lot of master classes on braid, I just want to remind this process.
We are fluttered on a double thread (both ends of the thread insert into the needle as in the embroidery of the cross).
Then we recruit 36 Delica beads, we have done a needle with a thread through a loop that has been formed, and tighten.
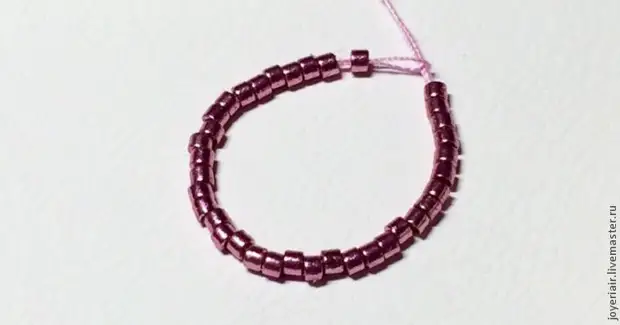
Next we are wearing a mosaic weaving 1 row (the same beads).

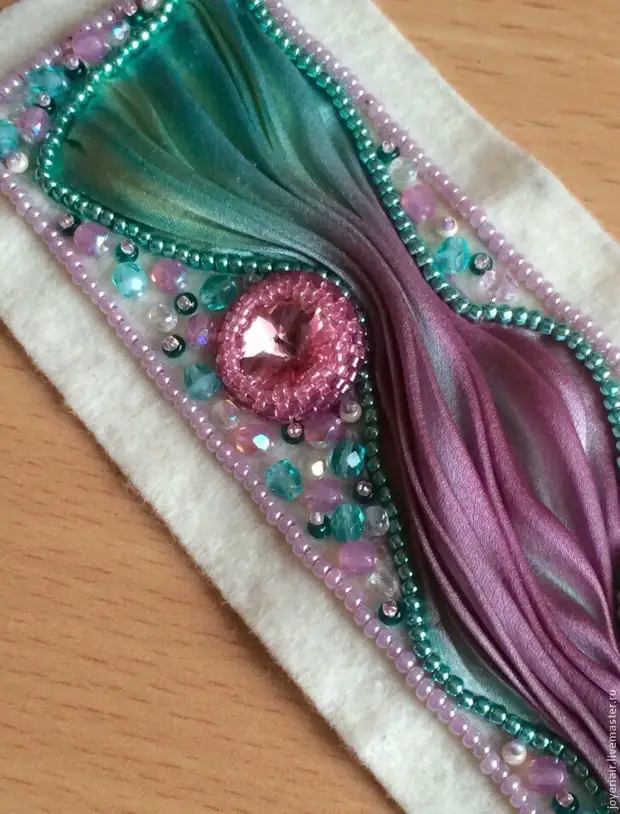
Then weave the round beads of the N15 two rows, not forgetting to push the thread. This is already enough to insert the rivoli, but I decided to make the cloves. We continue to weave the beads of N15. I climb one bisper, we pass at once through two vertices.
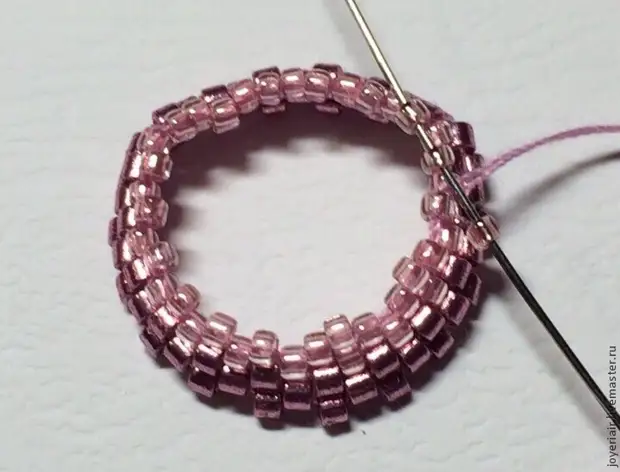
That's what happened.
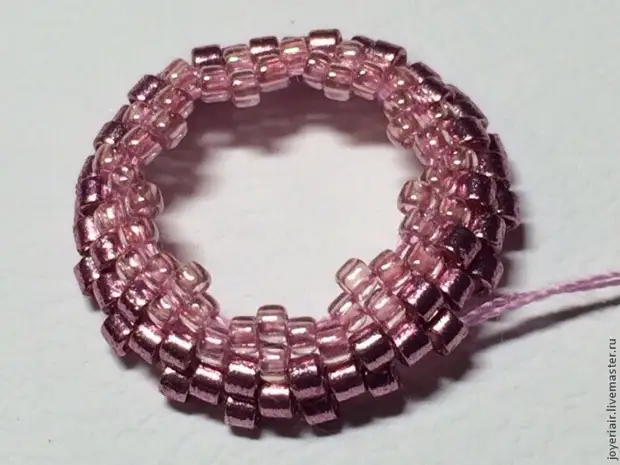
Then we insert the rivoli face up and decorated with an inside. Weave beaded N15 two rows.
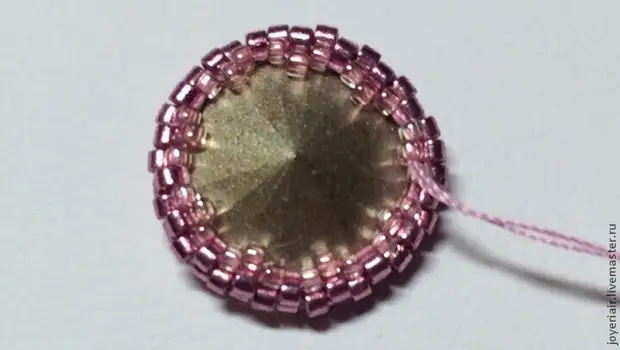
In the same way, we will determine the second rivoli.
Next, we sew them in the resulting wave of ribbon of chibori (from above and below) for the lowest bispers of the last row.
The next stage - we are wearing an outer contour beaded N10 seam "Back needle." To do this, fix the thread on the wrong side, we take the needle on the front side. We recruit one biserink and, retreating on its size, sew. Next, we return to one biserink back, we introduce a needle through it, we gain one piece of beads, retreat on its length and sew. And so all over the contour.
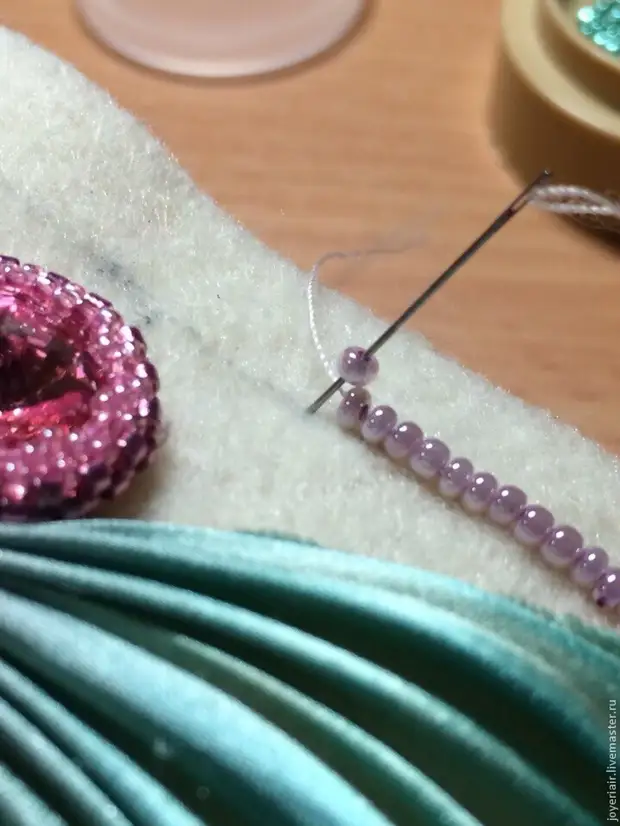
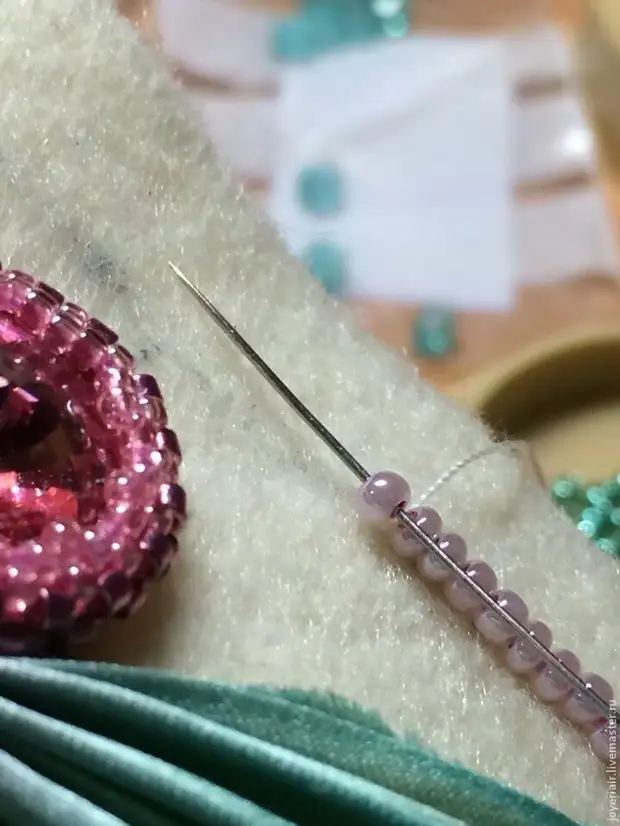
Then proceed to the inner contour. Send beads on the ribbon chibori with the same seam.
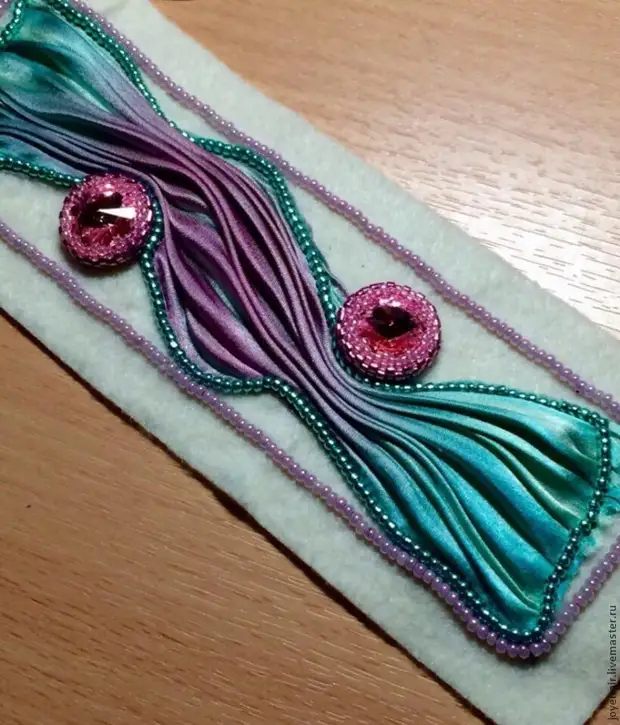
Now we will fill the space. First, sew faceted beads in random order and beads N9.
Then - beaded N10,11. And tiny empties - beadsN15. On the ribbon, chibori sew a little beads in an arbitrary order so that the waves do not break.
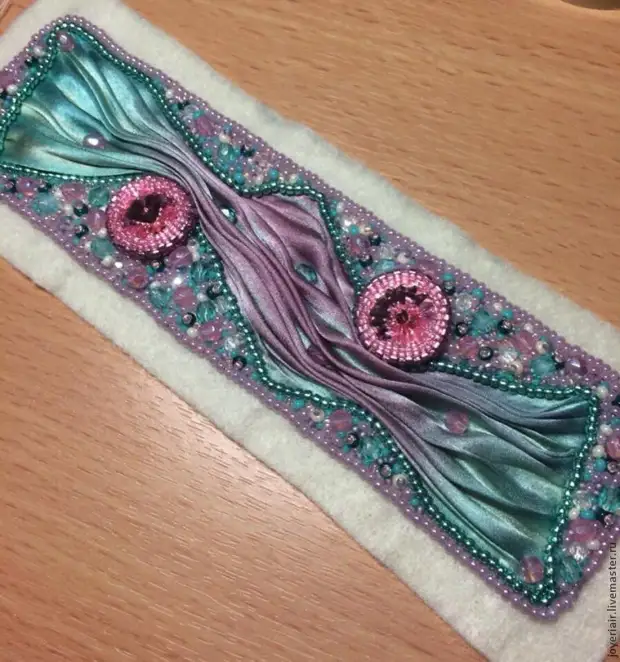
Next, we are wearing a beaded N10 again an external contour (it is not necessary to do) and cut out along the contour very carefully, leaving 1-2mm from the edge.
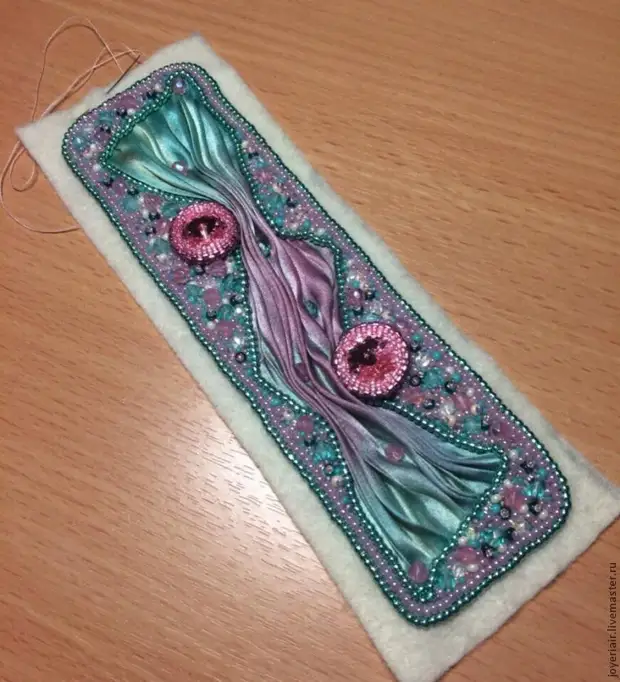
We take a piece of skin, result in an embroidered blank and cut out, retreating from the edge of 1-2 mm.
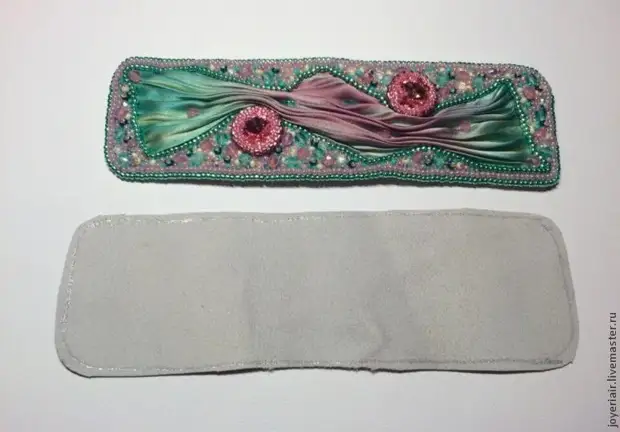
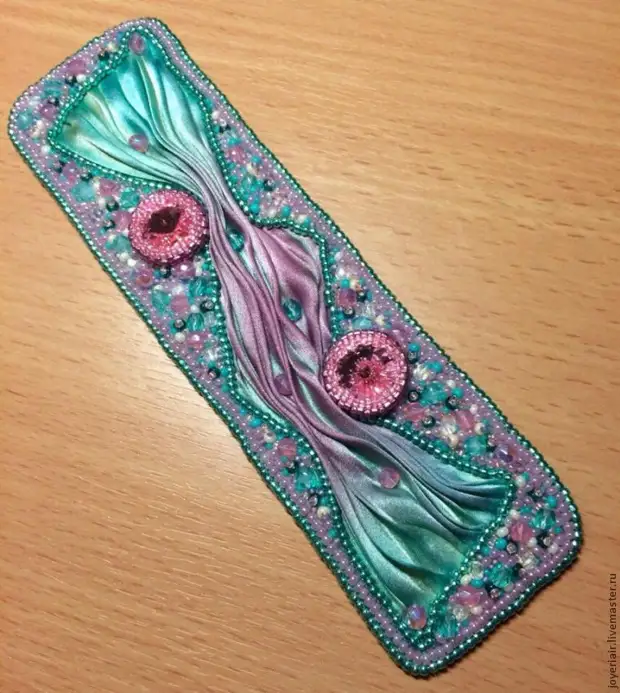
The final stage is the processing of the edge.
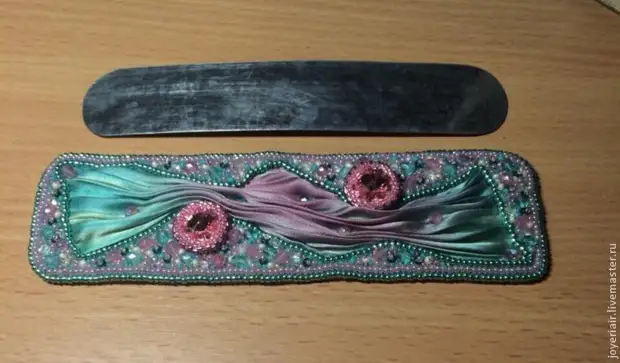
We take the metal base with a size of slightly smaller than the embroidered blank, give it a round shape of the bracelet (bending from the edge to the center using a cylindrical tube with a diameter of 3.5-4 cm). It is very important - to sow on a bent-based basis (the tape will not lose its waves).
Next, we glue the embroidered base to the metal blank, let the time so that everything fell well.
Then we glue the skin to the metal blank, we wait when everything is thoroughly stick.
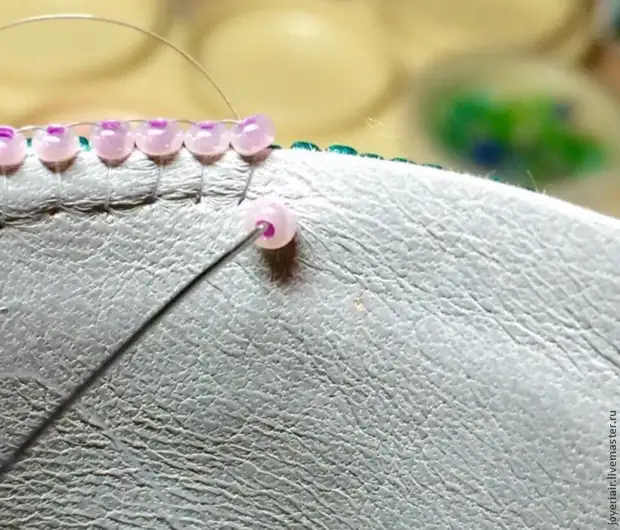
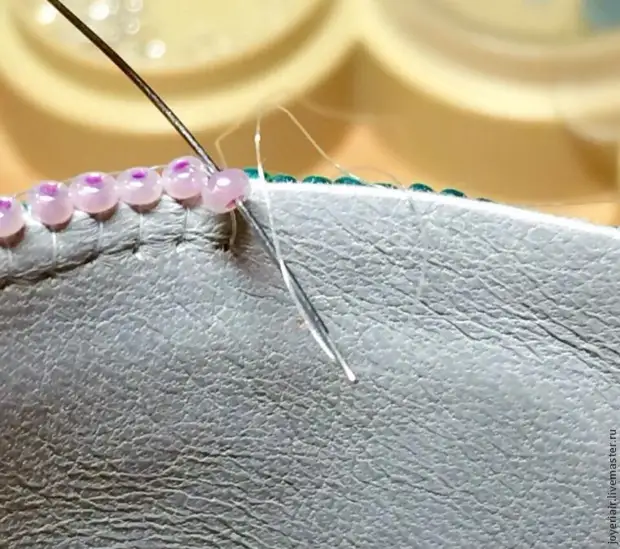
And begin to process the edge beaded N10. This time I decided to sneak the edge, keeping the work with my inside. Fix the thread between the felt and the skin, we are displayed on the involving stron. We take one biserink and enter the needle from the wrong side to the front, pull up the thread. Then I introduce a needle from the bottom and tighten the thread. We are wearing the whole edge.
Having completed the processing of the edge, we completed the process of creating a bracelet.