
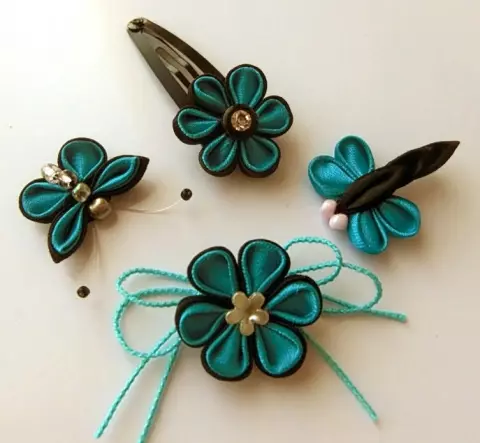
Kanzashi. Master Class.
Kanzashi is not just fabric flowers, not just jewelry and hairpins, Kanzashi is a whole art.
Of course, Japanese craftswomen make Kanzashi completely differently. For example, they use silk fabric and rice glue. It will be quite difficult to cope with the silk cloth, and where to get rice glue I don't imagine. Therefore, I will show an adapted version of the manufacturer of canzashi under our conditions.
Now I will show you how I did this simple flower.
What do we need:
Satin ribbon 2.5-5 cm wide two colors. For the first time I recommend to take a 5 cm tape and try to make a single-layer flower.
Lighter.
Glue gel moment.
Scissors.
Thin tweezers
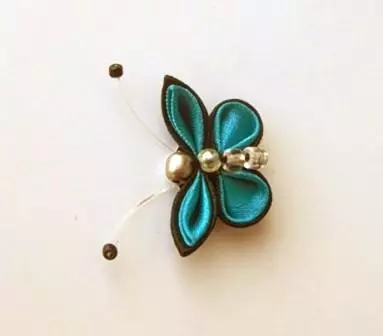
Decoration for the middle of a flower.
How to do Kanzashi:
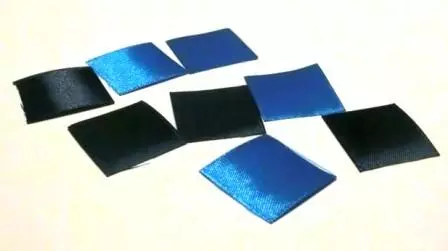
First, we take the satin ribbon and cut on equal squares of 6 pcs. each color.
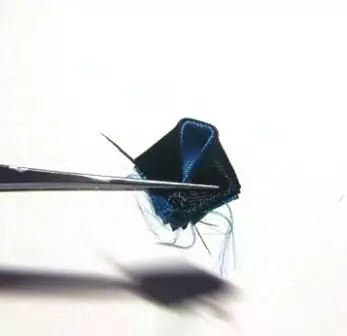
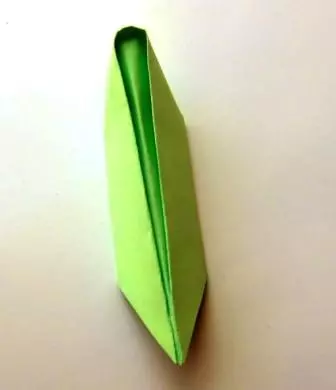
Next, we take the box of black, bending diagonally. Also bend the turquoise square. Then the resulting turquoise triangle on baiting on a black triangle so that the strip of the black triangle peeps from above due to turquoise by 0.5 mm.
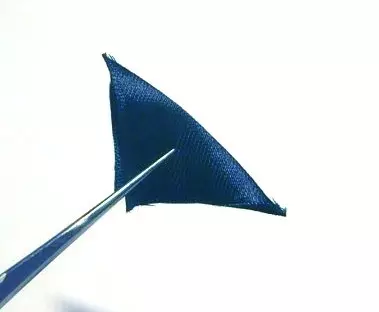
Hold the design of triangles with a wide angle to yourself. We begin the side corners to the middle corner. Here, here I use a lighter - I felt the resulting multi-layer angle and immediately squeezing my fingers. All layers glued together and you can work further. If you need to pour and sides, so as not to harry
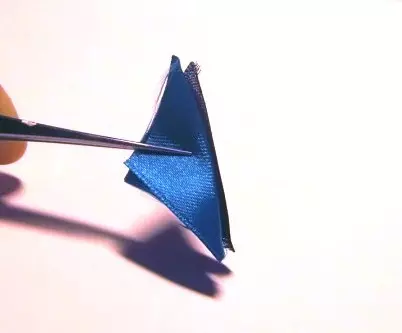
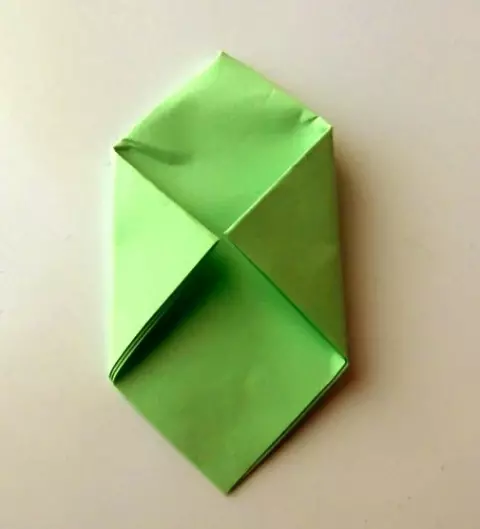
At the received rhombus (keep it with a booed angle to himself) turn back the side corners, connecting them from the wrong side.
Now neatly bend vertically the resulting item so that the inside side is as it were in the resulting design.
I'll show you on paper. Highlights to be clearer:
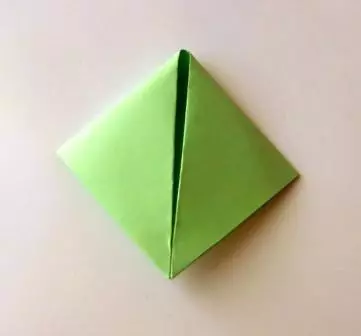
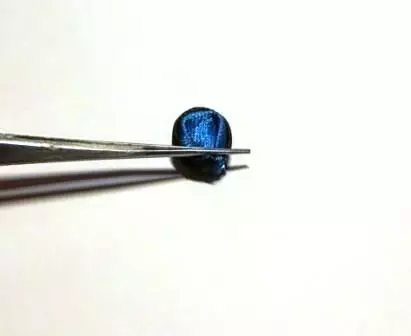
You can pierce in the middle pin or just keep hands or tweezers.
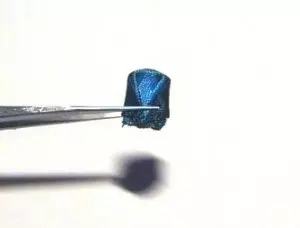
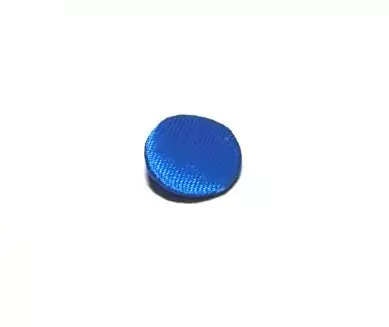
Now you need to cut off the corner with scissors (on the right or one that looks at us on the paper layout). Again, fade the tipped tip and fasten all the layers of the fabric.
Well, almost the petal is ready! It remains only to deploy it. This time I didn't need a too voluminous flower (and Kanzashi are quite voluminous) and I felt additionally from the outstanding of the petal and pressed my fingers at the base of the petal.
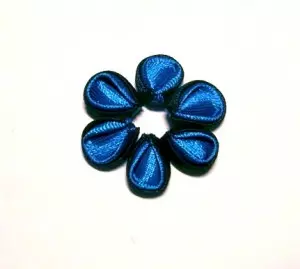
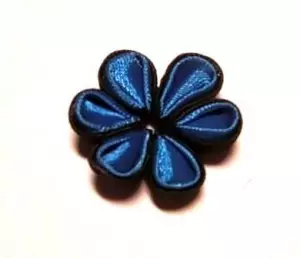
Thus, we make 6 petals.
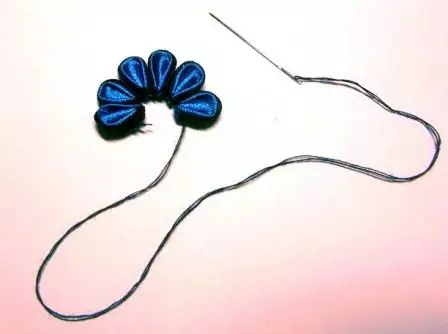
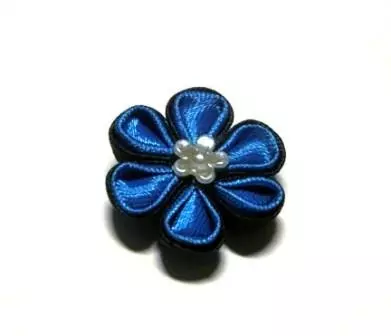
It remains only to collect Kanzashi. I collect petals on a thread. It seems to me so it turns out more careful than just put on glue.
For the base, I cut the circle from the cardboard, weching it suitable with a color to the cloth (from the fabric cutting a larger diameter circle, we collect on the edge of the thread and tighten the cloth, putting inside the circle of cardboard) and stick the flower off the outflow. Now only pick up the decoration for the middle and canzashi is ready!
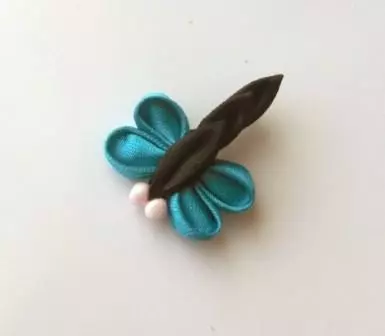
Next, you can leave like this or add leaves and curls, make the hairpins or gums with the resulting flower or use something like that.
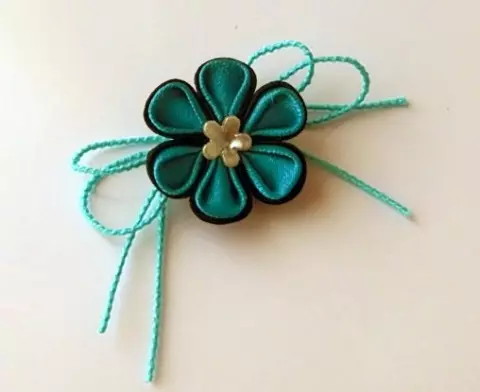
And you can shoot a little ...
Here is this creativity!
