
Master class on weaving bottom basket: http://svoimirukami.mirtesen.ru/blog/43945599205/pletenie-dna.master--klass
In order not to throw out the bottom, which I splured at your request. I decided to continue and weave the casket. This turned out.
Stoekhka we raised. Our workers were left at the bottom. And we will continue to work further.

Basket I was selected with a "rope" pattern. The front tube and start it for the rack. After the opposite, it goes ahead. So we will weave to the end.


To put a short tube, we take a new one. Slip the tip, lubricate with glue and insert into short.


Tube is rotated

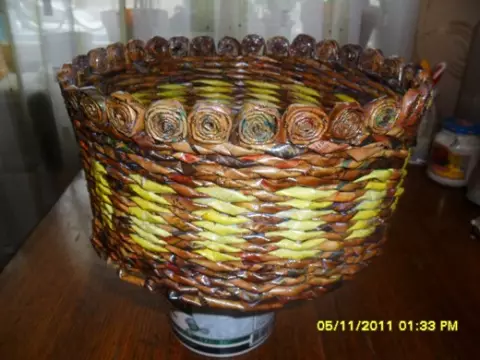
I regreep 4 rows in one color, I replaced one tube to another color. Plotting the rope pattern. The 7 multicolored rows were quenched. Another 4 row of one-photographs were quenched.


The box is almost ready. It's not necessary to finish the top. Our turns are no longer needed. I can glue the moment between the rags and the rear slave. I put ahead on the glue. And cut.


Then wept the cut tube on the top with the top and put the front working on it. It is cutting it into it. And we also cut it.


We press the clothespin until it sticks. With the moment it is not long.

I decided to close so. Write the rack. Machine between the rawdors and pressed, fixing the clothespin.


Breep all the clothespins will not stick.

That's such a box turned out to be lacquered.

View of inside

And this is donyshko. Lacuated, but still not dry.
