
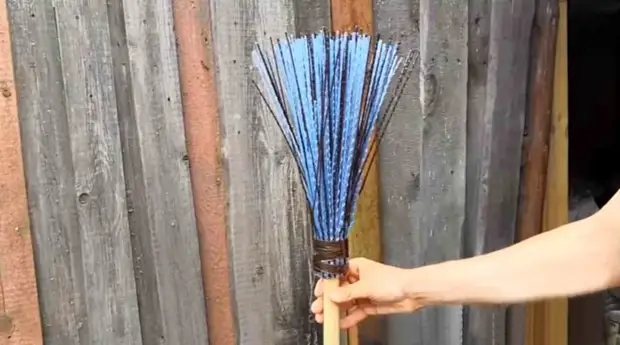
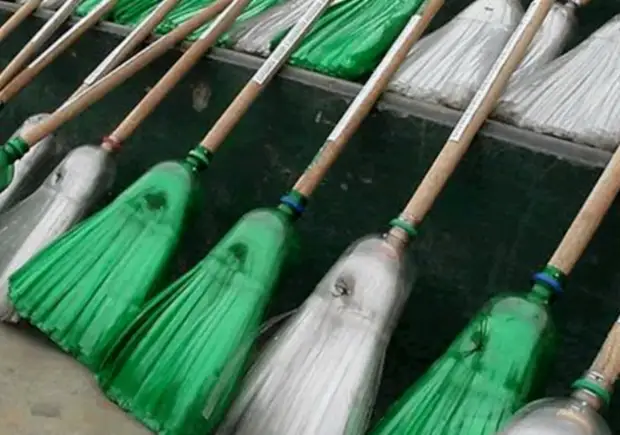
An indispensable assistant for the cleaning of the yard, a garage or workshop is a broom. If the purchase of the product is climbing and afraid of water, then the broom made of plastic bottles, made with their own hands, almost eternal, and how to make it for beginners, we will understand in step-by-step photos of instructions.
Master class for the production of brooms
Make a panicle of plastic bottles in different ways. Consider the most popular of them.Option 1
Creating such a product will require a minimum of time and materials.
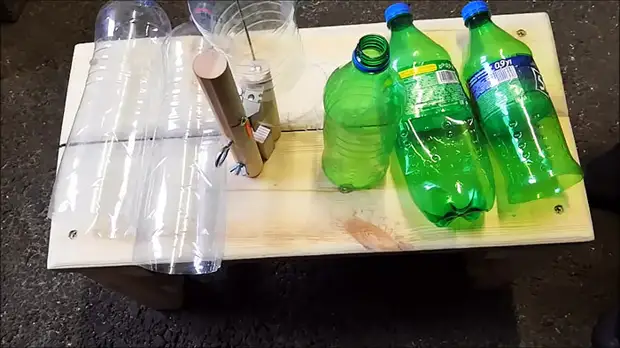
For work needed:
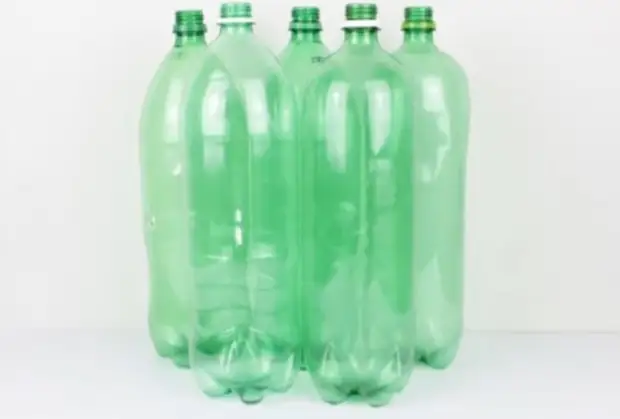
- 5 two-liter plastic eggplants;
- stalk or suitable stick;
- Durable wire;
- pair of nails and hammer;
- Knife and scissors.
Step-by-step instruction:
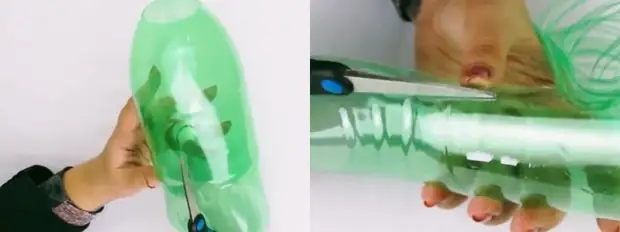
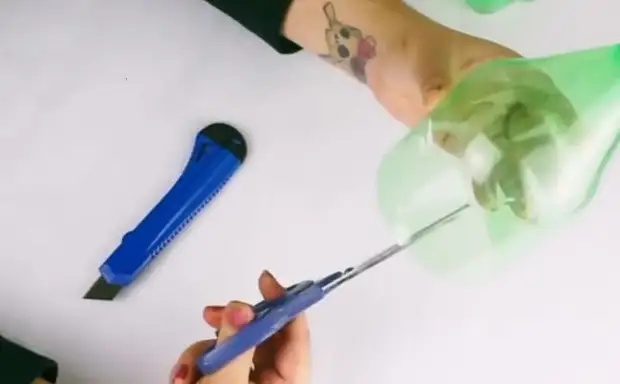
- Cut from one bottle with a stationery knife, slightly retreating from the edge.
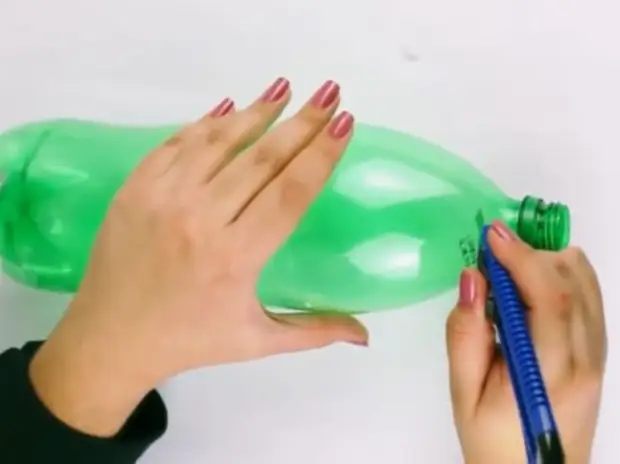
- Similarly, cut off the bottom.

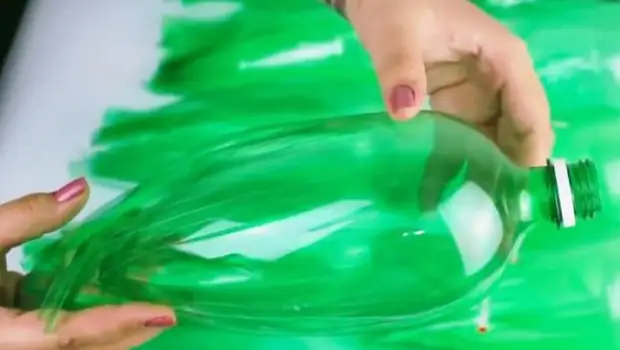
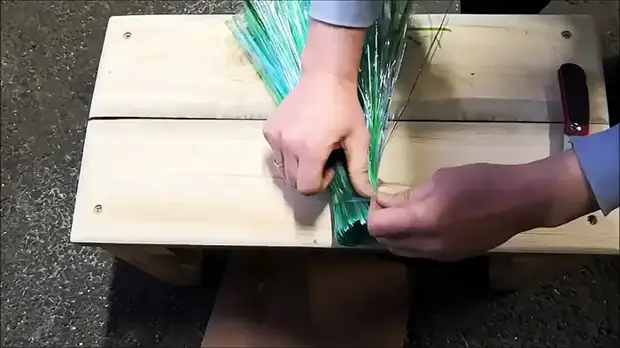
- Scissors cut a blank on a strip of 1 cm wide, not reaching the edge of about 6 cm.
- We repeat all actions with other tanks, leaving only two intact.
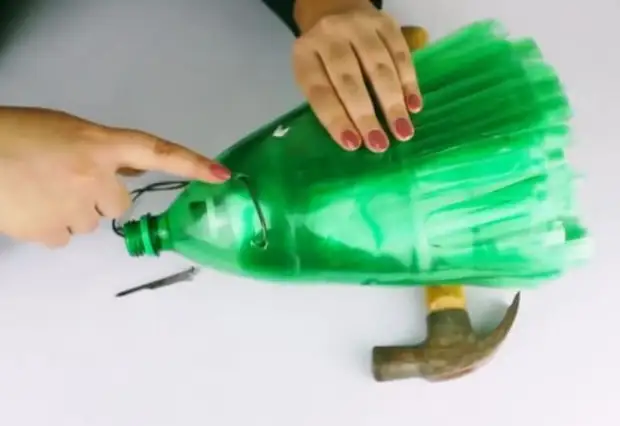
- With one of the whole bottles we do all actions as with others, but at the same time do not cut the neck.
- On the harvesting with the neck, we plant all other parts of the product without the bottom and neck.
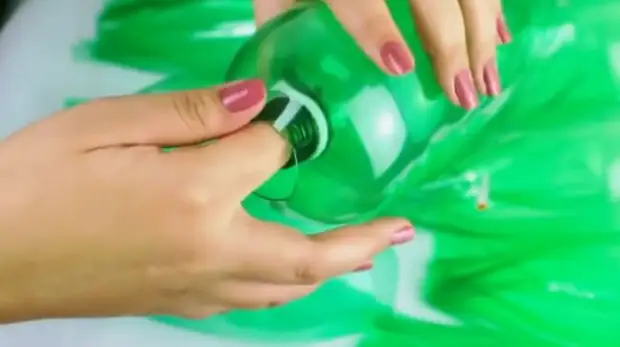
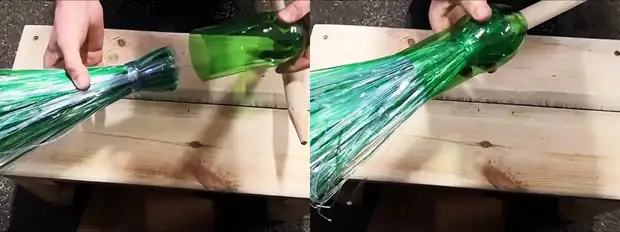
- Spindle the resulting part of the broom, giving it a flat shape.

- We cut in half the remaining bottle and scissors in half with the neck we make cuts to the middle.
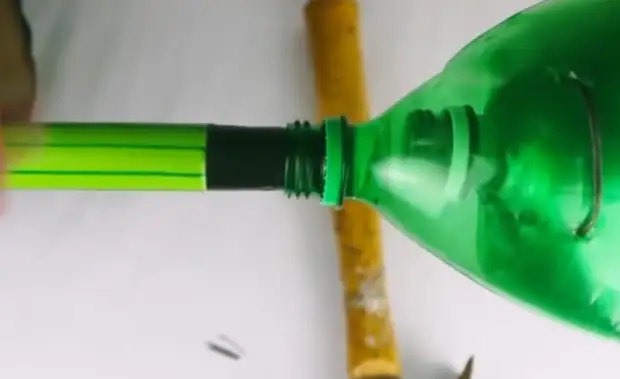
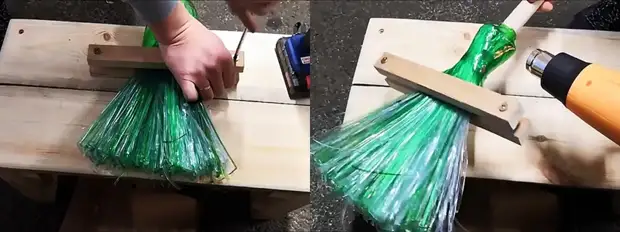
- The detail from P.8 is planted on the previously made workpiece. Pierce the future broom in two places with a nail and fasten the wire.
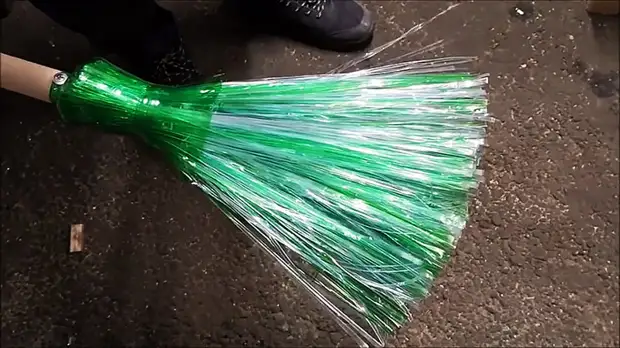
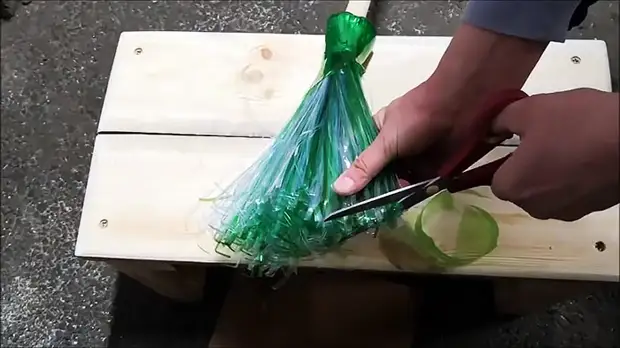
- Fix the cuttings and use the broom to direct.
Such a mockery is most simple and suitable even for beginners.
Option 2.
Possible and other options for the manufacture of brooms for the garden.
For the product you need to prepare:
- 20 eggplant for 2 liters and one on 1 l;
- holder;
- Saws.
Manufacturing technique:
- Cut the two-liter bottles on a strip of 5 mm wide, for which homemade bottles will be made.

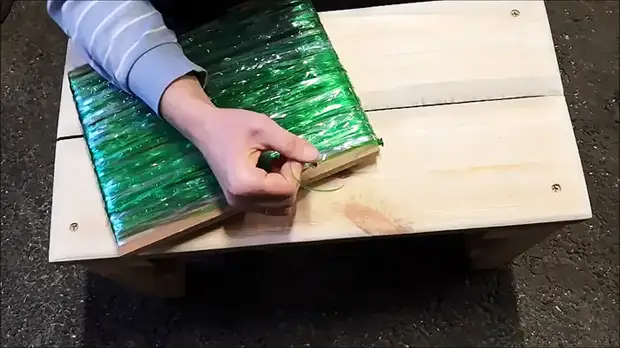
- In the process of cutting the tape we wake up a piece of 250x300 mm particle size. The tape should be wound as much as possible and binding the node among themselves.
- After completing the winding into the board, we screw the self-tapping screw and tie the edge edge to it.
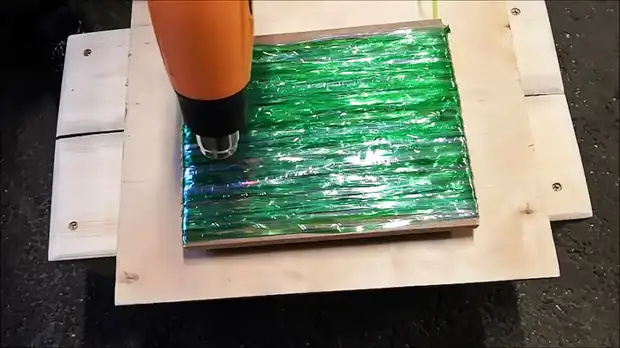
- To make a tape more rigid, pour it with boiling water. You can also use a construction hairdryer. As a result, the tape will turn into the tube and will become tougher.
- After completing the shrinkage, cut the material at one end.
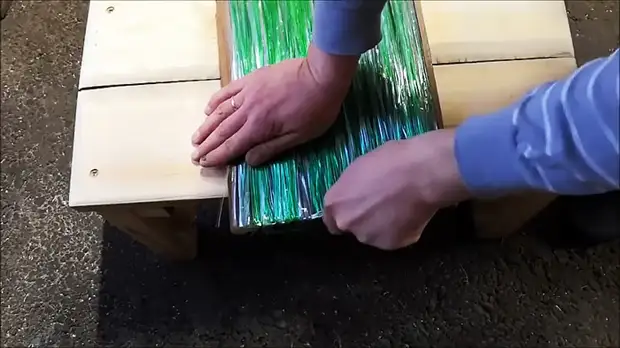
- Walking in half the ribbons hang on a plastic strip of greater width, we collect in the ring and associate.
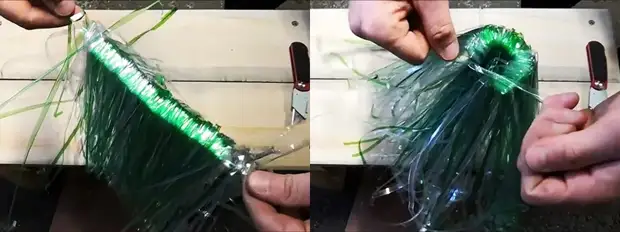
- Run a bundle and link it with a ribbon just below the bend.
- With a bottle of 1 l with a capacity of 1 l, cut off the bottom and neck, insert the bundle into it. Put the workpiece on the holder.
- Squeeze the beam in the tees, grow up, we sit down the top bottle by means of a hair dryer. Fix the broom on the cutlets of the screw. That part of the bottle that remains not compressed, cut off with a knife.
- The edge of the brooms are smoothly cut by scissors so that there are no bends.
This necker has medium rigidity. It copes perfectly on smooth surfaces. If there is supposed to clean the asphalt with the pits, then the tape is recommended to make 10 mm wide. During heat treatment, it also twists in the tube, and it gets higher rigidity.
From the video, you can learn more about how to make a backed broom:
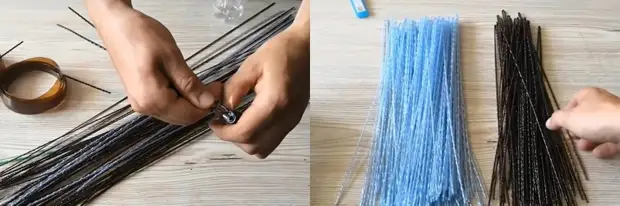
From plastic rods
For the manufacture, you will need to assemble a fixture for cutting bottles on strips, which after will be refined in the rod. To build such a product, in a small bar make a slot, the depth of which corresponds to the width of the plastic tape.
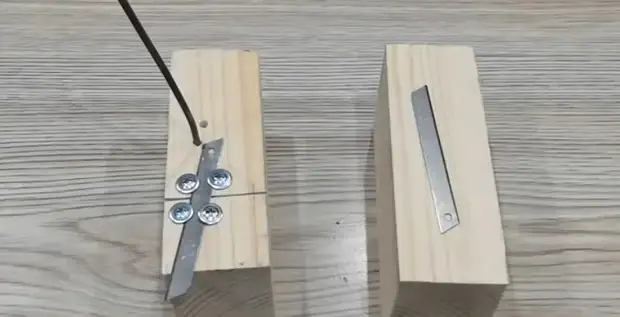
Breeping self-drawing blade of the stationery knife at an angle. In Broke, we do a small hole and insert a solid wire that is used as a bottle holder.
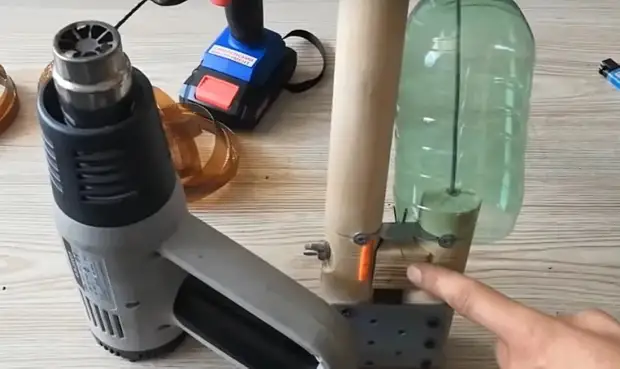
To get a strip from an eyelamp, cut off the bottom, we make a cut with scissors, which will be the beginning of the tape. Then I proceed the edge into the slot of the bar and carefully pull on yourself.
We make stripes of 10-20 plastic bottles, after which we turn to the production of brooms:
- The construction hairdryer heats the edge of the tape and twist it for several centimeters. We hold this edge into a drill or a screwdriver, we have a tape over the ones with the hair dryer and twist the ribbon in the rod.
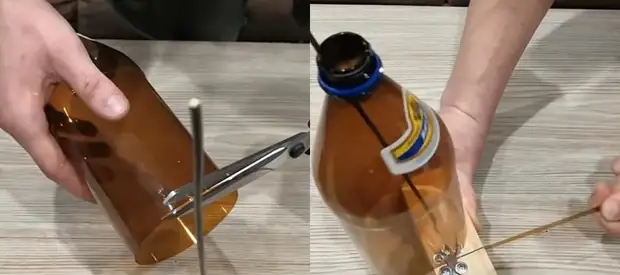
- Long bars cut 70 cm long.
- Hair dryer heating and bended every rod in the middle.
- From a plastic bottle, we cut a wide ribbon with a length of about 1 m and secure it to the cutter.
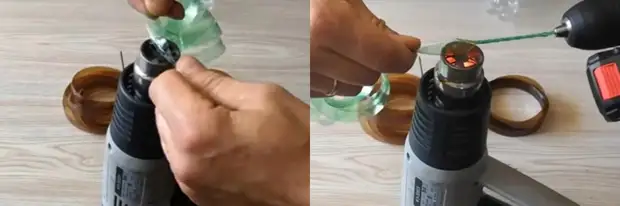
- On the tape insulating the rod in the form of garlands, after which they turn the cuttings with rods and firmly tighten the entire product with a ribbon, fastening it with a self-tapping screw. For a better tightening of the ribbon, you can heat the hairdryer.
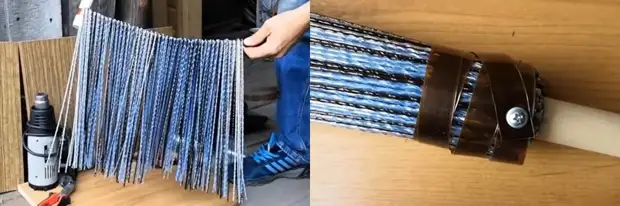
- To make a tool more convenient to use and similar on the broom, the rod will need a slightly flush.
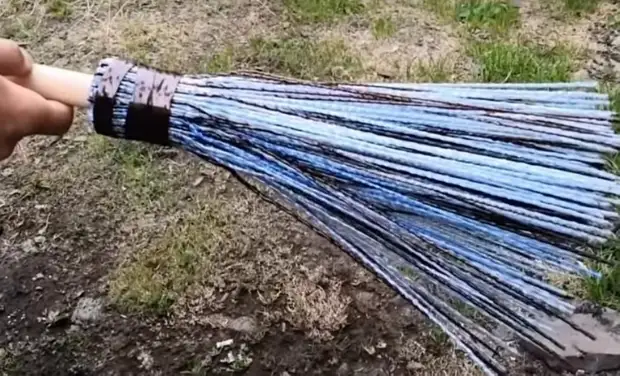
As the owner of the country area, a country house, a workshop, it will be worthwhile to get such a useful tool as a broom, while buying it optional. It is enough to assemble a dozen plastic bottles, of which the excellent broom will turn out, and interesting ideas and step-by-step instructions with photos will help to figure out how to make it with their own hands for beginners.