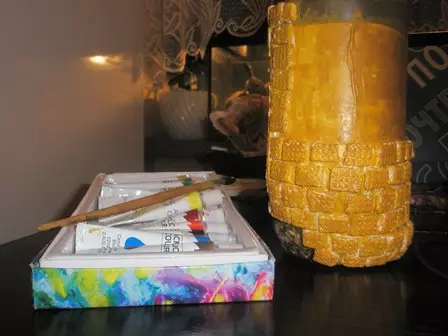
It took: a bottle, PVA glue - 4 pcs., Glue moment for shoes - 1 pcs, superchalters - 1 pc., Unnecessary beads, beads, pebbles, a piece of foam, acrylic paint, sparkles, lacquer, napkins, toilet paper, Paper towels (or one of the three), shells from egg, rope, wire, any thin threads, toothpicks - 1 jar, skin pieces, flashlight, sea salt (quarter banks).
At first, they found a bottle of coffee, soaked, tear off the sticker, degrees. Found a picture with the image of the cave (you can also draw, but it was lazy), printed on the printer on the photo paper, wet a bit in the water and the hands were smoothed out the bank outside. Then the pva glue smeared over the picture and glued it to the bank.
Then they found a bunch of all sorts of trifles, baubles: beads, a pendant, serving, which are one, beads of different colors, multicolored peas ...
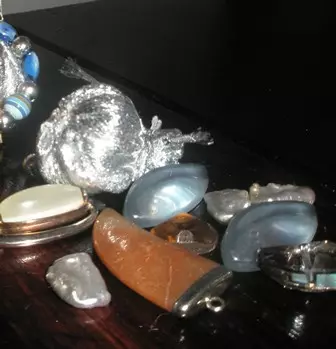
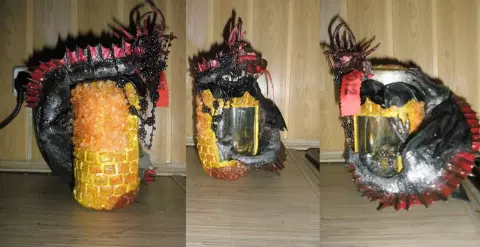
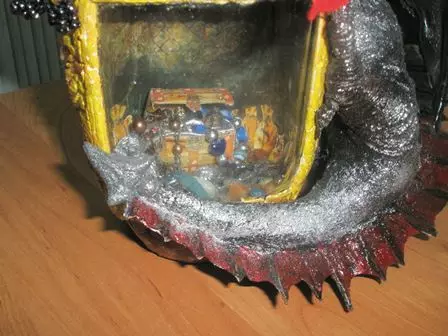
Found in the NET pattern of wooden boards, printed, painted a chest of a chest with a lid, glued, inside the chest put a silver tissue, on which the moment of beads, chains, pebbles were glue ... It turned out a treasure chest.
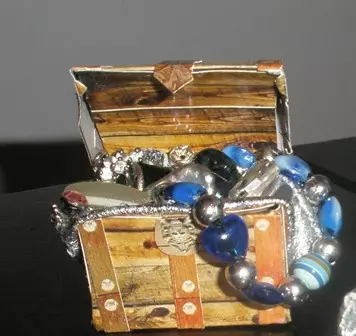
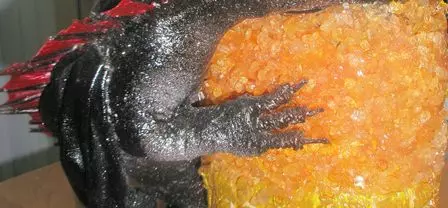
In the bank first poured PVA glue (thought that this is enough), various pebbles from the bead with a centimeter were height with a centimeter, a treasure chest was put on them in a middle stage. After PVA's glue is dry, realized that pebbles and chest do not hold much, so they had to breed an epoxy (added a little more hardener) with a cap with a cover from mineral water and poured all the pebbles and jewels, the chest smeared the bottom and put on pebbles. Now I was pleased, because if you turn the jar, then everything is kept tightly. Found in NEAT pictures with bags of money, made them of different sizes, and stuck into the cans on the right and to the left of the chest.
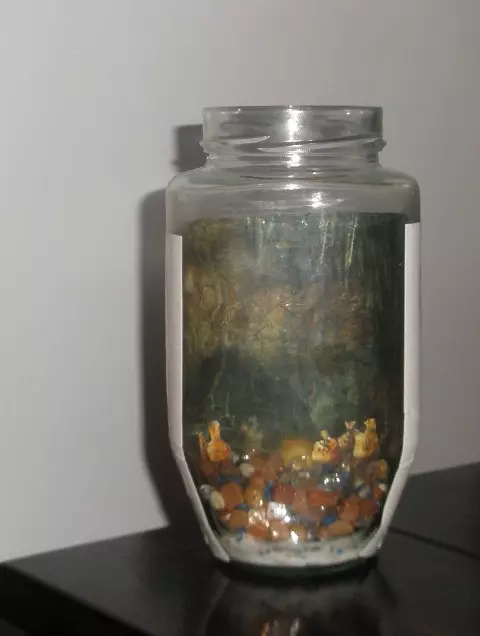
Well, here and the jar inside is ready!
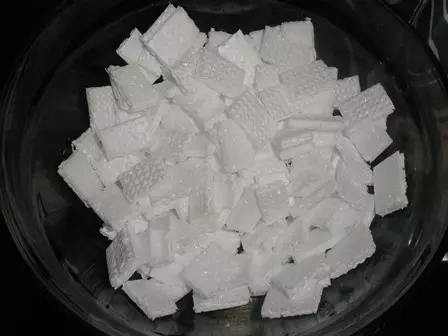
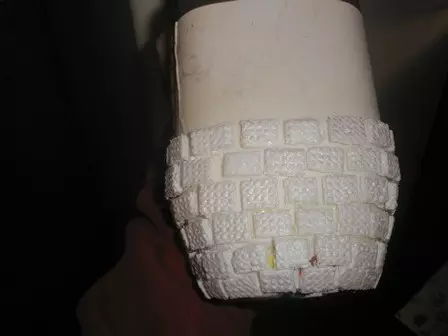
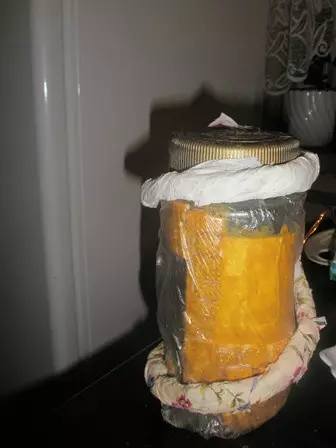
Then found a piece of ceiling coating from polystyrene foam and cut it with bricks together.
The bank from behind, where the image was pasted with the cave, glued halfway with these bricks on PVA glue, starting below and until the middle.
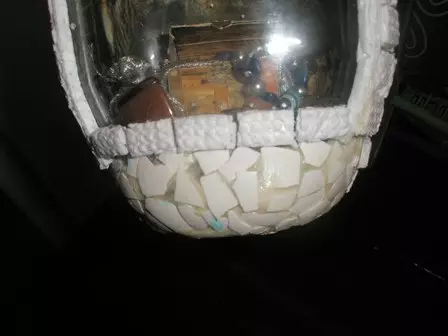
In front of the bottle made a window, through which the cave will be seen with jewels.
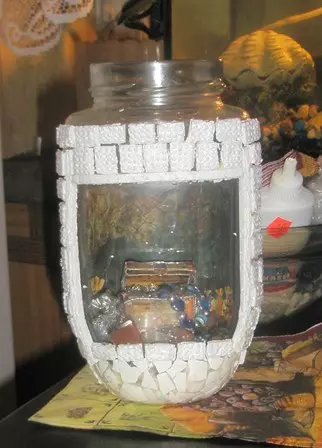
The bottom of the banks were placed on the front with a white napkin, operated in PVA, and the pieces of eggs were joined on it.
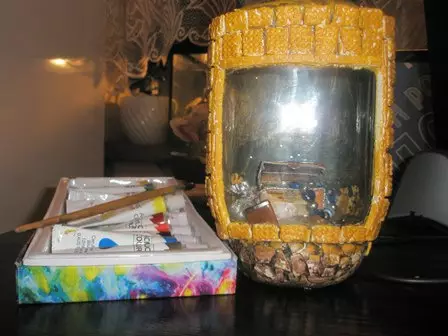
Acrylic colors of the son painted the bottom of the banks (shells) in a brown color, bricks painted in yellow, this is the first layer, then there were two more (9, 10), the coke cover pasted the twine in a circle.
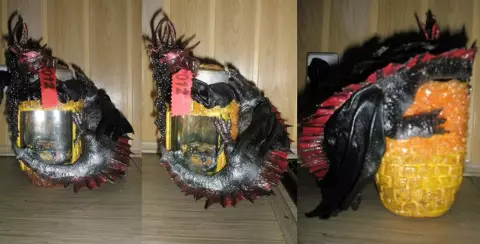
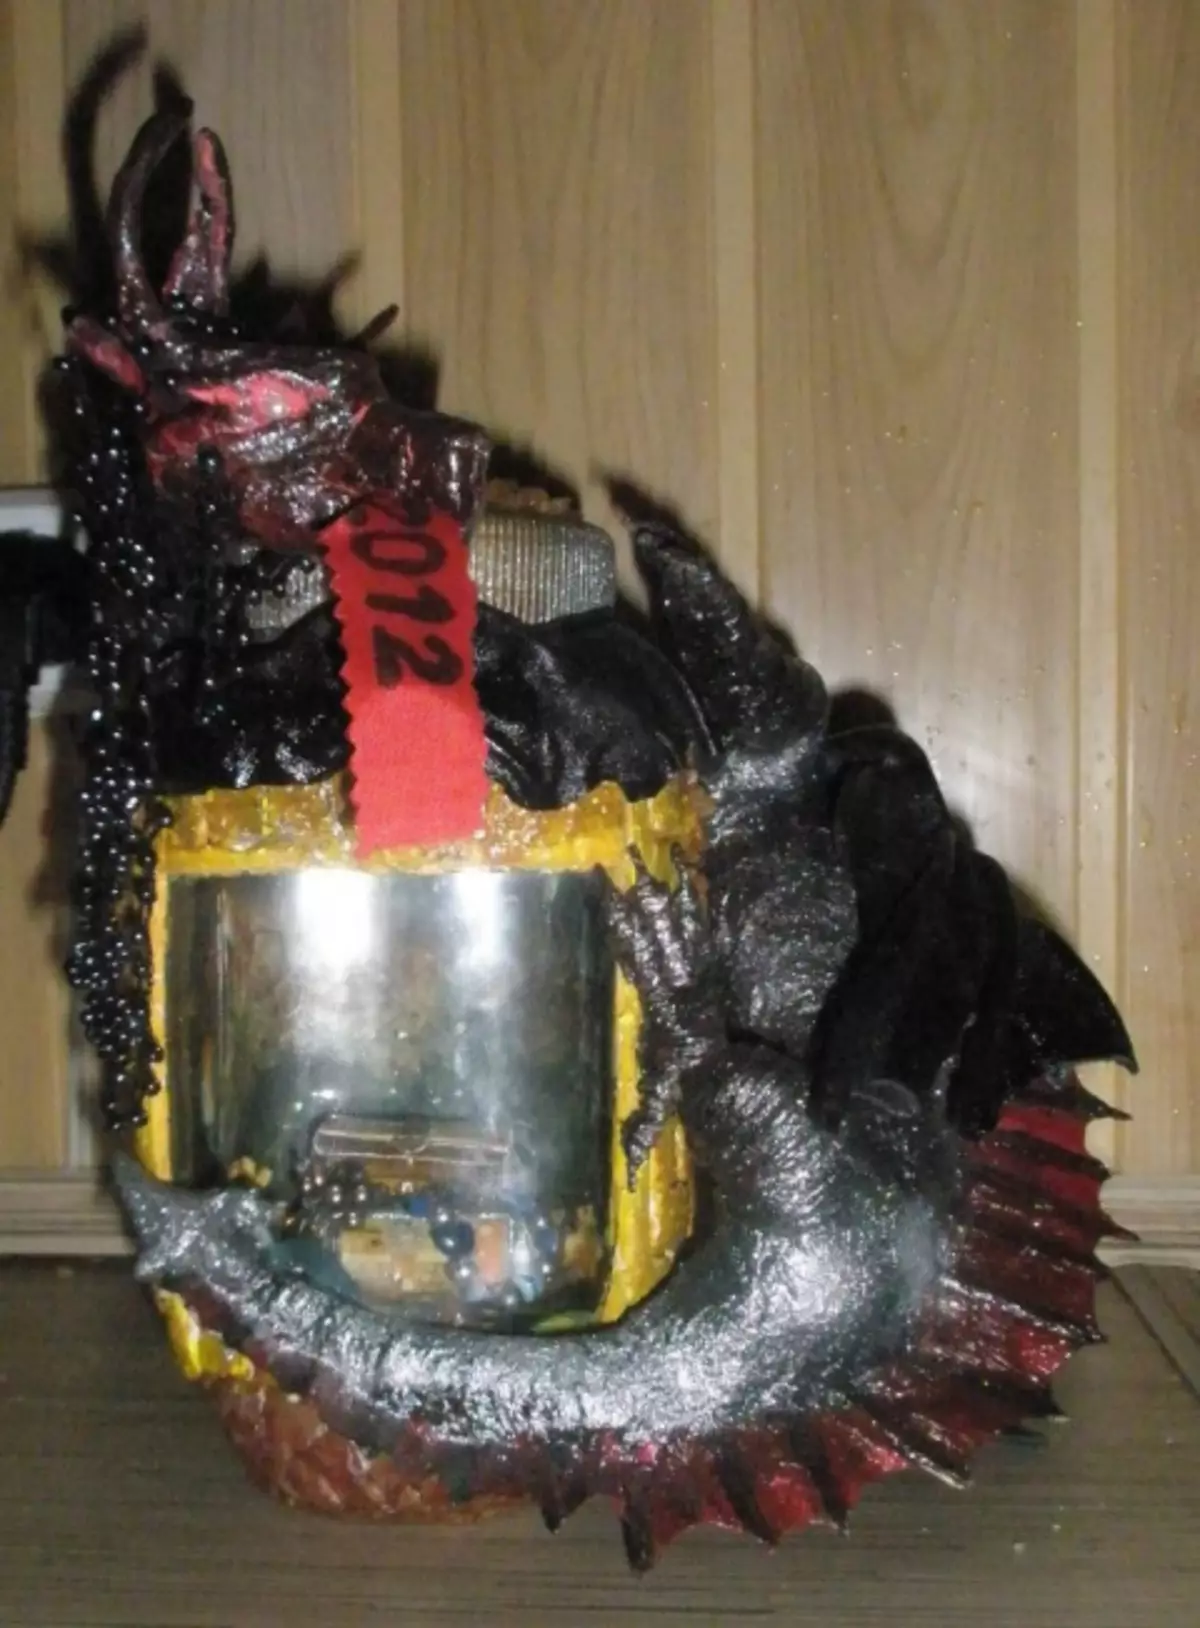
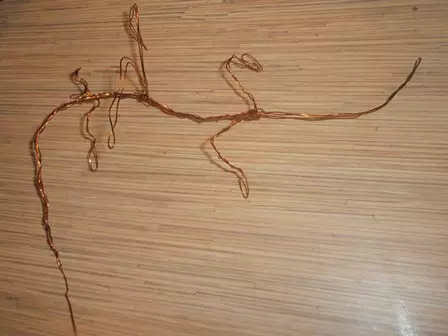
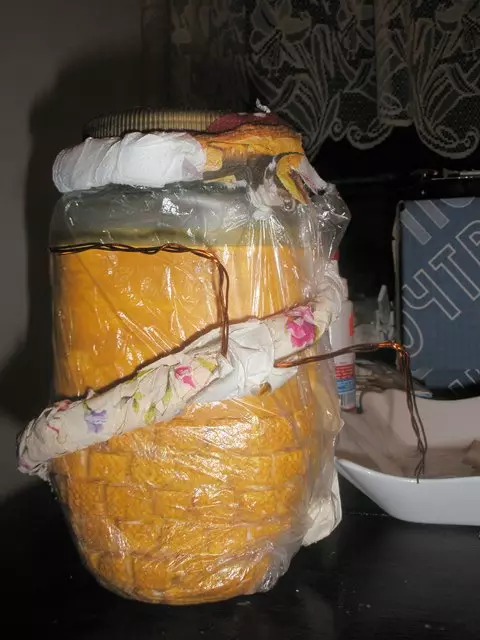
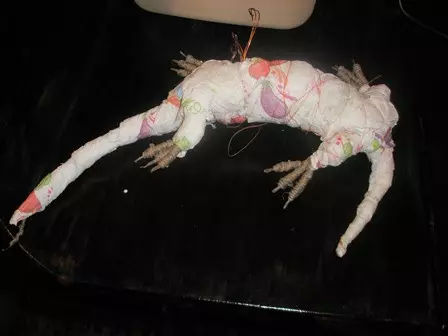
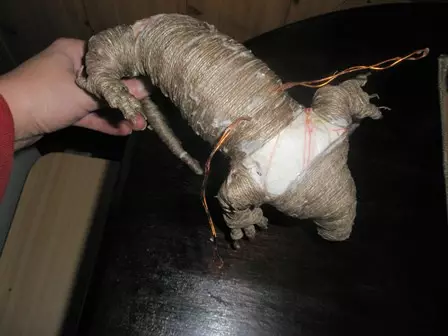
Now the most difficult job is Dragon on the bank. On the bank put on a bag, even two, so that it is not swirling.
Made a frame from a wire in two rows (where he suggested that there would be a neck and tail - in one row). From individual pieces of wire made front and rear legs, and wings between them. Wire wrapped the twine.
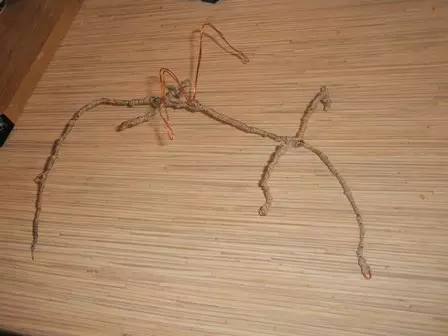
I forgot to sfotkat how my fingers did: I took a piece of wire and wrapped it with the twine, slightly retreating from the half-one from the beginning of the wire (this will be a claw), in advance of foaming the twine in PVA glue, so made 4 fingers with claws for the rear paws and three - for front. When the fingers dried, brought them with wire to the paws of Drakosh. Then he took paper towels and began to wrap the frame with the son, forming the body of Dracoshi, wrapped with thin threads to be tightly held. At the beginning, I tried out this design to the bottle, so as not to make a mistake with the size and that Dracosh makes a bottle, and held firmly on it.
Each layer of towels was launched by PVA glue. Almost the fingers of Dracoshi were not blocked. It turned out such horror. He herself was afraid that nothing would not succeed, because such a spell very rarely due to the lack of time. I remember something like that did 5 years ago, and maybe more.

Now that Dragon is on the bottle, it was necessary to give him a certain form. To do this, I smeared it with a glue of Pwa, formed it around the jar, soaking with thin threads. I decided that it would be located around the bank, there will be a tail from below, then he wakes up the bank with his paws and the neck around the cover (but so that the lid necessarily opened), and the muzzle will be ahead of the banks.
So he stood for me the whole day until the dryness. Then he took it carefully with the can, he was already a curve, like a wooden, but but such an arched shape, which I need. Then he took the twine and completely, starting with the neck of Drakoshi (a little retreating from a centimeter from the beginning of the wire, it would be necessary for putting the head on this piece then the head), they began to warm up carefully, they tried both so that the strings were closely behind each other. Then they wrapped their paws, torso, tail. There are only two places left, sorry: the socks of Drakoshi and the transition from the neck to the paws, they cannot be wrapped. For this, I cut off the pieces of the twine, measuring the desired length, and glued them with pieces on PVA glue.
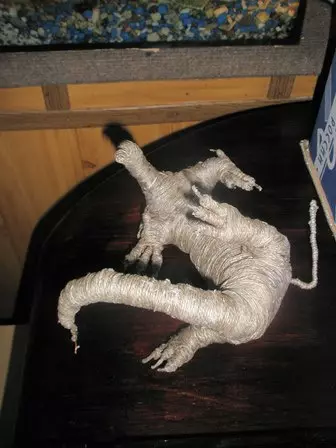
Winched the twine wings. Leave to dry.
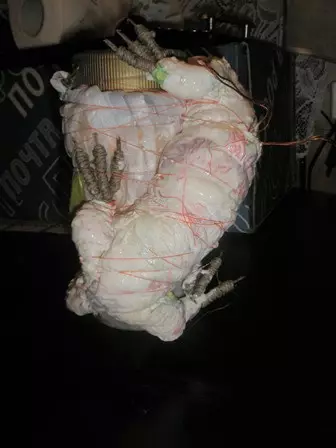
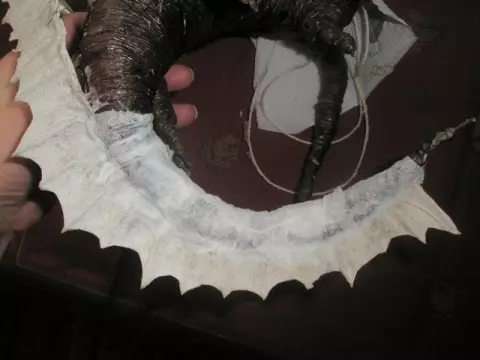
Then it began to darcochine spikes all over the body. I took the rope, measured the desired length from the tip of the tail before the neck. I was lying, took 5 cm more just in case. I smeared her PVA glue, torn off a piece of toilet paper the same length. In the middle glued the rope. Then he took the jar of the toothpicks, the son cut off their different lengths and began to glue them at ropes on paper at about the same distance. Between the toothpicks also walked glue,


Then the second half of the toilet paper put on the one that with the toothpicks, once again passed the glue, pouring into his fingers each spike. Leave to dry. Then she cut off with scissors from the spike to the spike, thereby emphasizing each hipper.
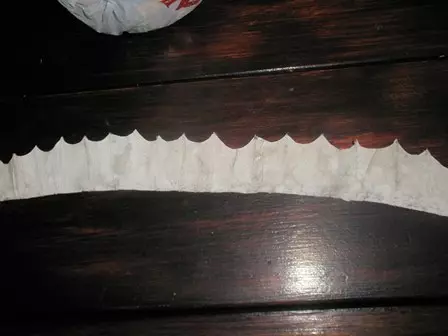
It began to stick to the dragon of the spikes, for this smeared with water (quite a little bit, because if you wet more, then the paper will rush) a small piece of spikes and glued to PVA glue to Draco, starting from the neck. It was glued with a thin layer of napkins, every blasting glue, barely imposing on the spikes.
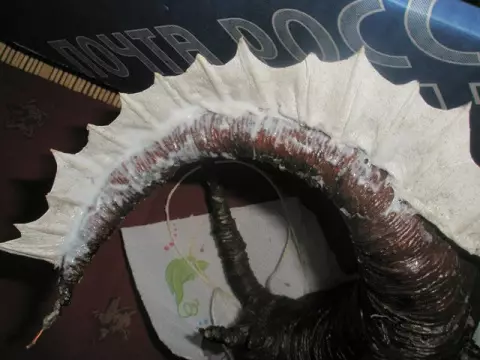
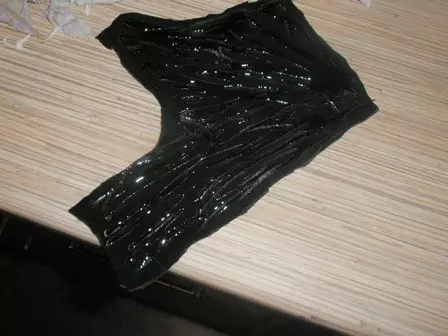
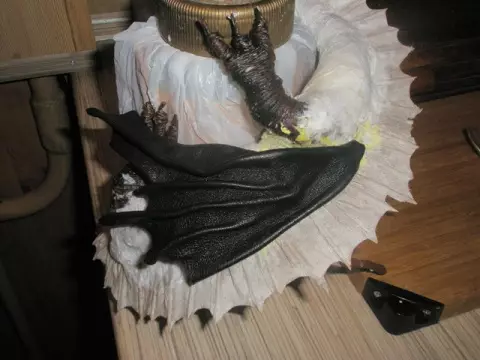
Here it was pleased that inside the spikes paved the rope, because the angle of transition from the neck to the torso was too big, and the paper began to rush, I had to trim the rope, making the desired angle. So stuck spikes from the neck to the tail. Then it took after the wings, cut out two pieces from pieces of skin, smeared them with the inside, 10 minutes gave it, then began to form wings, for this I made folds. Leather - the material is wonderful, so it did not make it difficult to do it.
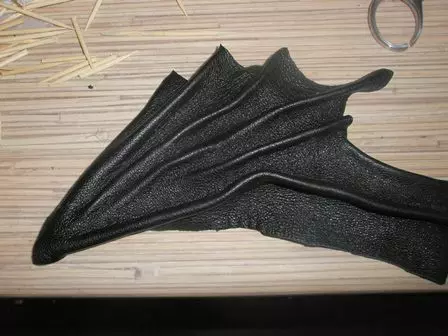
It turned out two wings, which I pasted on a frame wire, wrapped in the twine.
The son made from toilet paper (it will be belly than napkins) spikes on the head - 6 pieces. I glued them to the neck.
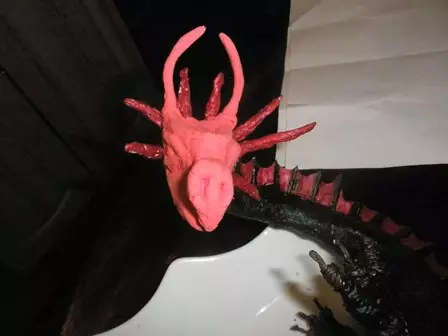
Sona painted Draco into a black color, since he said that the year 2012 will be the year of the Black Dragon (I read somewhere), the spikes colored acrylic paint in red, making bodies (toothpicks) black. I mixed paint, making a little lighter or darker tone. Dracoon occasionally, when working, filmed with banks, because it was easier to work with him when he was not on the bank. While Droko drove, I began to make my head. To do this, I shook my son some interesting clay, which dries out for 24 hours in the air, although it was possible to make it hung like a torso from the napkins. Formed a head, and the horns and rim head arched from a piece of wire, wrapped their clay. Eyes - stuck silver beads until the clay dried. A knife made all sorts of screws, stripes, decorations in clay. On the nose handle from the knife made two holes for the nose.

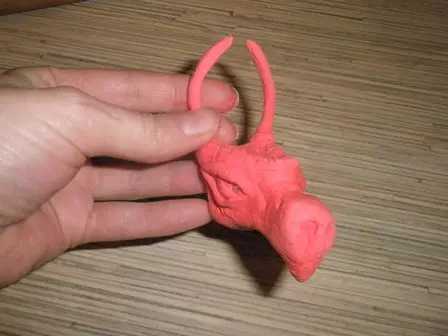
I thought, wow, what a scary turned out. From the same material made an arrow at the tip.
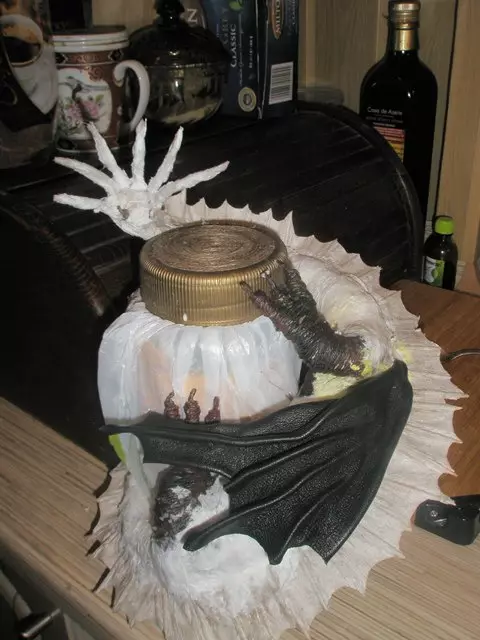
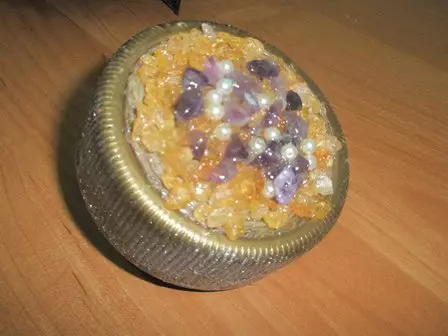
In the lid, the banks mounted a flashlight on three batteries, which turns on and off. I decided that it would be great if you could open the lid of the can and turn on the flashlight, and beautifully, if the treasures can be covered inside banks, especially in a dark room.
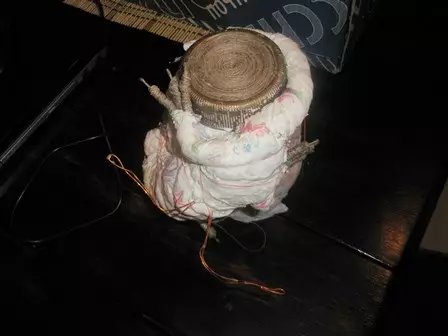
Suckedore his head to the neck, putting it on the wire.
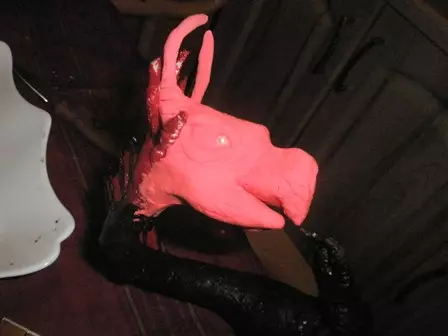
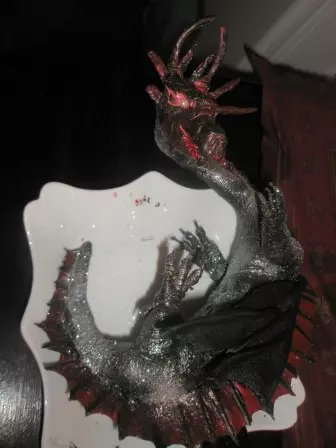
Painted his head. Gave dried. Removed from the bottle. Over the past year left last year, a spray with silver sparkles, so I decided to make Draco to make a festive. Skared Draco Lac.
She put it on the bank, already gluing him superclosure in places of contact with a can. After that, bricks on the bank gave a beautiful color, mixing some paints, making darker and lighter color. I took a piece of the skin, smeared with glue moment and made folds on the skin, so that it is close to close the place of the bank, where it was empty.
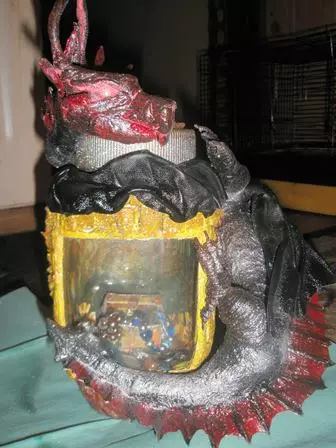
Everything thought how to fill out empty places. The idea came by itself, bought a bath salt for himself and here the idea came to mind that she would also come in handy for the bottle. I smeared with glue the moment of empty places of the jar, poured on the glue salt for baths. Made in three signs, turning the bank.
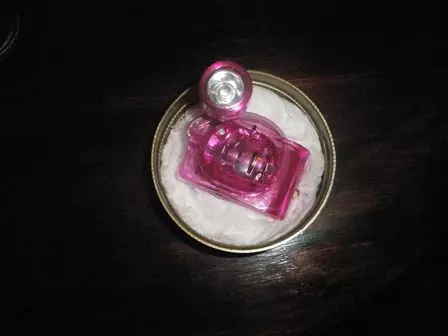
The lid decided to decorate the son. On the lid on top of the tweak poured glue momentum and poured salt and different beads. The cover broke the hair with sparkles.
In the mouth of Dracoshi, the ribbon, at which he wrote a year, hung beads on Draco.
The last touch trusting his son - he traded everything with a thin layer of colorless varnish on the gland, which gave a pleasant brilliance (the window, where the treasures were visible were closed with polyethylene, so as not to fill with varnish). It is a pity that the photo is not visible when the light is turned on or not, in fact it is very beautiful, because The treasures inside the bank begin to sparkle, and in the dark room looks even better. It was done about two weeks: evenings and on the weekend. We wanted to make a terrible and terrible dragon, and it turned out good and beautiful Dracosh :) I hope that the new year for everyone will come in all its glory, with good and with wealth! I exhibit to your court what happened