
In this article we will talk about how to make a beading machine. The master-home-maker will hold us on all the steps of its manufacture, and then tell us how to use it.
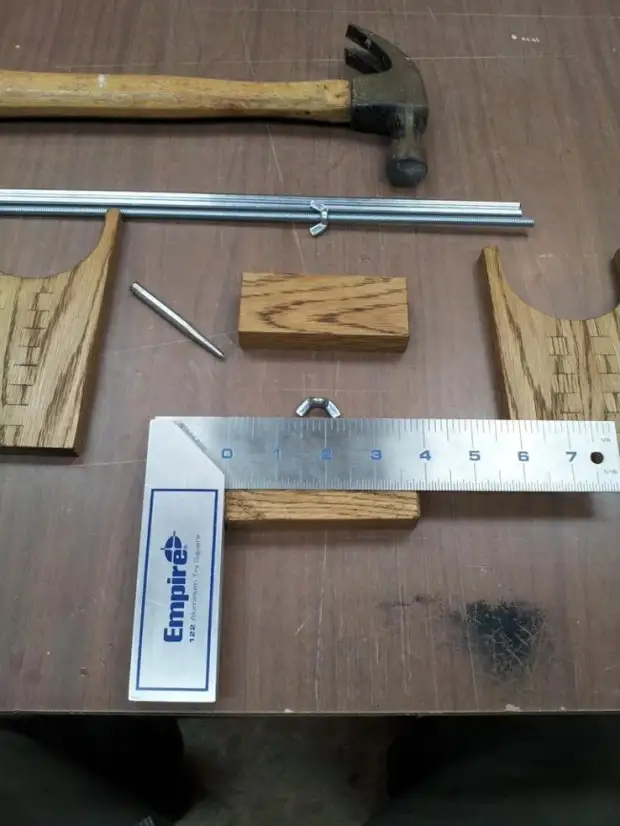
Tools and materials:
-A circular saw;
-Drilling machine;
-Ronal grinding machine;
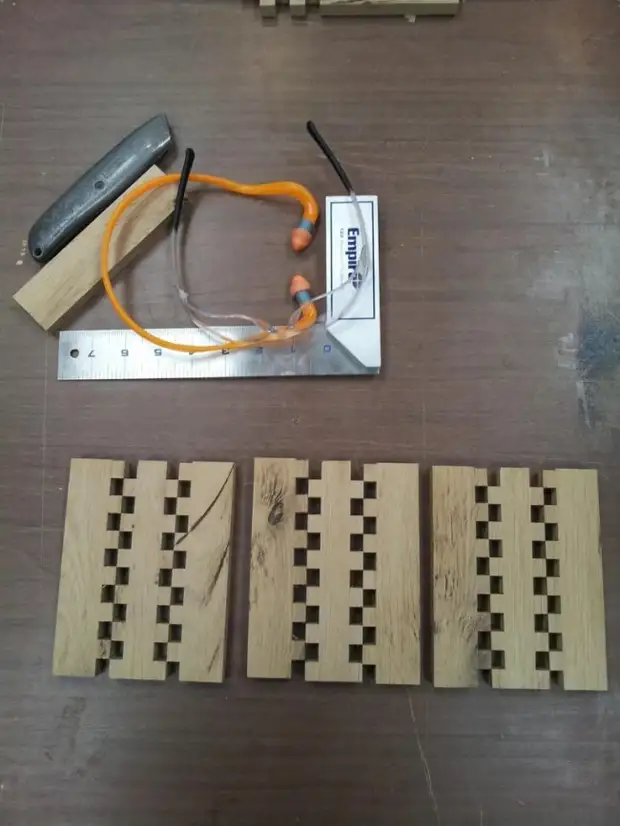
-Not metal;
-Strumbcins;
-Glue;
-Pilometers;
-Plore;
-Screwdriver;
Shipples threaded;
- Ring - 4 pcs;
-Spts;
-Tish (pegs) for golf;
-Beads;
- Heal for beading # 10;
-Beer thread;
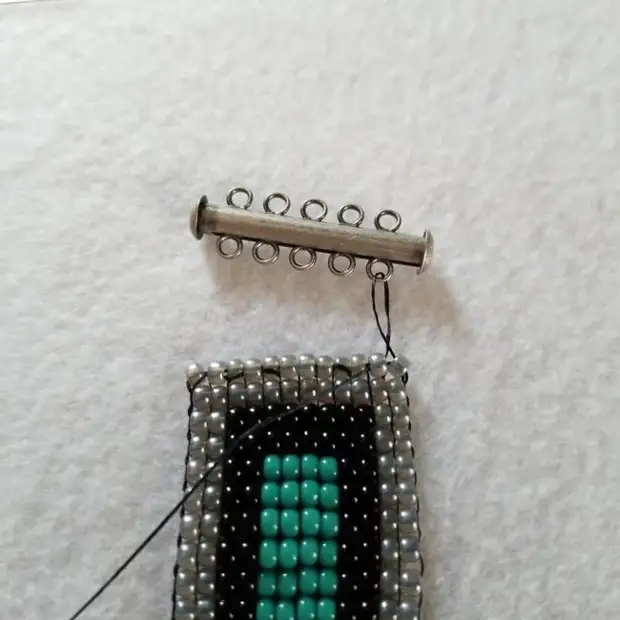
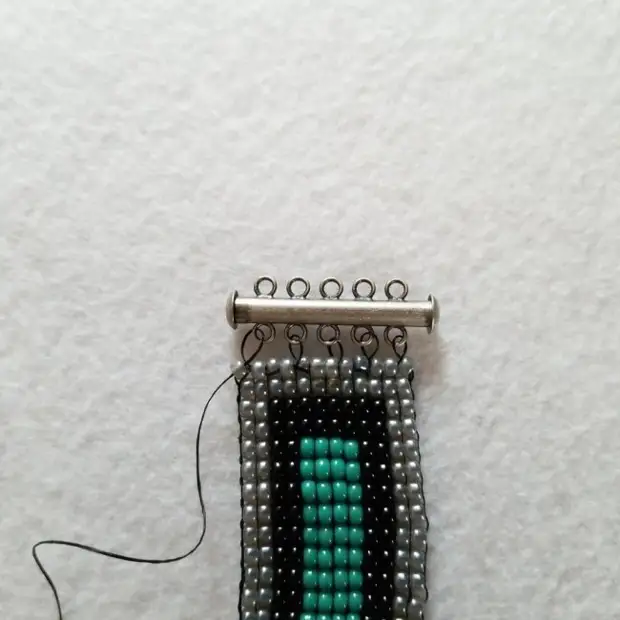
-Case clasp for bracelet;
-Playing card;
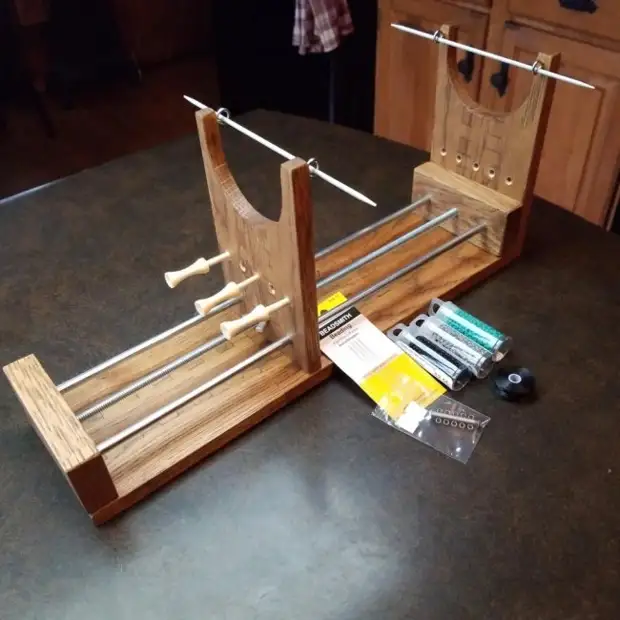
Step One: Base
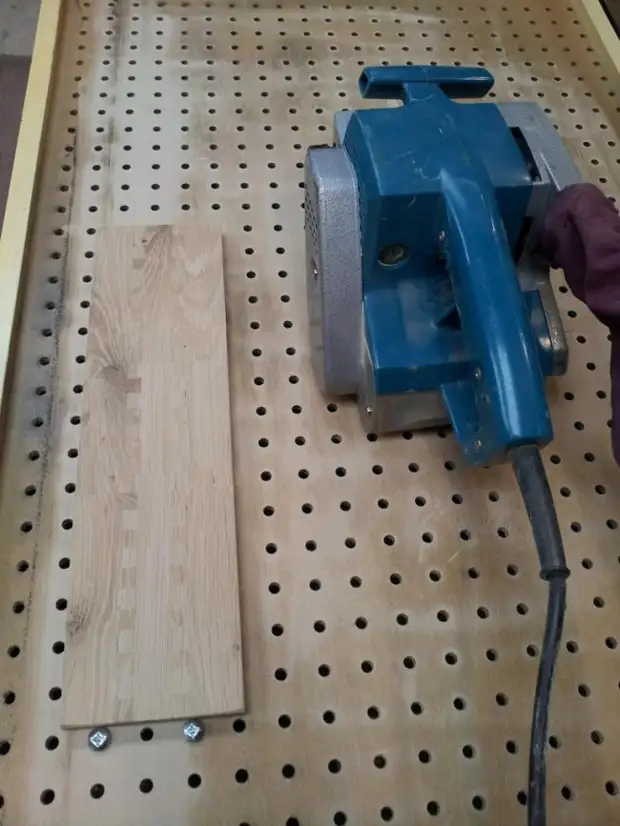
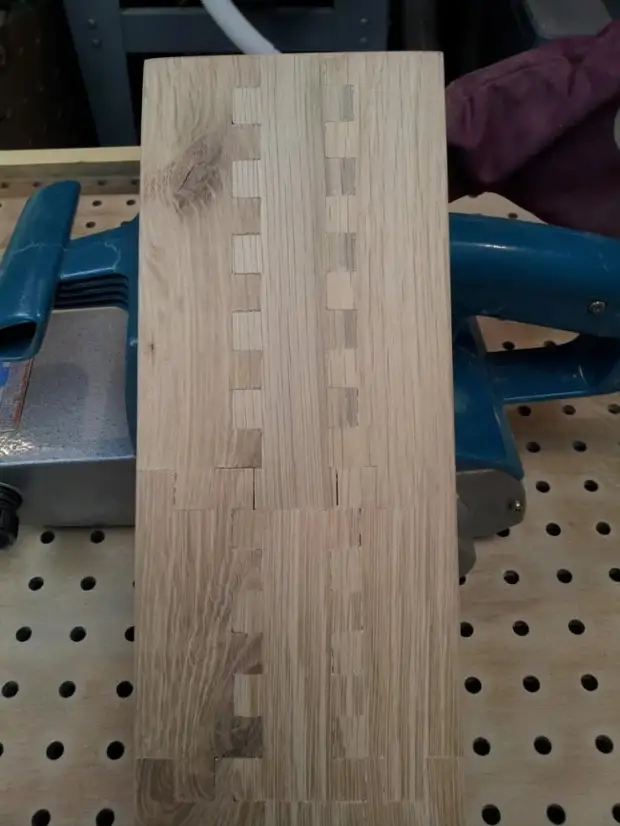
For the base there will be any board. The masters had a planks from the past homemade, he decided to make the basis of them.
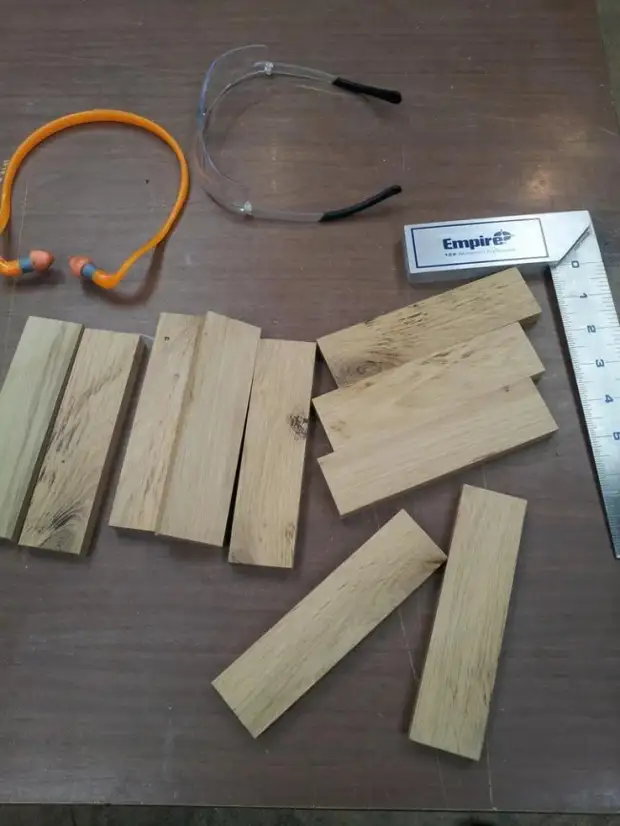
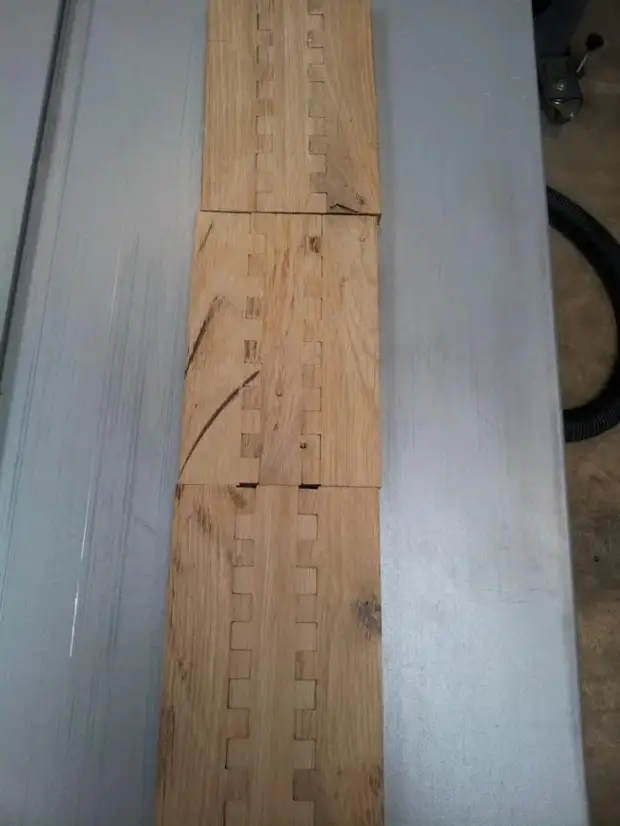
Planks It will be connected by a spike groove. Put the connection. Collects three wide blanks (in each three planks).
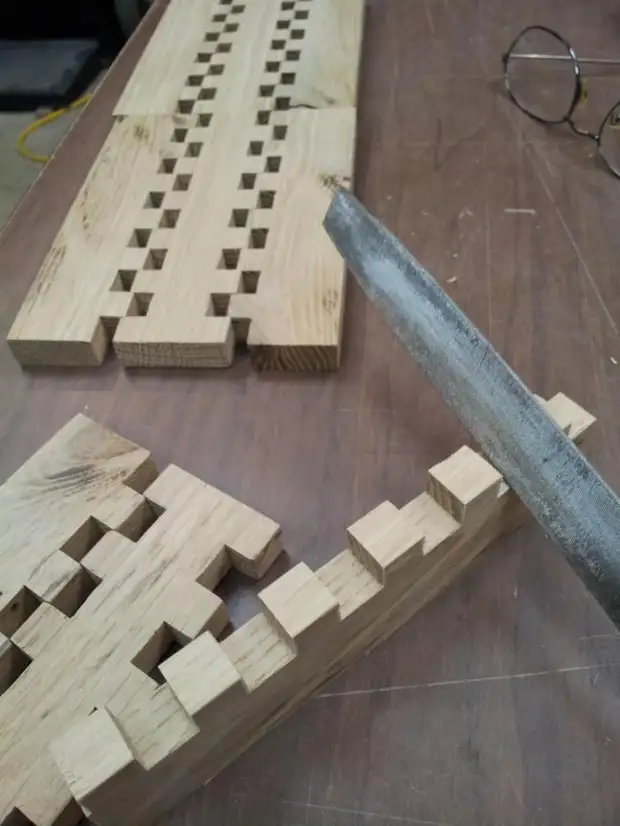
Takes the workpiece and cuts the grooves from the ends.
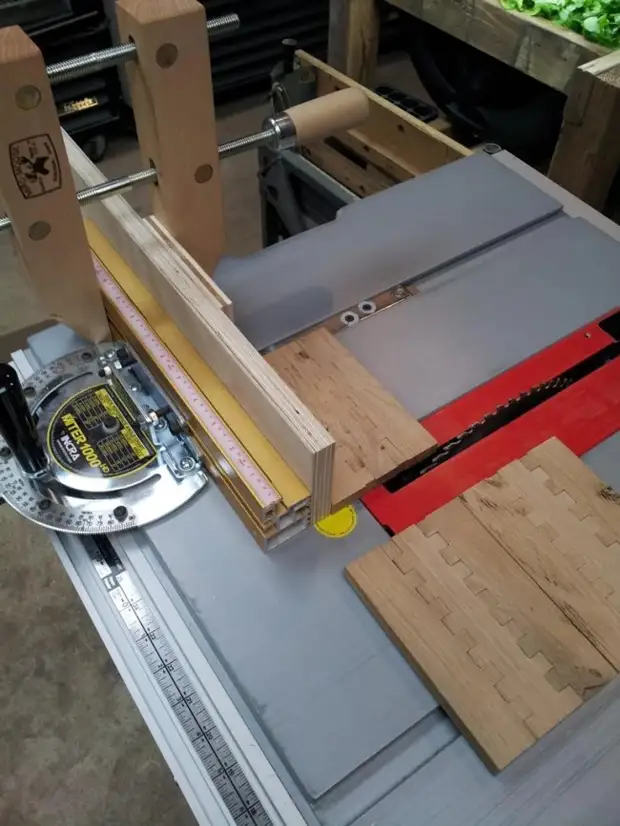
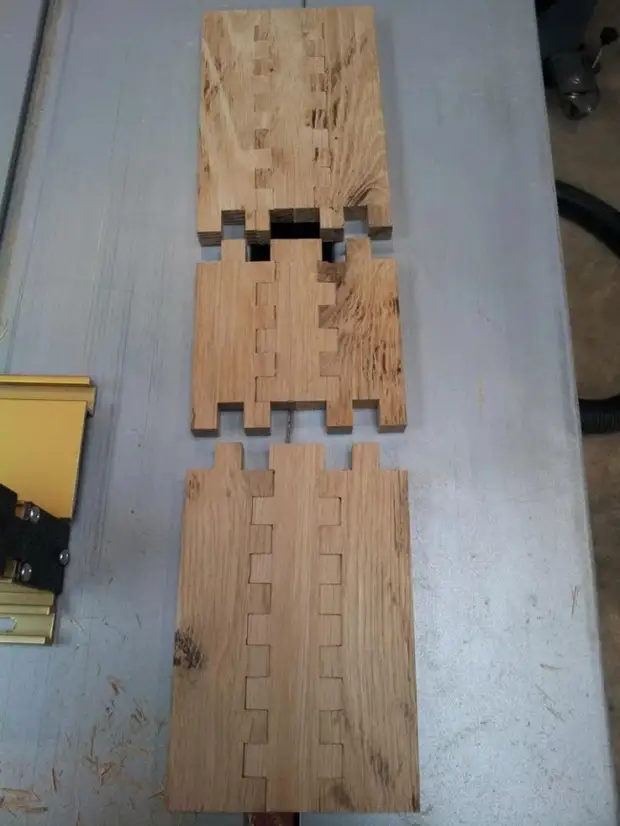
Further inflicts glue to the connections and collects the base.
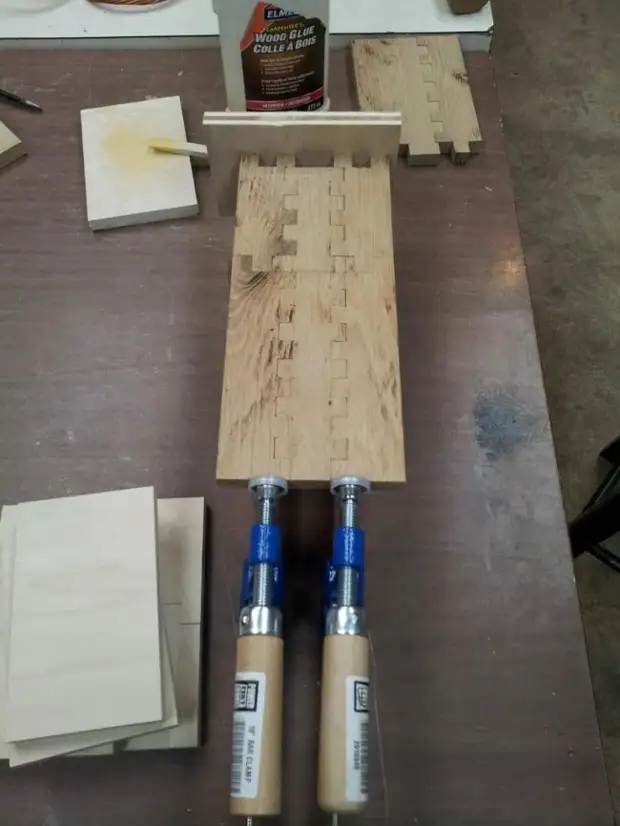
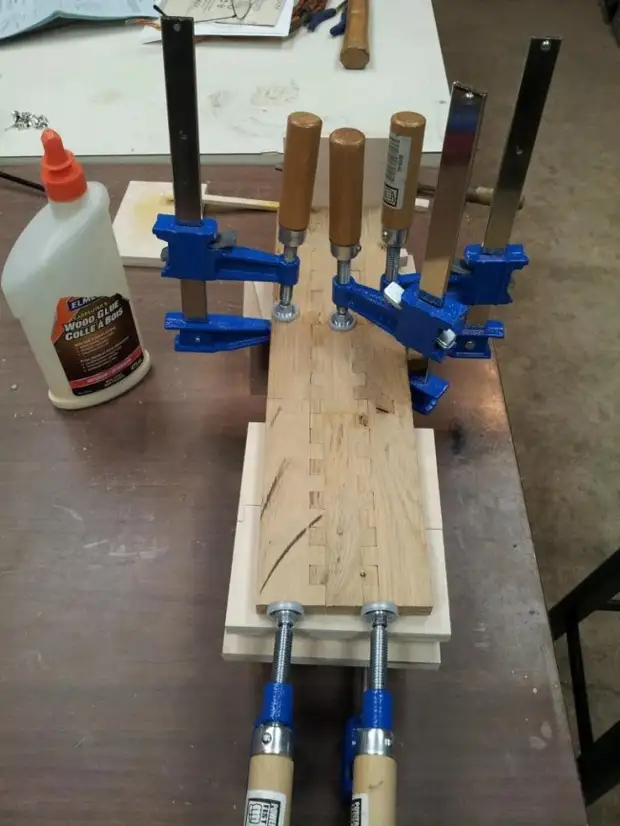
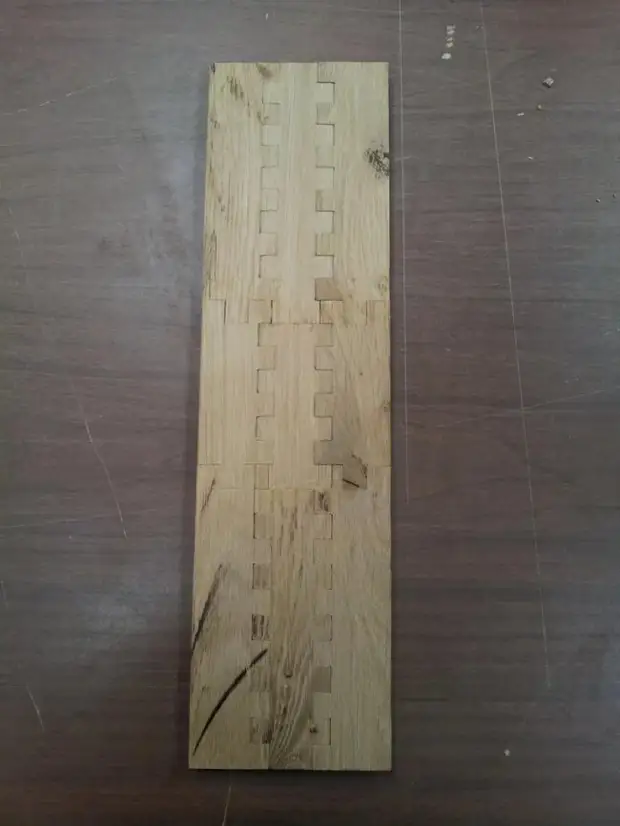
After gluing, grinds the board.
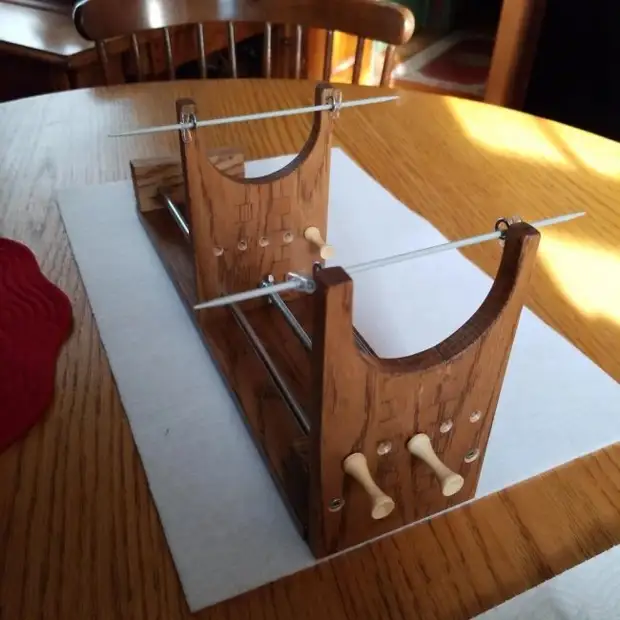
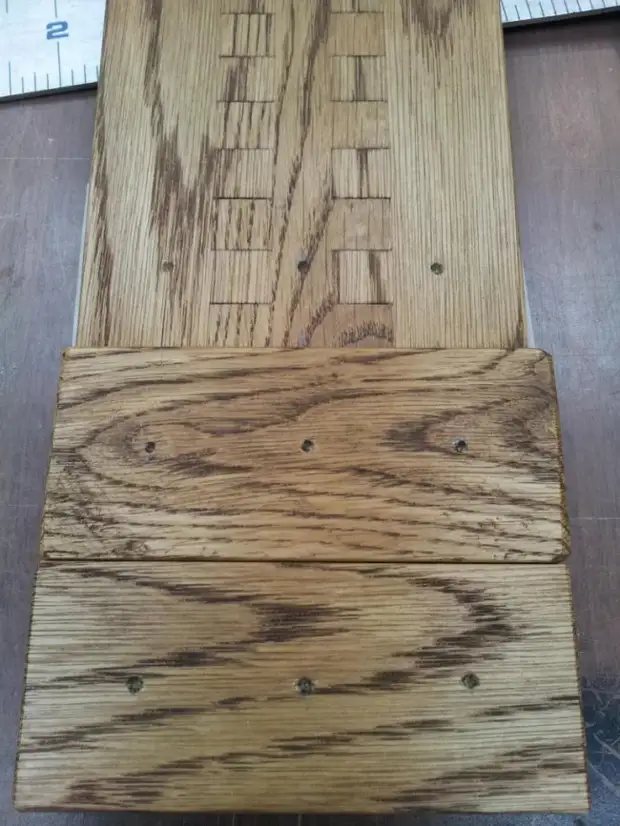
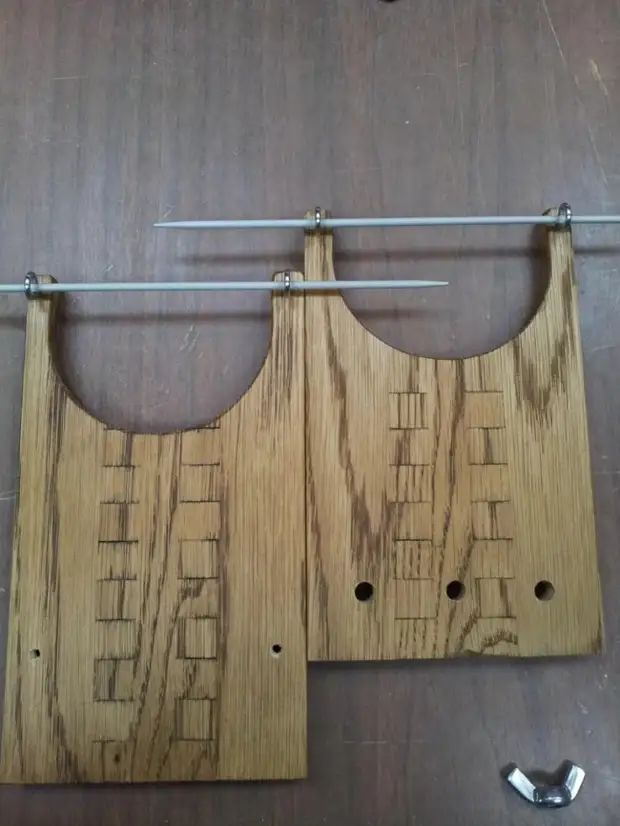
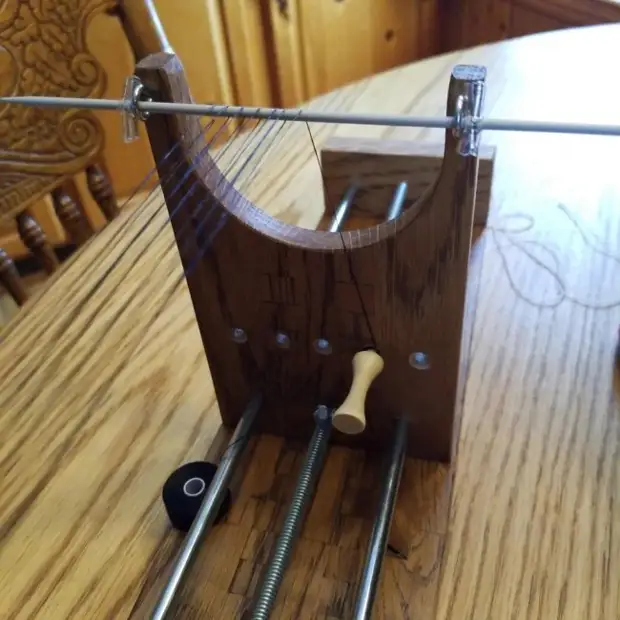
Step second: Bruks and racks
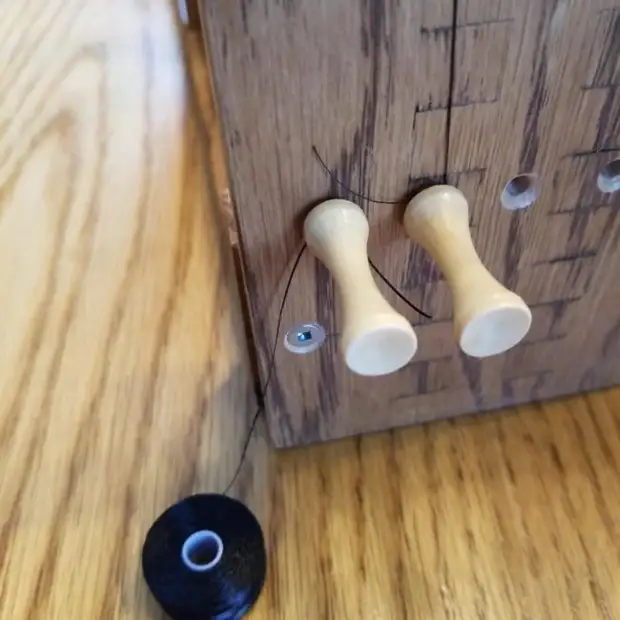
Now you need to make two bars and two racks. Studs will be installed in bars. The master simply scolds them in the width of the foundation.
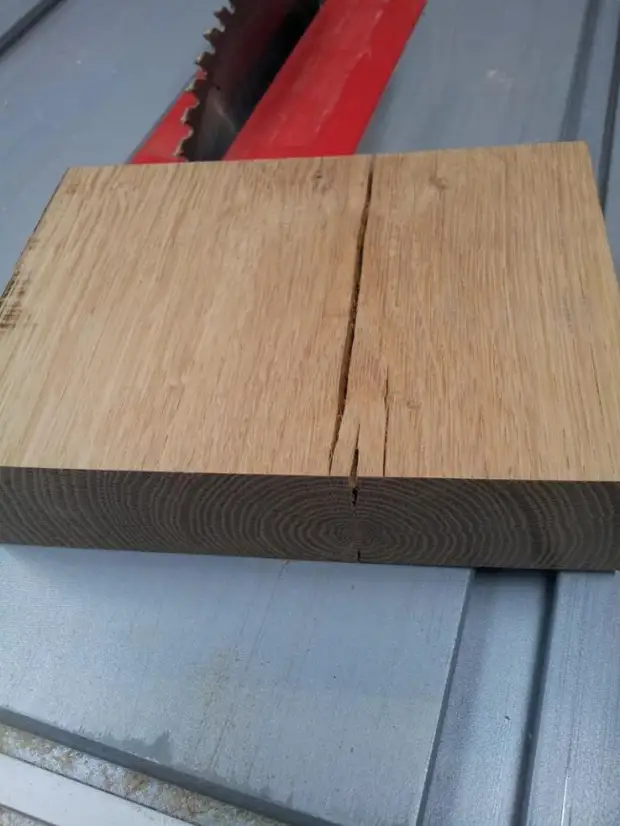
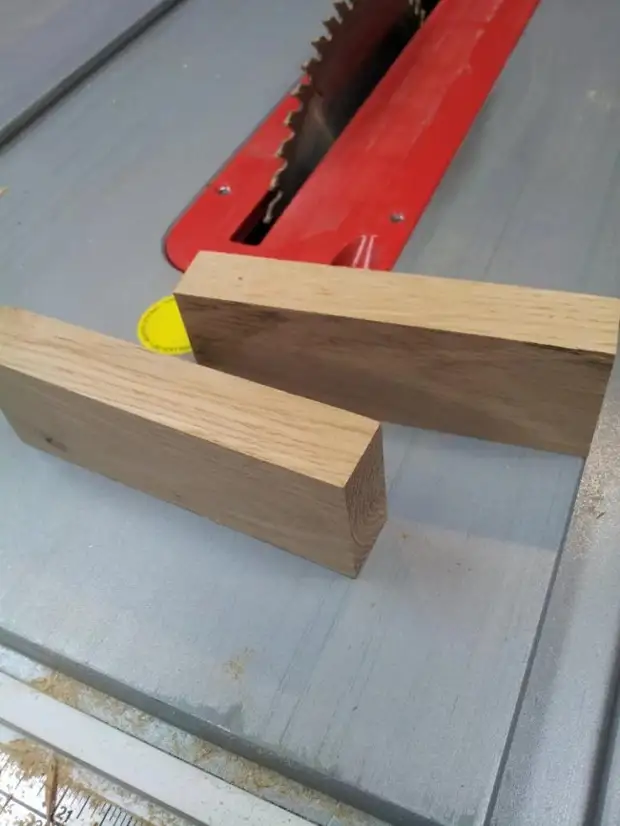
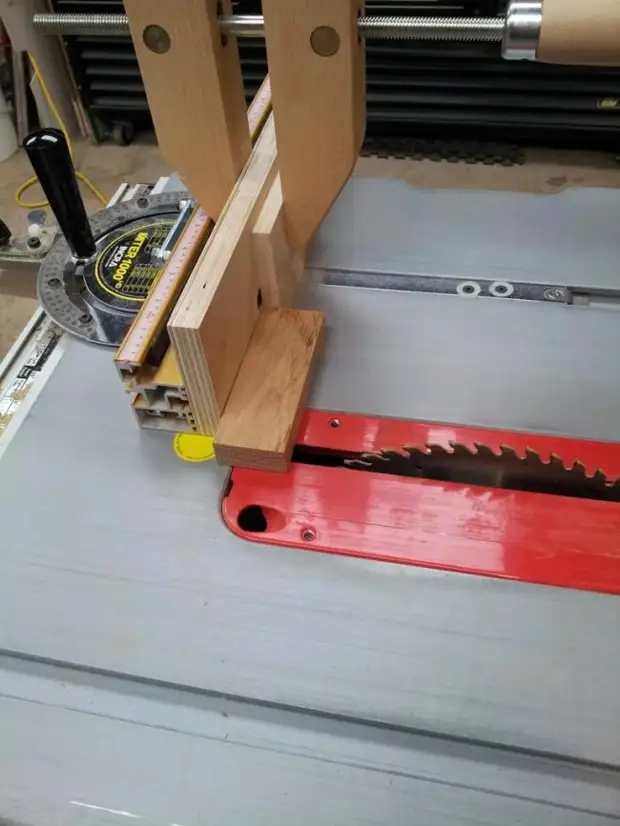
Racks makes from the same planks from which the base did.
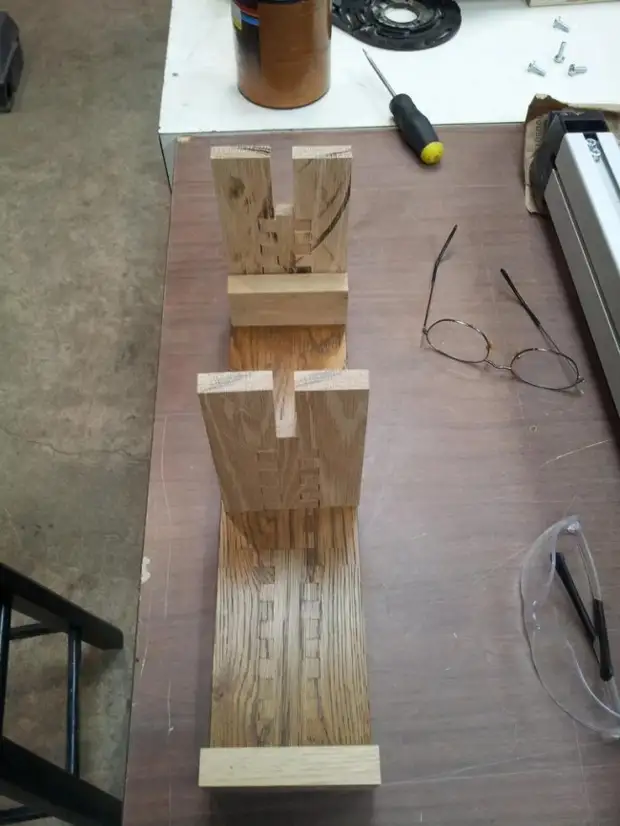
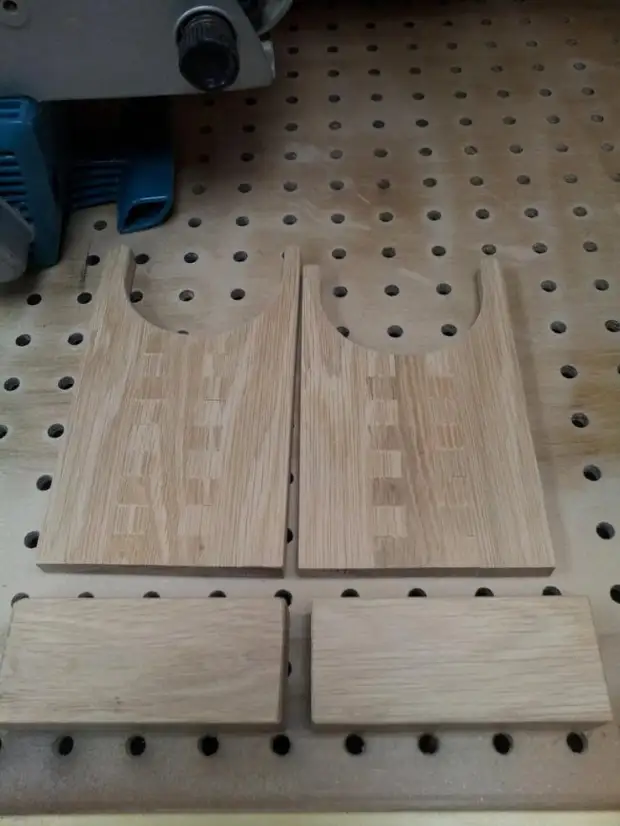
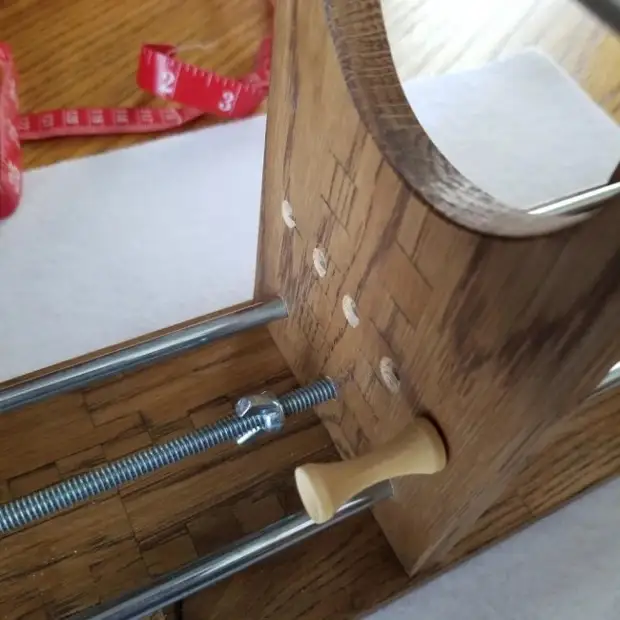
At the top of the racks you need to make semicircular cuts, then pollnate parts.


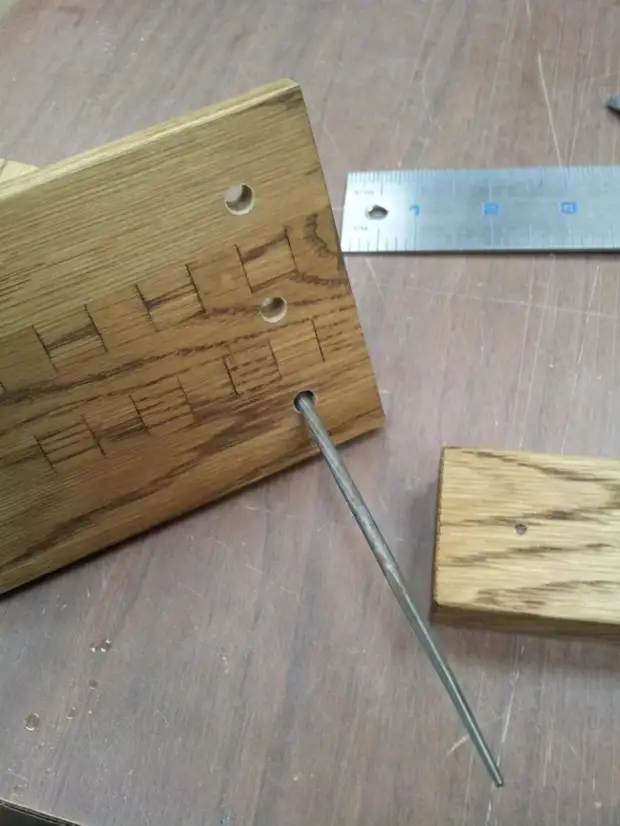
Step Three: Marking and drilling holes
Before marking holes, you need to cut off the studs along the length. Street length is equal to the length of the base.

Now about holes and studs. Three studs are installed in the lower part along the entire length of the rack. According to these studs, one of the racks will move and thus you can adjust the length of the bracelet.
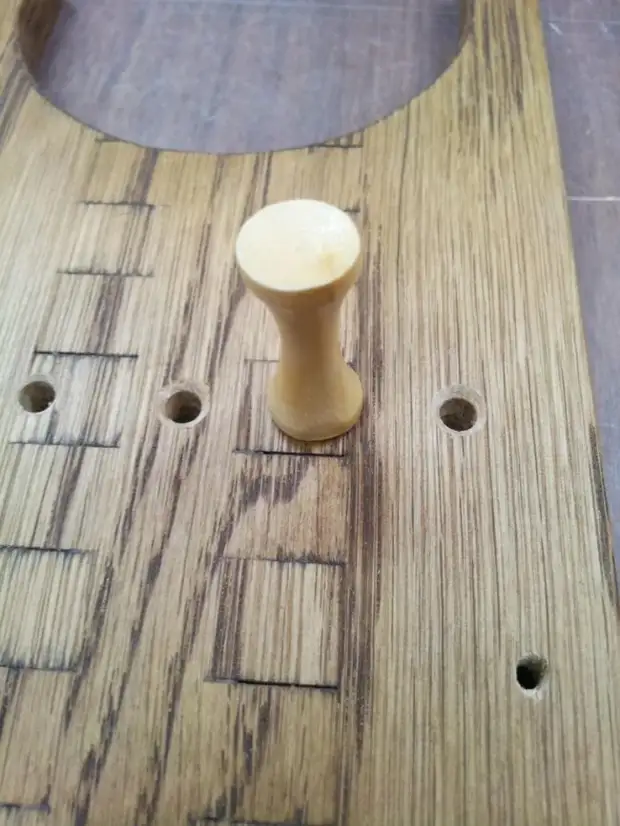
Two transverse spokes will be installed at the top of the top. Threads will pass through their top.
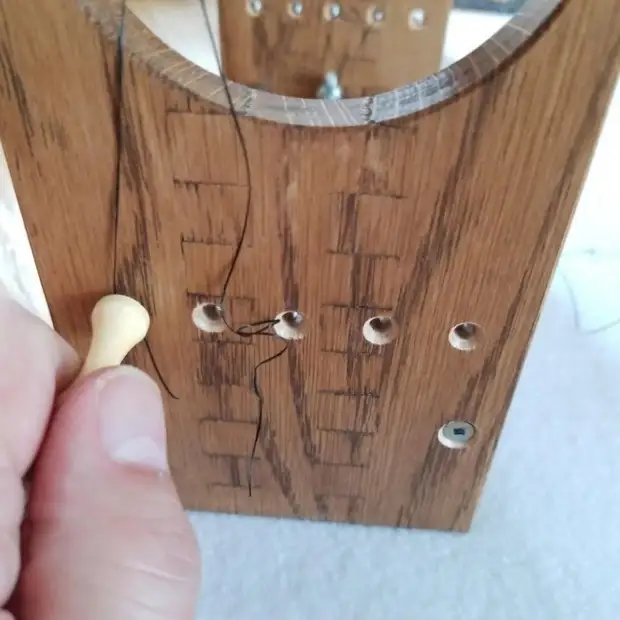
In the middle, cushions (pegs) for golf will be installed. They will fasten the ends of the threads.
The height of the installation of the lower spills should allow the adjustable rack to slide and the bars nut should not be cling for the base. Holes for pegs should be located at the same distance and correspond to the diameter of the pegs. At the bottom there should be no sticking screws that could scratch the table.
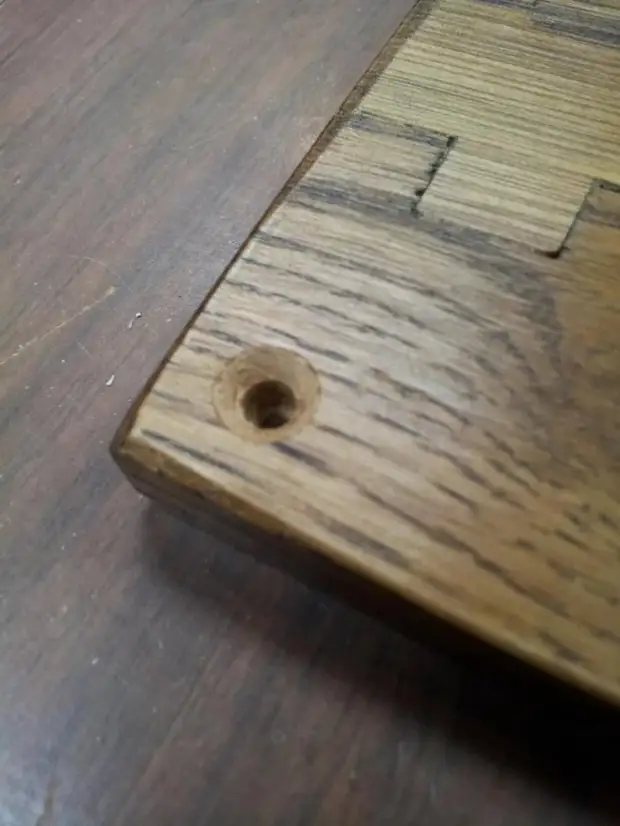
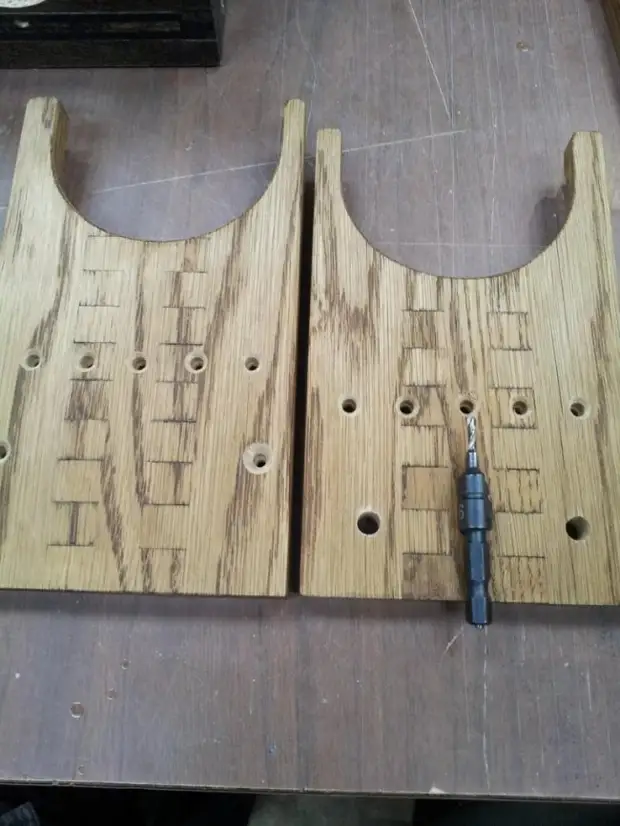
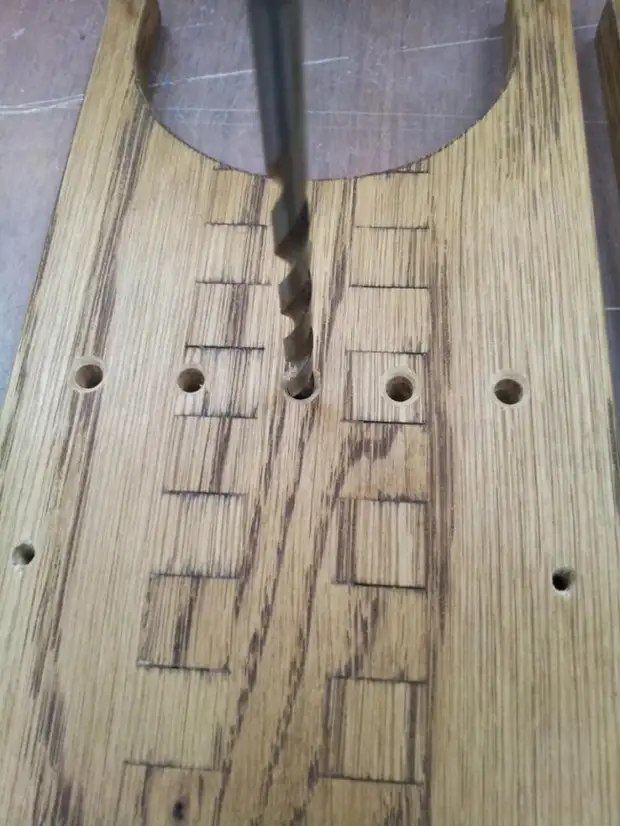
Holes in the rack that will move, you need to make more diameter of the stud.
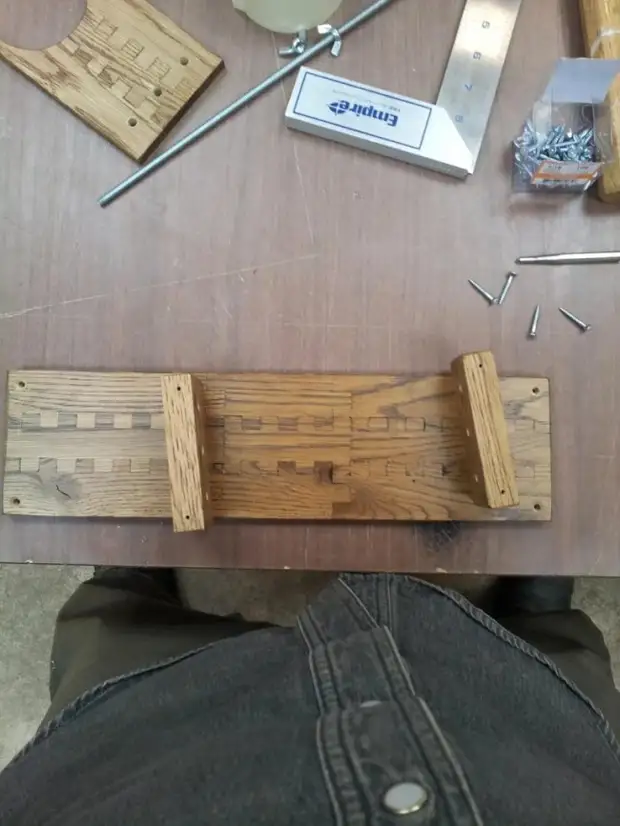
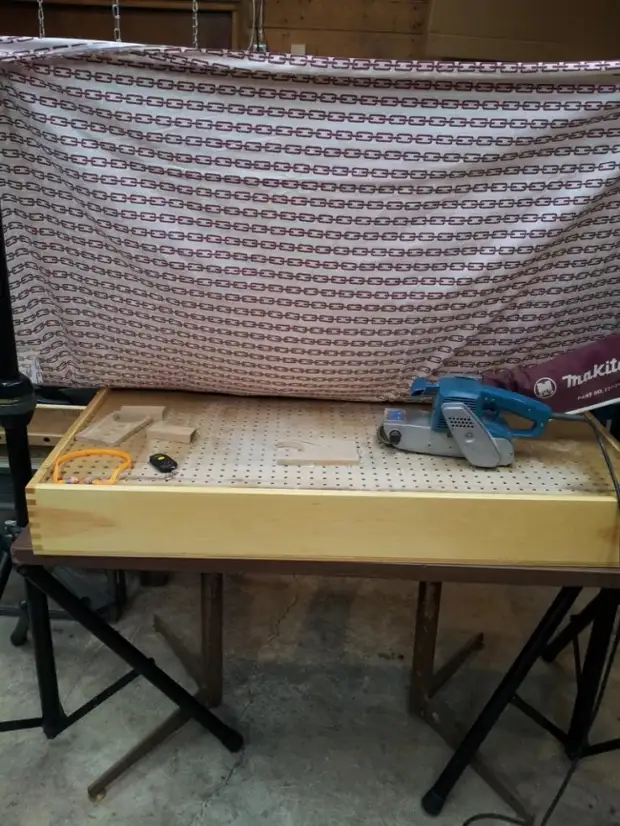
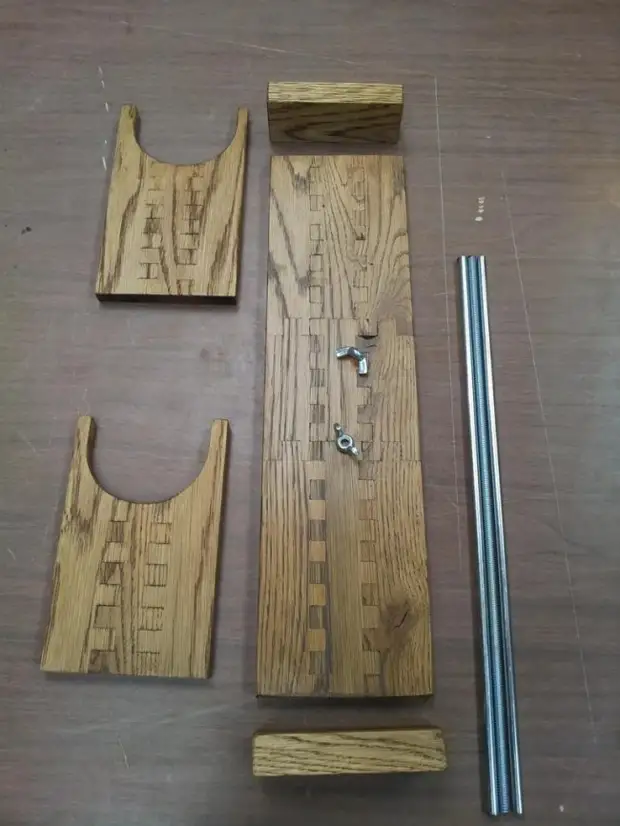
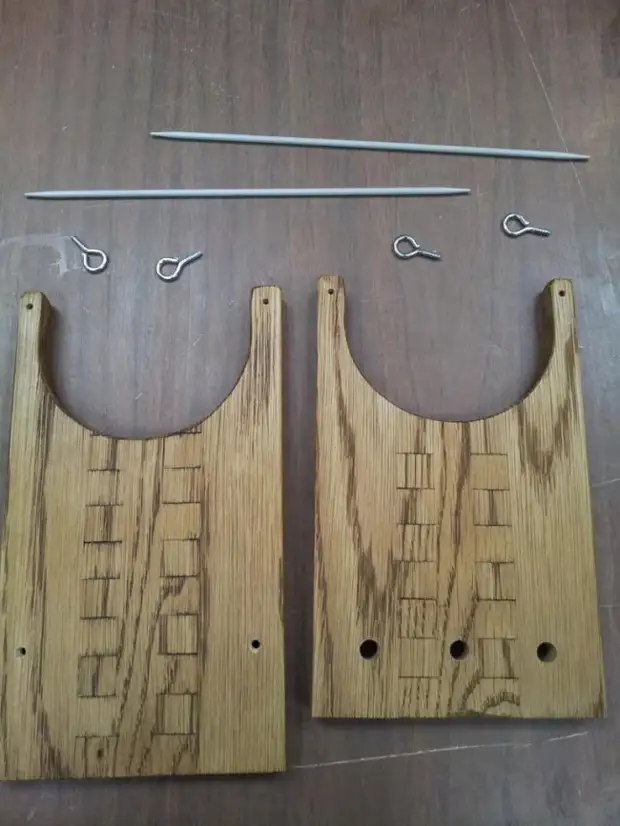
Step Fourth: Assembly
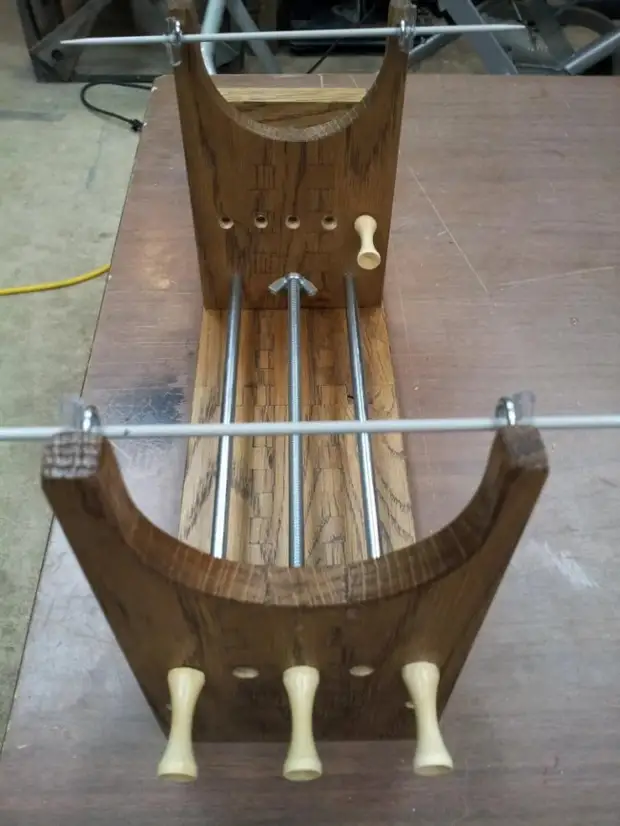
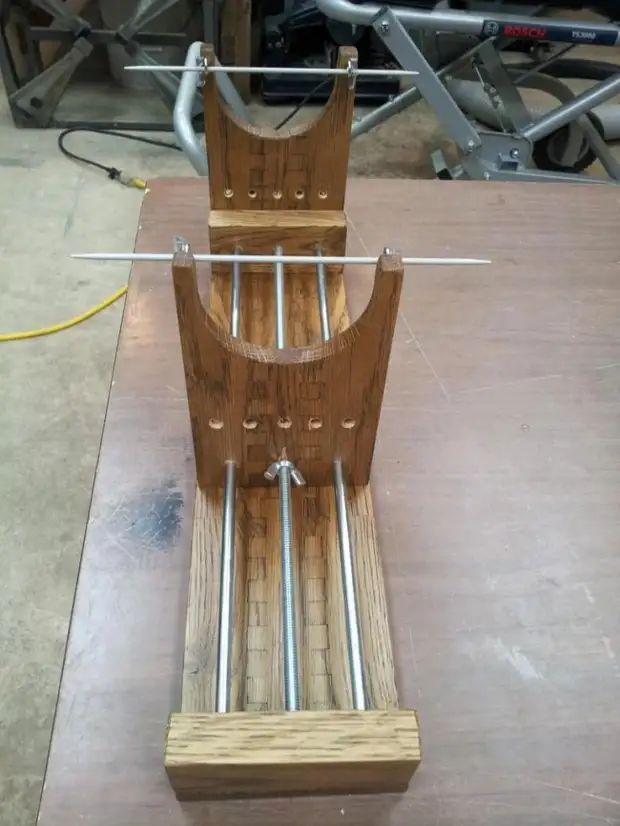
In the hole twists the screw ring. Spokes will be installed in the rings.
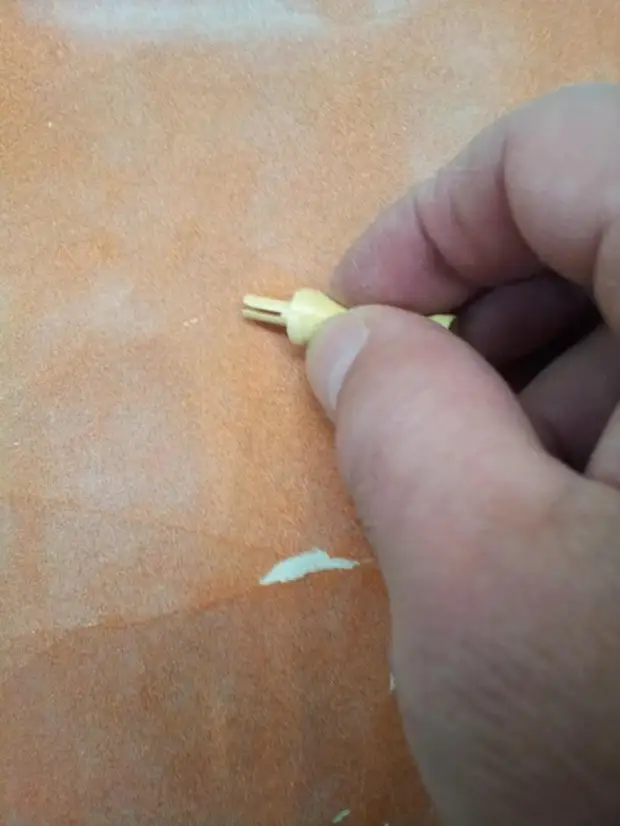
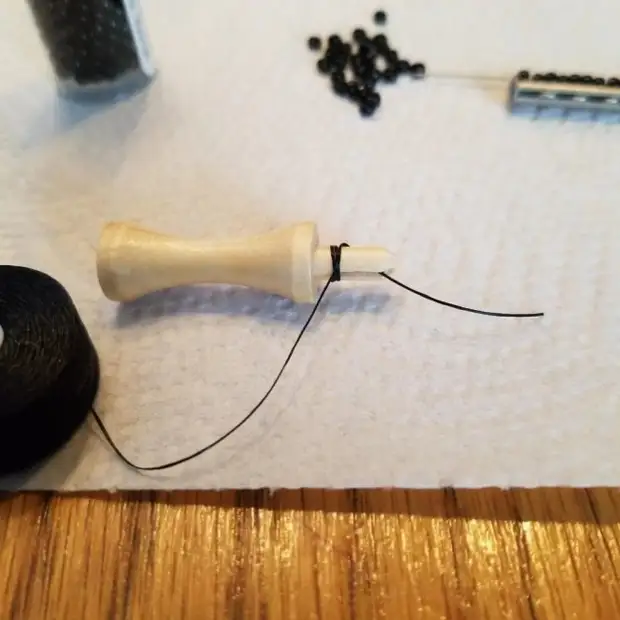
Pegs need to cut down, so easier to fix the ends of the thread.
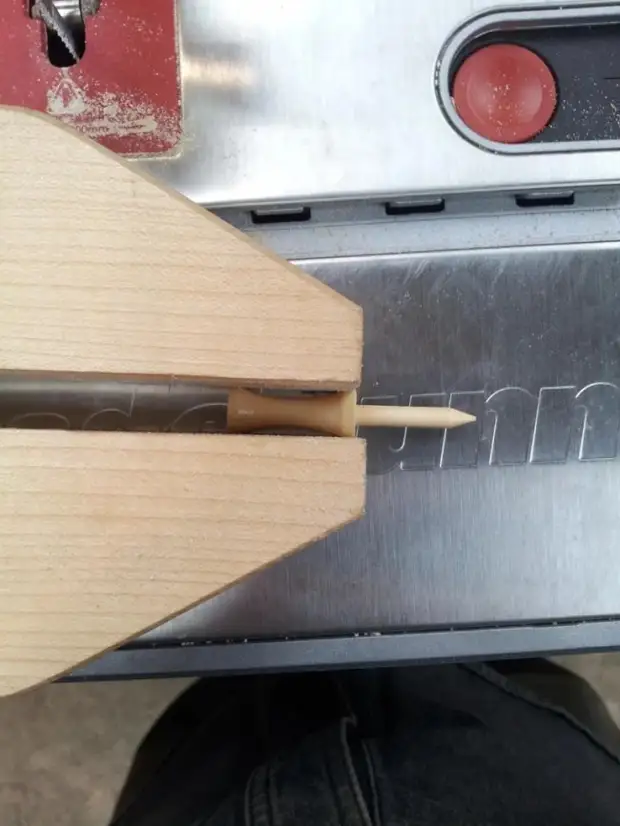
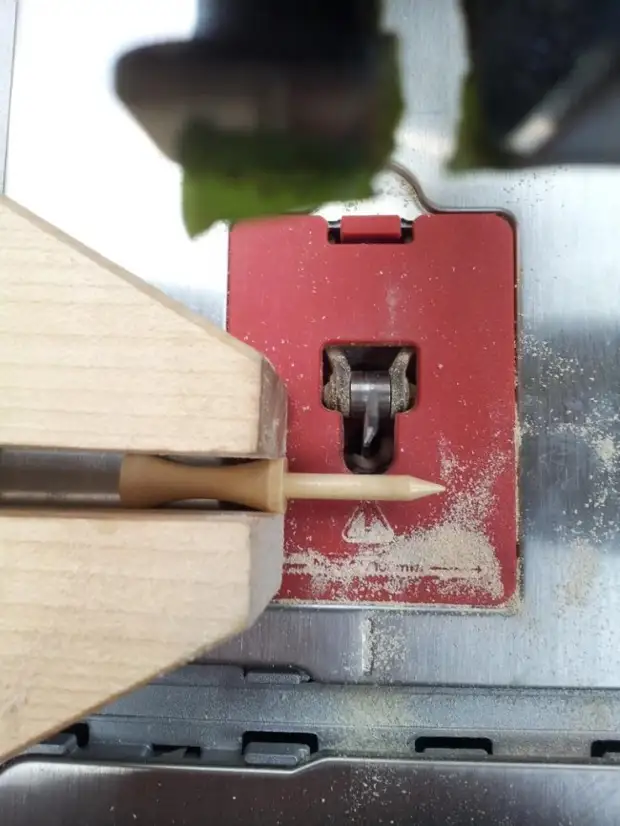
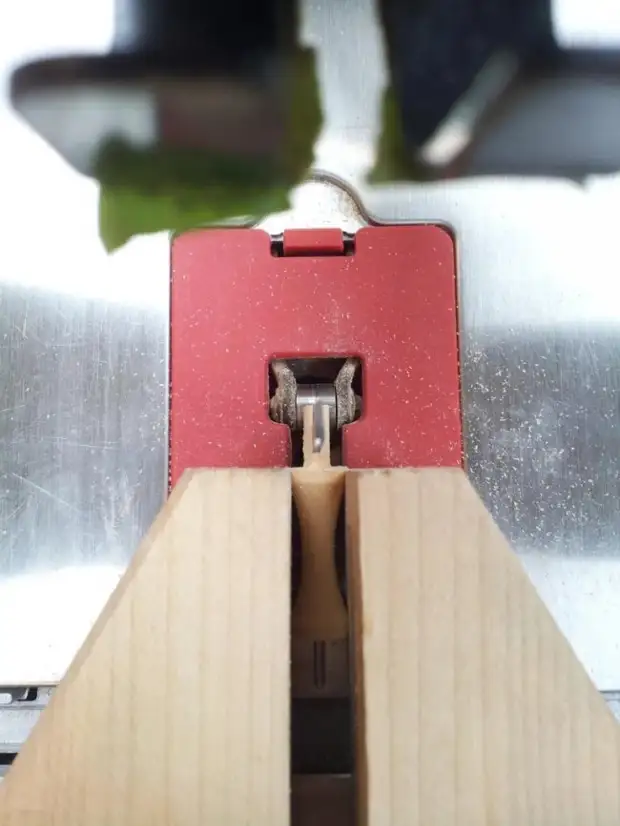
After sawing, you need to polish the ends.
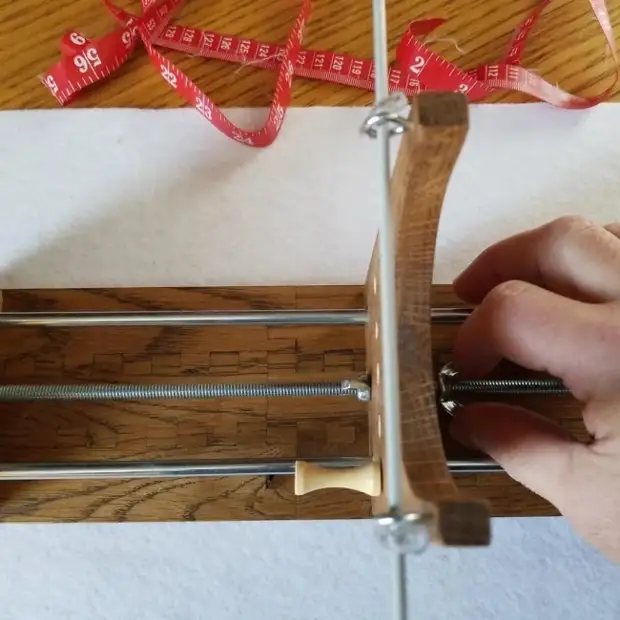
Now you can collect the machine. Bruks and rack are glued and fastened. Before moving rack and behind it, it is necessary to wind the bars nuts (enough two on one stiletto). Studs will fix the rack.
Now you can go to the manufacture of the bracelet.
Step Fifth: Design
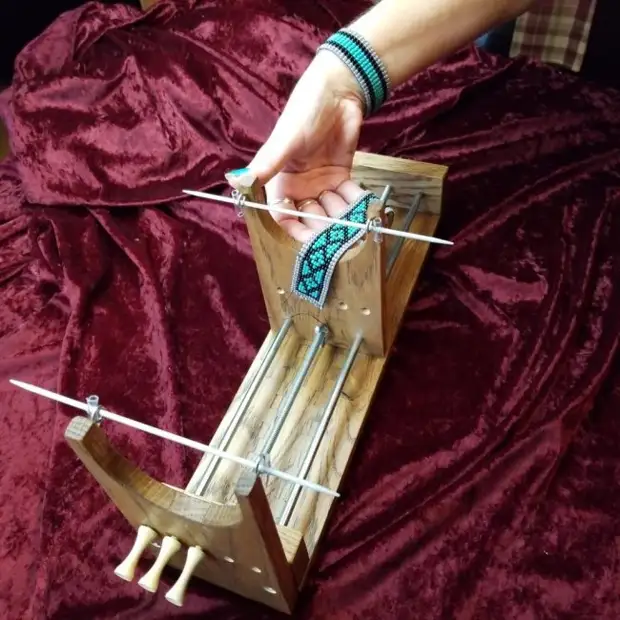
How to work on the machine Master will show on the example of bracelet weaving.
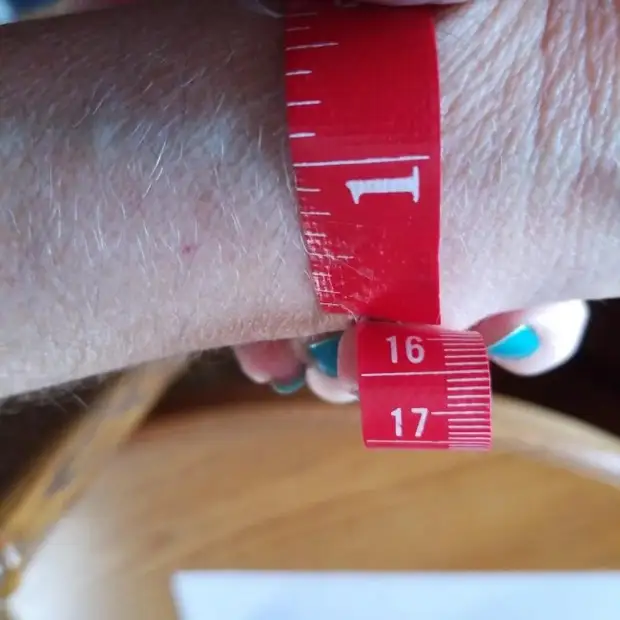
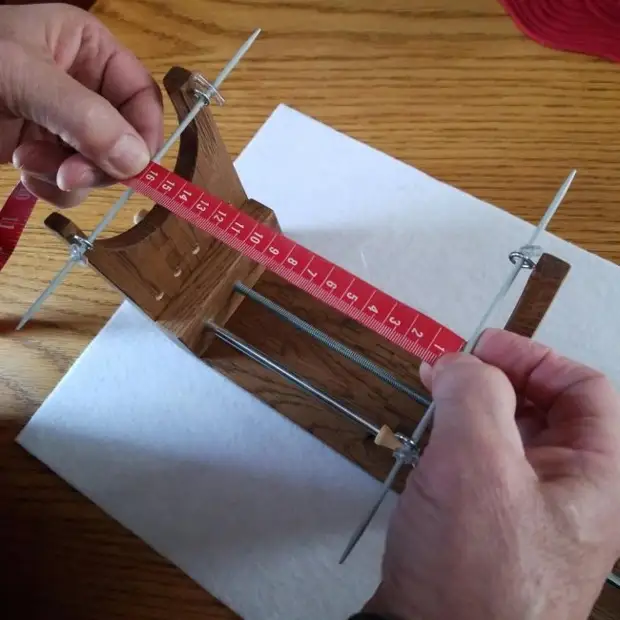
First measures the wrist diameter. Then it shifts the rack on the same length and fixes nuts. You need to set the length on the spokes.


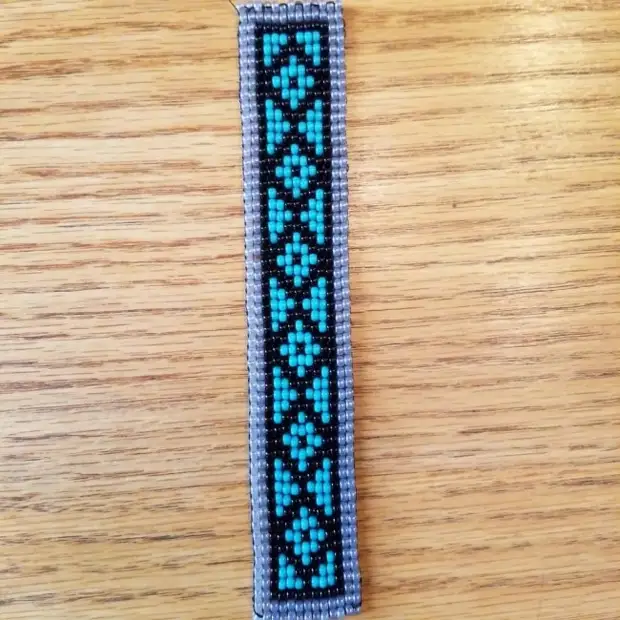
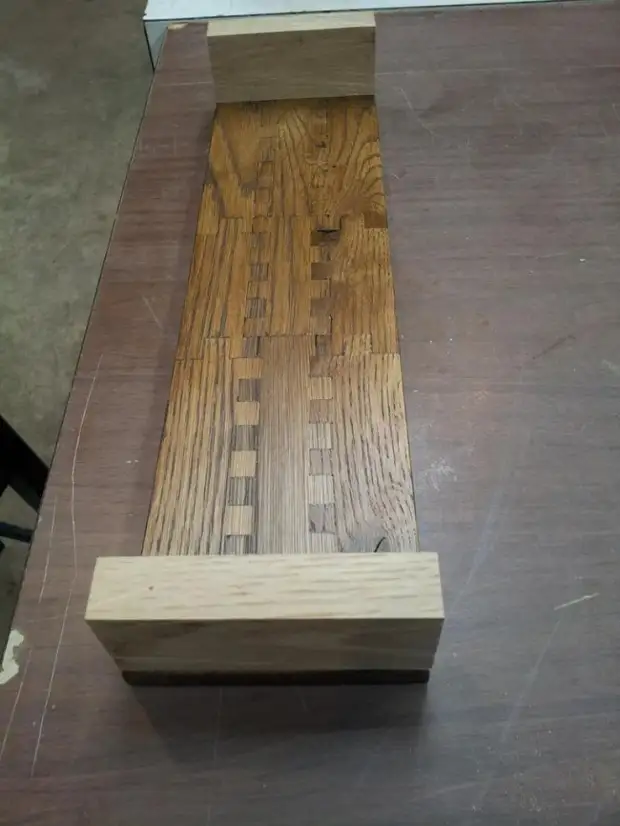
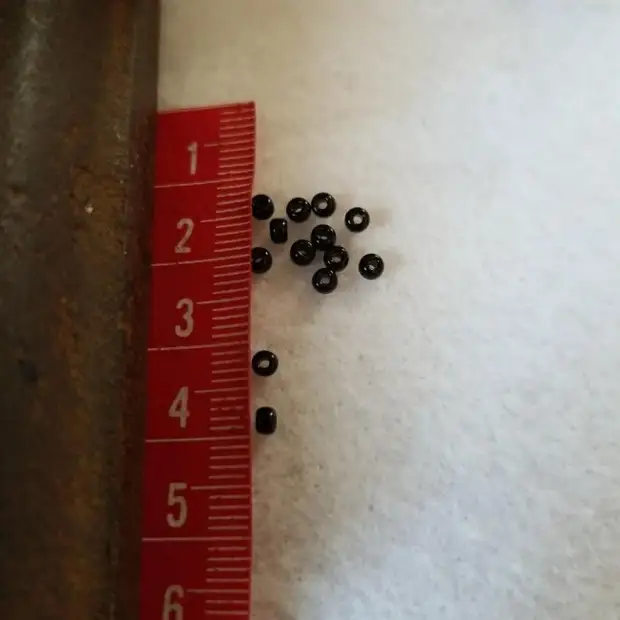
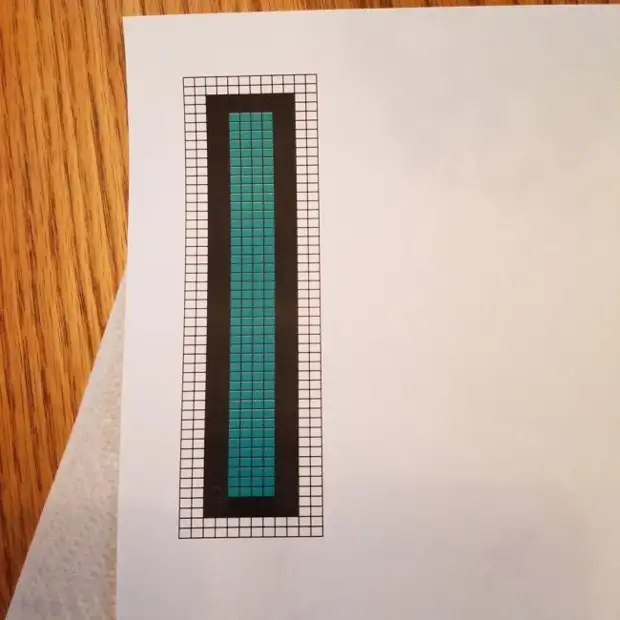
Beads have a width of 3 mm. 53 pieces are placed on a length of 160 mm. There will be twelve beads in a row. This size is due to the clasp. For his design, the master chooses a grid of 50 to 12. The design will be simple enough, so the master also twisted the bracelet.
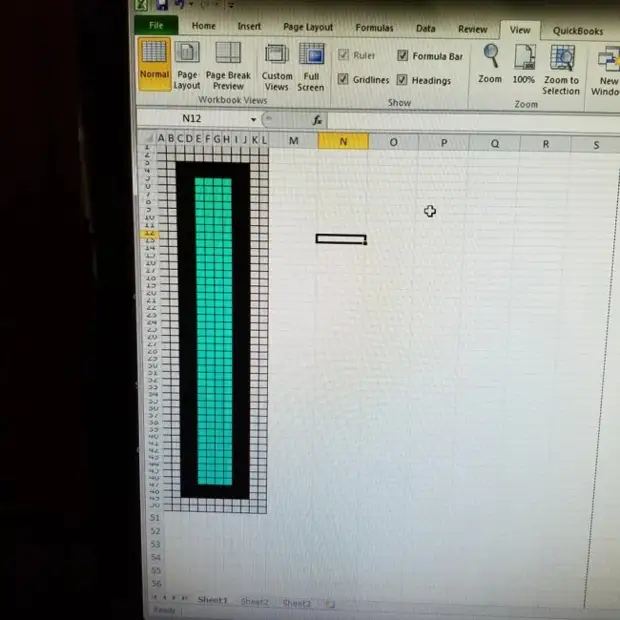
Then in Excel makes and prints the bracelet scheme. For those who do not know how to work in the program small instructions.
Click 1-a cell.
Scroll down the slider and find a 50-L cell.
Hold down the SHIFT key, click the cell 50 L.
This operation will allocate all the necessary cells.
Next, you need to select the format tab in the upper right corner of the Excel toolbar. Here you will find the settings of the row height and column width. This will make the selected cells more similar to the form created by the beads.
Now you can choose the grid sections and color them. If you click one cell and hold the SHIFT key when you select another cell, the range of cells between them will be selected. You can add cells to one by holding the Ctrl key and click the desired cells.
To paint the cells, press the arrow to the right of the can with paint on the left side of the Excel toolbar and select the desired color.
Now you can send a printing scheme.

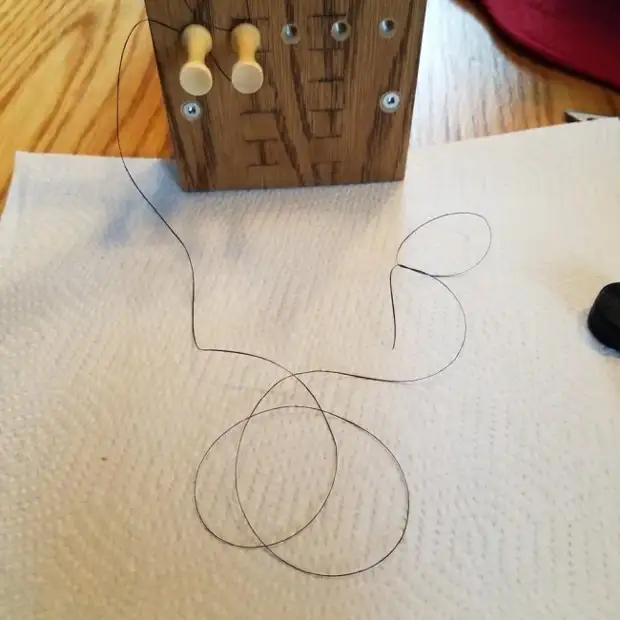
Step Six: Thread
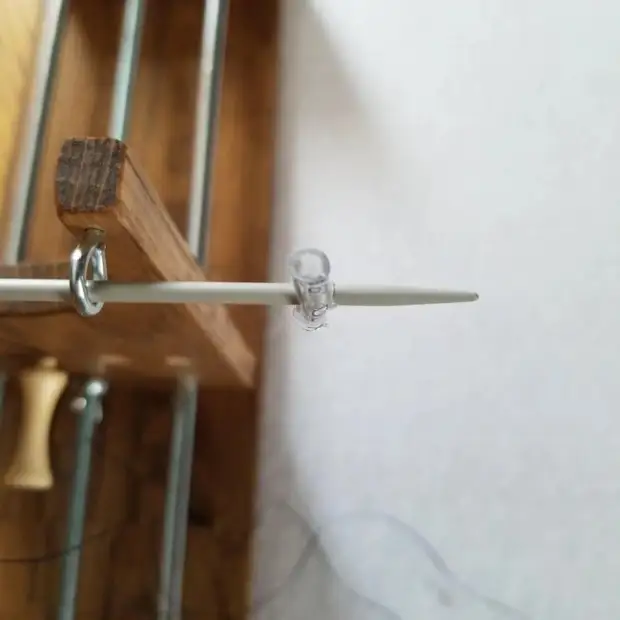
The needles must be securely fixed. The master cuts the silicone tube and makes a hole in it. Then puts the tubes on the knitting needles on both sides.

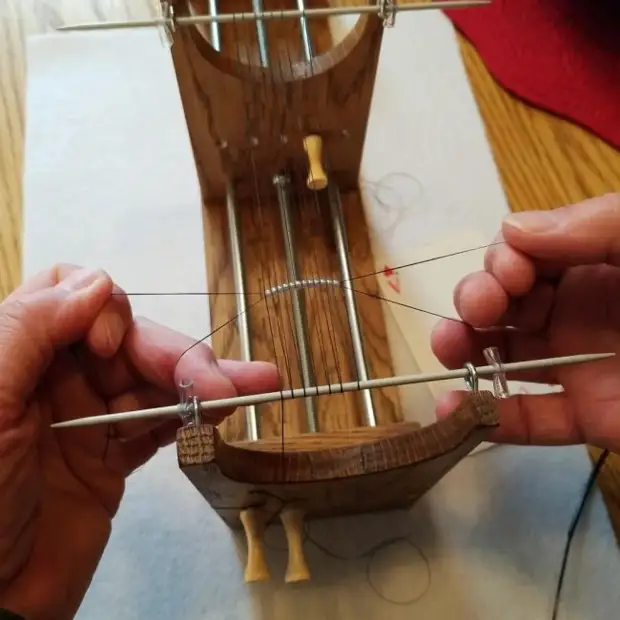
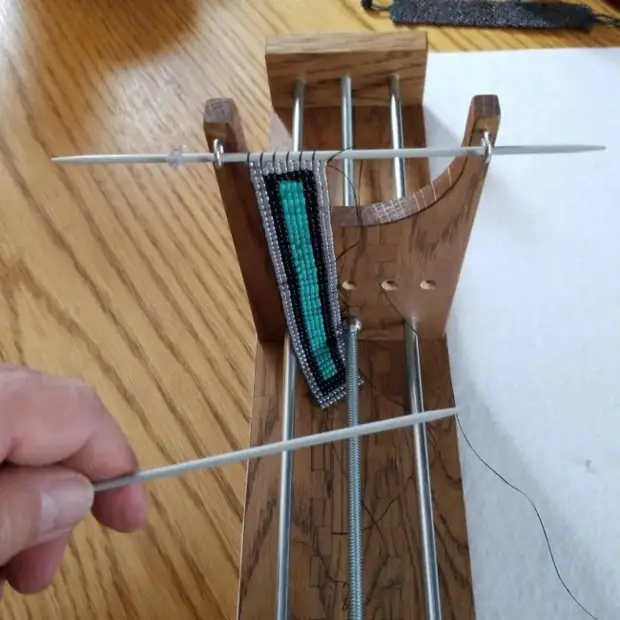
Next weakens the carrying nuts and sets the machine in length. Fixes a rack.
Wars the edge of the thread around the end of the knife.

Next winds the thread around the spokes. Total need 13 threads, always 1 more than transverse beads. The end fixes on the other peg. These threads are called - the basis.
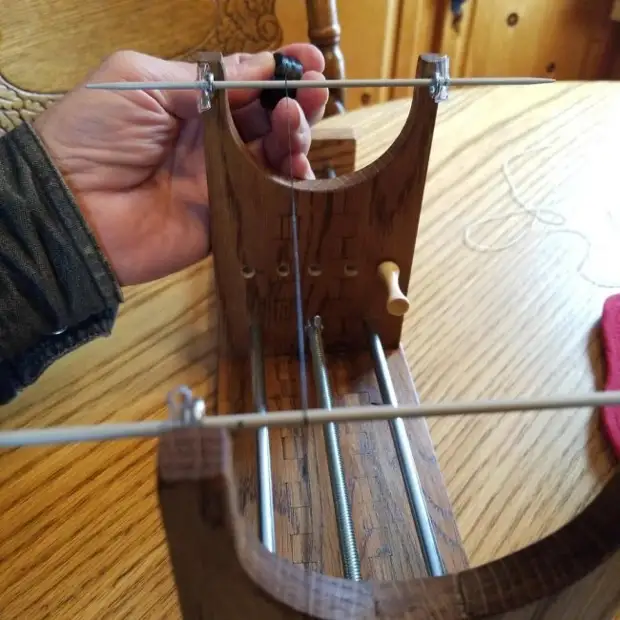
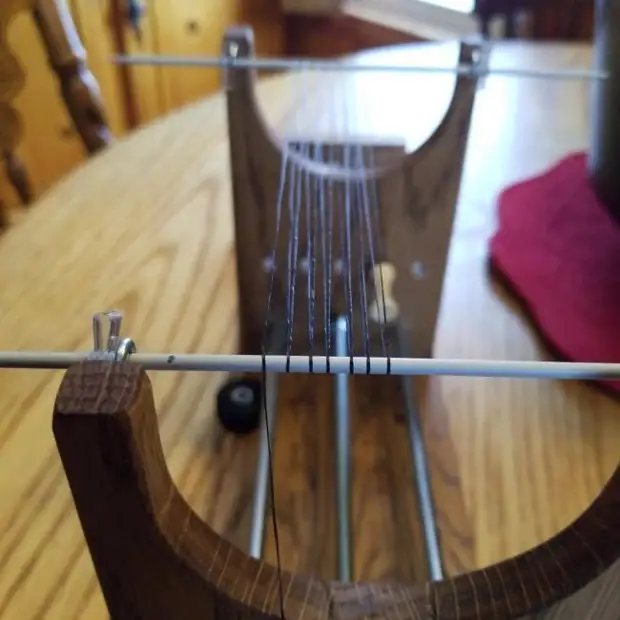
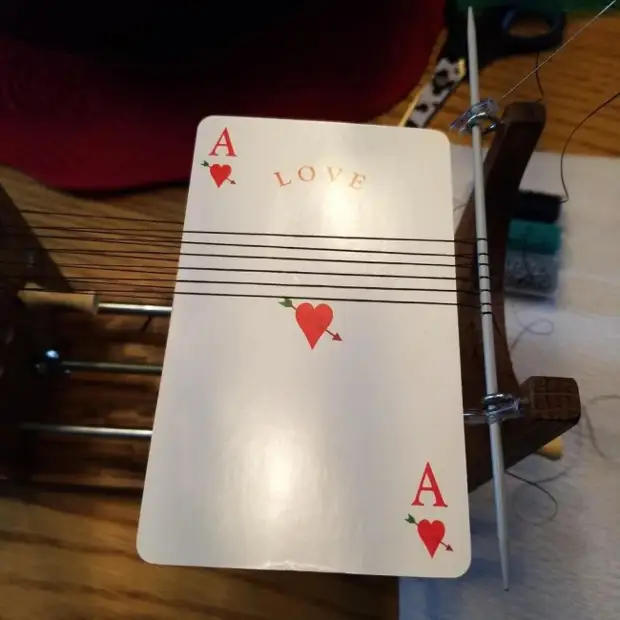
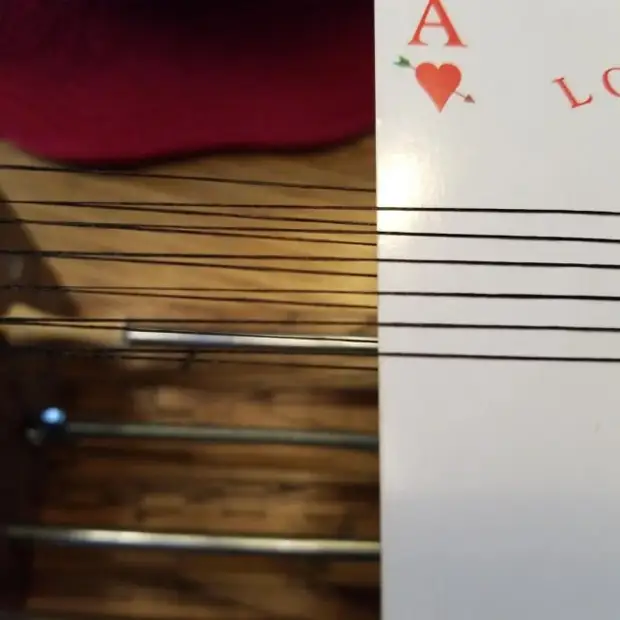
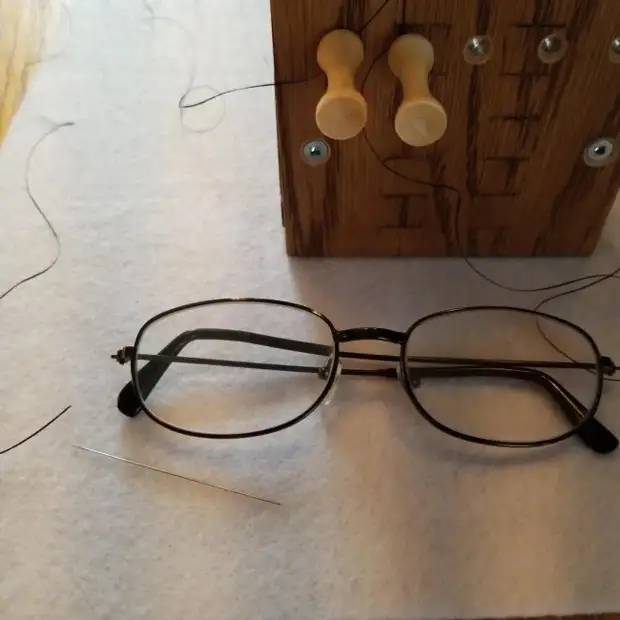
Now you need to divide the bottoms of the base. The master does it using a playing card. The first thread down, then the thread up, then down and so to the end. This operation will help when adding a first row of beads.
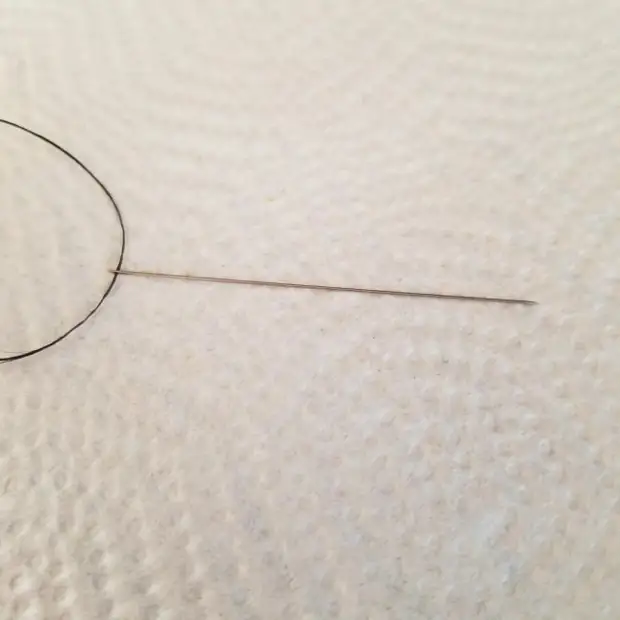
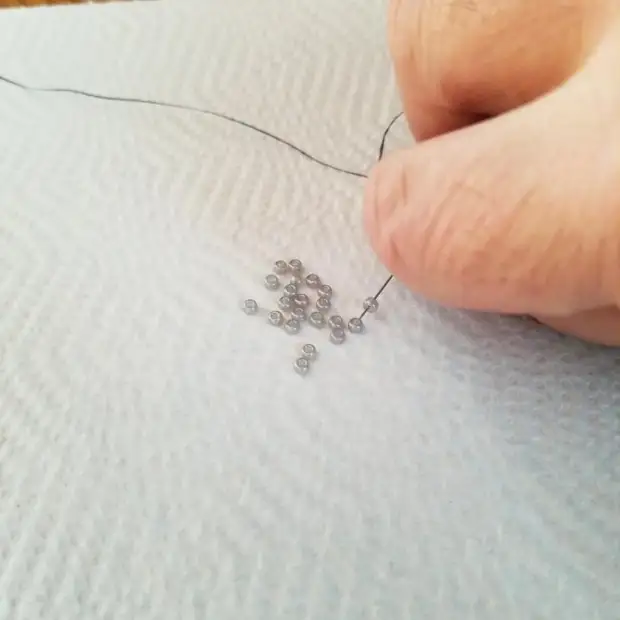
Now you need to secure the refinement. Beads will be driven on this thread. Thread is cut off on a comfortable length and refuel the needle.
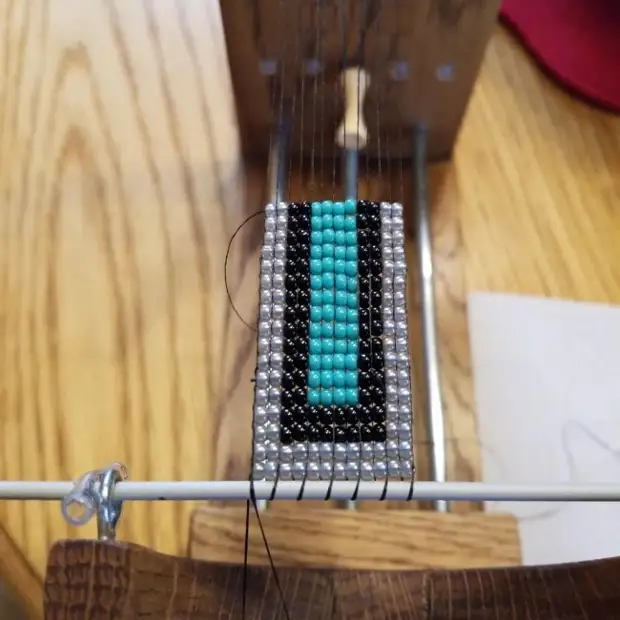
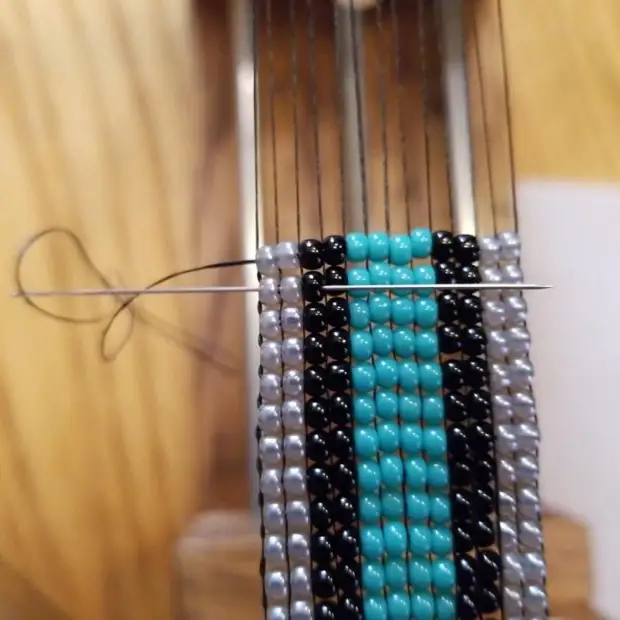
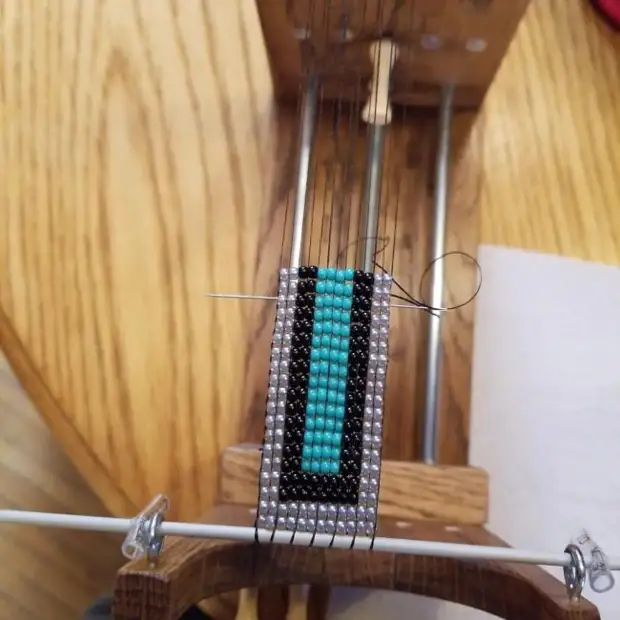
Seventh Step: Beading
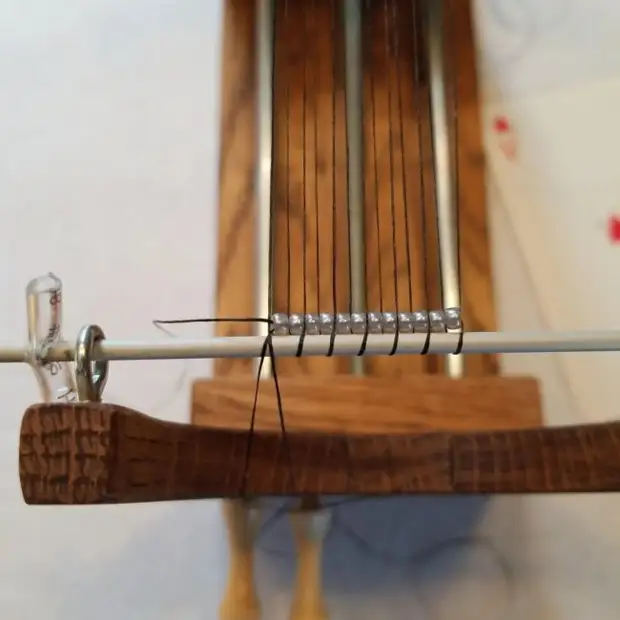
Further on the thread we ride 12 of the first row beads.
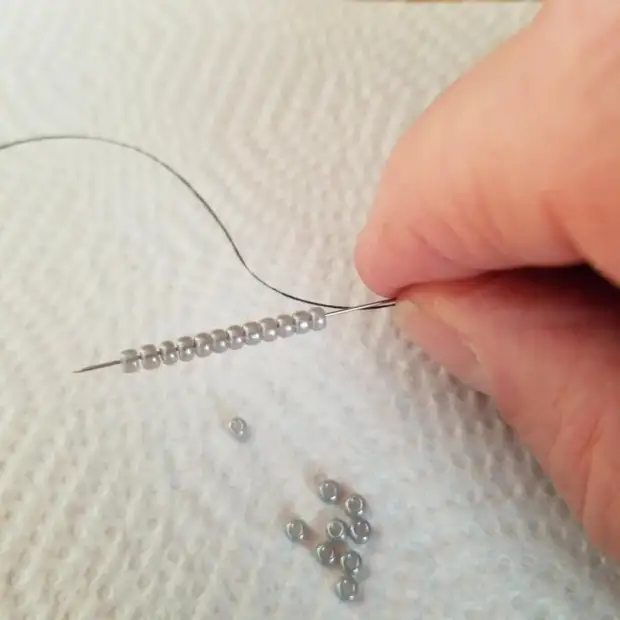
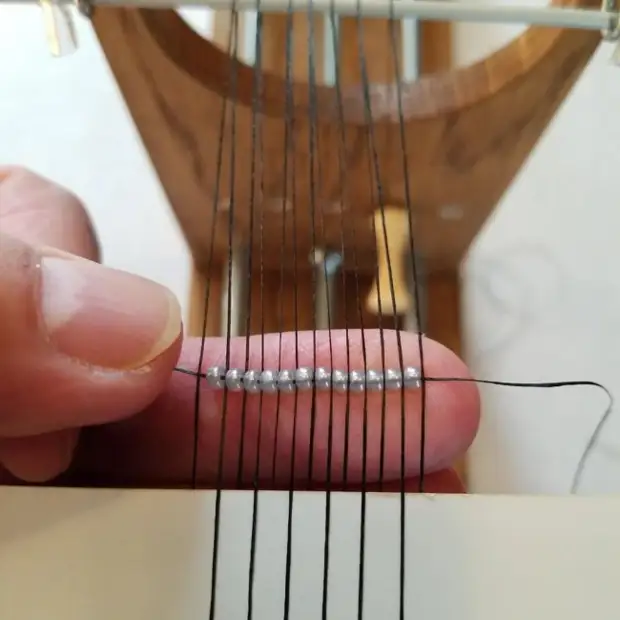
Now you need to place a row of beads on your finger, and press the bases to threads. Threads of the base should be alternate through beads, i.e. Bead - Thread, Bead - Thread, etc.
Then you need to right to stretch the needle in the eyelets of beads, and the needle must go from above the thread. It turns out the grid: shuttle thread - the filament of the base - the shuttle thread.
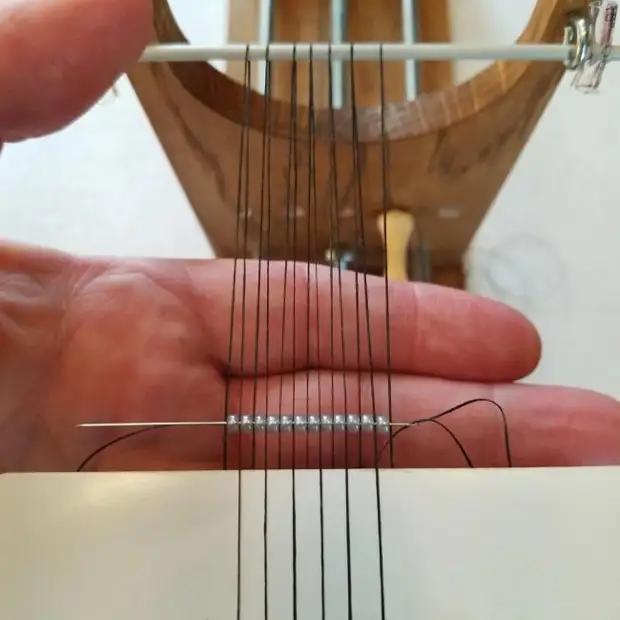
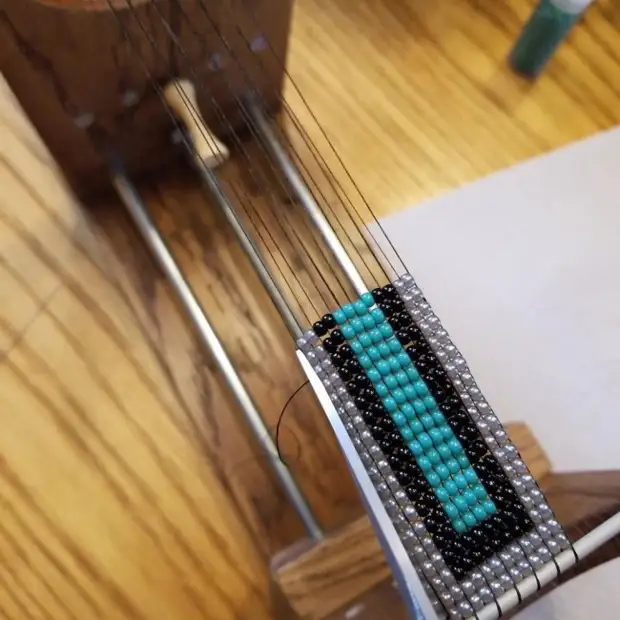
We clean the card further and pull up a number to the edge.
Further add the second row.
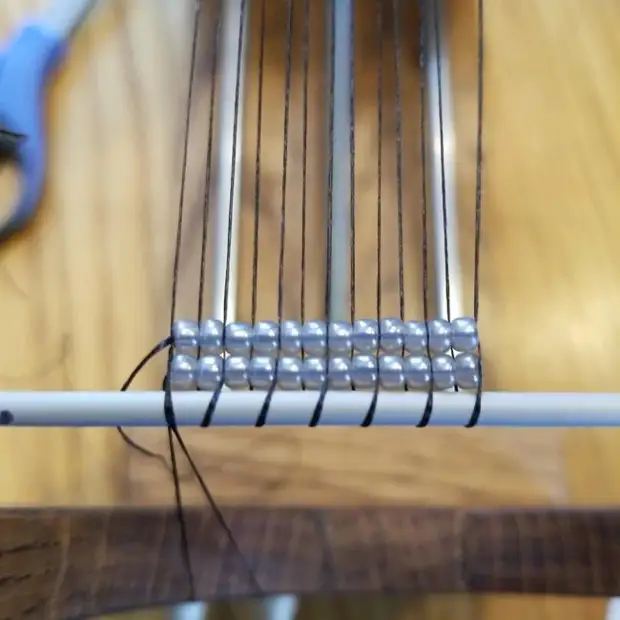
Weave bracelet according to the scheme.
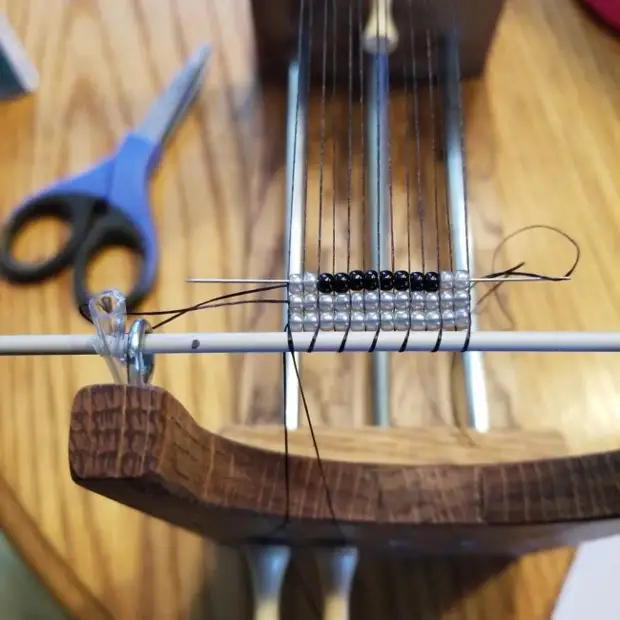
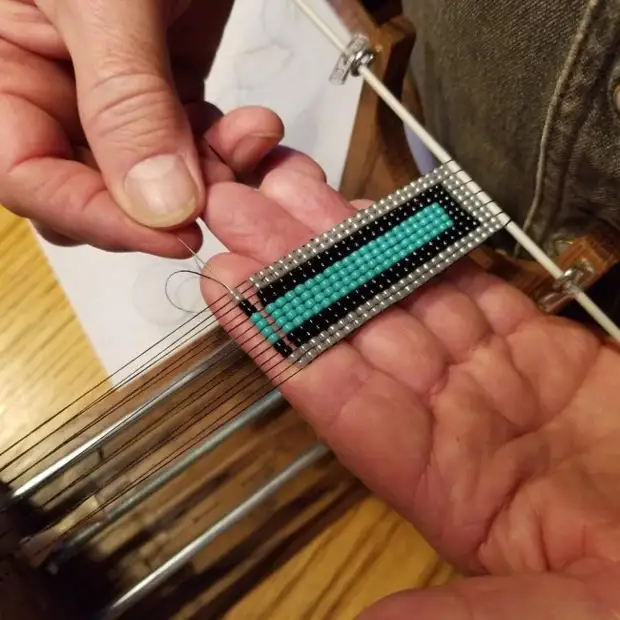
When the refinement will end, we do it in the beads and tie. In the needle, stretch another thread, tie.

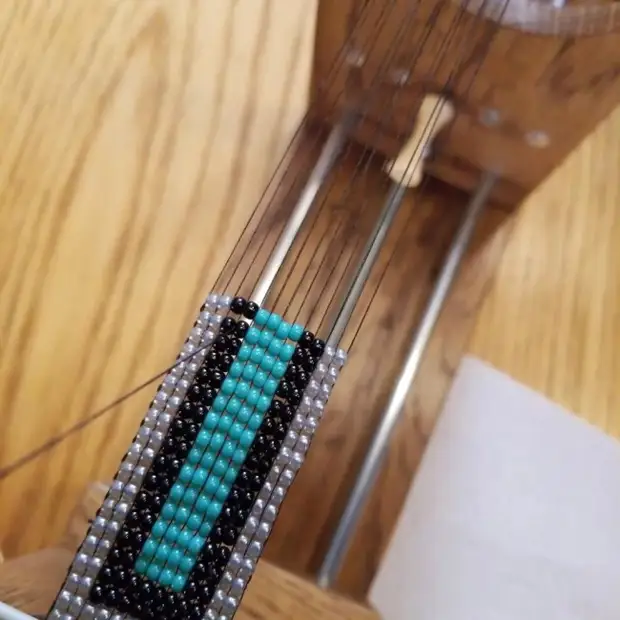
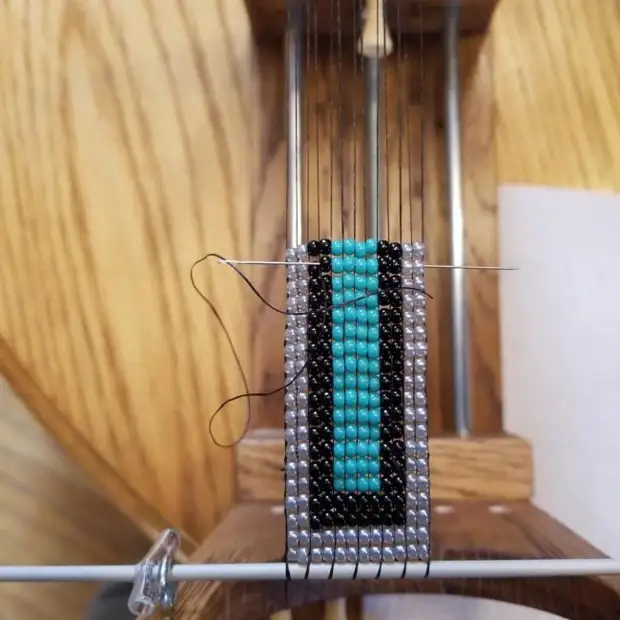
Continues weaving. The closer to the end, the more the tension of the bases of the base will be felt.
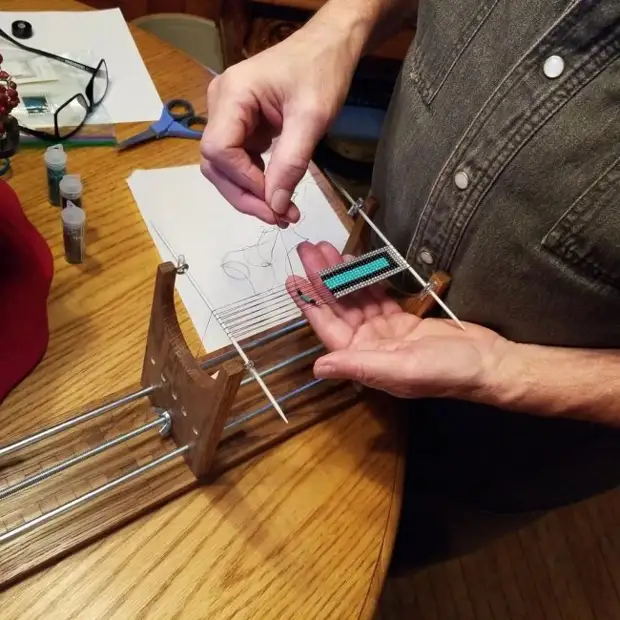
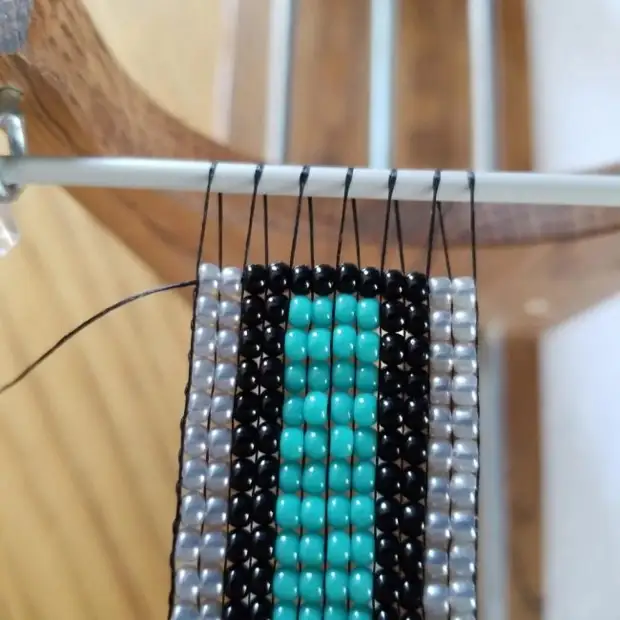

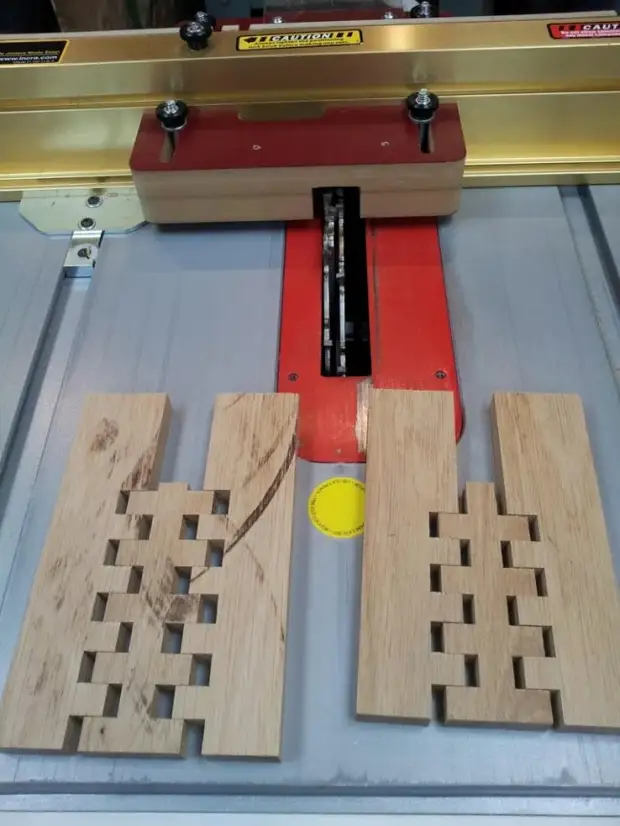
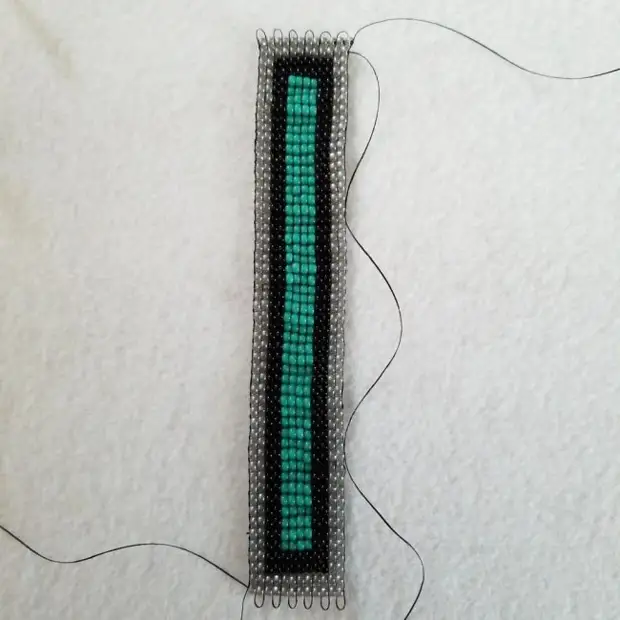
The last row is installed close to the needle. The stray of beads, visible in the photos, after removing the bracelet from the machine will smooth out.
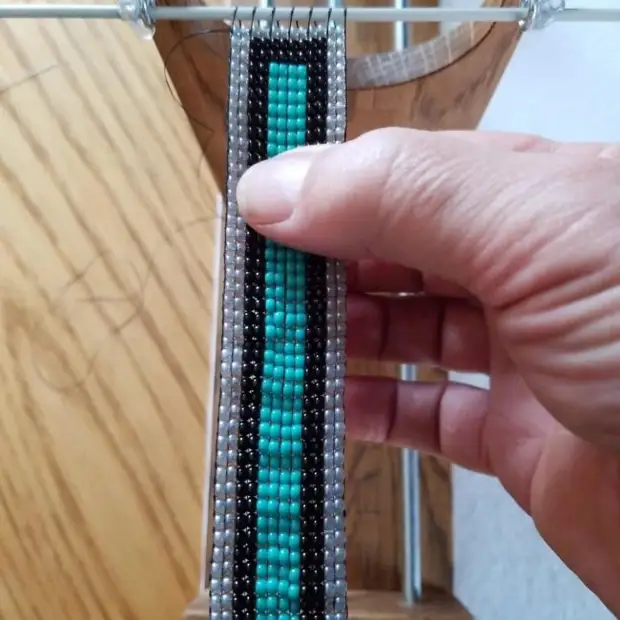
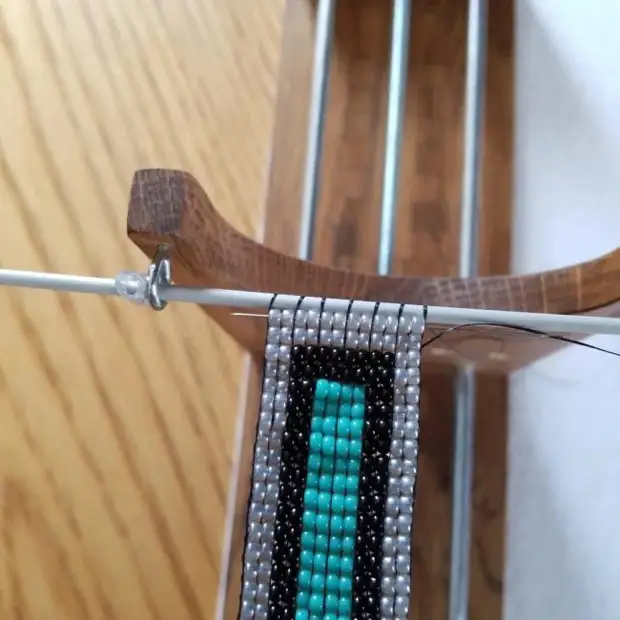
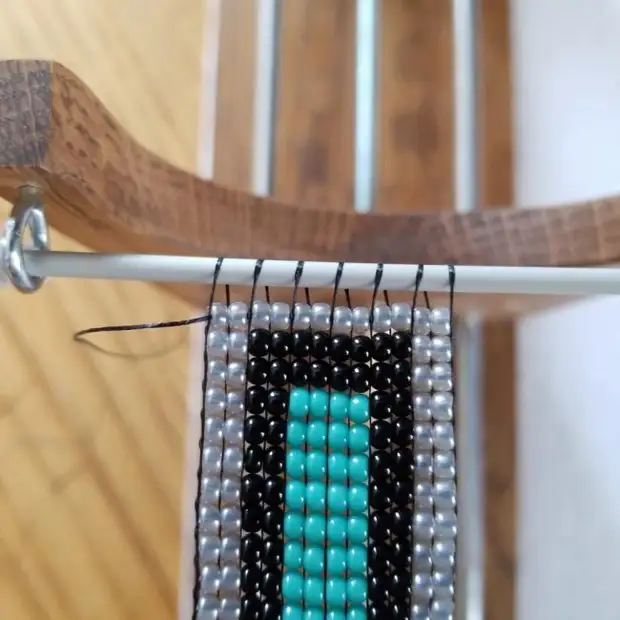
Weaving is over, and it is necessary to free the ends of the thread and remove the bracelet with the spokes.

If the bracelet "Missing" then beads leveled, and the loops at the ends of the bracelet will delay.
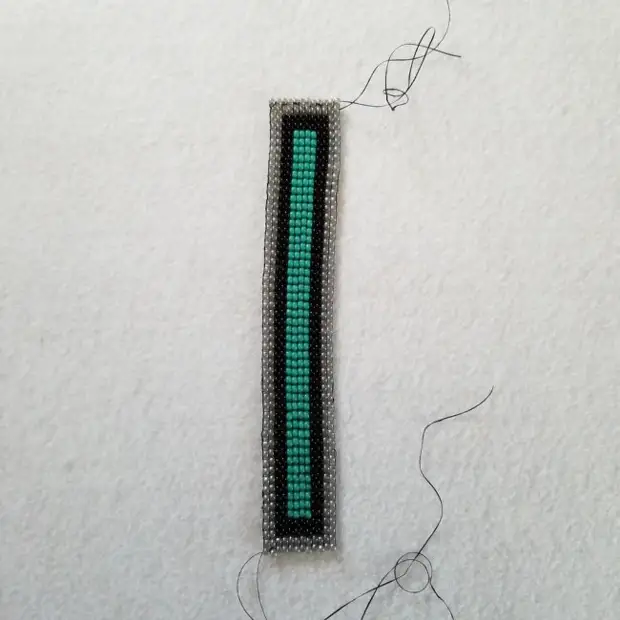
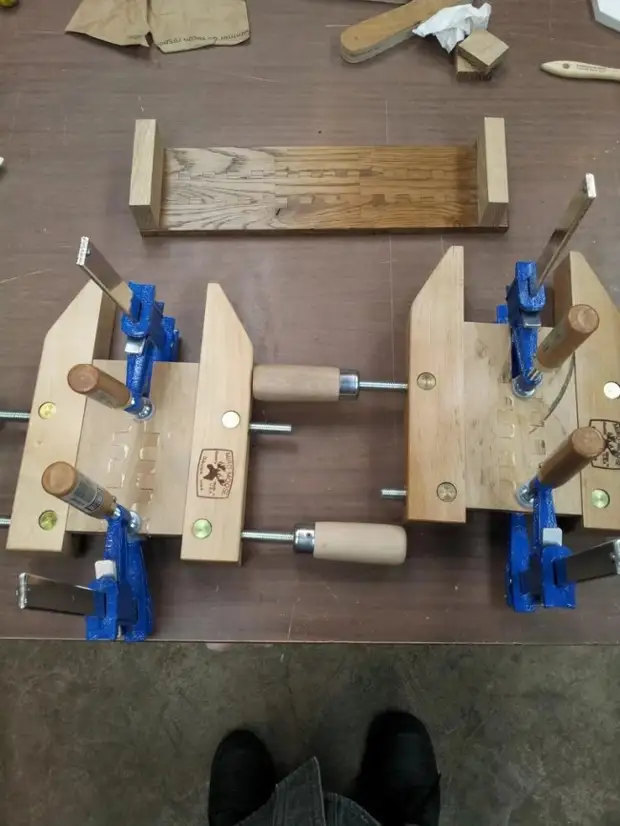
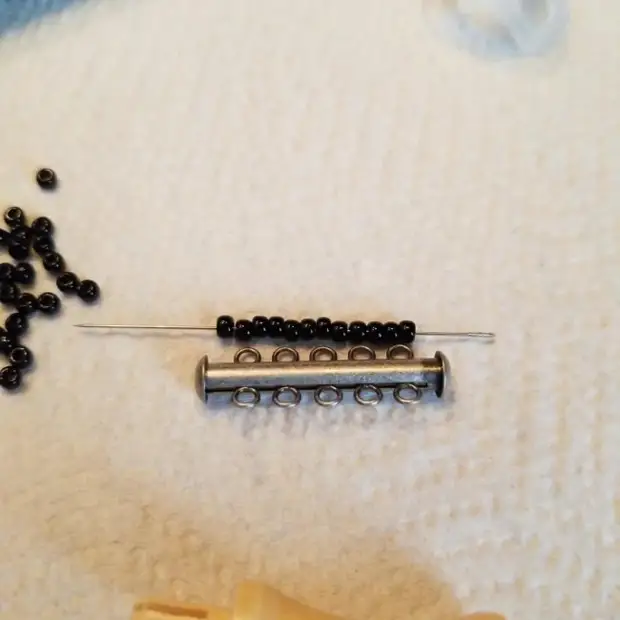
The last operation is to install the fastener.
All is ready. This is the first experience of the author in the manufacture of the machine and beading.

And this is already the second job.