
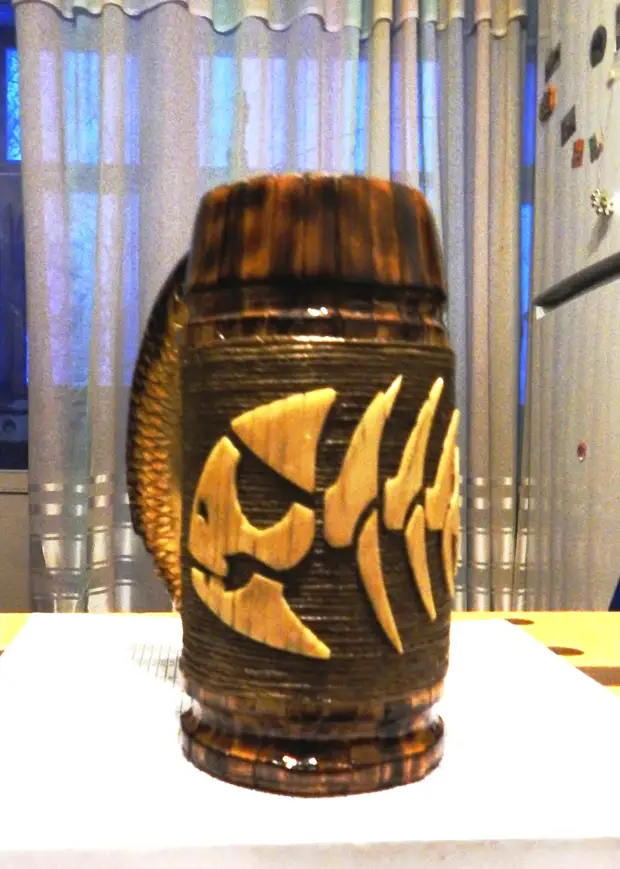
Choom to offer to your attention the original souvenir for the "real man" - a beer mug made of wooden linen clothespins. Of course, you can not only drink beer from it, so it will like it too.
For the manufacture of mugs we will need:
- Empty (although it is possible to complete) tin polite bank.
- Wooden clothespins - 12-15pcs.
- Board 20mm. Thick, hardwood wood.
- Fabric x / b - wrap twice the jar.
- Well, to fill the space between the clothespins, the filler - who has some fantasy, from river sand with shells to rhinestones from Swarovski. I will have a jute twine.
- Wooden ruler for the bottom.
- PVA glue
- PF-170 varnish
From the tool:
- Very sharp knife
- Lobzik
- Propane burner
- Sandpaper of different grain
- Brush with soft bristle
So proceed to creativity.
1. We take a tin half-liter bank and turn into two layers with a cloth impregnated with PVA glue.

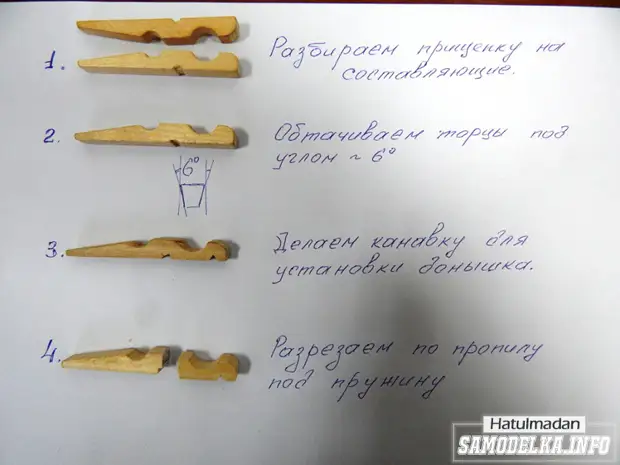
2. The clothespins are disassembled into the components. We will need only wooden parts. The ends are subscribing on a large sandpaper to the type of trapezing with corners at the base of about 6 degrees in order not to be gaps after gluing. Next, we make the groove for the bottom on the side that will be glued to the jar. Cut the sprocket to the sprocket, it is better to finally roll at the end after completion. And cutting advice immediately before gluing so that the upper part in width, color and pattern coincide.
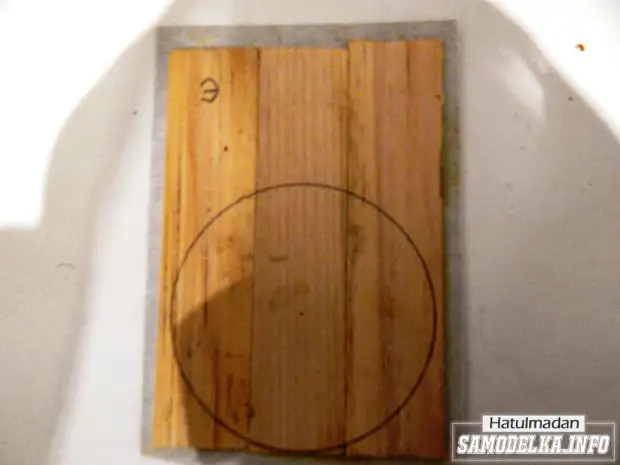
3. From wooden lines, we make a dyshko mugs. We stick segments 7 cm. On paper in the junction, blacks are 67 mm. Lobzik cut the donyshko and remove the chamfer with a knife.
4. Cut the jar of cut-off clothespins. We cut the clothespin, we apply the bottom and the lower half, lubricated with glue, to the can so that the bottom is entered into the cut-off groove. The upper part is glued opposite the bottom, checking the parallelism to attach them to the ruler (it is that the handle is correctly incisible). Further, in the same order all over the perimeter, banks, without delivering to full filling about 20mm. For handle (two clothespins).

5. Now proceed to the manufacture of the handle. I will have it in the form of fish. On a sheet of paper, we carry out a line on which we occupy a segment equal to the height of the circle (from the bottom to the top ends of the glued halves of the clothespins). Apply the clothespin and supply the circuit to get a profile of the cut of the circle.
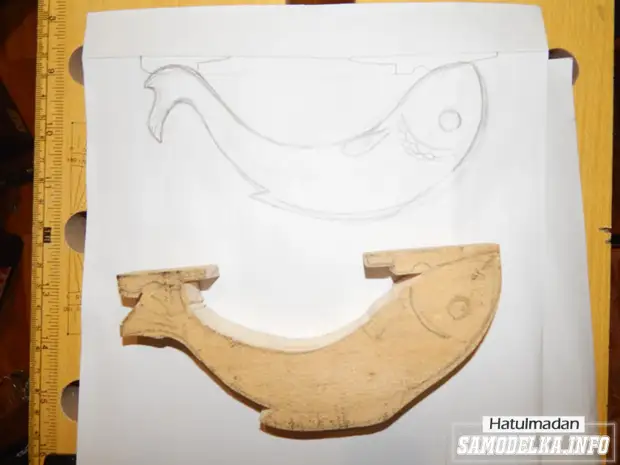
6. Next, we draw a sketch, entering the dimensions of the handle in the profile size, we translate it onto the board, cut down, we grind, we cut and cut the eyes, gills, fins and scales (it does not make sense to describe the wood thread).
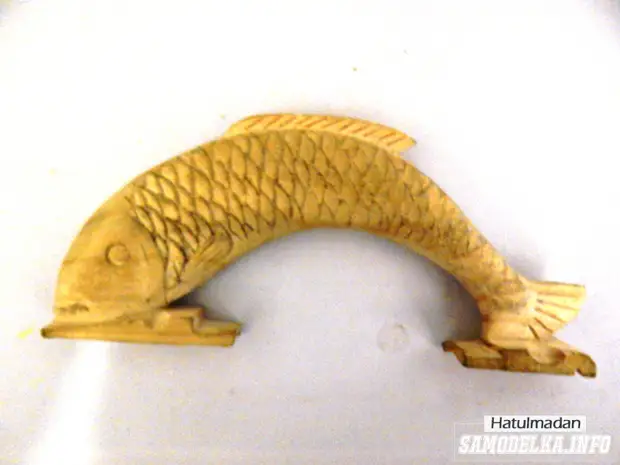
7. We glue the handle to the circle, where you need to cut, or glue the pieces of clothespins to remove the slots. After complete drying of the glue, we process the product with sandpaper throughout the area, including small shorts.
Now the responsible moment of the wood burns, here it is better not to hurry, spoil almost the finished product is very easy, it is much more difficult to correct (Oriental wisdom: "You will drive in vain with a horse"). Fishing only from the spin side imitating its color, clothespins as you will be pleased, you just need to keep in mind that the roasting is worse and light spots are worse.
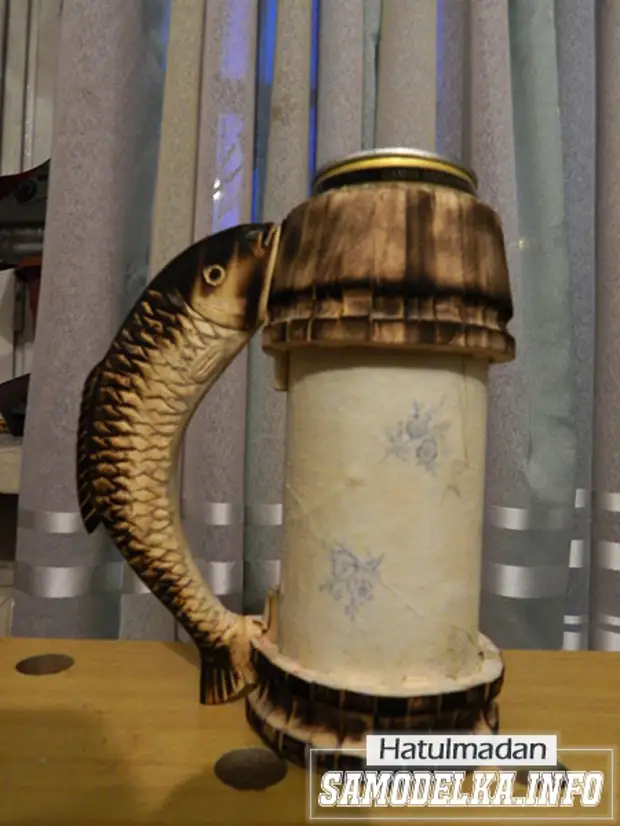
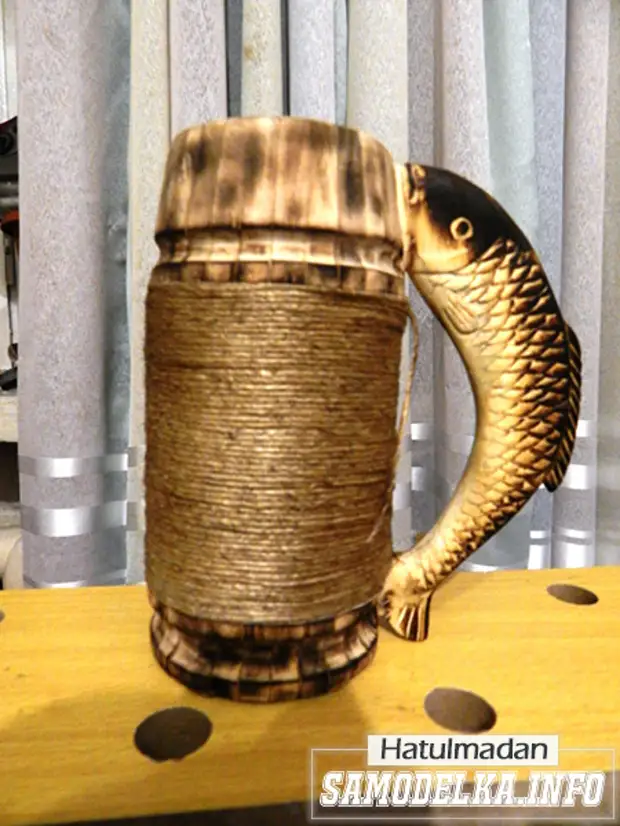
8. We will proceed to fill the space between the upper and lower parts of the glued clothespins. As I have already written, it all depends on fantasy- can be filled with river sand, impregnated with glue, you can save the pebbles, shells, rhinestones from Swarovski, coins, shells, and so on, I will have a jute twine - it is suitable for me And it looks not very bad. In order not to wind all the bobbin and save the twine simply filled the excess space of the waste paper by sticking several layers to the remaining twine thickness, and only then glued the twine, winding his turn to the twist. By the way, you can now cut off the top of the banks, because of the pasted clothespins, the rigidity has increased much, and there is no longer danger to deform the edges of the mug. Cutting the can flush with clothespins and a little fragile with a steel spoon to do not cut lips.
9. Finally, the last barcode. At the beginning I did not want to sculpt anything at all, but so the mug looked too modestly, did not pull on the gift souvenir. Therefore, I chose a simple pattern of a skeleton again, cut it out of white veneer and pasted on the facade of the mug. Of course, it was overwhelmed with the size, but I think the one who I will give, will not be in claims (as a last resort, it will turn the picture).
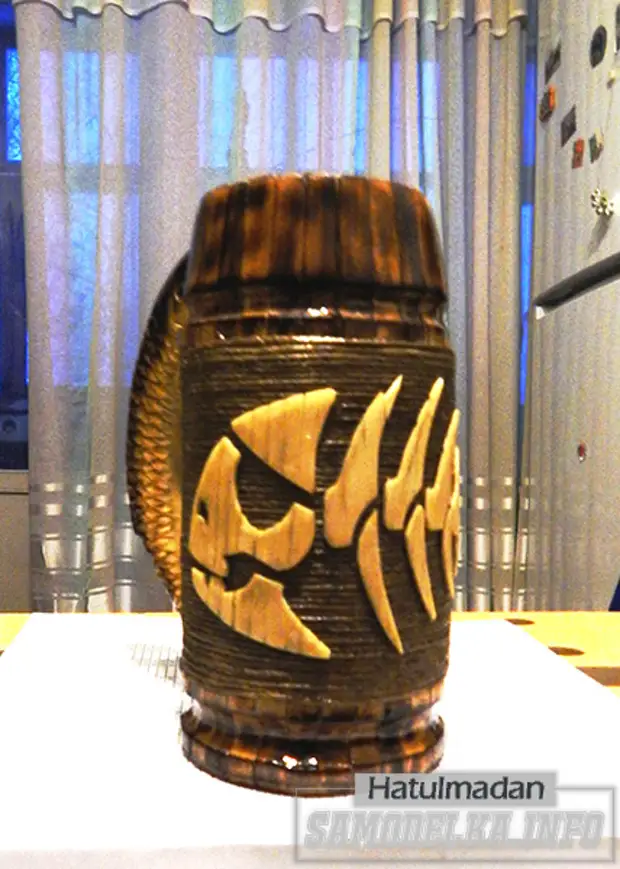
Well, that's all, outside covered with two layers of PF-170 varnish, if you believe the Internet, then they cover wooden spoons in factories without problems, and the bank from the factory is covered with varnish for food.
