
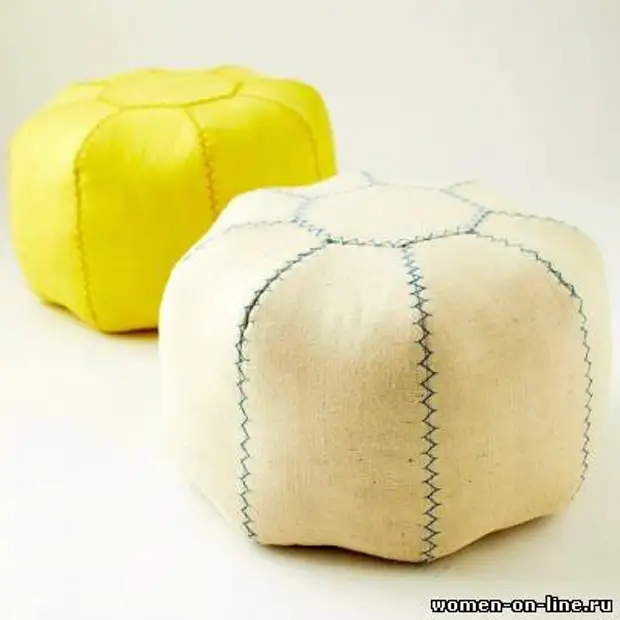
Make a pretty pouf with your own hands is quite simple. But as a result, you will get a great addition to your interior. In addition, this is a great opportunity to choose a color yourself, because it is not always in the store you can find something suitable.
Before making your own hand, prepare everything you need.
You will need:
- print pattern (download pattern, PDF format);
- scissors;
- Scotch;
- 2 m liner roggels 1.37 M width;
- Old sheet of light color of any size or 3 m Muslin 1.15 m wide;
- straight pins;
- sewing machine;
- the coil (115 m) of strong threads or threads for the upholstery of furniture corresponding on the color of the rogger;
- 2 large trees of different flaps for packing (flap or just old clothes and towels);
- packing packing (sinteration) for pouf;
- roll of adhesive cobwebs;
- a big needle for embroidery or straight needle to work with a coarse cloth;
- 4 Mokes of threads for embroidery appropriate fabric or contrasting.
Step-by-step instruction:
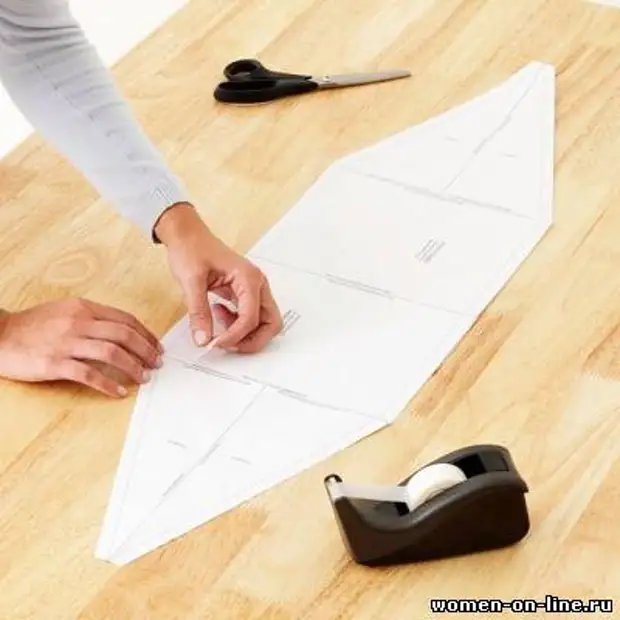
1. Preparing pattern
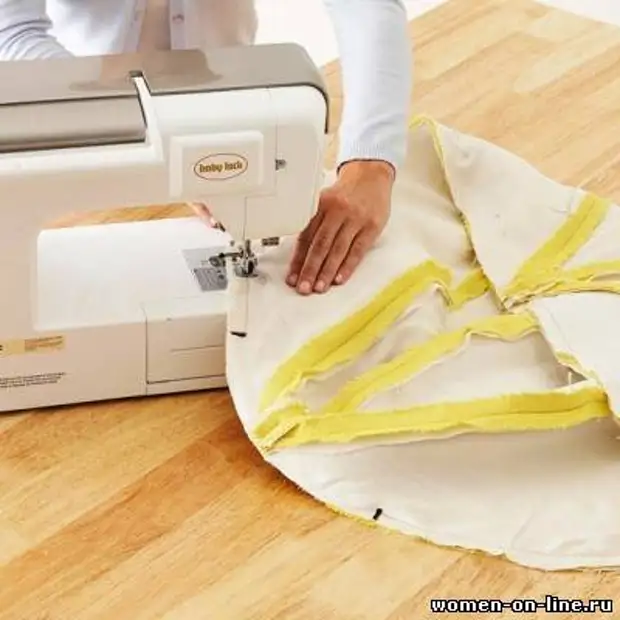
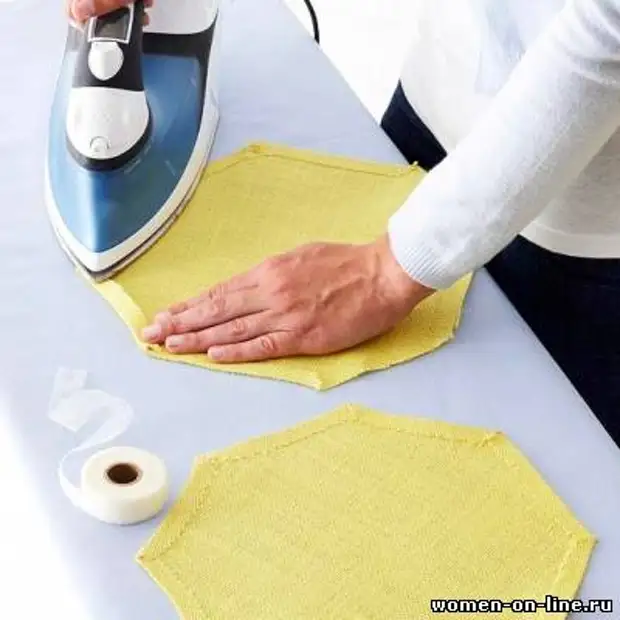
Print patterns. Each page indicates how many copies need to be done. Cut them along the contour. With the help of a scotch, glue the patterns into one unit, following the instructions. When you connect the pieces together, the pattern will resemble a rectangle, but with triangles at each end (see photo No. 1). Also connect and glue the scotch ends of the patterns for the upper and lower parts ("covers").
2. Cutting patterns
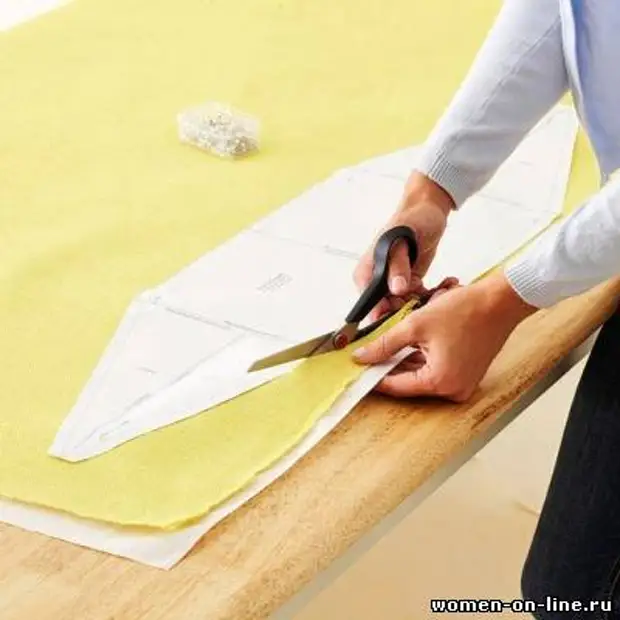
Explodulate roogle over the sheets. Attach the pins from the paper from above and cut down the contour. Make only eight such sets: eight parts of Rogodh and eight of the sheets. Using patterns for the "cover", take two octagonal parts for the tops and the base of the puff. In order to make each item, bend a piece of rogodes in half and pin the length edge of the patterns along this fold. In the same way, make a second octagonal detail.
3. Basin parts pin
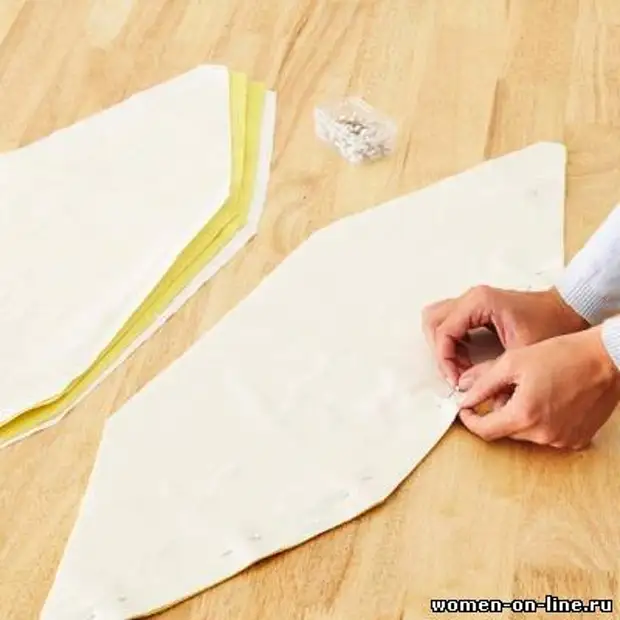
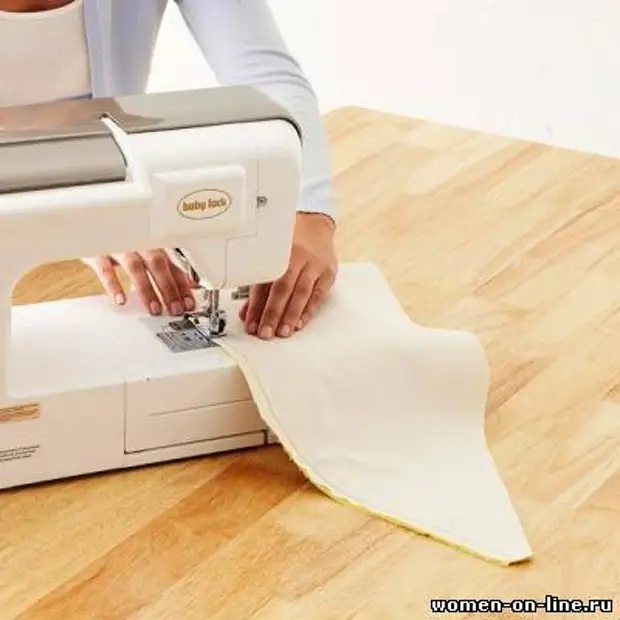
Start sewing a pouf with long details. Put the detail from the sheet on the flat surface, on top of two parts from Rogodh and again one piece of sheets (see photo number 3). In the same way, collect the remaining three sets.
Tip: Since the synthetone or another filler is quite expensive, and especially in such quantities, it is possible besides it to use for filling and various flaps or old clothes and towels. More solid fabric will make pouf stable. And the syntheton will give softness.
4. Stitching sets
Sustained with a stack of a stack along the plumbing edges by direct stitch, leaving the allowances on the seams in 1 cm. As you progress, pull the pins from the fabric. You will get a steam detail. In the same way, the rest of the sets and other sets.
5. Smoothing sews
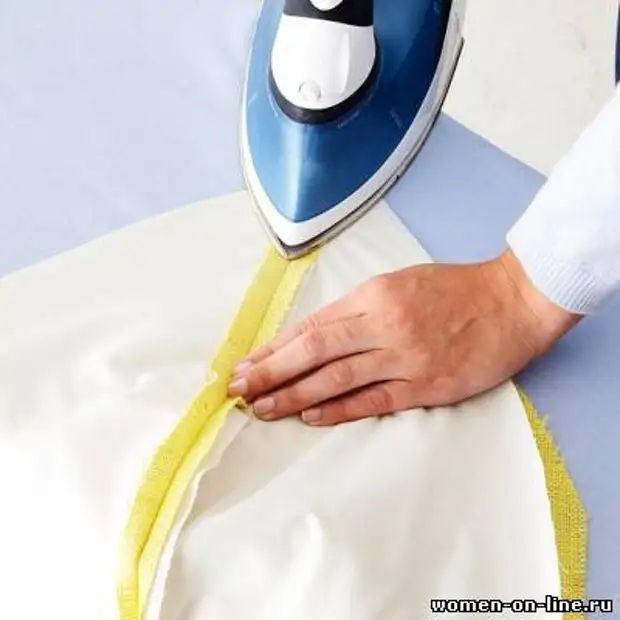
Open each seam on the steam detail. Schedule open seams so that the roar of the roger lay flat on the surface of the fabric.
6. Connection of paired parts
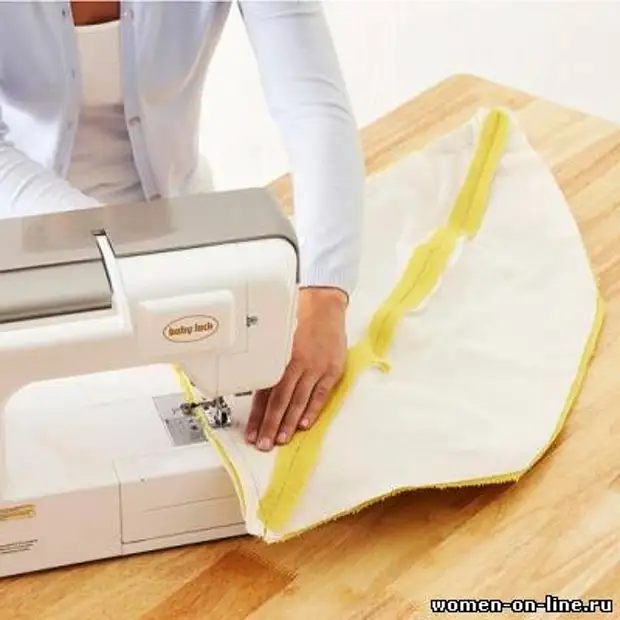
Fold two paired parts by the front parties together (Roger to Roger). Scaliate pins. Purge along the plump edge. Pull the pins and scrape the seams open. In the same way, connect the remaining two paired parts with each other.
Now you have two half of the Purphic. Remove one on the front side, and the other must be inside out.
7. Connection of two halves
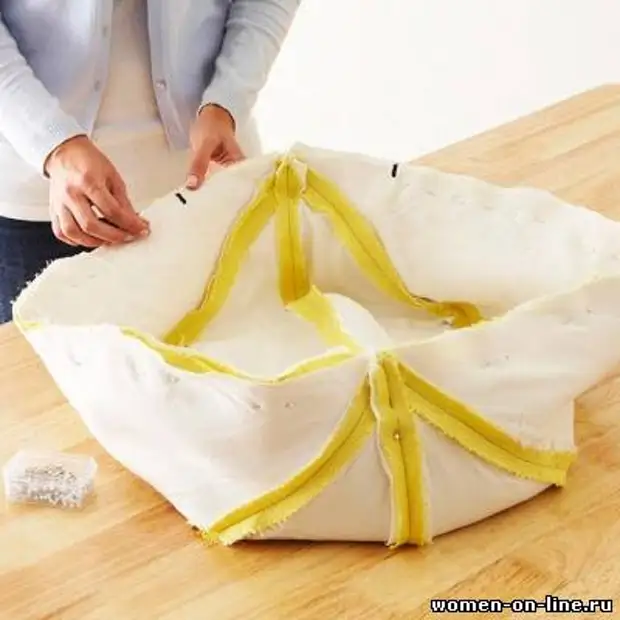
Place one half of the pouf inside the other front parties together. Scaliate on the outer edges. Make a 12.5 cm mark on each side at a central point where all the seams converge at the end of the pouf. See photo number 7.
8. Stitching Purph
From one 12.5 cm mark, position around the outer edge of the pouf, stopping at the second mark on the other hand, leaving a hole 25 cm long for packing. Additionally, strengthen this hole by flashing through the allowance on the seam on the right corner to the seam by 12.5 cm.
9. Putting Pufa
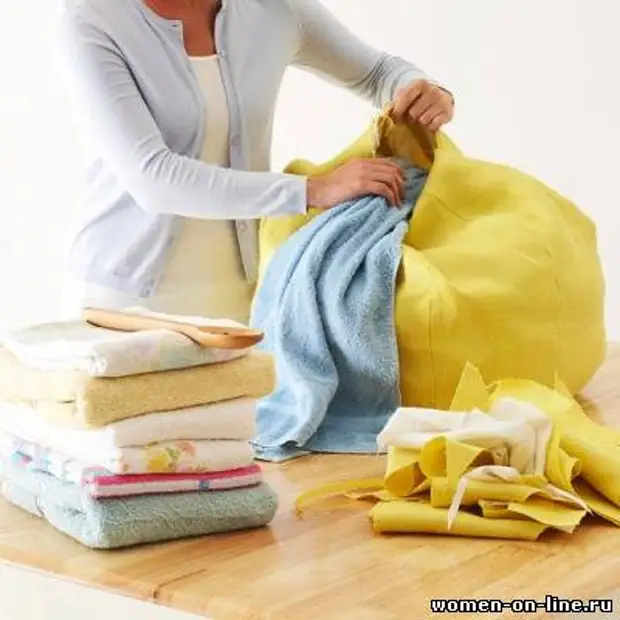
Remove the emblem to the front side through the hole at the top. Sort the fabric sorts into heavy, lightweight and small stacks. Start stuffing a puff from the biggest (heavy) pieces of fabric. Put them in the center of the base of Purph. Heavy fabrics, such as denim, should be placed inside carefully, so that there are no big bars between them.
As soon as you fill the ottoman with a padding half, start adding soft and small pieces on the sides. To prettily push them inside, you can use a wooden spoon.
Continue to fill the ottoman with heavier tissues in the center and lighter (small) at the edges. The base of the Purph and the Center must be filled with heavy tissues to provide it with good stability. And soft and light fabrics on the edges will make pouf soft.
10. Adding Synthenburg.
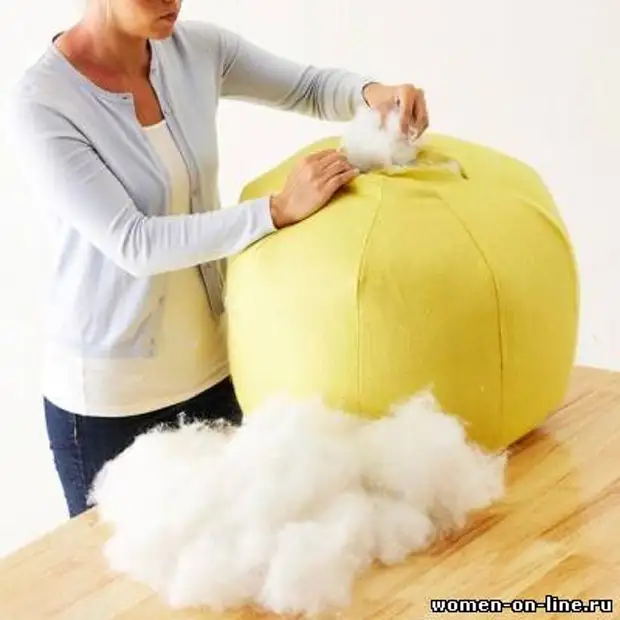
When the pouf is filled with two-thirds, along the parties, type it with a synthepship to fill all the slots and make it soft. In the upper part of the pouf should be a thick layer of synthet tube to gently sit on it. The more denser you do the emblem, the better it will keep the form.
11. Sewing hole
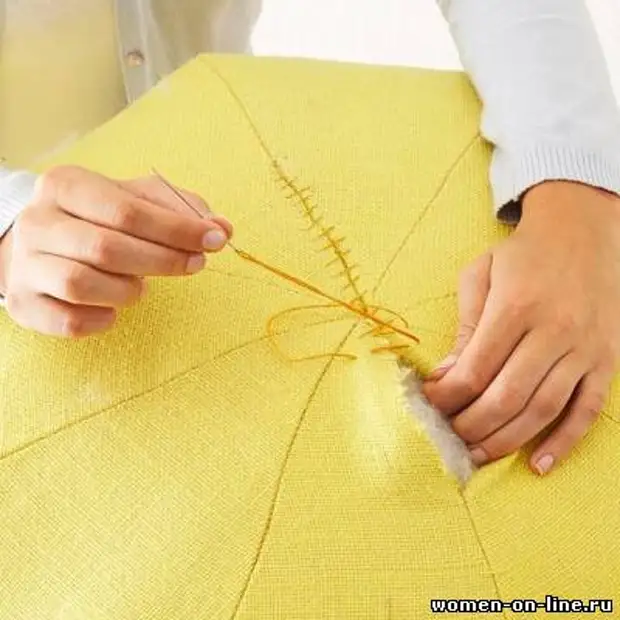
As soon as you fully fill the emblem with packing, inhaling the thread for furniture upholstery in the needle and manually squeeze the hole. The octagonal lid will close this seam, so do not worry if it turns out a bit uneven.
12. Preparation of the upper and lower parts
Secure the bends on the octagonal parts using the adhesive web. To do this, simply by following the instructions, enter the edges of all sides of two parts, bending them for 1 cm and inserting a cob.
13. Tagging the upper and lower parts
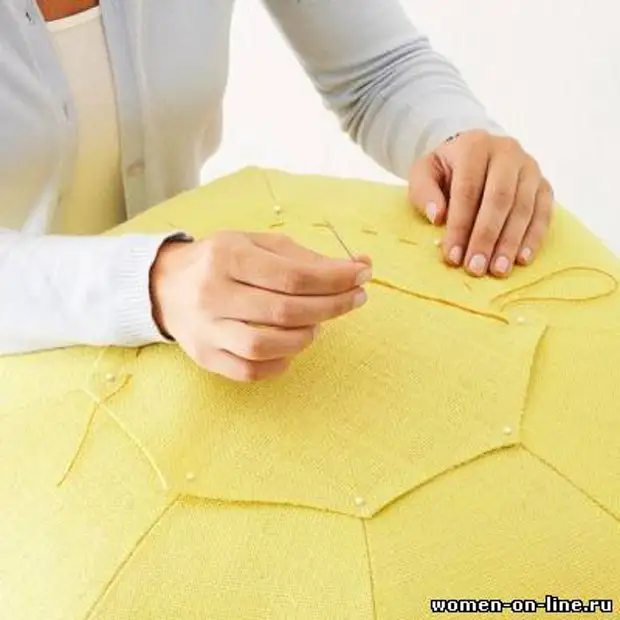
Align eight angles of the octagonal detail with eight seams on the top of the PUPPU as close as possible. Insert the pins of the rally down in the seams to make the alignment of the parts even easier.
The corresponding stitch at a distance of 2.5 cm from the edges, on the inner edge of the octagonal part, notice it to the top of the puff.
In the same way, notice the lower octagonal item to the base of the puff.
14. Decorative seam
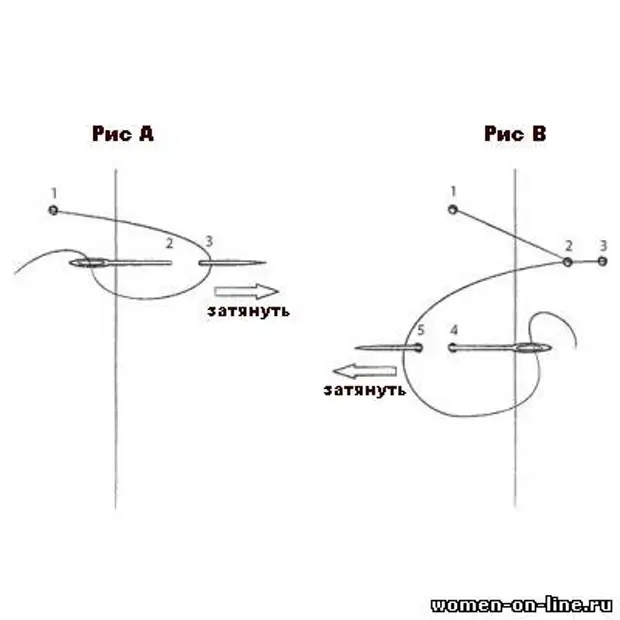
Following the suture scheme, make the finishing decorative seam along the stamping seam.
Although this seam is rather simple, still practice the flap of the fabric, before proceeding to performing a seam on a puff. So you will find your stitch interval and enhance the technique.
Scheme Spa:
Figure A: Turn the needle up at point 1, down at point 2 and again up at point 3, making sure you put a thread under the needle, as you can see in the diagram. Pull the needle and tighten tight. Throw thread through the seam at an angle of 45.
