
My previous MK was dedicated to a cold china, here is the link:
http://svoimirukami.mirtesen.ru/blog/43841817794/holodnyiy-farfor ,-lepka ,-oformlenie-posudyi.-prosto-tsvetyi.
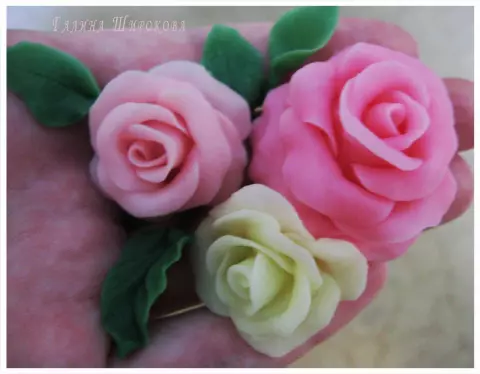
I did not expect so many responses, therefore, on numerous requests, I made this master class, in which I show how to make a rose, I make leaves 2 ways, I'll show how to paint the finished flowers on the example of orchids.
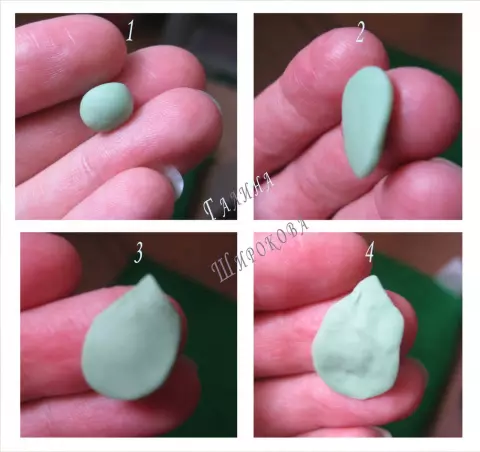
So, let's Slopim Rose:
1. From the ball we make a layout.
2. Sleep squeeze,
3. The edges of the laying make Toshish, but so as not to be broken.
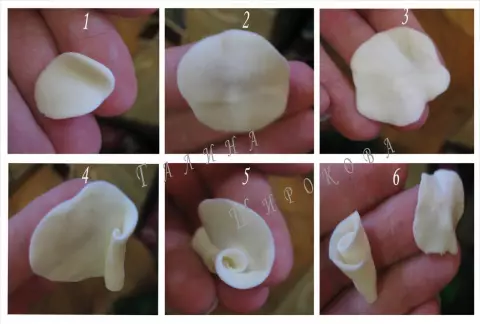
4 - 5. One edge of laying coats,
6. Fix the opposite edge, but not quite tightly - this is the base of the rose to which the other petals will be attached. If the petals do not add, then the bud will be. Next, we prepare the second layout.
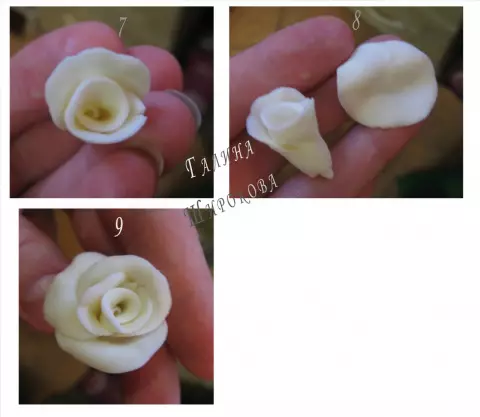
7- 8 add-to-layer petals in such a way that the middle of the petal is opposite to the edge of the previous one.
9. Rose is ready!
If the petals do oblong, then the booton shape will change, for example:
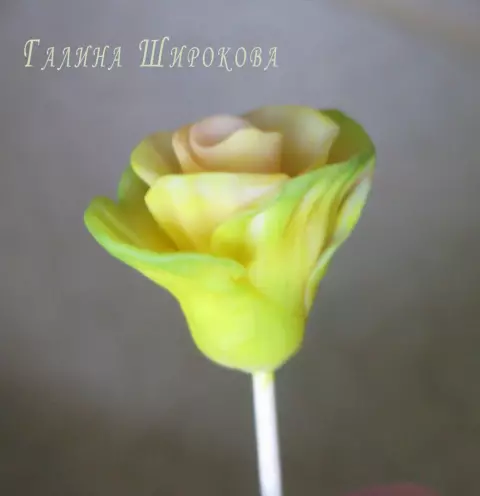
Now let's Slopim leaves . I make them 2 ways.
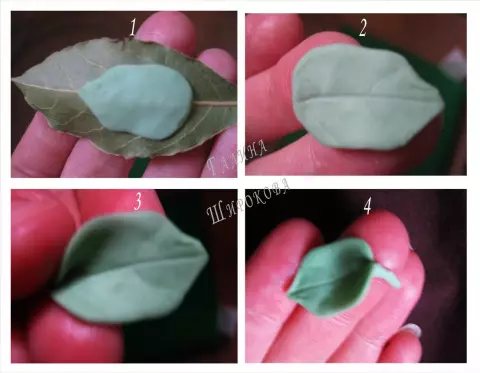
This option is when Starids are made by applying on stencil . And the stencil is an ordinary bay leaf. What does it look like:
1- 2 exactly as with a rose, make a ball, from it the layer in the form of a sheet.
3 - make the tip,
4 - the edge of the edge for the subtlety and imparting an uneven shape (this can not be done. To whom it is necessary). I note that than the leaves are unequal, but they are not the same, the better, it looks natural in bouquet.
Next, do the accomplishments:
1 - We apply our leaf to the laurel sheet, observing the parallelism of the tips of both leaves, as in the photo.
2 - that's what happened,
3 - Pipping the bottom edge of the leaf and slightly extend,
4 - form the leg.
The leg leaves is needed that it is convenient to stick to the mass, when designing a bouquet, for example, this:
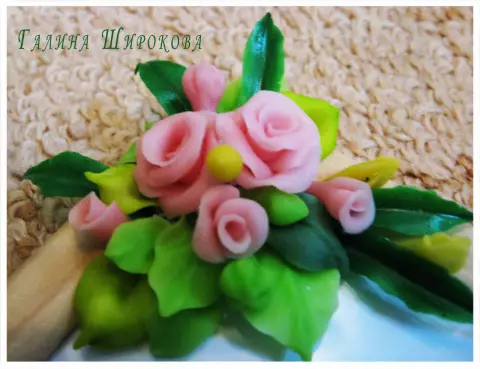
This is the element of the photo frame. In the angle of the frame, I joined the ball of paste for modeling and inserted all these roses in it, leaves.
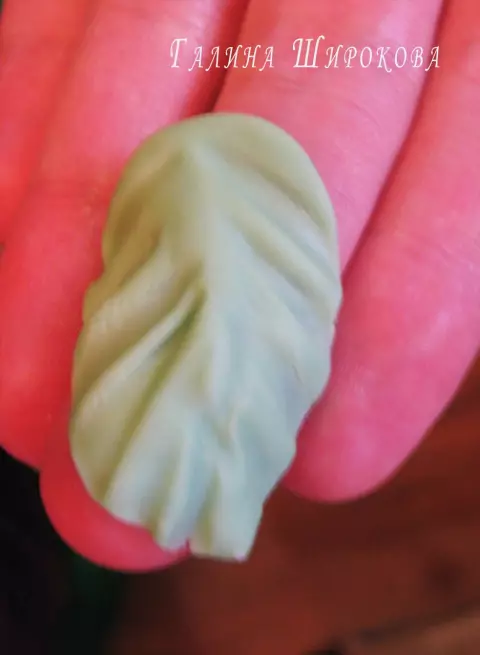
Now SECOND OPERATION LANK LIST:
1 - 2 The same: Make a ball, from it to the layer laying,
3 - With the help of the needles or toothpicks, we form "Ryushi", just pressing, but not much, but it will break.
4 - Here is half a sheet ready.
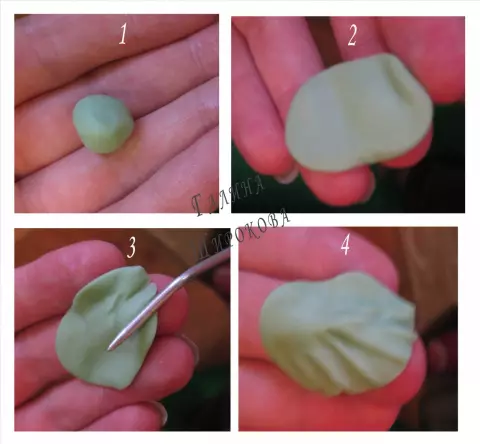
And here is the result:
For convenience, you can also make a leg.
In any case, I draw your attention to what it is necessary to do everything while the product dried out, as soon as the leaf lay down, then let it dry, and then do not fix it.
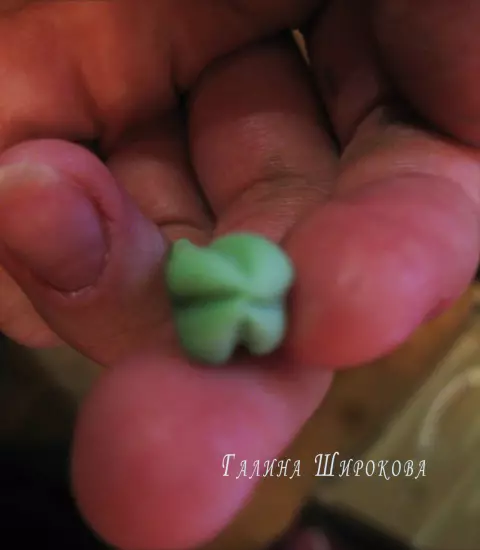
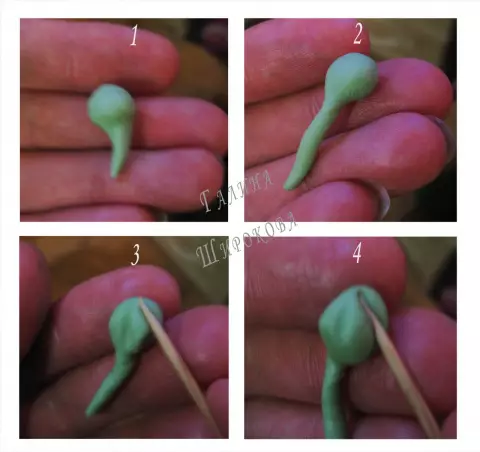
Now we will make boutons: From the ball pull the leg, and with the help of toothpicks squeeze the form of bud.
Now we will do this beauty orchid and paint it.
Here is a caloring paste, which I use. They are easily diluted with water, they can be added as in the HF itself, or rushing the finished flowers with a brush.
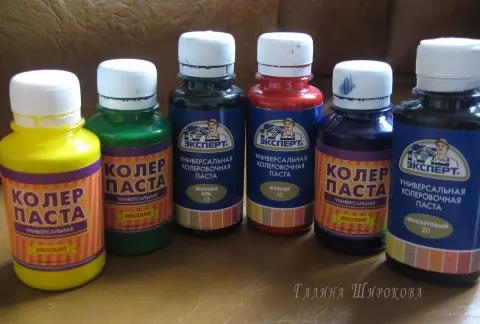
I tried acrylic paints yet, but they did not like, because When drying on finished colors, look like caramel, i.e. Not natural. It did not use anything else, but I know the MK from other sites that the craftsmen use both gouache, watercolor, even the shadows for the age, lipstick, in general, the variants are many.
So - Orchid:
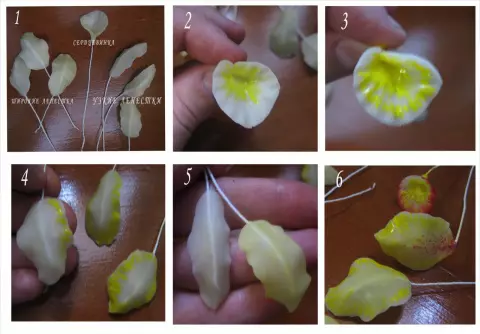
1- Making 7 components: 1 - Core, 3 narrow petals, 3 Wide,
2 - Prayer Cores Center,
3 - and strokes can paint the edges of the cores,
4 - Praying strokes of wide petals,
5 - Narrow petals on the front side are painted in a pale yellow color (graduate), the photo shows that on the left, an unpainted petal, to the right already shaded.
6 - add red dots thin tassel.
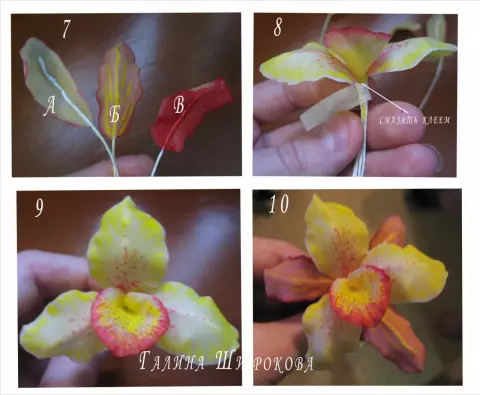
7 - petal "A" on the reverse side. To assemble petals in a flower, every detail is secured by a white corrugated paper with a white corrugated paper: when the petal was cut off, immediately attach a wire, slightly pressed, and supervise PVA from above, leave dry.
Petal "b" from the front side with painted yellow longitudinal streaks,
The petal "in" on the opposite side fastened in red (the front of the front will shine red, plus we still have a yellow - look very impressive).
Assembly:
8 - to the heartset first wide petals, winding a strip of corrugated paper.
9 - that's what happened.
10 - added thin petals so that they were between wide, they also wrapped the strip of paper, from the reverse side, the PVA cooled on the opposite side and all - let our orchid dries.
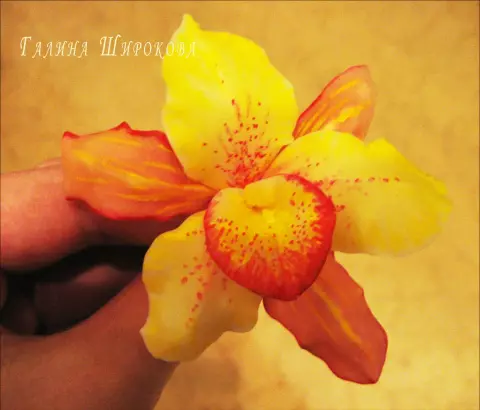
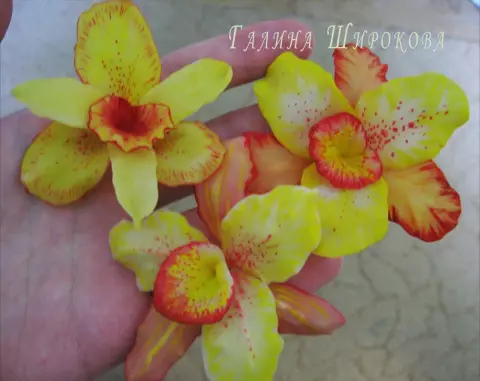
Here is such a bouquet I got: Beauty. Truth? Please note that here all three flower are painted only red and yellow, but in different versions.
And here are some more subtleties to staining the HF. Painted HF dries faster, i.e. It is better not to keep it, he just hardened even in the cellifore. When staining before fancy, keep in mind that the intensity of the color of the drying item was much brighter, suitable than in the raw form. Here at this photo I want to show the difference in the color of roses, which were already frowning from the painted HF:
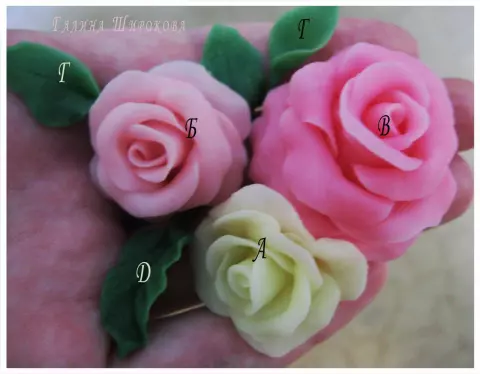
Fig. "G" and "D" - Lists, Founded from the painted HF. The leaves I advise to do from the painted HF of different colors, start with a pale and adding 1-2 drops of paint, so leaves, when dried and fall into the bouquet, will look very naturally.
It seems that all. I hope that I did not miss anything.
Thank you all for your attention and patience, I really hope that I have clearly explained. Dare !!!