

This is the second part of my master class in which I will show and tell in the details as a product from clay to prepare for decorating glaze and describe the process itself. The beginning of the master class, with the description of the modeling process, can be found here.
Part 2. Decorating the product.
Preparatory stage
For work it will be necessary:
- a piece of skirt (I prefer in the form of a mesh);
- a small bucket or a different water container;
- Sovie sponge;
- wide brushes;
- Glazes at your discretion.
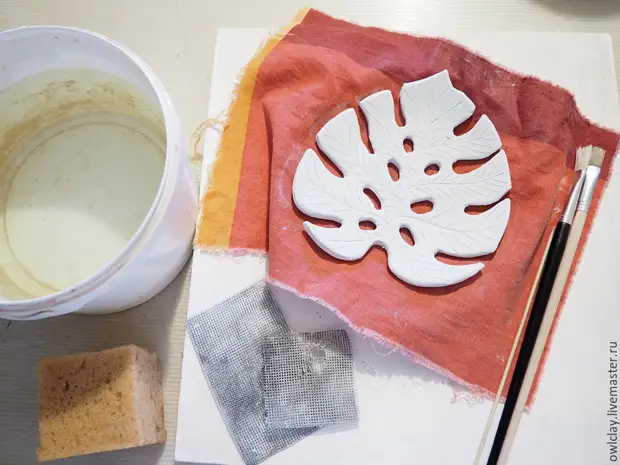
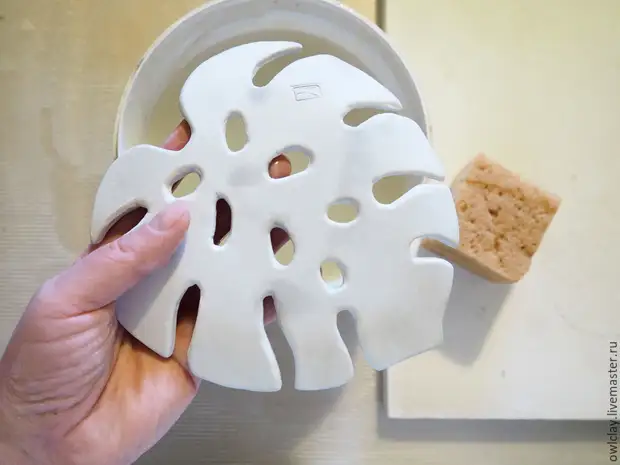
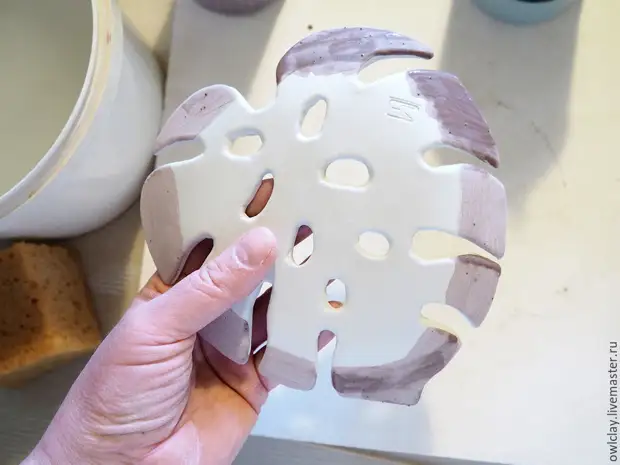
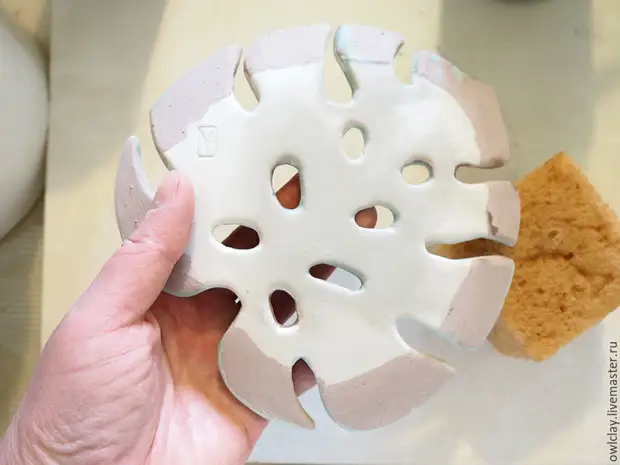
So looks like our dried leaf on a piece of fabric. The product is already good, it has become solid, but, at the same time, and quite fragile. Brem in his hands confidently, but gently. At some point you yourself will feel that the pressure is to be limited when working with raw.
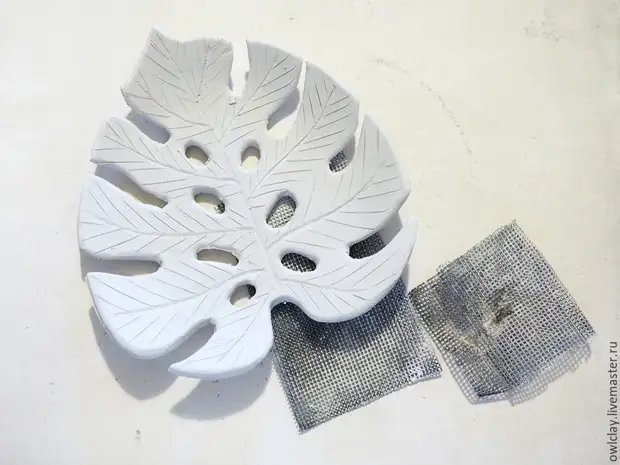
1. Gently separate the fabric from the sheet. As we see, in the drying process, our product has slightly decreased in size and roughness has sharpened on its surface. Here they are to be deleted.
ATTENTION: Everything needs to be done by two hands! I have how you remember from the past master class, one was occupied by the camera.
On the palm of non-working hands put the product, and we take a small piece of skins to the workman. Confidently, but without push, we start to handle the entire surface of our sheet. We care all roughness.
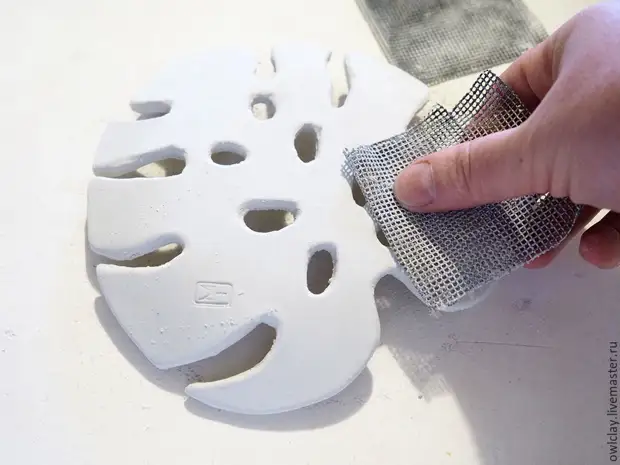
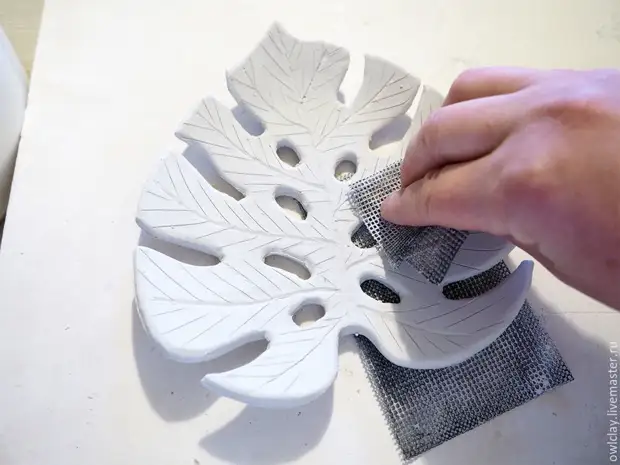
2. turn the sheet to the opposite direction. In one hand, hold the sheet, the other handle the product with a skin. Do not forget about the ends.
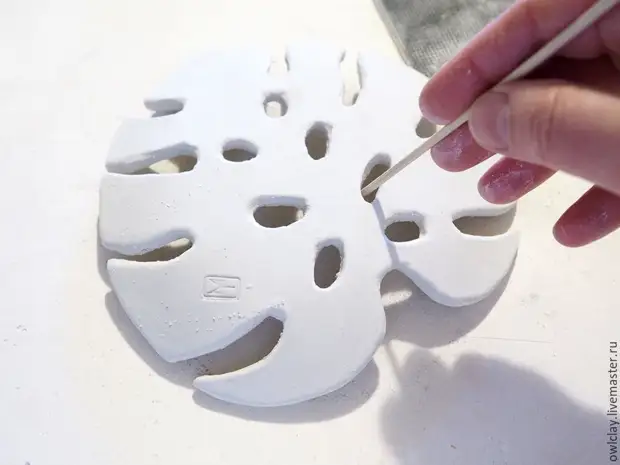
In those places where the skurt is not to brush, you can rush with a wand.
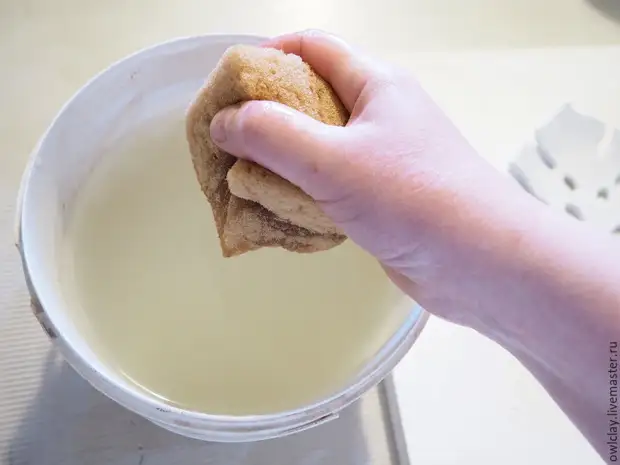
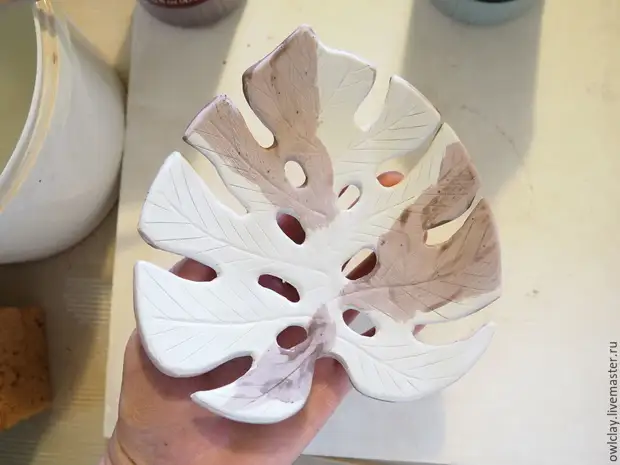
3. When the product is completely sandwich, it is necessary to remove dust from it. You need to wet the sponge and squeeze it slightly.
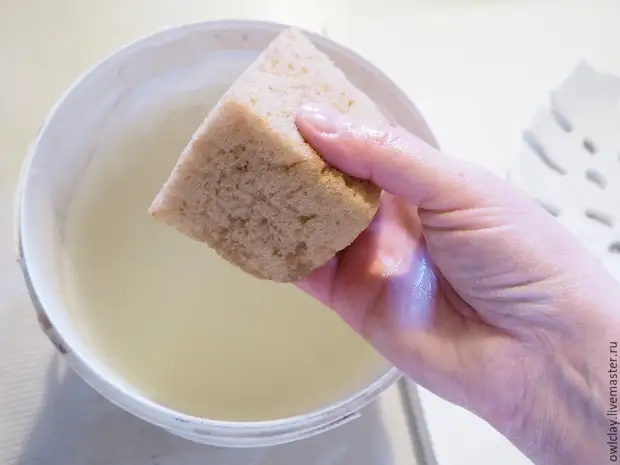
The sponge should not be dry. It is necessary to find a balance: water must be inside, but not to flow.
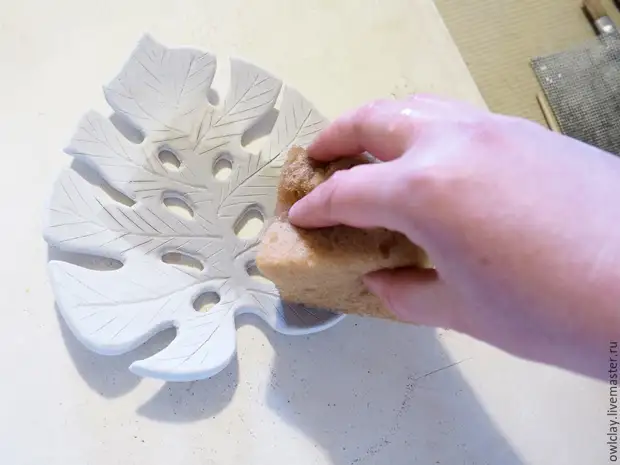
4. In one hand, keep leaves, the other - gently, as if by my child, wipe it with a sponge. Try not to scroll it! From an excess of water, the soaps can fall apart.
Wipe your sponge our product on the reverse side.
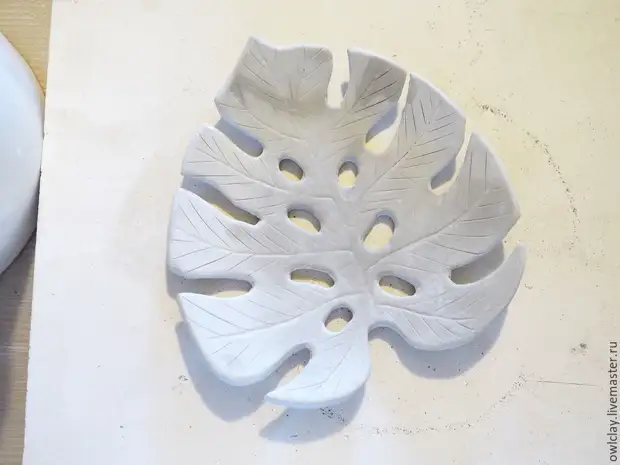
5. Sheet is ready to decorate the glaze.
If at this stage you accidentally damaged the product, then, alas, it is no longer possible to restore it. But do not hurry to throw it away. This consists of the beauty of clay: if the debris grinds, pour boiling water, wait a while, and then, the resulting mass of reversal, you will have a clay from which you can still make something.
By and large, if there is no glaze, Angobov or other materials at hand, then the next day the leaf can be burned and in this form. You will get a white matte soap. After the firing, it will be necessary all the product again to handle the skin - it will give a leaf of smoothness.
But I was going to tell how to decorate it with glazes, so I will continue.
Decoration glazes.
Before items to cover the glaze, they were firing or not, they are always wiped with an important sponge, because Dust does not affect the quality of the glaze.
Immediately I want to remind you that clay and glaze should be from one temperature range! I chose a faience (he has a firing range of 1150-1250 degrees) and glaze, green and red (1180-1230). I will burn the hatch with 1180 degrees, since I know what the result should turn out. Beginner ceramists recommend taking average temperatures.
There are several ways to apply icing. Liquid glaze I am nanous with a brush from the protein. Those two glazes that I chose a sheet for painting, sufficiently thick, so I take a wide brush brush.
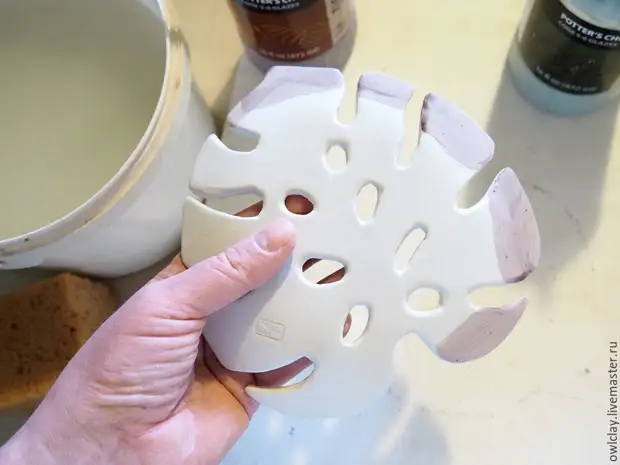
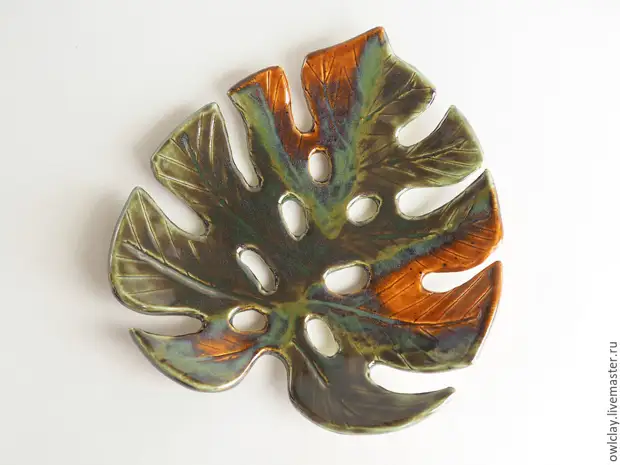
6. For sample, start painting from the back. You can take any color. I chose a redhead for a pedestal.
ATTENTION: Only the very edges of the leaflet are described! The bottom must remain unlawed.
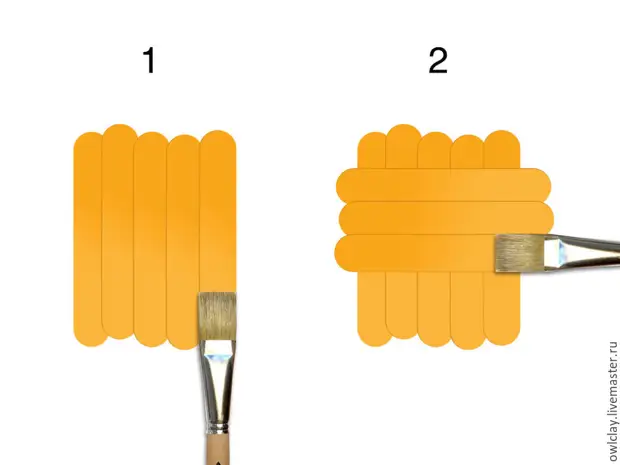
As a rule, the glaze is applied in 2-3 layers. The first layer: We make all the brush strokes in one direction and bring each subsequent smear with a small overlay, in order to avoid properms. The second layer is applied perpendicular to the first. The third layer, if necessary, you can apply diagonally to the first two.
Try to remember from what space began to put the glaze, because Hyd, the second layer becomes indistinguishable from the first. You can get carried away and apply a couple of extra layers, and this can lead to stuffing or to the fact that the leaf texture will become indistinguishable after the firing. If you restrict ourselves to only one layer, then, most likely, the product will be striped. 2-3 layers - the optimal option.
In the photo: I apply the second layer of glaze perpendicular to the first.
7. I turn over the sheet and apply in 2-3 layers already described in the manner, red icing on those places that you seem most suitable for this.
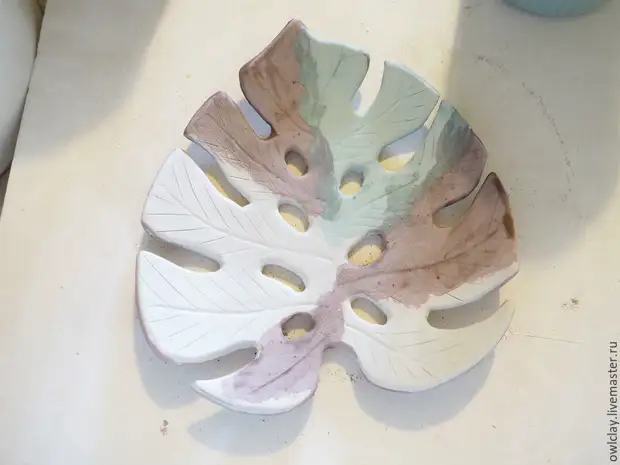
8. Green icing cover everything else. Do not forget to apply paint to the ends of the product.
The sheet is almost ready.
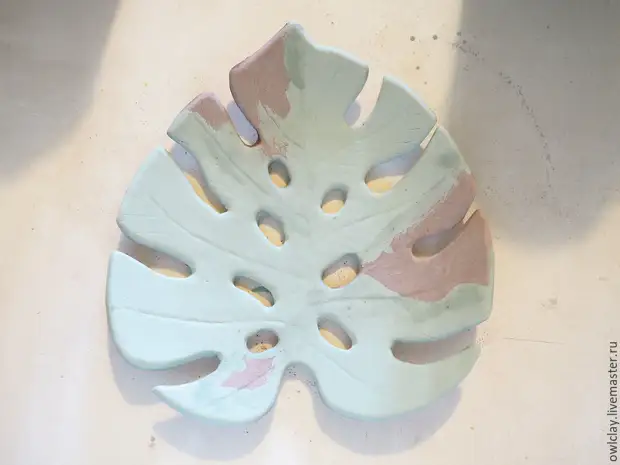
9. Now you need to flip the sheet on the back side and sponge to erase all the glaze, which flowed across the holes. In no case can not leave the glaze on those surfaces that will contact the product with the stove stick to the tight!
If you look at the bottoms of all ceramic cups and plates, you will see that everywhere there are places uncovered with icing. If there is no, then traces from the needle-needles are defined.
10. All. Our workpiece is ready for burning. It is worth timing the next day, whatever it can, and it can be burning. Tell the owner of the oven the temperature range of glaze and clay, and it will set the desired firing mode.
If you yourself will load products to the stove, then keep in mind that during the roasting products covered with icing, should not touch the walls of the furnace and other products in order to avoid their damage. Somewhere in a day your sheet will be ready.
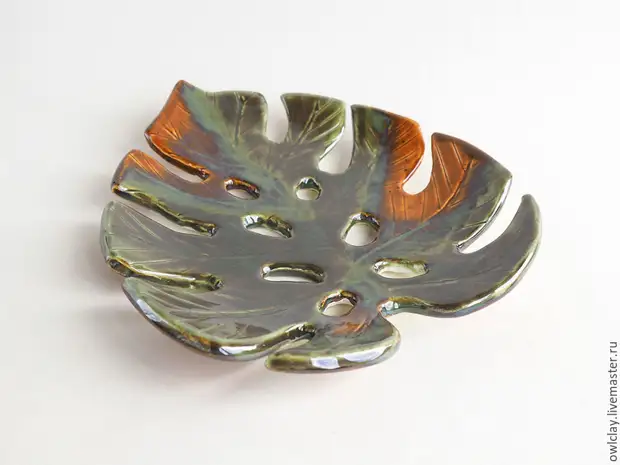
11. The finished product, in those places where there is no glaze, handle the skin and wipe the sponge. Everything!
Unused clay residues can be wrapped in a wet cloth and closed into cellophane until the next attack of inspiration. If the clay, as a result of storage, will turn mold and starts it unimportant to smash, do not be scared - it is a normal phenomenon for clay. As experienced ceramists say, it even improves its quality.
Create boldly. I wish you all success!
