
Such an organizer can be made from a suitable box or box.
If you have a beautiful box or box, it can be turned into an organizer in which it will be convenient to store decorations. Pick up a beautiful soft fabric - for example, velvet is used here. It will be enough small loskutka. A dense thick material is suitable as the basis, for example, felt or batting.
You will need:
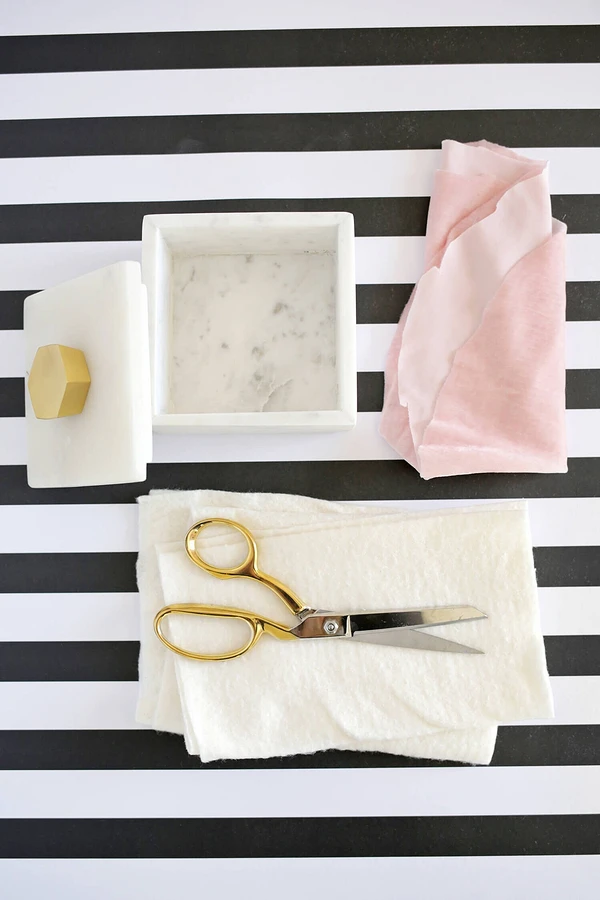
- box or box;
- batting, felt or other dense volume material for the base;
- velvet or other suitable material;
- small pushing fabric flasks;
- cloth scissors;
- Portnovsky pins;
- tape measure;
- Role knife and mat substrate;
- Glue-gun or durable universal glue.
STEP 1
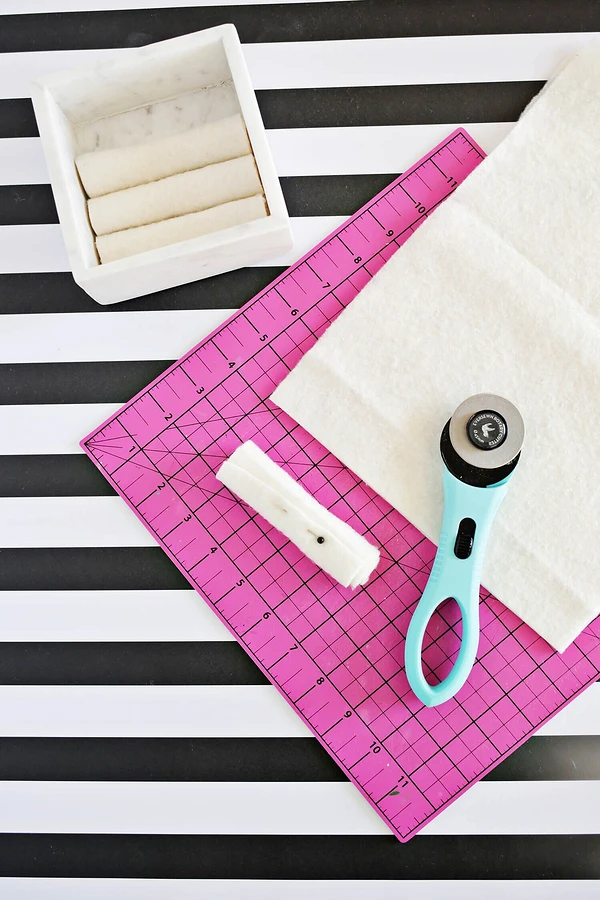
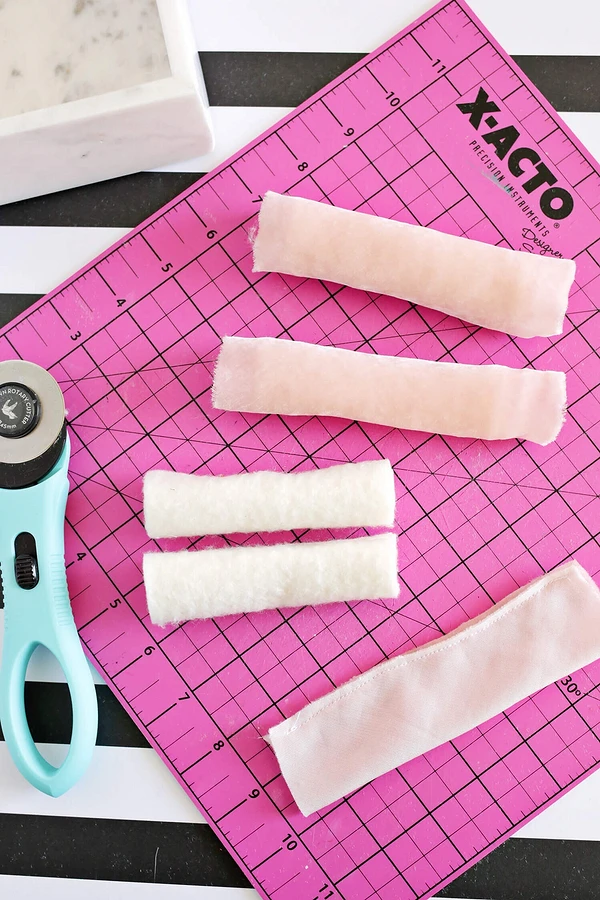
Measure the width of your box or box inside. Material Basics Cut on the strips, the width of which will be equal to the width of the box. Roll one of the strips into a roll and define the desired length strips for a roll with a diameter of 2-2.5 cm. Cut as many details as you plan to make rollers - in this case, they are 4. Each section of the strips roll up into a roll, and the ends will fasten up the tailor pins.
Step 2.
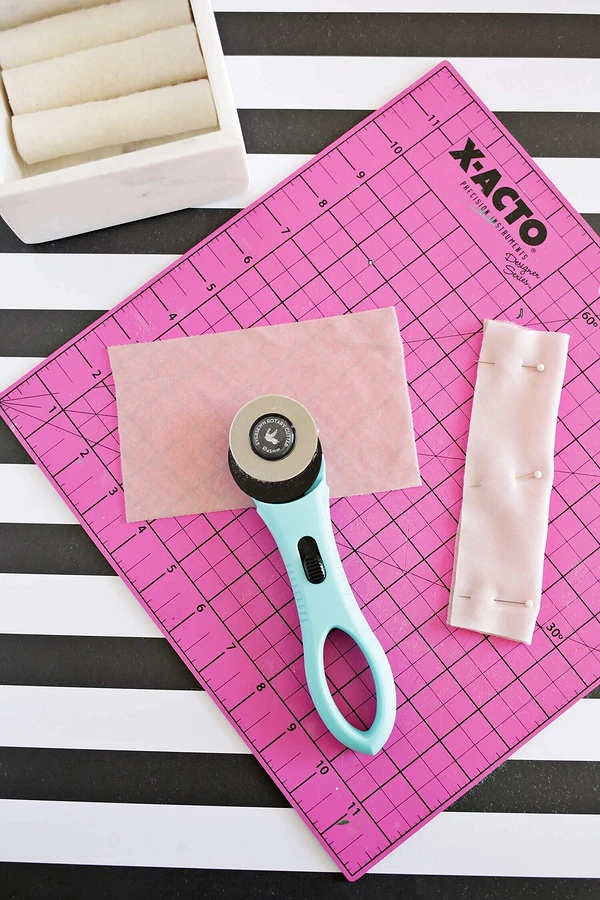
Use the chalk of the rush fabric to make a template for parts from velvet. Bash one of the base rolls with a cloth and add 2 cm on the allowance. It will be the width of the part. The length length is equal to the length of the bases of the base + 2.5-3, see the parts from the velvet - one on each roll.
Step 3.
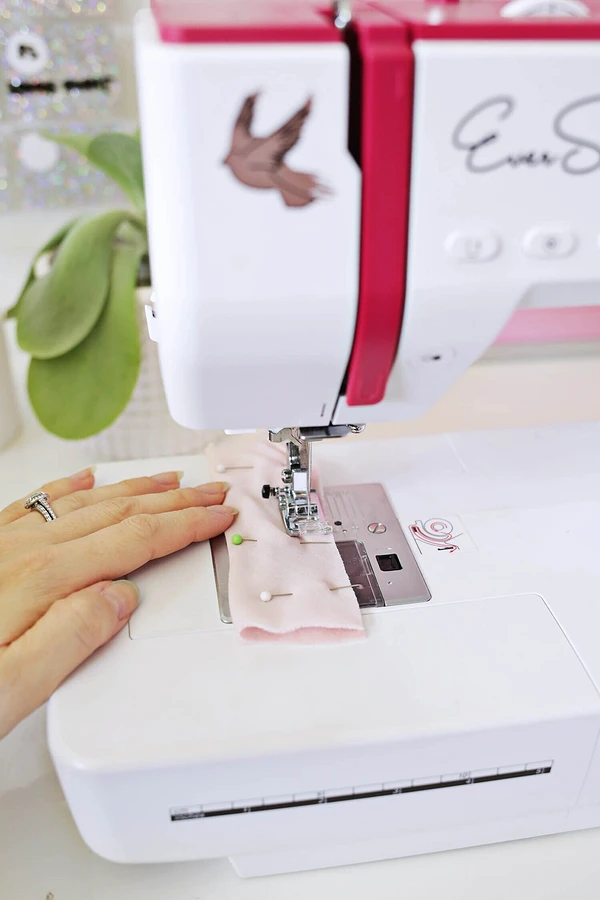
Every detail from the velvet fold in half face inside, aligning the long sides, scrolling the pins and hold, leaving the allowances of 1 cm. Remove pins. The allowances can be cut to 0.5 cm.
Remove the parts from the velvet and place the intake of the base rolls, removing the pre-pin. The basis should be in the center of velvet covers.
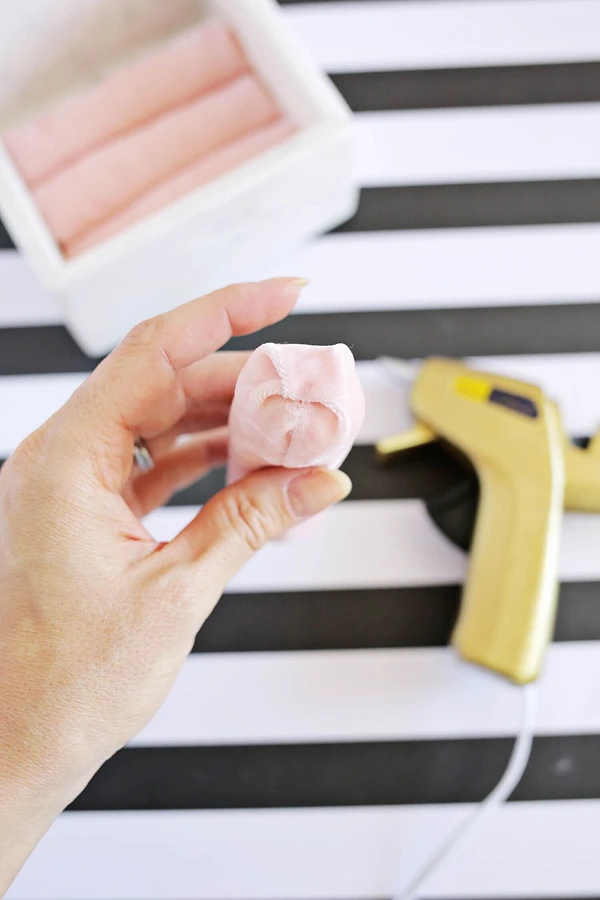
Free ends of velvet covers roll up and secure glue (you can also sew them manually).

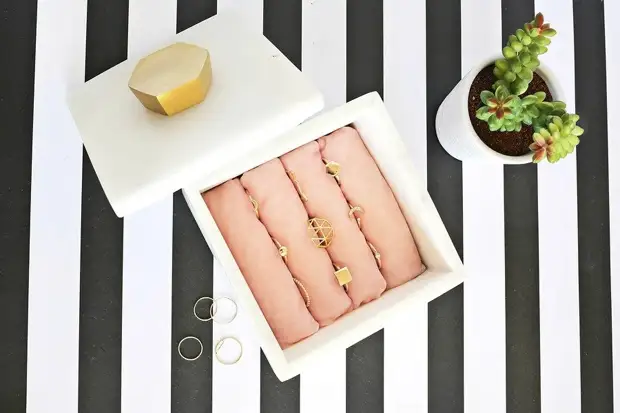
It remains to fold the rolled bars in the box ...
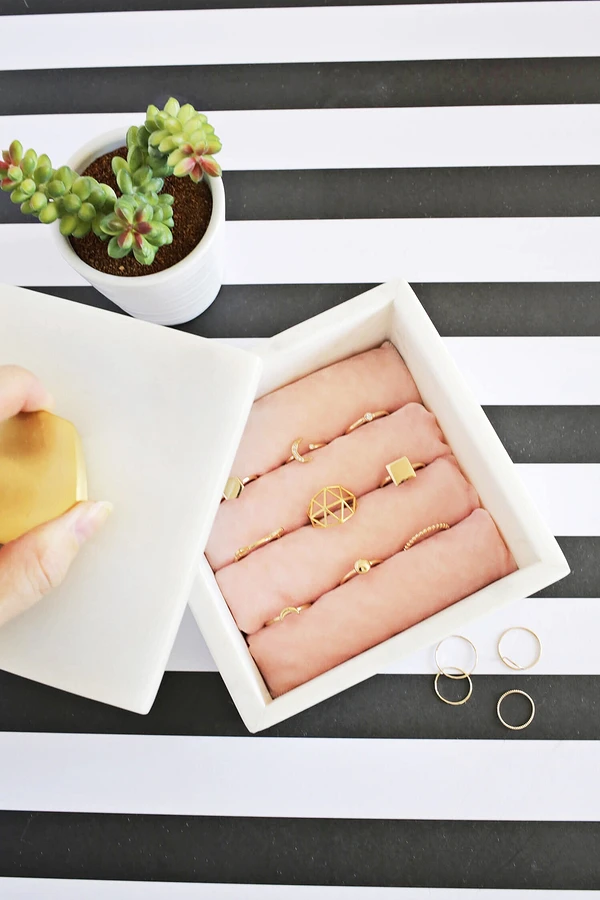
... and place there decorations there.