
Kusadama is a Japanese technique of modular origami. Modern needlewomen create entire masterpieces from paper modules. Balls collected in this technique perfectly undercite the interior design, give an abstract mystery and, of course, are of interest. In this article we will look at: how to make a ball of cousadam from paper novice masters.
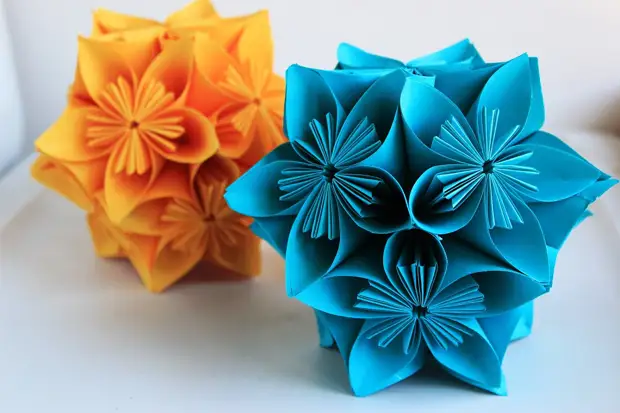
Creative ball
You will need: Double-sided colored paper, ruler, glue, clips.
Master Class
- Prepare paper sheets with a size of 10x10 cm.
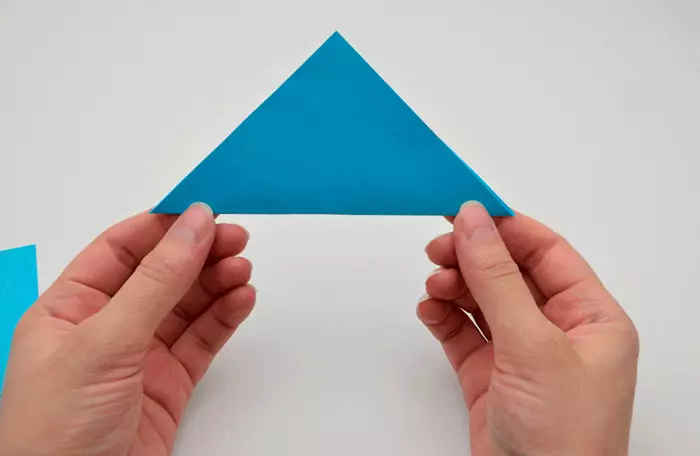
- Fold the square sheet diagonally.
- Generate the edges of the triangle up to get a rhombus, then remove the edges, as shown on the animation.
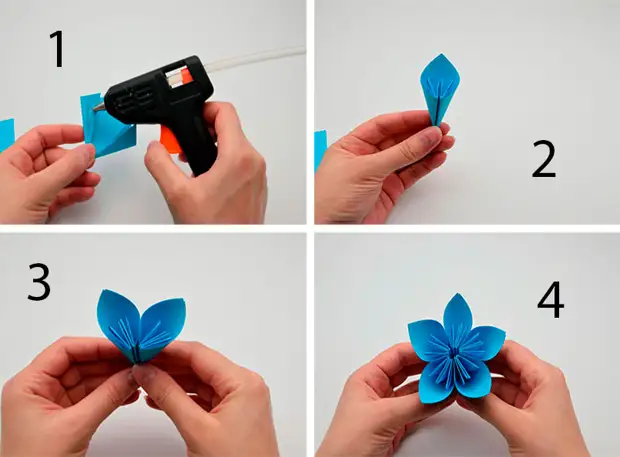
- Apply glue on the side parts of the workpiece, then glue them to formulate the petal.
- Make 5 petals in the same way and glue the flower.
- Make a total of 12 such colors.
- Let's start assembling a ball: take the flower, apply glue to the middle fold of any petal and glue the second flower, then fix the clip.
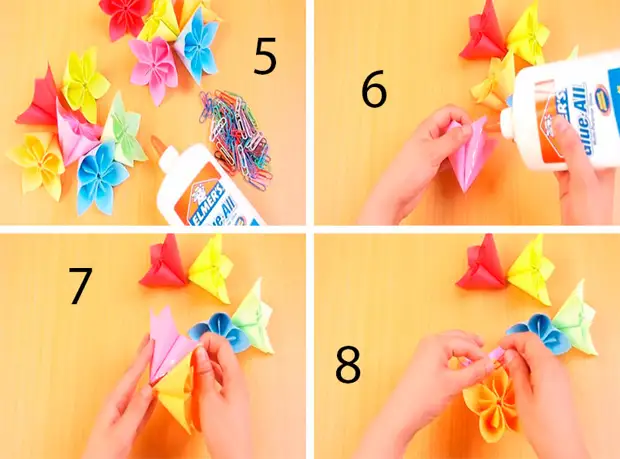
- Apply glue on the petal of the 1st and 2nd flower that are located nearby, then glue the 3rd flower by forming a triangle.
- Fasten the 3rd flower with two paper clips.
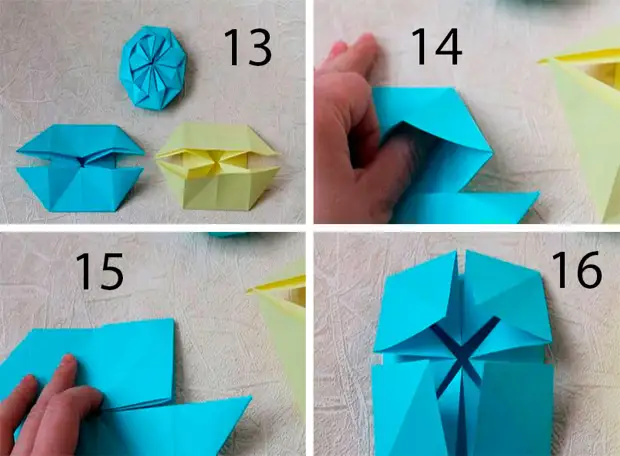
- Enclose 4th and 5th flower in the same way and do not forget to fix the clips.
- Apply glue on the petals of 3 colors that are located near and glue the 6th flower, then fix 3 paper clips.
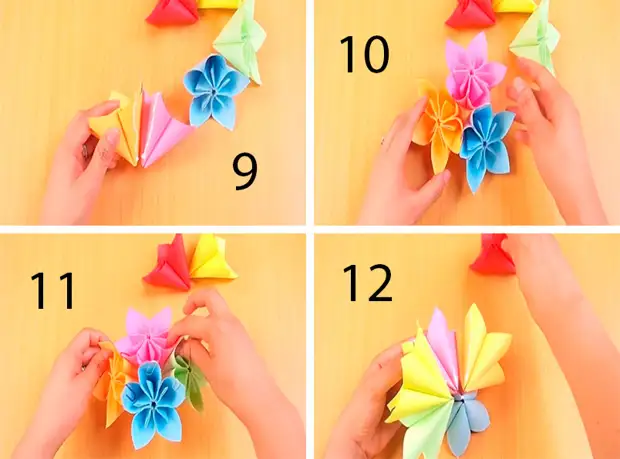
- Make a second half of the ball from 6 colors in the same way.
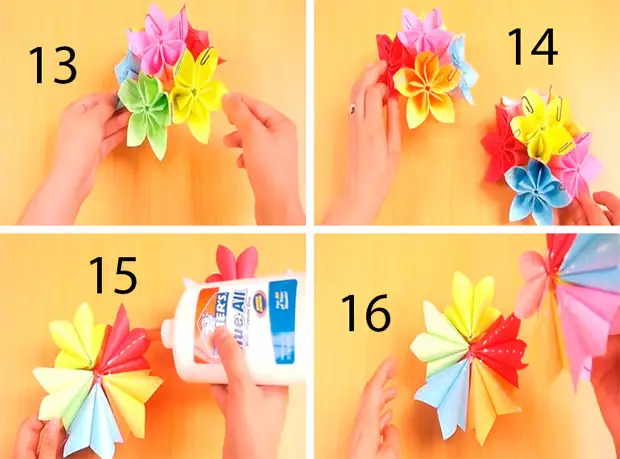
- Apply glue to each petal and glue 2 halves of the ball between themselves, then fix the clips.
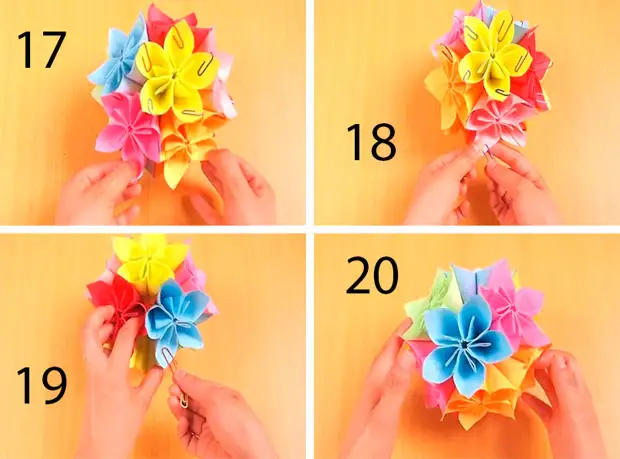
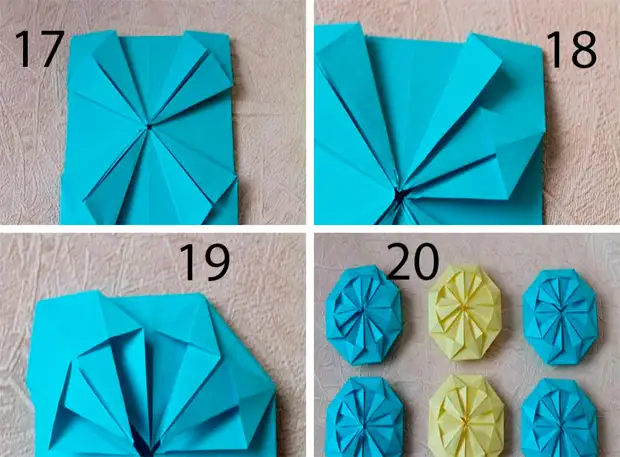
- Wait for drying and remove the paper clips.
Creative ball Kusadam is ready! I recommend to view this video!
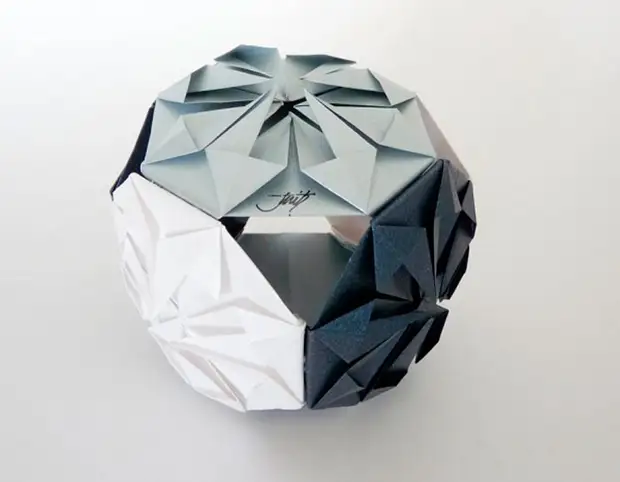
Kusudam "Brilliant"
You will need: 6 sheets of A4 double-sided colored paper, PVA glue, scissors.
Master Class
- Make from the sheets of A4 squares.
- Bend the squares diagonally from both sides.
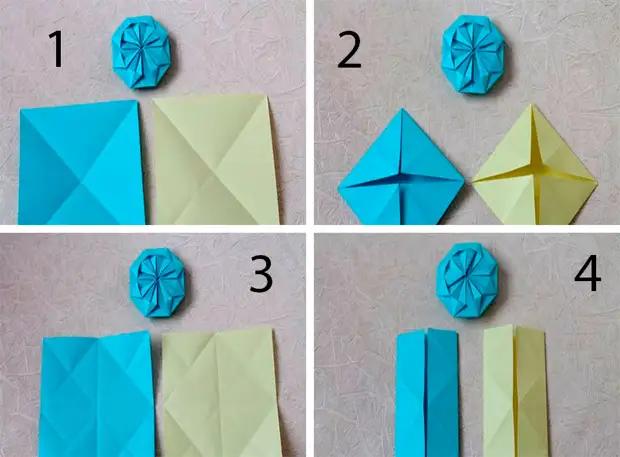
- Bend each angle to the square of the square, then disappear them.
- Fold the sides of the squares to the center.
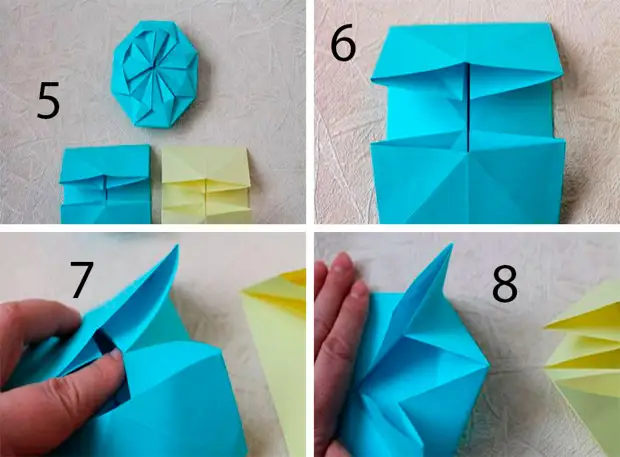
- Fold the top and bottom sides to the center.
- Remove the finger from the inside hidden edge of the paper on the right, holding the palm center of the workpiece.
- Spread part of the workpiece, as shown in the image.
- Put one finger from above in the center of the workpiece and 2 of the finger placed under the paper at the top and bottom.
- Remove your finger from the center, and two extremely reduced and press the sides together. Do the same process on the left side.
- Patter your finger and open each angle.
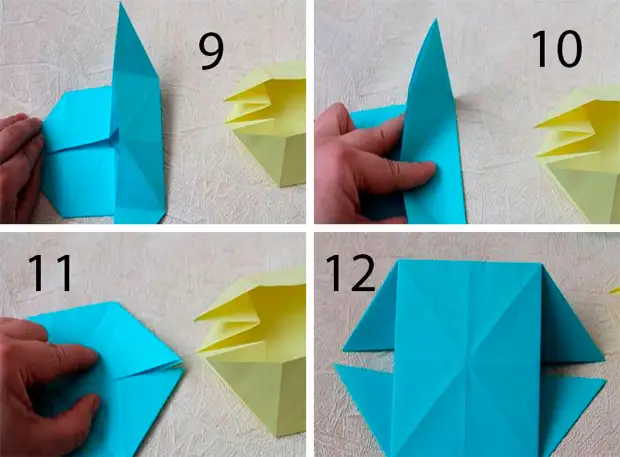
- Fold the corners to the center so that the square was formed from above. Generate all 4 corners in this way.
- Fold the sides of each square to the center.
- Raise and straighten each of the sides.
- Wrap 4 protruding angle under the bottom to get an octagon.
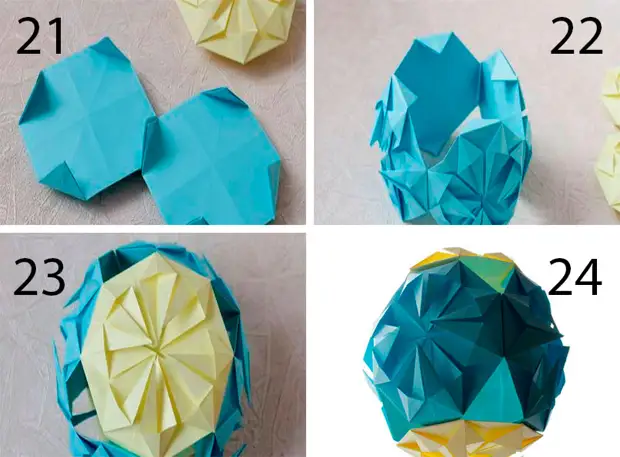
- Make 6 blanks in this way.
- Slit for the corners of the 4 side elements, then glue the bottom and the lid.
Kosudam "Brilliant" from paper is ready! I recommend to view this video!
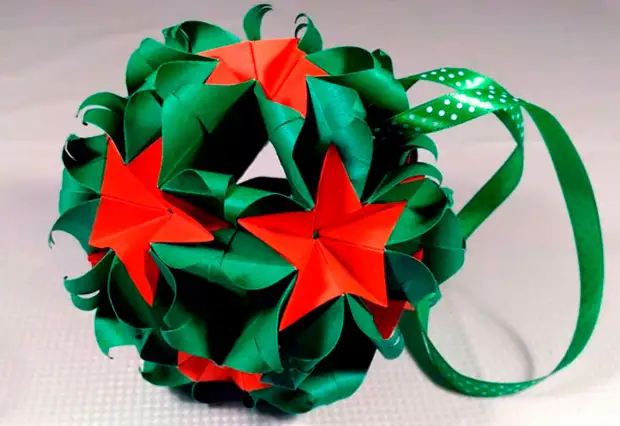
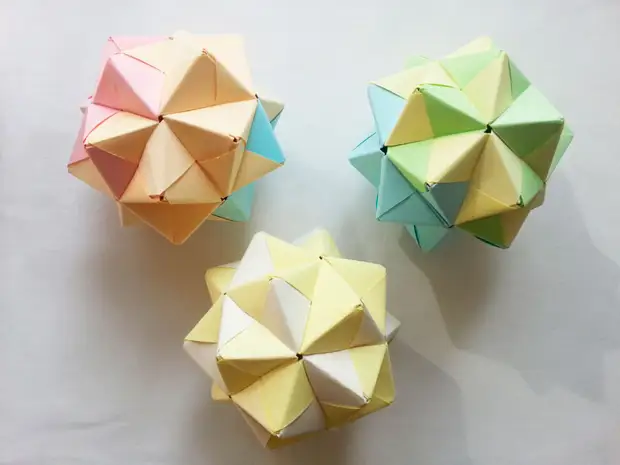
Star ball
You will need: Double-sided colored paper, scissors, ruler.
Master Class
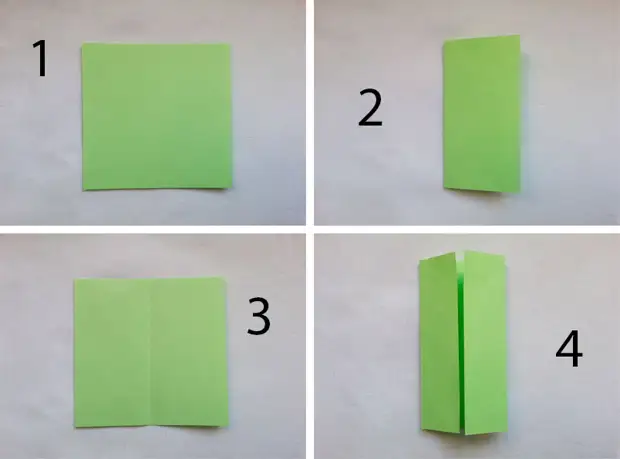
- Prepare paper square 10x10cm.
- Fold the square 2 times in half, then expand it.
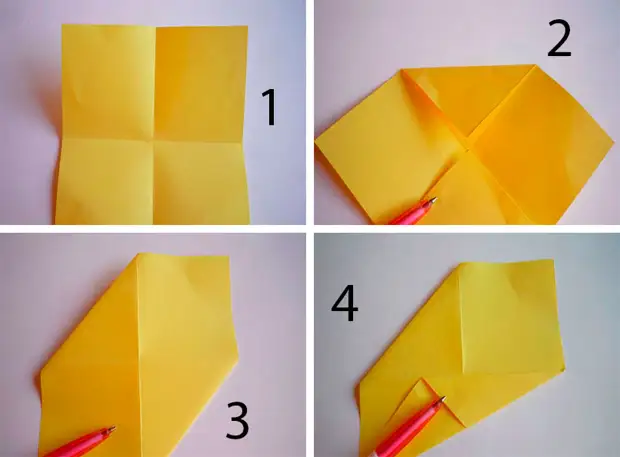
- Wrap 2 corners to the center.
- Turn over the workpiece to the other side.
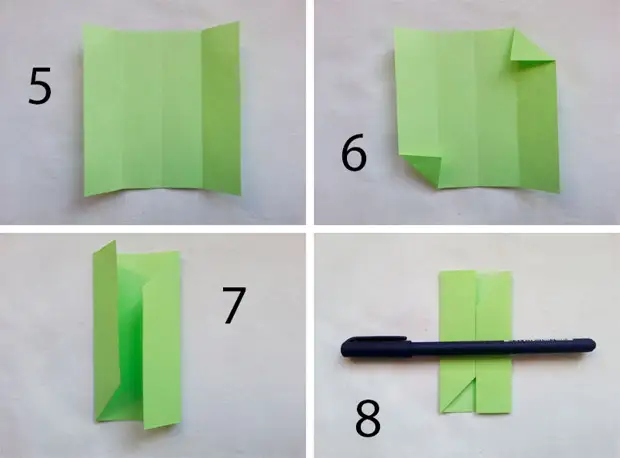
- Fold to the midline the right bottom edge, then the left upper edge.
- Turn over the workpiece to the other side.
- Wrap the right corner up, and left down.
- Turn over the workpiece to the other side.
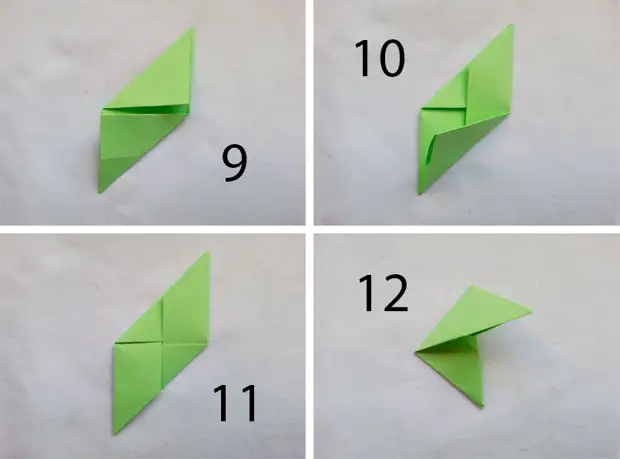
- Fold the angles to bend - first right, then left.
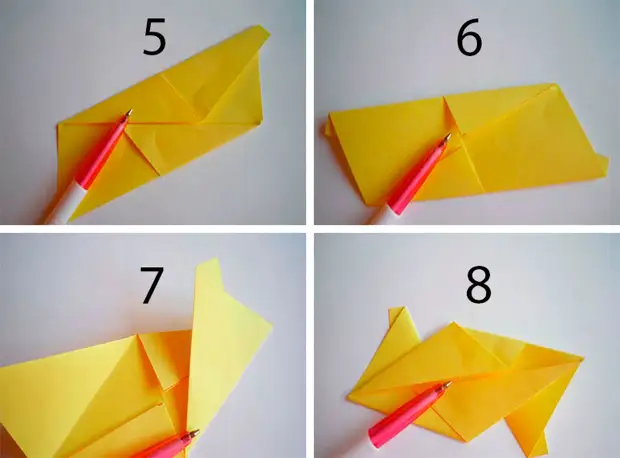
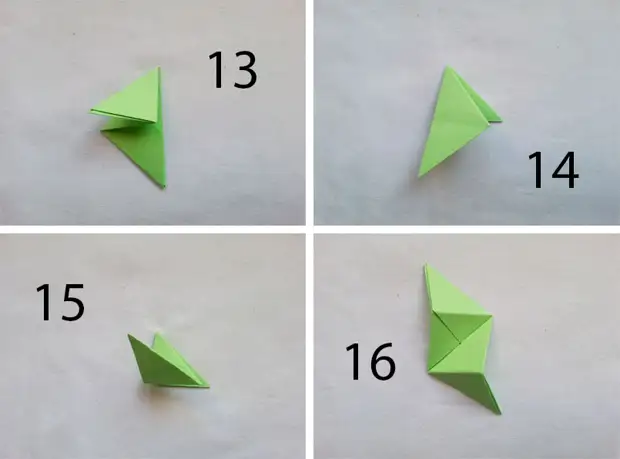
- Place the module vertically and connect it tops.
- Little expand extreme folds.
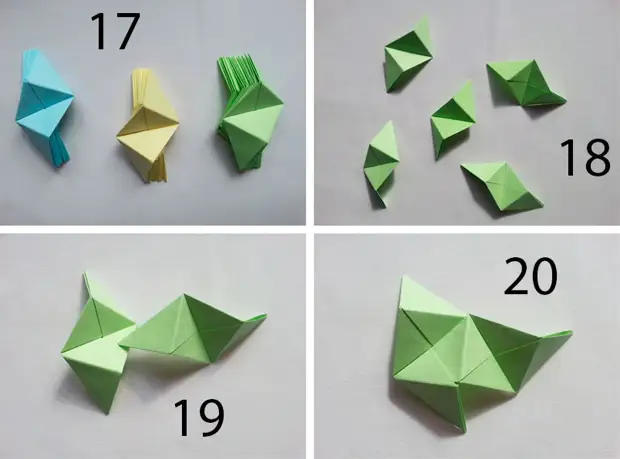
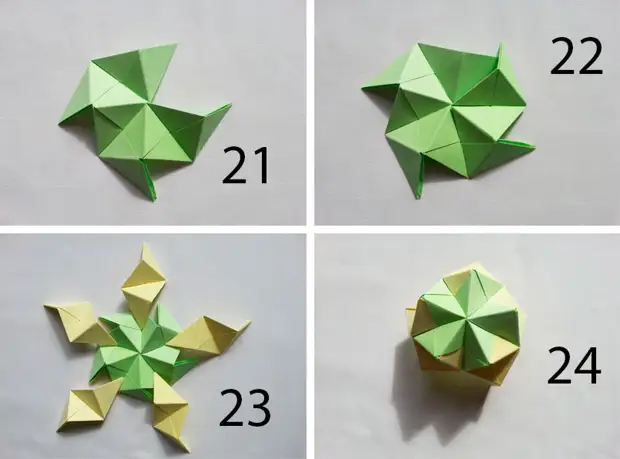
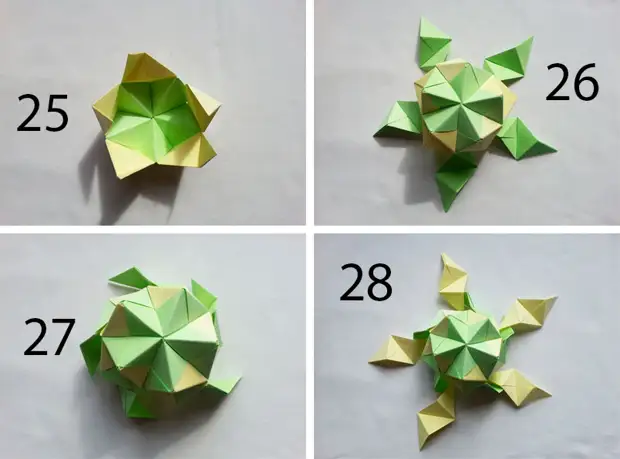
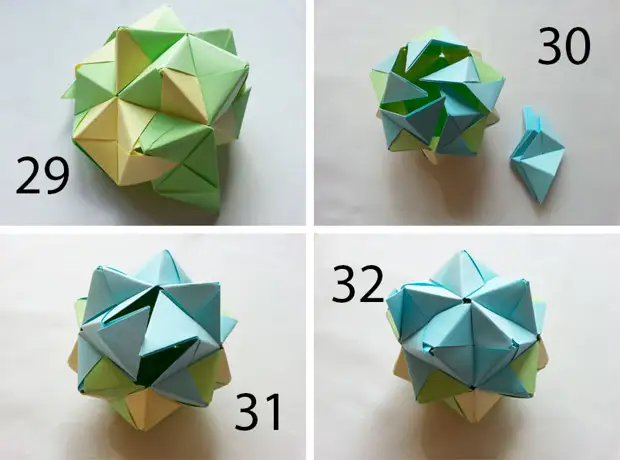
- Make 30 modules in the same way.
- Connect 2 modules by inserting the edge of one into a latch of another module.
- Add another 2 modules by forming a pyramid.
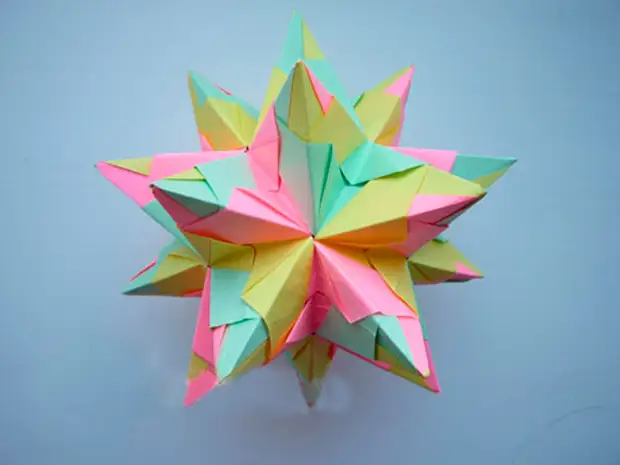
- When forming the 5th beam, clon the circle.
- Each ray consists of 3 modules - the circle closes five rays.
Cousuda Star Ball is ready!
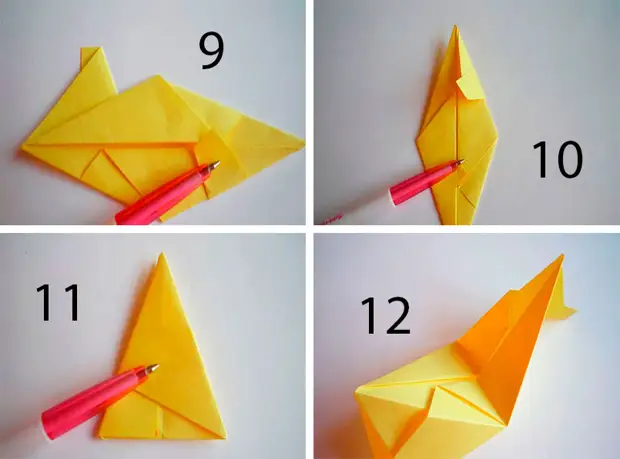
Classical Kusudama
You will need: Square sheets of double-sided colored paper of the same size and density.
Master Class
- Bend in half a sheet of paper.
- Expand it, then lower the edges to the center.
- Expand the sheet, visually it should be divided into 4 equal parts.
- Generate the left lower and right upper corner perpendicular to the first column.
- Bend the corners inside the first line.
- Generate perpendicular to the workpiece by the resulting corners.
- Get each part of the workpiece inside.
- Bend the workpiece in half.
- Bend half the top triangle.
- Turn over the workpiece and remove the top triangle.
- Expand the workpiece - the module is ready. Make another 29 modules in the same way. In this master class, 10 modules of each color.
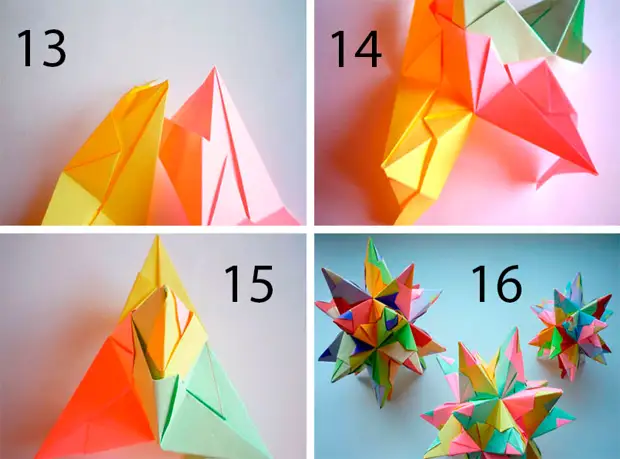
- Let's start assembling a ball by preparing the first 5 modules.
- Take the 1st module and insert the 2nd on the right side, then attach the rest of the modules.
- Prepare the following 5 modules and place them as on photo instructions, then closed.
- Collect a whole ball, each time you attach 5 modules of different colors each time, in the completion, go through the folds and strengthen the locks.
Classical Cosudam from paper is ready! I recommend to view this video!