
In one of the previous articles, I told, and showed a video, as I decorated the walls of the fireplace of Venetian plaster.
In this article I will tell you how Make a portal for the fireplace with your own hands . It was necessary to make this article to write this article first, and then. Well, in some places no longer change.
First you need to decide which portal you want, corner or straight, large - small, with podium or without. In a word, you must represent which portal you should turn out. If you can, draw your dream on paper, so that then it was from what to repel.
I'll tell you on my example. For me, it is better if the electrocamine is already available. You can certainly remove the exact dimensions in the store, but even such small nuances, like eyelets for ventilation, can at the end to spoil your work - the fireplace just may not fit into the finished niche.
We continue. We have a passage room and wanted to install a fireplace. The very place to him in the corner. We went to the construction store, bought electrocamine. But the finished portals for them are standing like 4 such fireplaces. Thought and decided to make the portal with their own hands from the plasterboard. And this, for sure no one will, so to speak exclusive. They rummaged on the Internet and chose an approximate configuration.
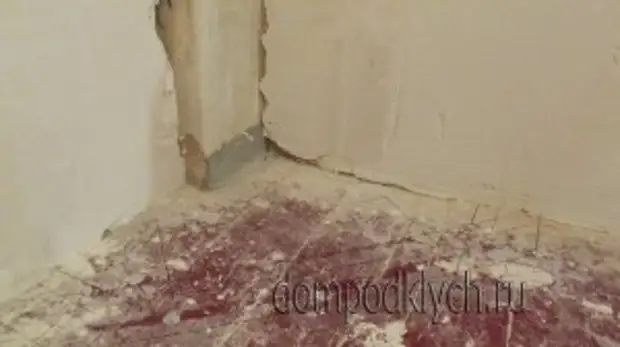
Start. From the corner, I dwell the same distance and carry out the oblique line. Then we put the fireplace itself exactly in the center, as it will stand, and get it on the floor. Now we will draw the future portal from this visual rectangle.
The most important tool is the level, and the main thing that it shown correctly. It is advisable to check it and adjust if necessary. I told about it here. Beauty depends on accuracy.
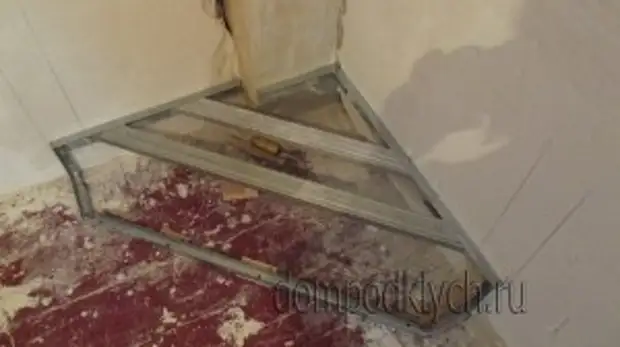
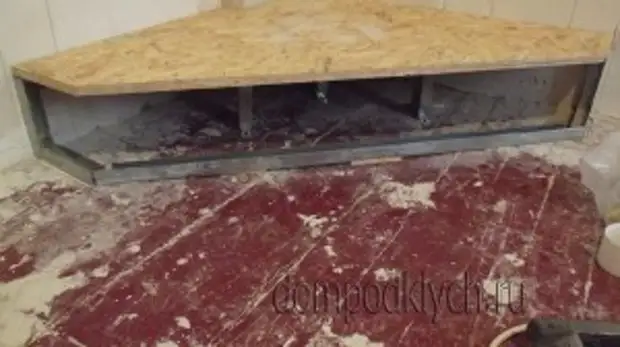
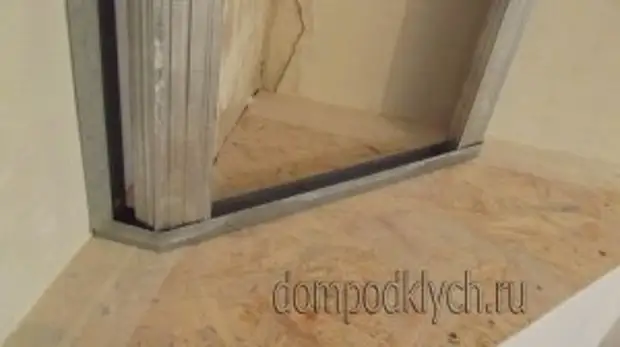
First we make the podium. Location, taking into account the exemption material. In my case it is an OSP. By markup, type the crate using UD and CD profile.
Under the base, I additionally set amplifiers made from the CD profile. All the same it will carry some load.
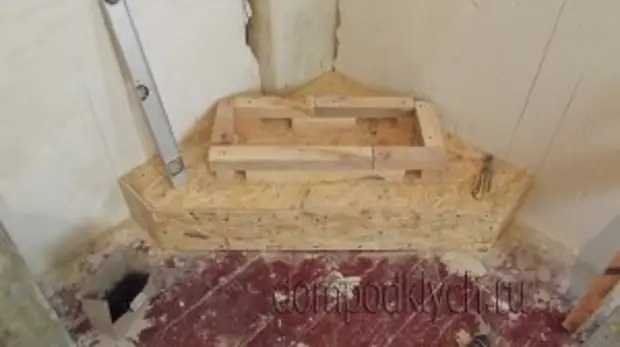
Now on the podium we make the markup of the portal itself. We also do not forget to take into account the size of the exemption and finishing material. Between the fireplace and the podium, it is desirable that there was a space that I am going to close the plinth. And so I had to raise a place for the fireplace itself. For this, I used wooden bars. Also, using the profile, type the crate.
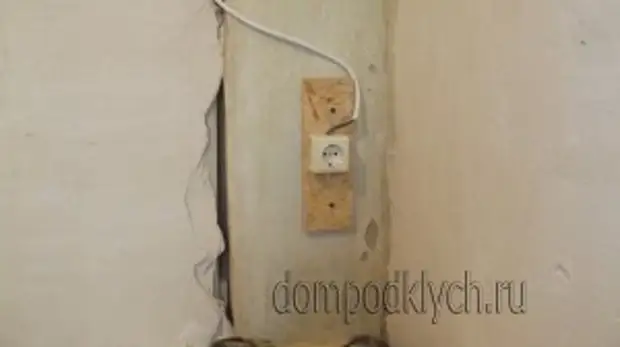
Yes, I almost forgot. Since we have an electrocamine, then you need to spend 220 volts in the middle of the portal. You can directly, and you can and through the switch.
Next, I cut out from the OSP, and installed, the top of the portal. This can be done from drywall, but then you need to make a mortgage from the inside, from the same OSP. It depends on what and how you will finish. I will have an ordinary kitchen countertop.
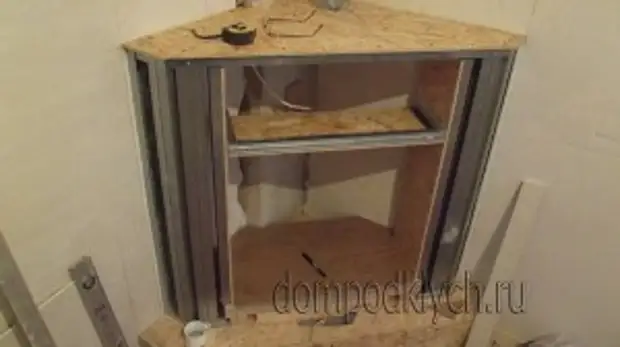
Now we collect a niche for the fireplace itself. Here, we need a fireplace, when assembling you need to try on the niche to be exactly in size.
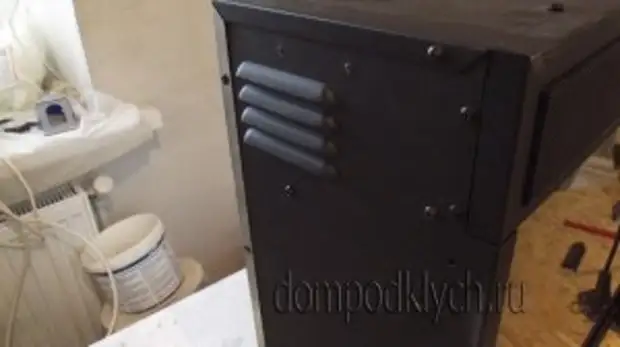
I didn't immediately pay attention to the convex ears for ventilation. And I had to redo it, because the fireplace did not become, because of these ears.
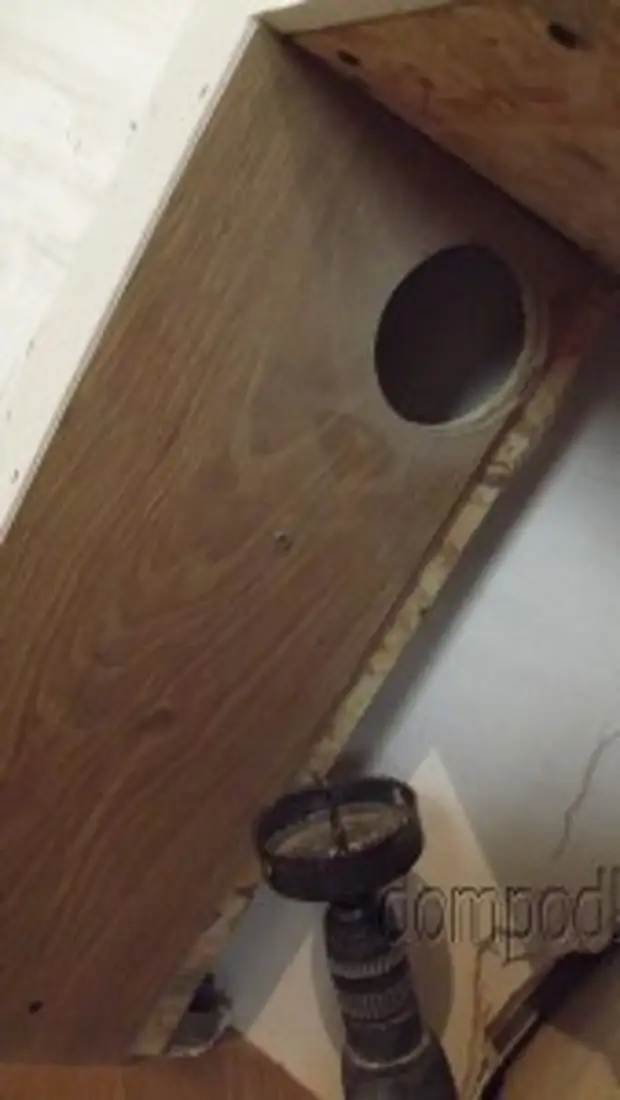
In niche, opposite the ears cut the holes for ventilation. Yes, and the wire also came out of the side wall. I redid it, brought the back.
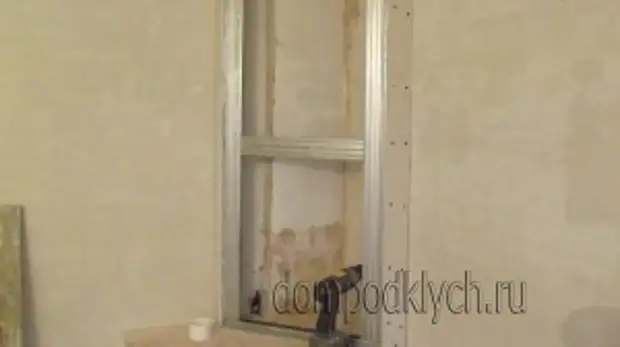
Now you can sew the walls with plasterboard.
Since I have corners under 45 degrees, then so that there is no cracks, the docking edges of the drywall, also we take under a small angle.
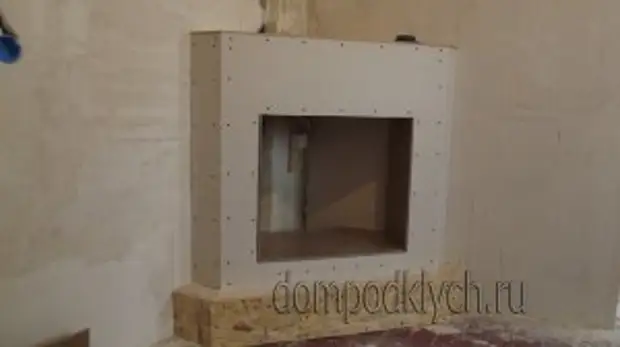
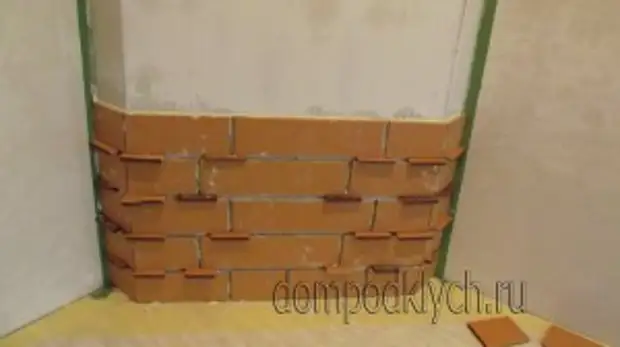
Well, the podium and portal are ready. Now we make the pipe.
The pipe is recruited in the same way. The only thing to strengthen the front part, I additionally set the struts from the same profile. See photo.
And yet, in the angle, two profiles do not become, there are few spaces. Therefore, we put one, previously arched one wall of the profile under 45 degrees. We are plasterboard. And voila - Portal for the fireplace with your own hands Ready. It remains only to make the finish. There is someone else for the fantasy.
Briefly describe. The podium will be finished with laminate, like the floor and separated will be plinth. Also, the plinth will be installed on the junction of the podium portal. The top was carved from ordinary kitchen countertops.
Advice; For accurate fittings, at first it is better to make a pattern.
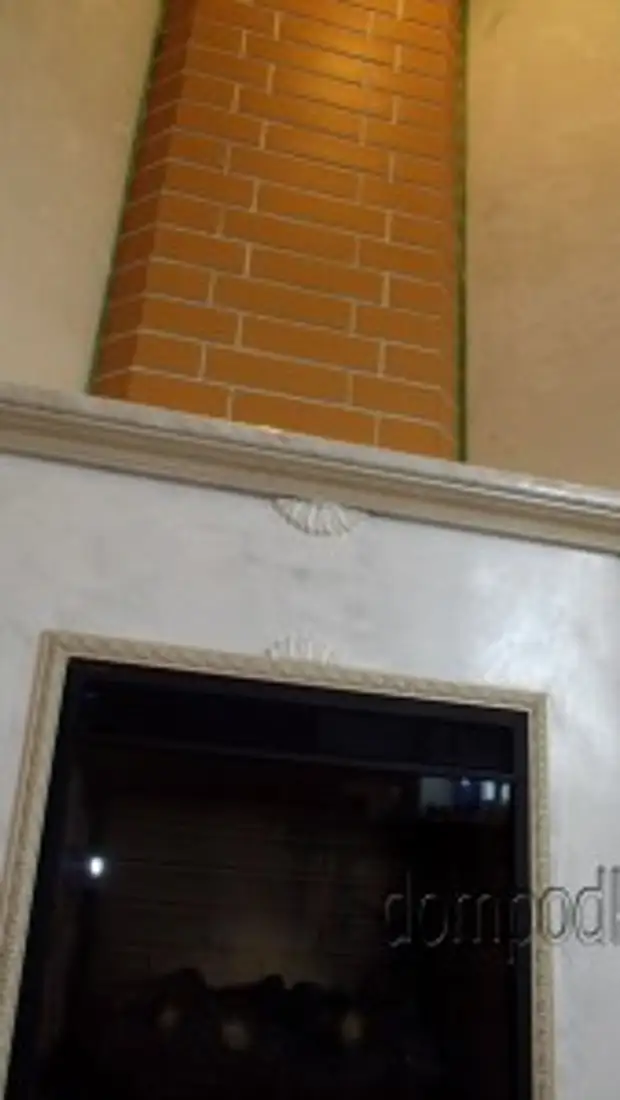
The junction portal countertop was decorated with ceiling polyurethane baguette. The countertop was wider than the portal, taking into account this baguette. Since she was under marble, the portal walls decided to do under marble, applying Venetian plaster. You can learn about it, and even see last article.
The niche itself also decorated with a polyurethane baguette, only wall.
Advice; When cutting the angles of polyurethane baguettes, so that the joints agreed clearly, it is better to use stupid.
Then he took one socket, cut off two semicircles and glued one top, another bottom.
Pipe pasted tiles under the brick. I remained tiled glue for mosaic tiles, it is white. They also did the extender.
Instead of crosses used trimming from the same tile. The main thing is to pull up to complete drying, otherwise it will do problematic.

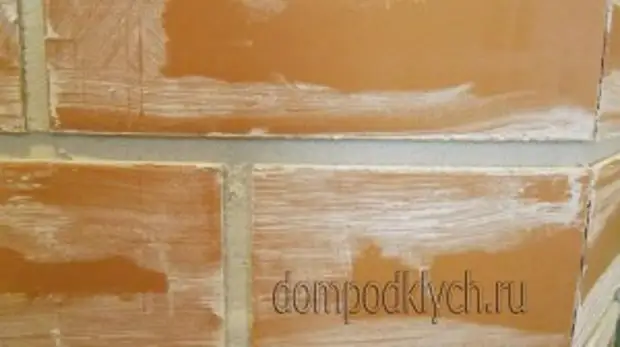
From the car spatula, the shpatellek for the batch, and with its help made the seams neat.
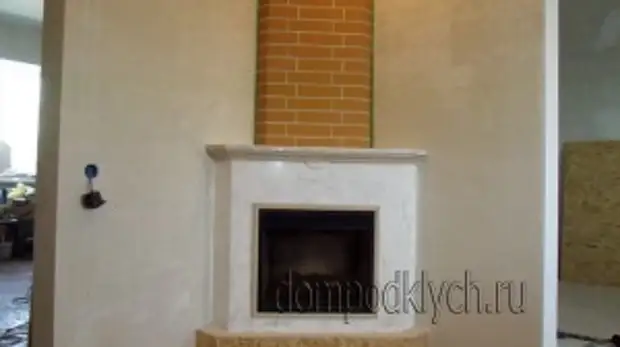
That's all, my Portal for the fireplace Ready. In my opinion it turned out not bad. And I am sure that you will have a fireplace even better and original. Do and you, too, everything will turn out.