
Two master classes from soldering Svetlana

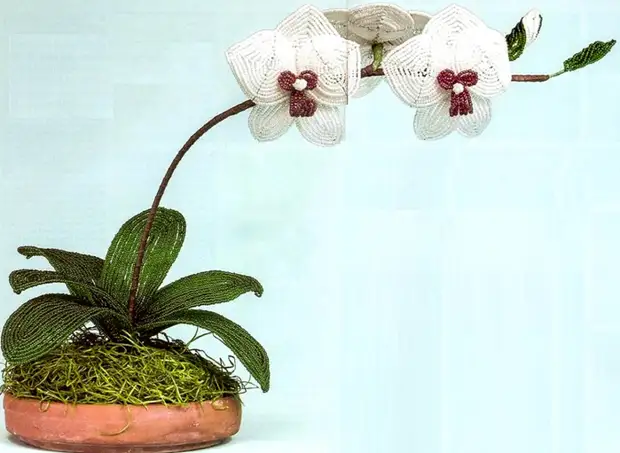

1. Flower orchid
Necessary materials:
- Beads Orange №10
- Brown beads number 10
- Beads Yellow №10
- Beads Yellow №6
- Copper wire 0.3 mm
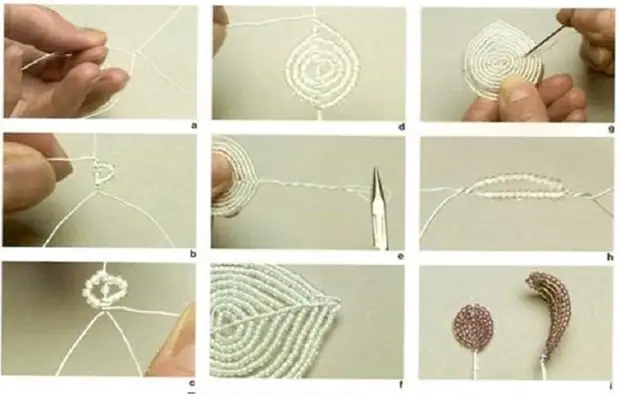
We begin to weave the petal using the technique of French weaving colors. Cut the wire with a length of about 50 cm. Make a small loop from one edge, type 4 bispers and twist a large loop on the other hand as shown in the photo.

We are wearing petals, gain so much beads so that they fit tightly to the first row and did not create an excess space. Make three arcs on each side. Taking into account the central series you should have 7 arcs. Watch the photo below, it is clearly clear how many rows are clearly visible and easy to calculate.

When the petal is ready, the end of the wire turn around the loop several times.
It's time to seal the wire. First spout a small loop, straighten the wire (see photo below). Low large loop twist to get a leg. Expand the petal to yourself with an invalid side, reproduce the top wire and give it to the central row of the petal, and the end doze. That's how you got a neat petal!

For a single flower you need to weave 5 identical petals, 1 latch with a large yellow beads, a latch with two small yellow beads and the central small petals made of brown beads. The sidewalls consist of two arcs and a central row of 8 bisper, and the central petal of four arcs (2 on both sides), and the central series of 6 beerin.

To collect a flower, to start twist the middle of the flower, then twist the five petals among themselves and insert the dial to the center and tightly tighten these parts with an additional wire, forming one leg of the flower. Glowing total 5 orchid flowers to create a composition.
2. Orchid flower bud
For it, it will take:
- orange beads number 10
- Round bead 6 mm yellow or beaded
- Copper wire 0.3 mm
Weave the bouton with the same French weaving as the petals earlier, but with a little cunning! We twist the wire, type 3 bispers, make one arc on each side.
Now the most important thing! So that you have a cup, and not a flat petal, you need to do the subsequent arcs to do in shorter and tighten the tight. Beeer will have no hope to go and it will argue, creating the necessary convex form.

One half of the bouton consists of 6 arcs and 1 central row. Glowing the second same, twist their legs together, insert the bead and sew the wire bouton. Such buds needed 4 pieces.
3. Green leaf
For weaving sheet you need to take:
- Green beads number 10 or number 8
- Wire 0.5 mm or 0.6 mm
- Green wire 0.3 mm
For weaving long and pretty large orchid leaves, I took a wire on a lot of thicker so that she can keep the shape of a leaf under the weight of beads. A piece of wire needed a rather long no less than meter !!! I spurled three sheets with a length of 11 cm, 13cm and 15 cm. The central number was 9cm for the first, 11cm, for the second and 13cm for the third. Each sheet consists of 6 arcs, 3 on each side and plus a central row.

To leave the sheet, it is necessary to flash it. The photo shows that the seam passes in two places, it is almost not noticeable because I used green wire. Ends I hid in the nearest beads, but cut off too much.
4. Assembly and planting orchids
Necessary materials:
- 1mm wire in diameter
- Brown thread
- Gypsum
- Water.
- Gorshok
- Newspaper
- watercolor paints
- A little land
We take a thick wire and adhere to her extra wire boutons and orchid flowers. To hide the wire, make a trunk of brown thread Moulin, as well as with the second branch of orchids.


Now lay out the walls of the pot in a crumpled newspaper to avoid cracks. Divide the plaster with water, achieve the consistency of sour cream and fill it into a pot. While the plaster does not froze, stick the flower and leaves, hold them a bit until the plaster clarifies. If you are all done correctly, then in minutes 15 it will be possible to decorate the surface of the gypsum. I took the paint watercolor dark brown and painted white plaster. From above, a little sprinkled the earth.

Since the orchid flowers are pretty heavy, you can pour them into them with a wand or make the backup of thick wire.

Finally all! Your orchid is ready to decorate your home and please your eyes all around. I wish you a pleasant needlework and my own ideas!

Source: biserok.org/orchid-bead-orhideya-iz-bisera/