
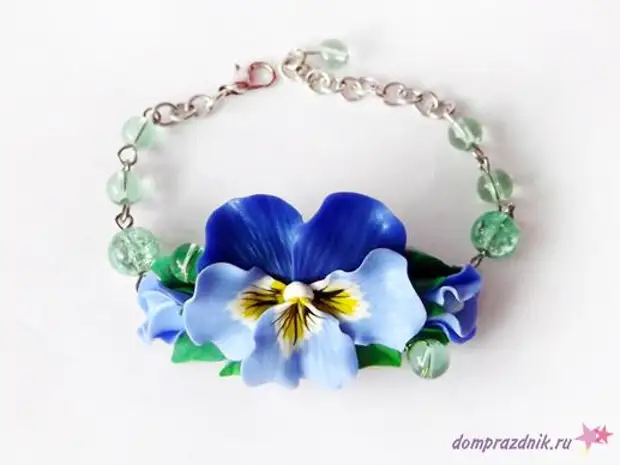
Surely, you had to hear about the colors called Pansies, and maybe you have repeatedly seen. These are very interesting flowers of various colors, and therefore painting in the form of pansies will be a win-win option if you want to surprise others.
We will need:
- polymer clay blue, white, yellow, green, silver color;
- acrylic paint of black;
- Glass beads of green color;
- large chain;
- Carabiner clasp;
- jewelry rings 0.7 cm;
- jewelry pins;
- thin wire green;
- Thin brush;
- toothpick;
- universal stack;
- a knife for polymer clay;
- Mold with leaf texture;
- Rock for polymer clay;
- mold for cutting in the form of an asterisk;
- round-rolls;
- glass or ceramic cup with smooth walls;
- latex gloves.
Step-by-step instruction:
1) form squares of different colors Mix blue clay with a piece of white to get blue color. Form from blue clay square size 3x3cm and 0.7 cm thick. Make the same squares from white and yellow clay, but their thickness should be 0.2 cm. | 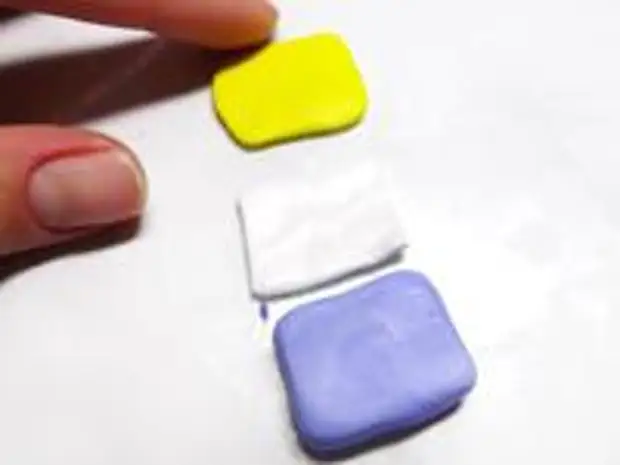
|
2) We press the grooves At the top on the blue square, put white, and from above on white - yellow. Now the stupid side of the knife sell on a stack of squares a lot of parallel recesses. Melt the knife deep. | 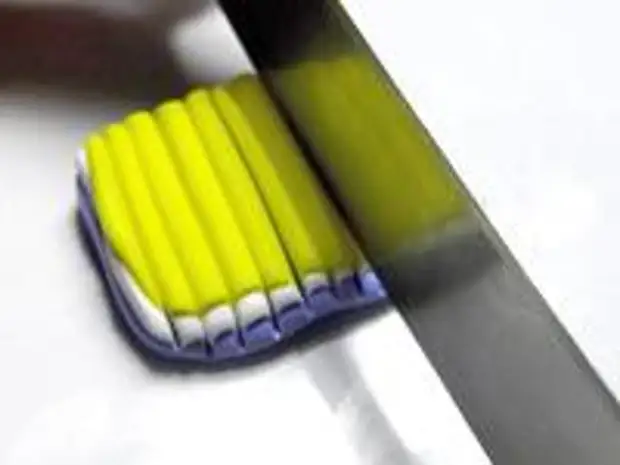
|
3) Squeeze the workpiece It is gently lift this workpiece from the working surface and start compressing it on the sides, giving it a triangular shape. That is, the workpiece should form a yellow pointed side and a wider blue part. | 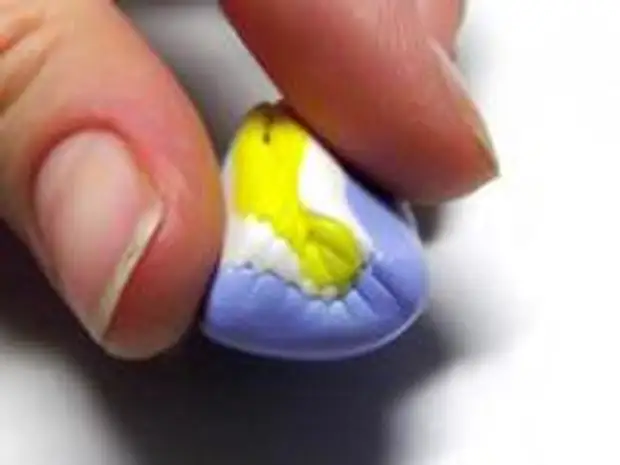
|
4) Cut and form petals with a pattern Cut the resulting color blank to pieces with a thickness of 0.2 cm. Put gloves and form a piece of petals from pieces. For one flower, you need one larger petal (approximately 2x2cm) and 2 identical petals of smaller size. | 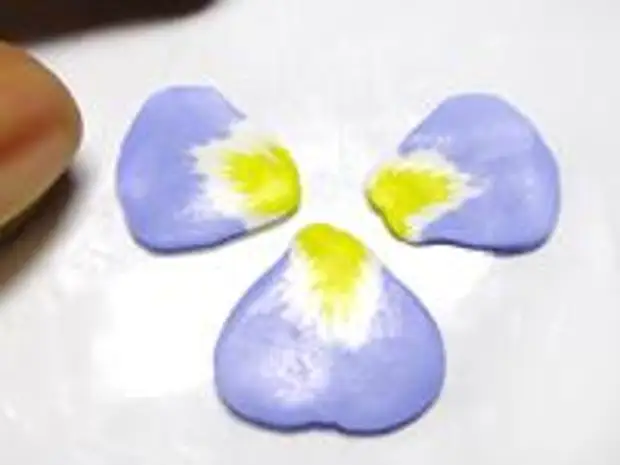
|
5) We form blue petals For a flower you need to make another 2 petal of blue. | 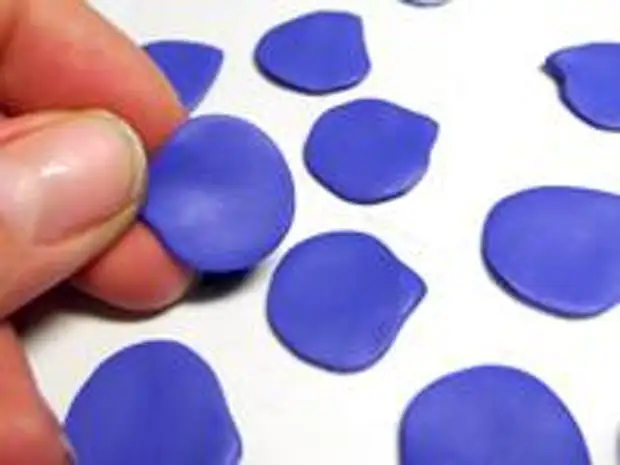
|
6) stretch the edges of the petals Take the petal and the second hand lightly stretch its edges in several places. Do this procedure with the rest of the petals. | 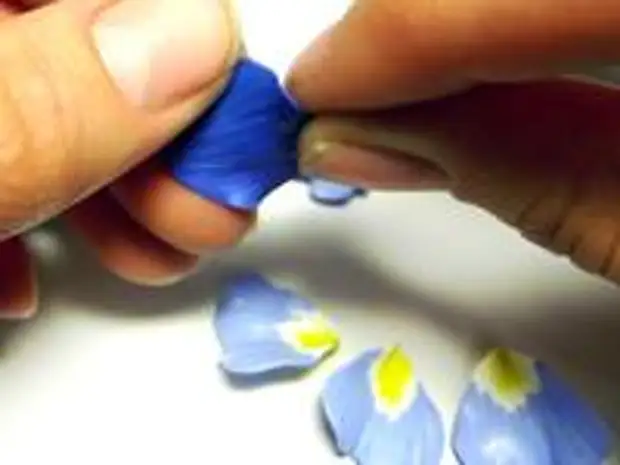
|
7) cut off the cup Green clay roll into a thin layer and cut out 2 cups from it in the form of a sprocket with a size of 2x2cm with a special mold or knife. | 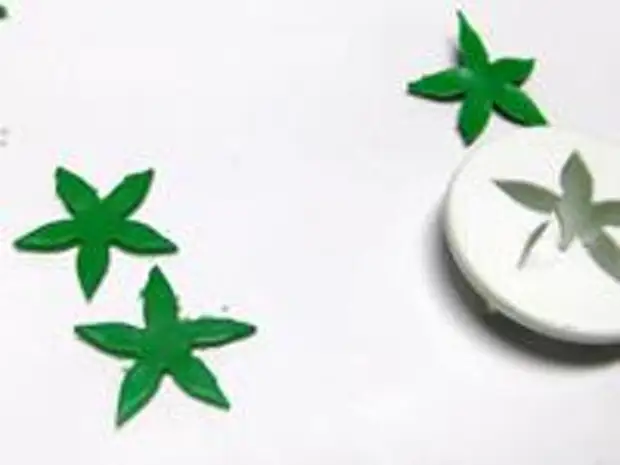
|
8) make leaves From the reservoir of green clay, cut 4 oblong sheets with a length of 2 cm. Mix a piece of green clay with a piece of yellow to get a light green clay. Roll it out and cut out 4 more fewer leaves from it. On the leaves you need to do accommodation. They can be sold by the tongue with a toothpick or take advantage of a special melt with a leaf texture. | 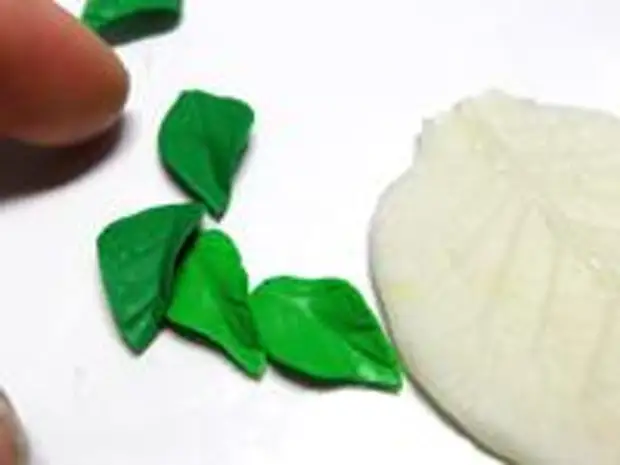
|
9) cut out the basis of the bracelet Silver color clay roll 0.2-0.3cm into the reservoir and cut out from it to the 5-6 cm long side from it. It will be a playground for colors. It can be made on top of the embossed, if you press the lace before cutting to the clay. Put on the side of a glass or ceramic cup and put a silver platform onto her wall. At the edges of the pads of the toothpick, make a pass-through hole. | 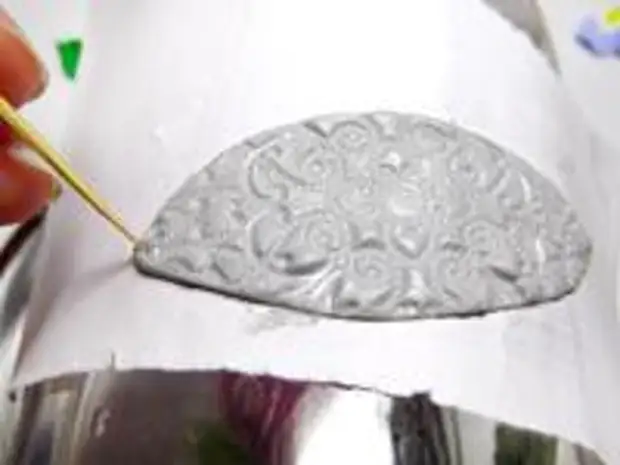
|
10) Lepim buds Mix white clay with a small piece of blue, should get a pale blue color. From this clay, roll up with 1 cm long and put it on the toothpick. Take the blue petal and wrap them on the toothpick so that the oval looked slightly between the edges of the petal. Now make the same petal from clay of a darker blue color and stick it back on the blue petal, as shown in the photo. | 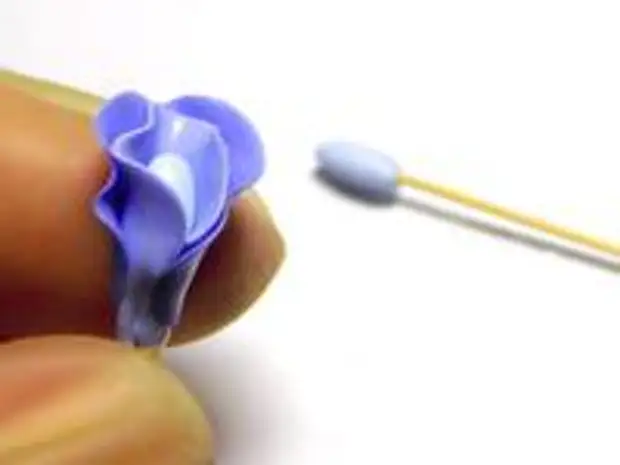
|
11) stick a cup Take the green chashelistic and pursue a hole in him in the center, put on the cup of the sewer through this hole from the bottom to the toothpick with a bud. Tighten the sewer to the bud and stick it to the bottom side of the bud. Then remove the bud with a sewer with toothpicks. Squeeze the bottom green side of the bud and ride it between your fingers, a little pulling visas to form a short stem. Similarly, make a second flower bud. | 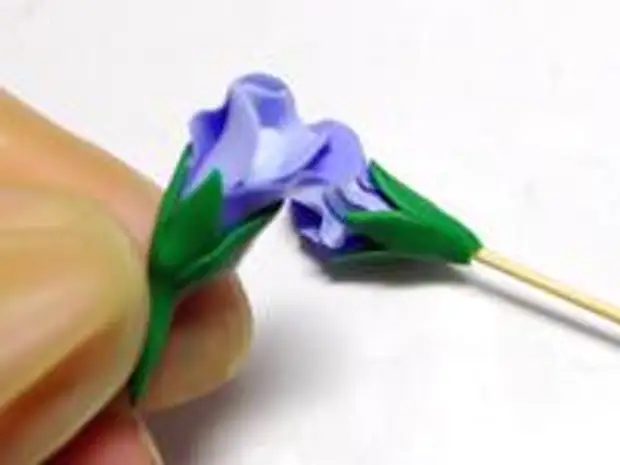
|
12) screwing beads to wires Thin green wire cut into 2 segments with a length of 3 cm. On the middle of one segment, put on a green glass bead, connect the segments of the segment and tightly twist them with each other. In the same way, screw the second bead to the wire. | 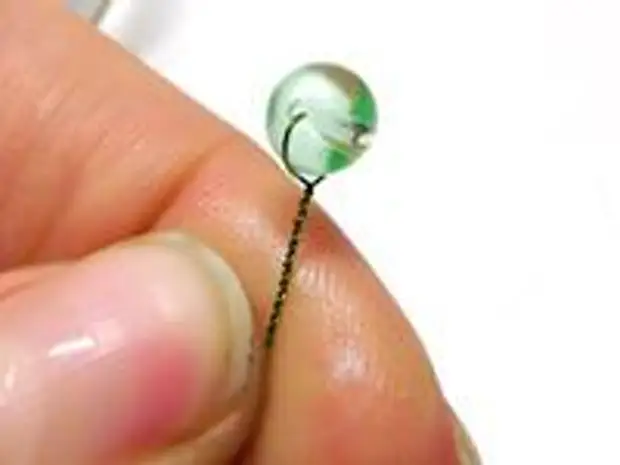
|
13) stick the leaves and buds to the bracelet site On the pointed edges of the bracelet site, stick 2 green leafs. Top gear on one bud. Next to stick wire with beads, pressing them in the site. Top gear light green leaves so that they close the stalks of buds. | 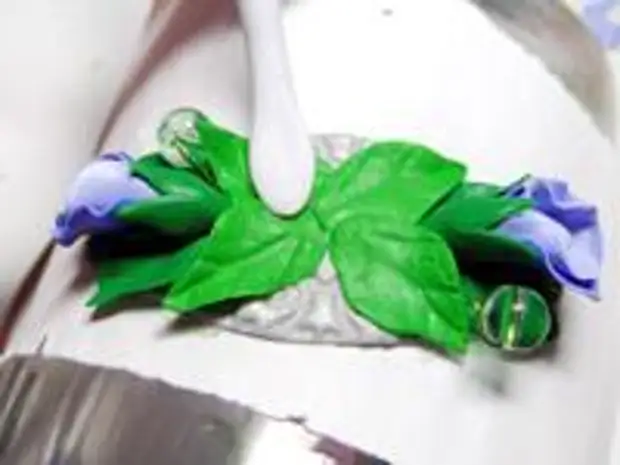
|
14) We collect flower of petals and baked Take 2 blue petals and stick them to a bracelet a little cleaner on each other. Then stick 2 smaller colored petals, and in the center, stick to a larger color petal. In the center of the flower you can enjoy a small ball of white clay. Now bake the product on the oven cup. | 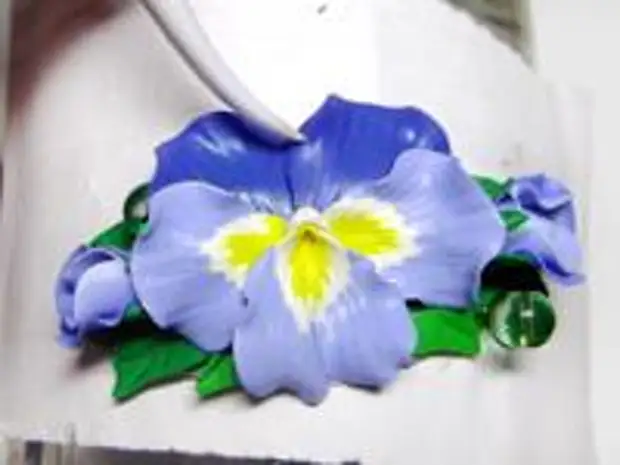
|
15) Coloring On the baked flower, draw a black acrylic paint a little thin residences coming out of the center of the flower to the sides. | 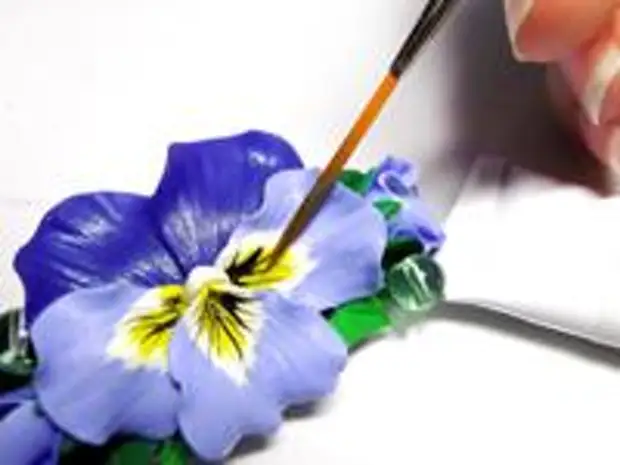
|
16) Attach beads to jewelry maps On the jewelry pin, put on the bead, undermine the second end of the pin and tighten it in the form of a loop. Prepare 4-6 beads. | 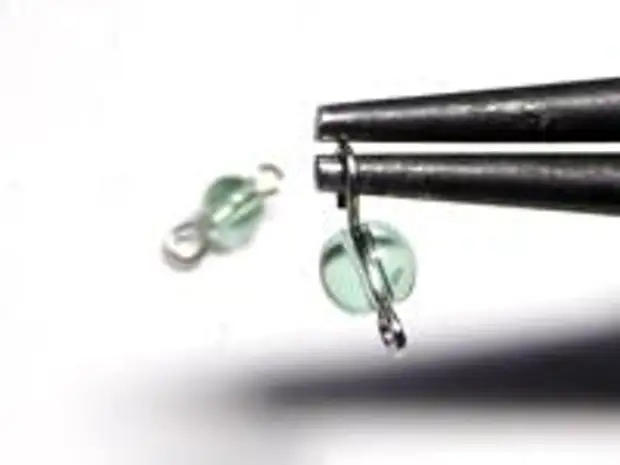
|
17) We collect a bracelet At the holes along the edges of the bracelet, attach one jiserous ring. At the rings on each side of the bracelet, attach 2-3 beads, connecting them between the penetrations of the pin. At the end of the bracelet, attach a chain with a length of 2 cm, to the second end, attach a 5 cm chain with a length. By the end, a longer chain attach a bead. By the end of a shorter chain, attach the Carabinist Castle. |
A source