
Recently, the decorations made using the jewelry grid-sleeves have become popular. This is due to the fact that such decorations are being made pretty quickly and at the same time look unusual and effectively.
In this master class, we will tell about how to make a bracelet based on a jewelry grid. The techniques shown in the master class will also use you when creating a necklace and earring from the grid. The way to complete the ends of the decoration, given in the master class, is a more reliable alternative to the traditional use of adhesive conveyors, including it is well suited for bead harnesses.
So, for our work, we will need the following tools:
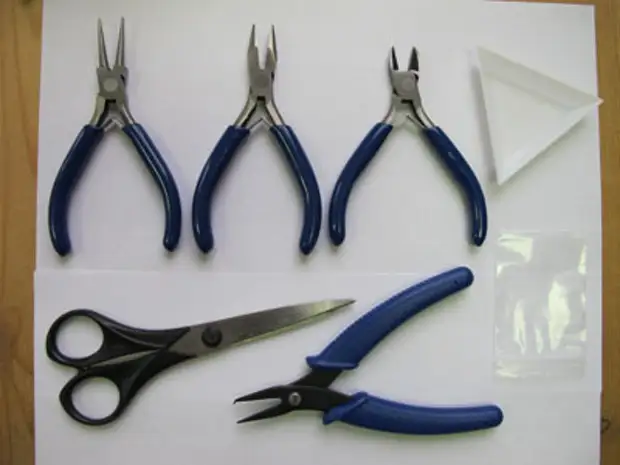
- Kruglogs
- Poppers
- Kusachachi
- Bead trays or zip bag with cropped corner
- Scissors
- Tool for working with double ringlets (optional, if you want to hang on the bracelet suspension)
Materials used to create a bracelet can be divided into 2 groups: the grid itself and its filling / decor (paragraphs 1-6); Furnitures to complete the bracelet (paragraphs 7-10).
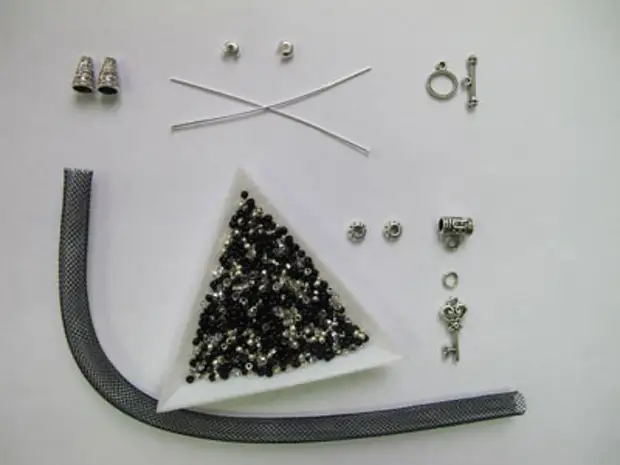
- Jewelry grid-sleeve 8 mm
- Beads or beads for filling the grid.
- Metal beads with a large hole for rugging (for comfortable operation, the hole must be at least 2 mm)
- Holder for suspension
- The connecting ring with a size of 4-5 mm (for reliability it is better to use double)
- Suspension
- 2 pitch or cone in the form of a cone. The diameter of the lower part of the cone must be approximately equal to the grid diameter. That is longer the cone, the easier it is to gently hide the end of the grid in it.
- 2 coated crimpa size 3 mm or 2 conventional crimpa with a hole at least 2 mm
- 2 long pins (5-7.5 cm) or a piece of wire with a thickness of 0.6-0.8 mm
- Zip (we used Togl, but you can take any other clasp on one thread suitable for the bracelet)
Stage 1. Fix the tip of the grid with KMP
Determine what length you need a bracelet, and cut off a piece of jewelry mesh suitable size. The fastener, depending on the type and size, will add to the length of the bracelet 1-2 cm, but in the process of working with the grid you will have to periodically cut the fluffy edge, so the pair of extra centimeters will just steal from the grid.
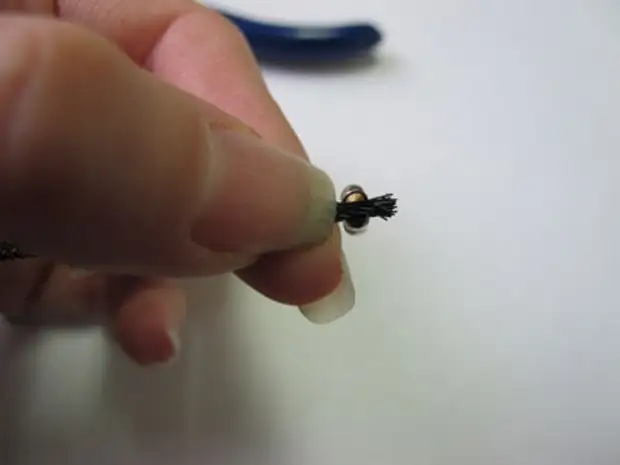
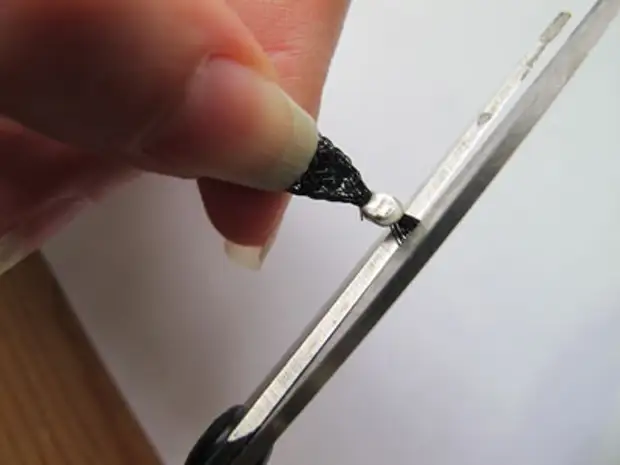
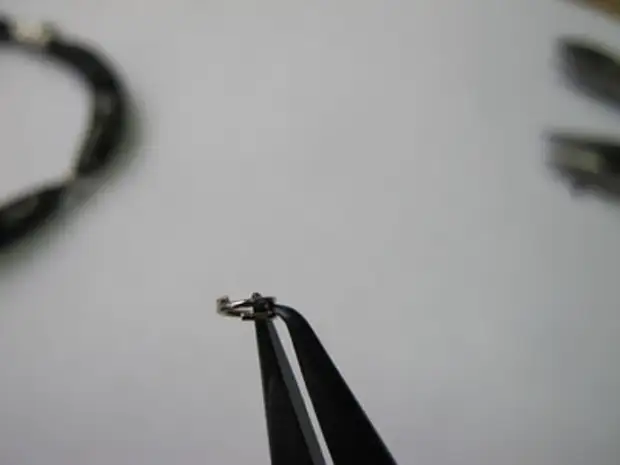
Before starting the mesh filling, we need to fix one of her ends so that it did not get out of it. To do this, squeeze the tip of the grid with your fingers so that it becomes thinner as possible:
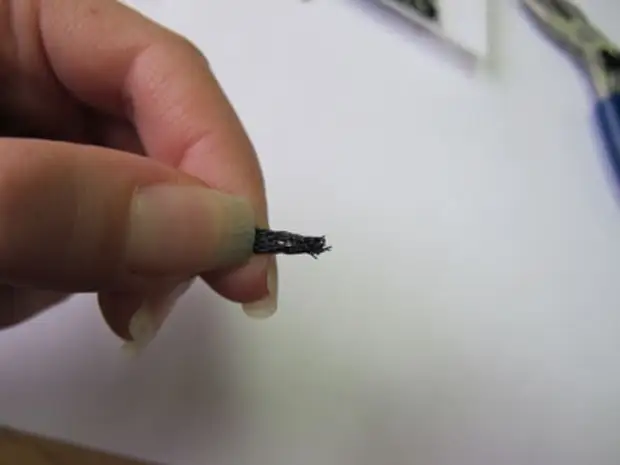
Shut down to the compressed tip of CRPL in such a way that a small piece of the grid sticks out of it:
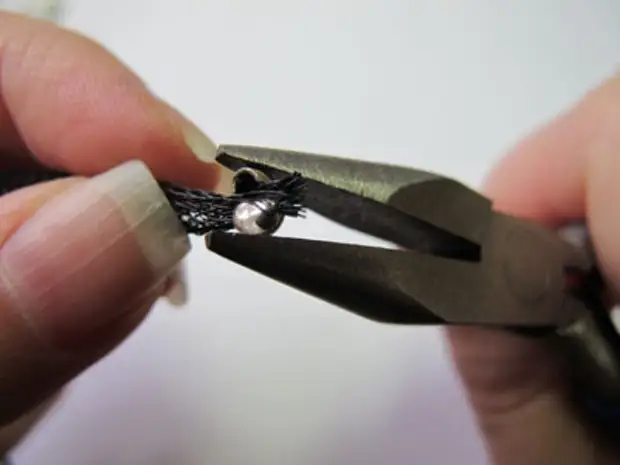
Clean the scan tapelings. First one side of Clima:
Then the brass on it is different:
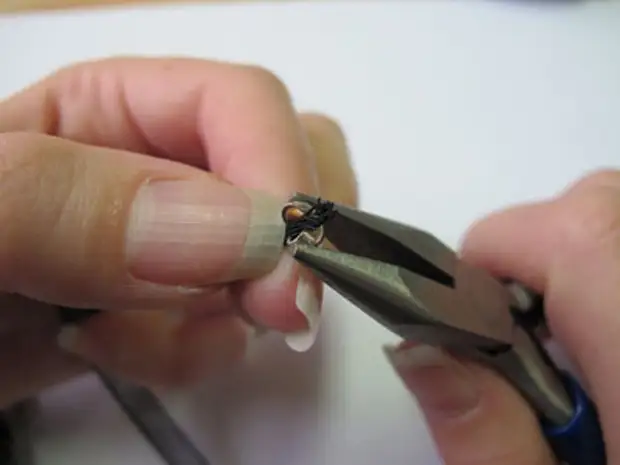
Cut the cryboard as stronger as possible so that it does not jump and become more compact as possible. Please note that CRPP needs to trigger a mustache, and not in the usual way (jack). You can also use the usual, non-refined cryboard, quite large for it to use the grid.
Carefully make sure that all the threads of the grid fit into CMP and not sticking out of it. It may be more convenient for you to clamp shock, keeping the grid for the "tail".
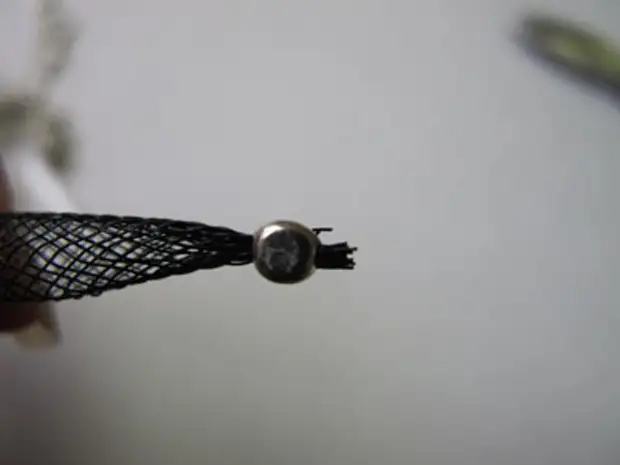
That's what you should get as a result:
Stage 2. Filling and grid decoration
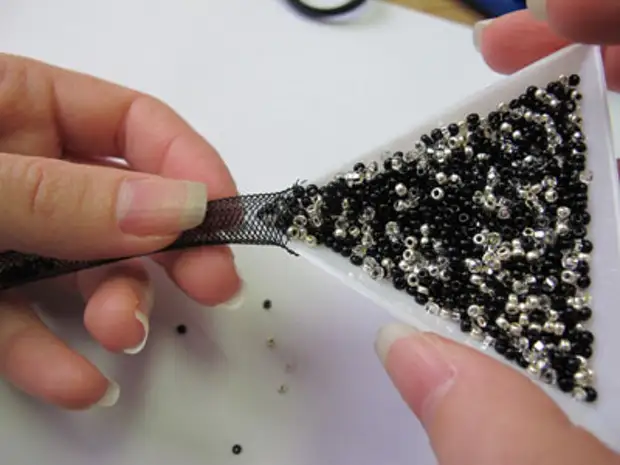
With a triangular tray, pumped the beads into the grid of about a quarter of its length:
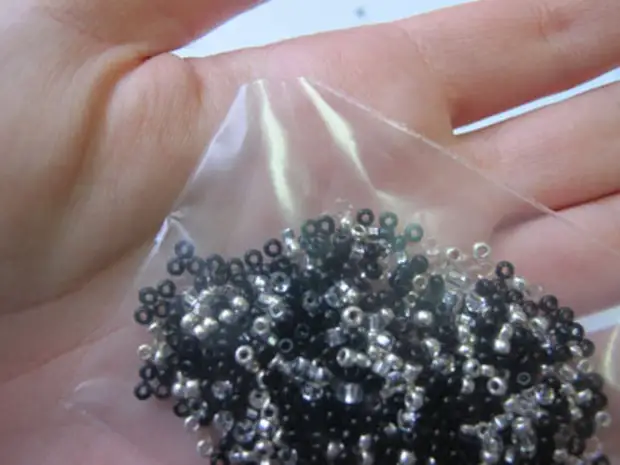
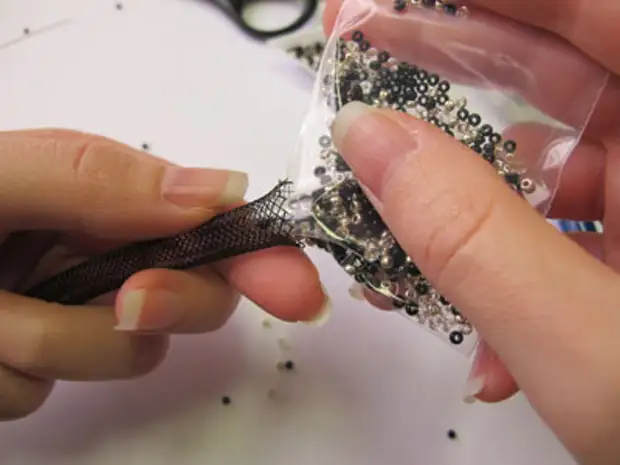
You may, instead of a trawl, it will be more convenient for you to use a zip bag with a sliced corner:
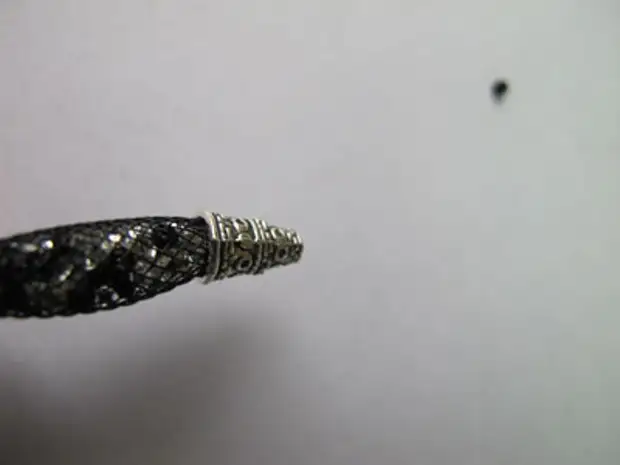
At this stage it is worth checking if a confusion is well sits on a filled grid. Just put it on the tip of the grid as a hat, it should fit tightly on the sides:
Making sure that the cone is suitable, we remove it aside and continue to decorate the grid. Squeezing the tip of the grid, we ride a bead on it:
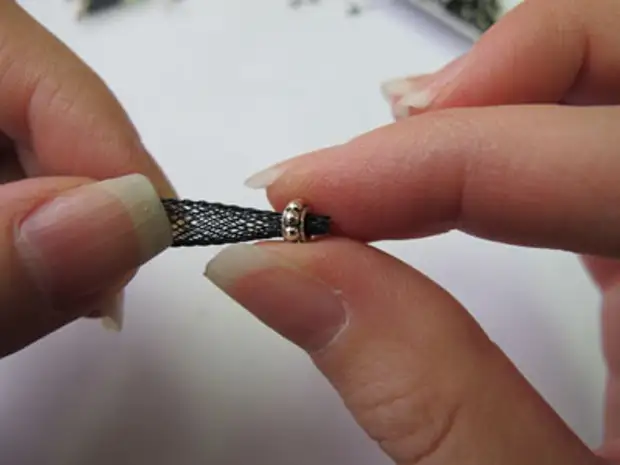
Move the bead tightly into the grid into the grid, we fall asleep as many beads and we ride the holder on the grid:
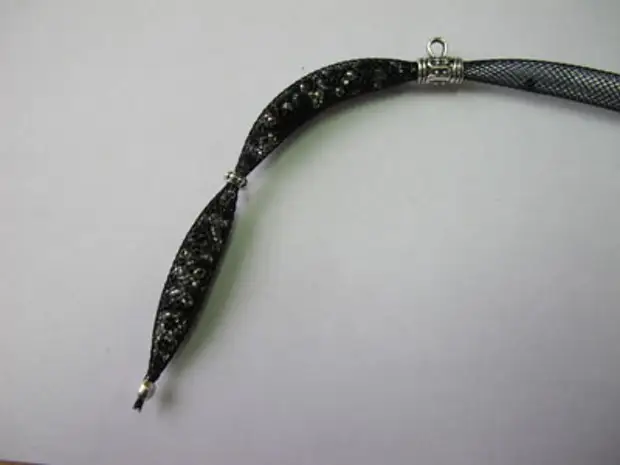
The holder must be in the middle of your bracelet. At this stage, it is recommended to check whether the length of the length is obtained and the bracelet is obtained and, if necessary, add adjustments: removing the holder, lump or squeeze a part of the bead. Note that the bracelet will turn out a little longer due to the addition of the fastener.
Next, we complete the decoration of the mesh:
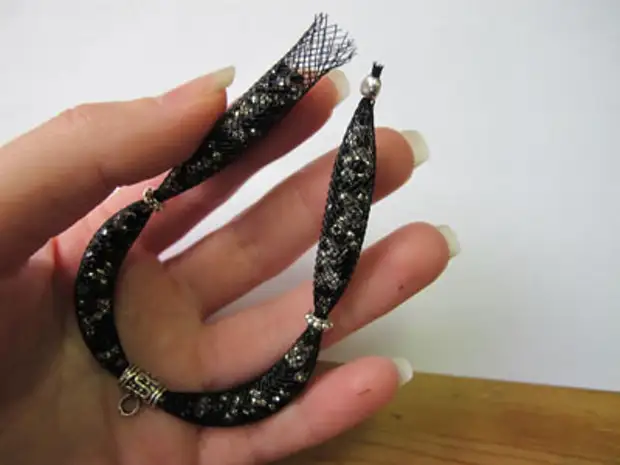
And clamp it with KMP, as shown above:
Cut off the excess grid, leaving a couple of millimeters so that Krim does not jump:
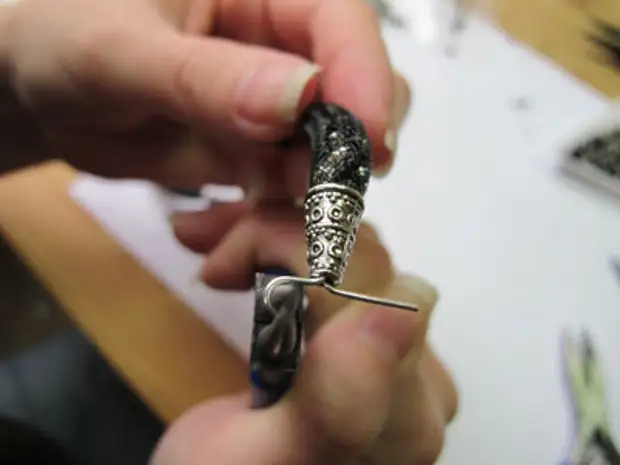
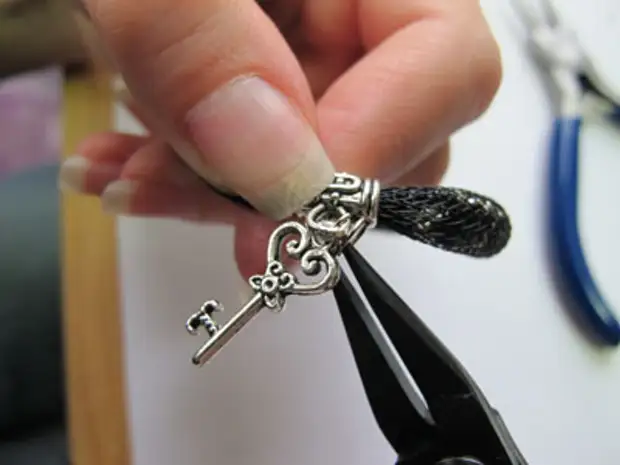
Stage 3. Decor of the ends and attachment of the fastener
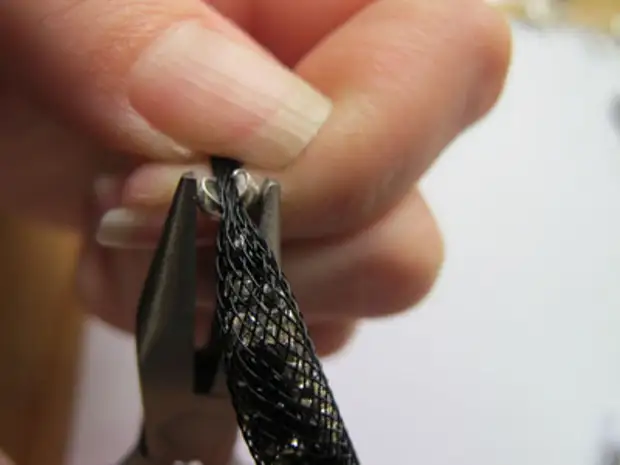
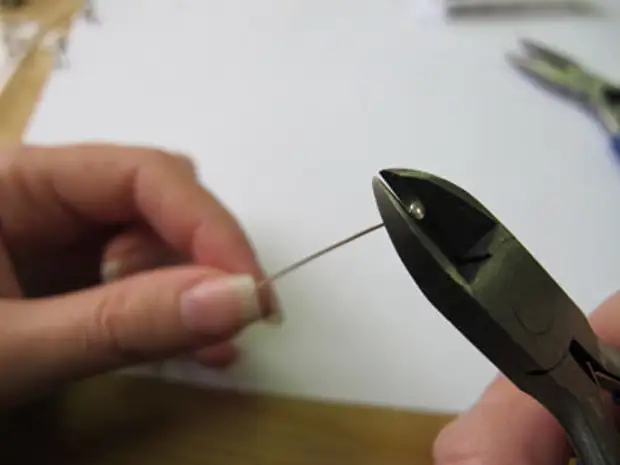
Cut from Pina Hat / Ushko to get just a piece of wire:
Populate the mesh with the mesh as close as possible to the clamping Clima:
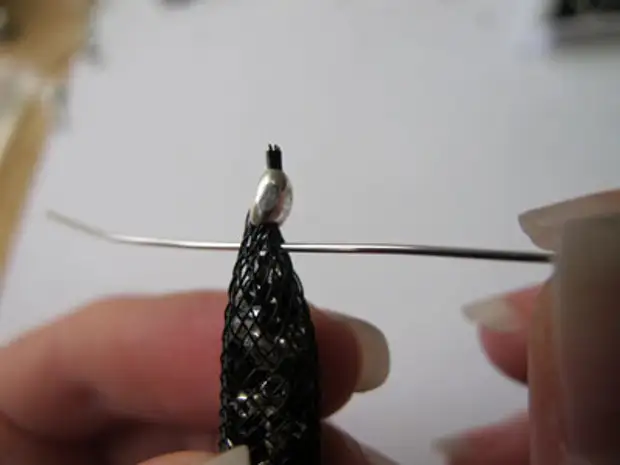
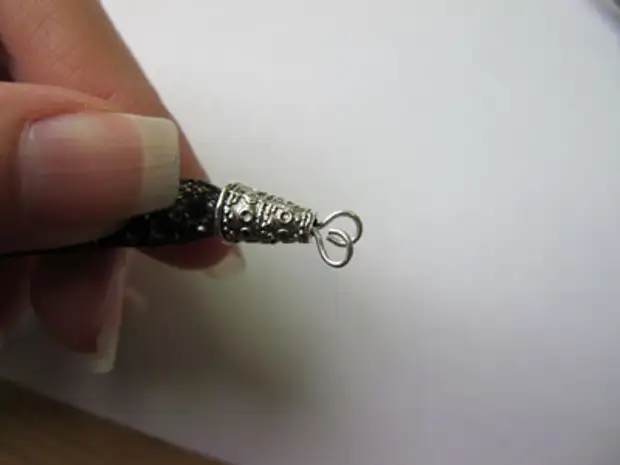
Bend PIN in half like this:
Grind the resulting mustache in the confusion:
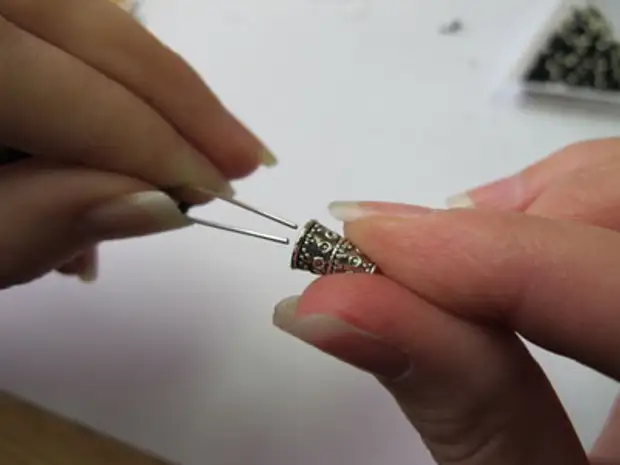
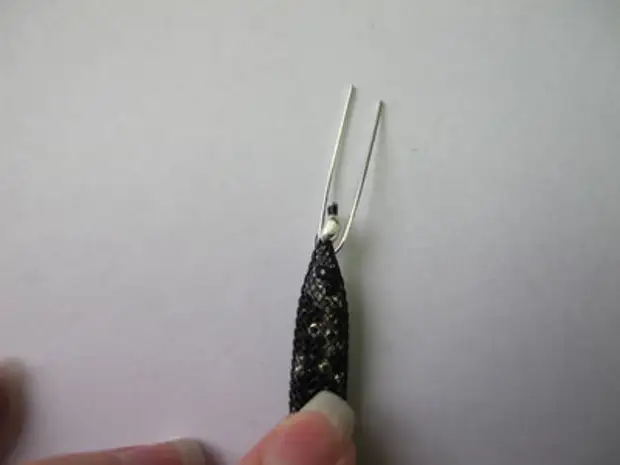
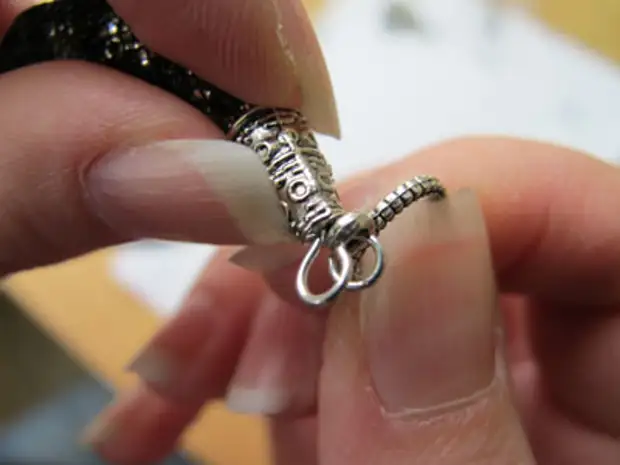
Casting in the ends of Pina with taps and the second hand holding the cone, put it on the mesh:
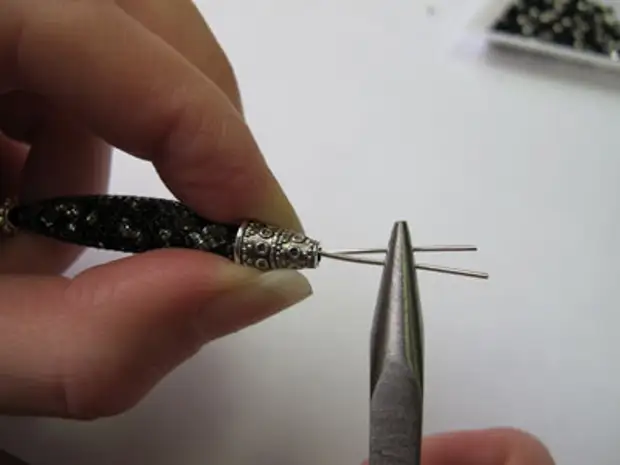
Beat the ends of Pina in different directions at an angle of 90 degrees to the grid:
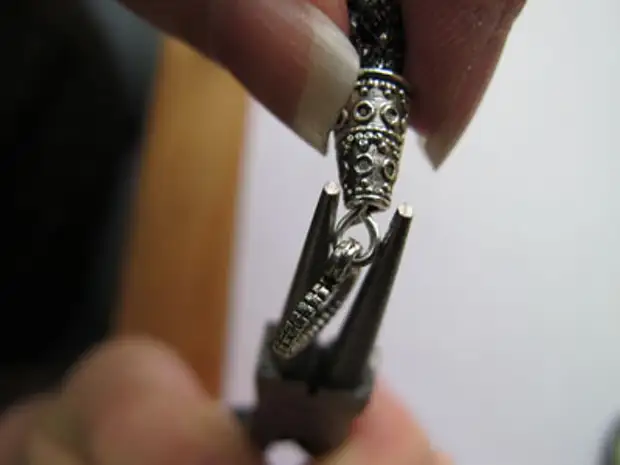
Cut the ends, leaving about 1 cm:
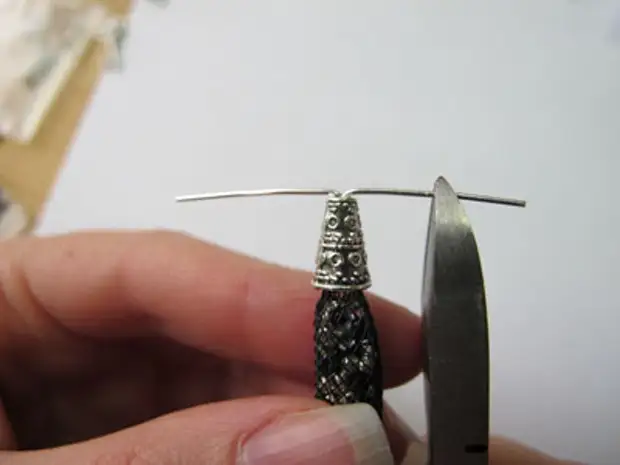
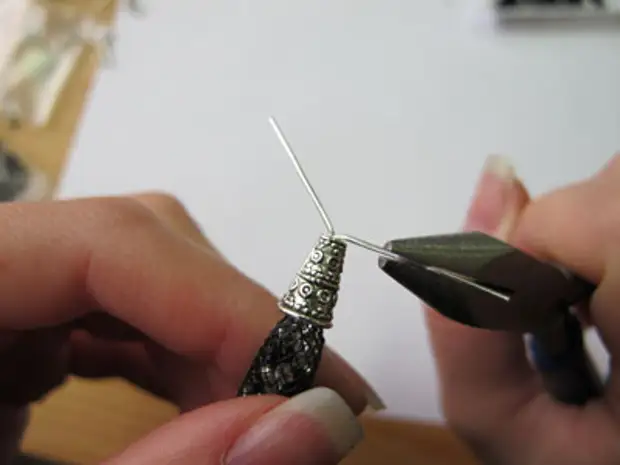
Casting the round-rolls for the edge of the wire, make a loop, bending it to the center, toward the hole of the terminal. Do not clamp to the end, it will be easier to attach the fastener:
Having done the same with the second end of Pina, we get such a heart:
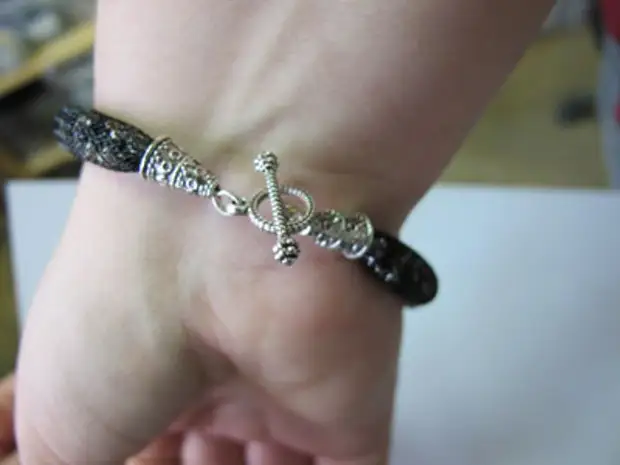
We dress on both covers consistently first fastener:
And press the loop:
Similarly, we attach the second piece of the fastener. It would be possible to make a loop of two ends of Pina at the same time. In this case, the fastener is easier to wear, however, when the ends bent in different directions, the fastening is more reliable, which is very important for bracelets.
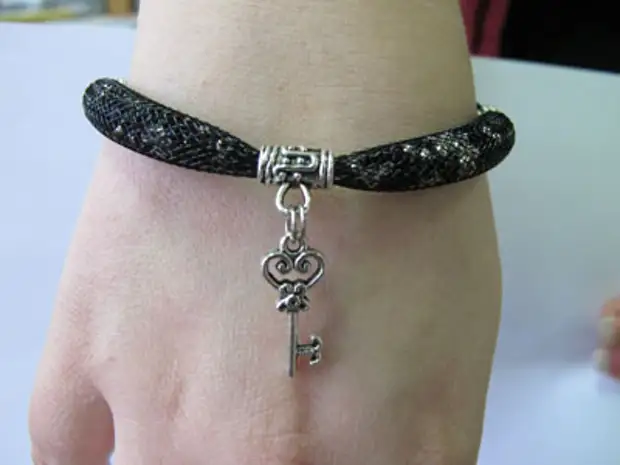
Stage 4. Attaching the suspension
We left to attach the selected suspension to the holder. For reliability, we will use a double ring. With the help of a special tool, we open the ring:
Put the pendant and holder on the end of the ring and stretch the ring completely through them:
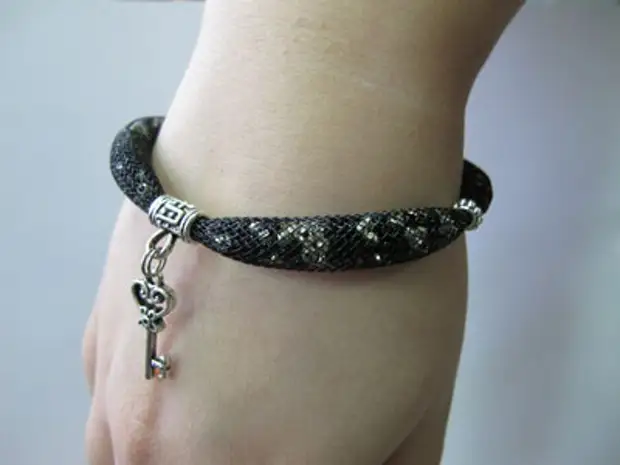
Our bracelet is ready:
Congratulations to all masters with the coming summer! We wish you more joyful events and interesting creative ideas!
A source