

Hello, expensive knitters, this is my first MK, so I say "worried", well, well, the exact excitement is - proceed !! :)))
Today I want to share one very interesting method of reinforcing the edge of the product, or rather the block of edges with pompons. This version of the strapping looks very original, is perfect for taking the edge of the plaid.
(In my case), I also encountered such a strapping on the edge of the cervical triangular handkerchiefs (eggs), perhaps there is still a bunch of things that can be decorated with this way! And we will knit here such a miracle Kaima ...


Immediately I want to apologize for the quality of the photo of the MK itself, I hope it will not prevent you from understanding the principle of knitting this strapping!
All the steps will show the most detailed as possible, for experienced knitters it may seem stupid, but I really want the MK to be available and beginner knitters who are difficult to get into the surface master classes!
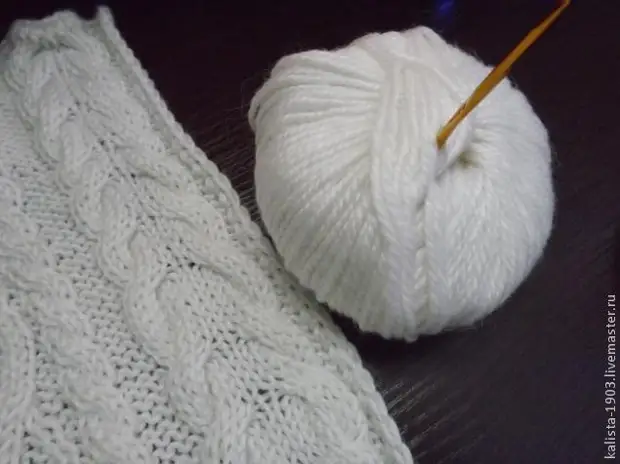
So we have such an inconspicuous edge of the product (in my case it is a plaid, the edge of which has already been preliminarily bound by crochet bars without a nakid), the corresponding yarn and hook.
Step 1 - Make an initial loop
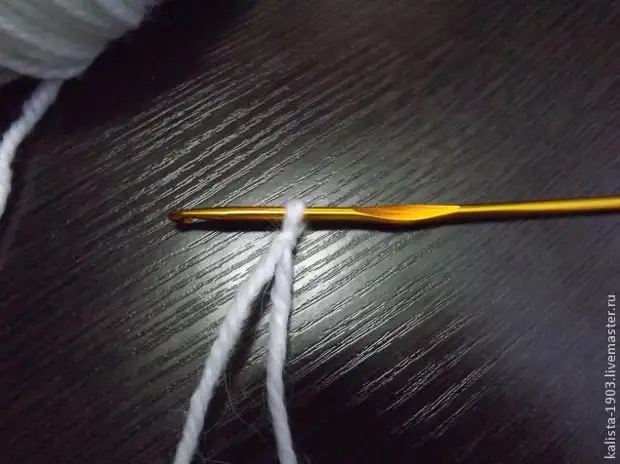
Step 2 - Find a corner of the product or the place from which your blockage will begin and stretch the initial loop in the product base loop
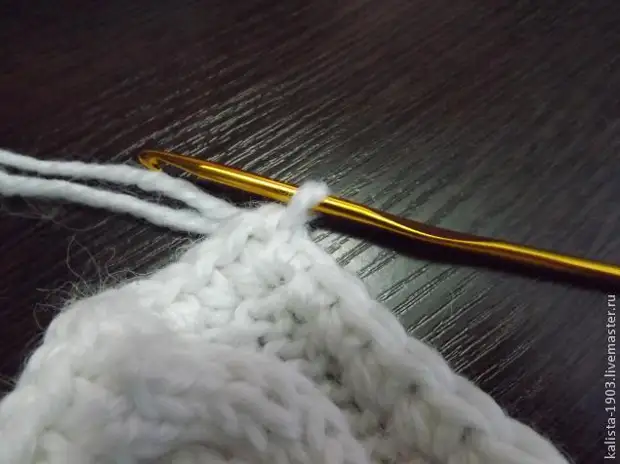
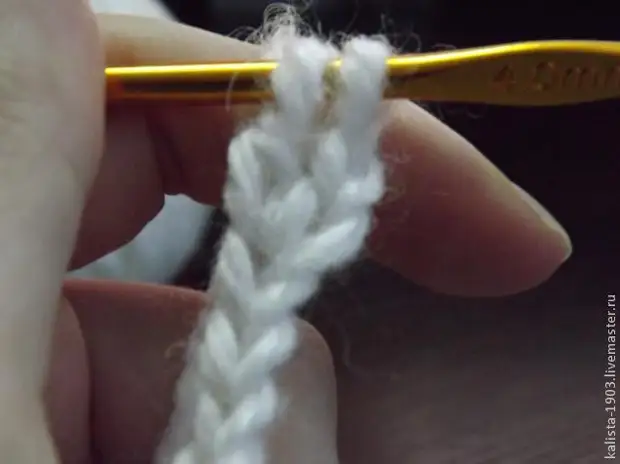
Step 3 - Slip the chain of 6 loops

Step 4 - Making the hook
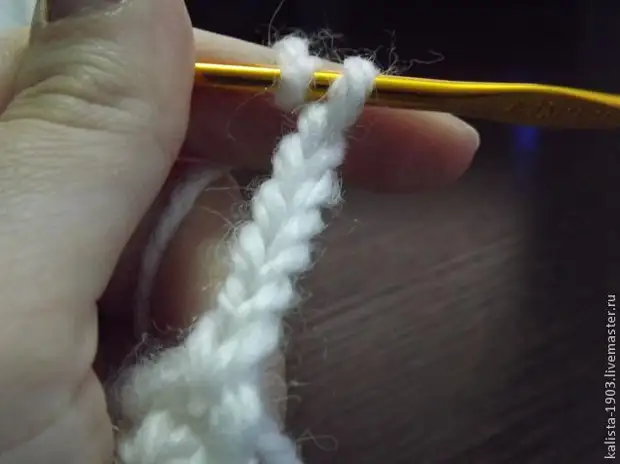
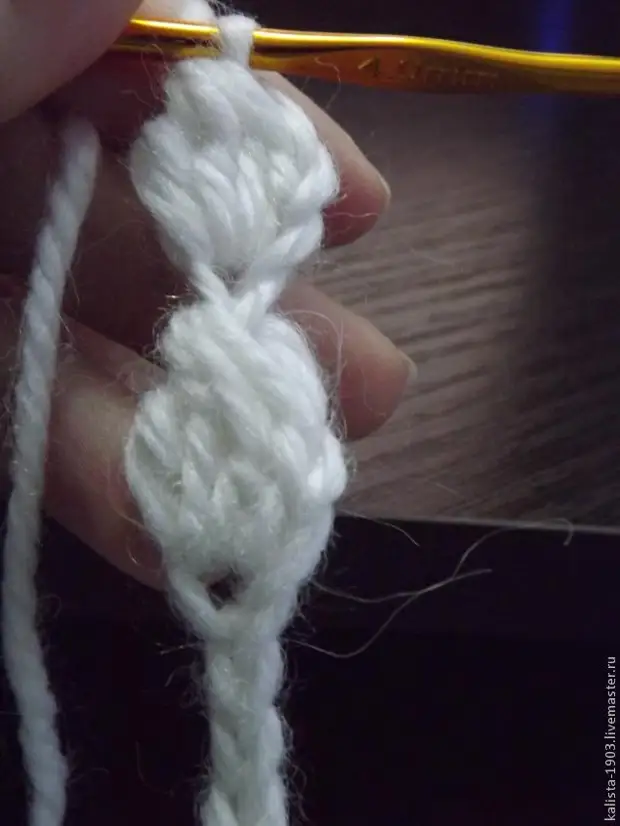
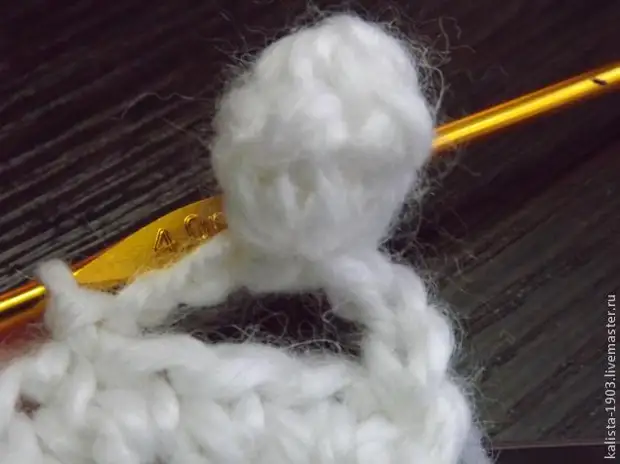
Step 5 - In the third shell of the chain, I have a column with an attachment, but with an open vertex, i.e. I do not take the last looting of this column, there should be 2 hinges on the hook.
Step 6 - In the same loop of the chain (in which the column has just been accuming with Nakud), knit 2 more columns with Nakad, with the same open vertices (without taking loops).

Total here: the first false column formed by 3 air hinges and 3 columns with one nakid with open vertices, total on hook 4 loops.
Step 7 - Capture a working thread and stretch it through all 4 loops
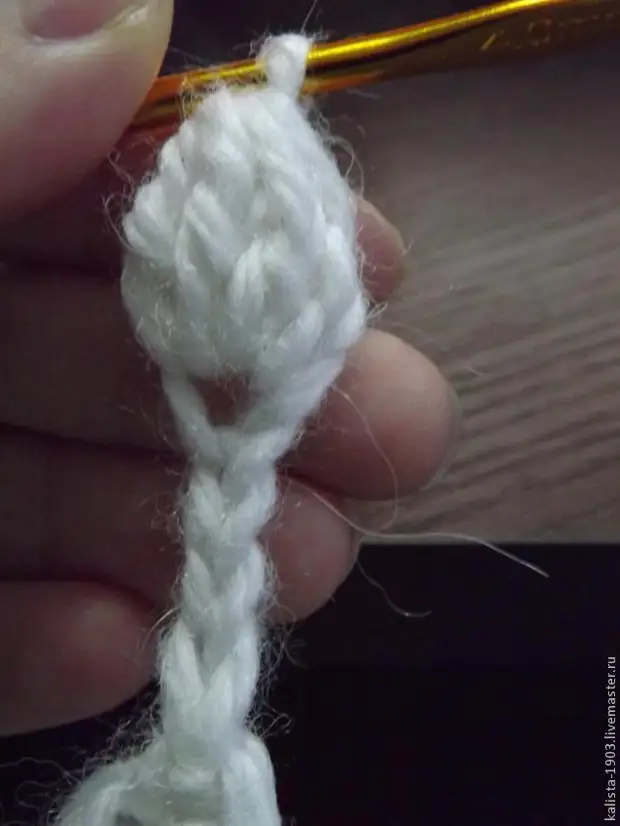
Here it turned out our first half of our pomponchik, and it will be from 2 halves, so further knit the soul mate.
Step 8 - Slip 3 air loops
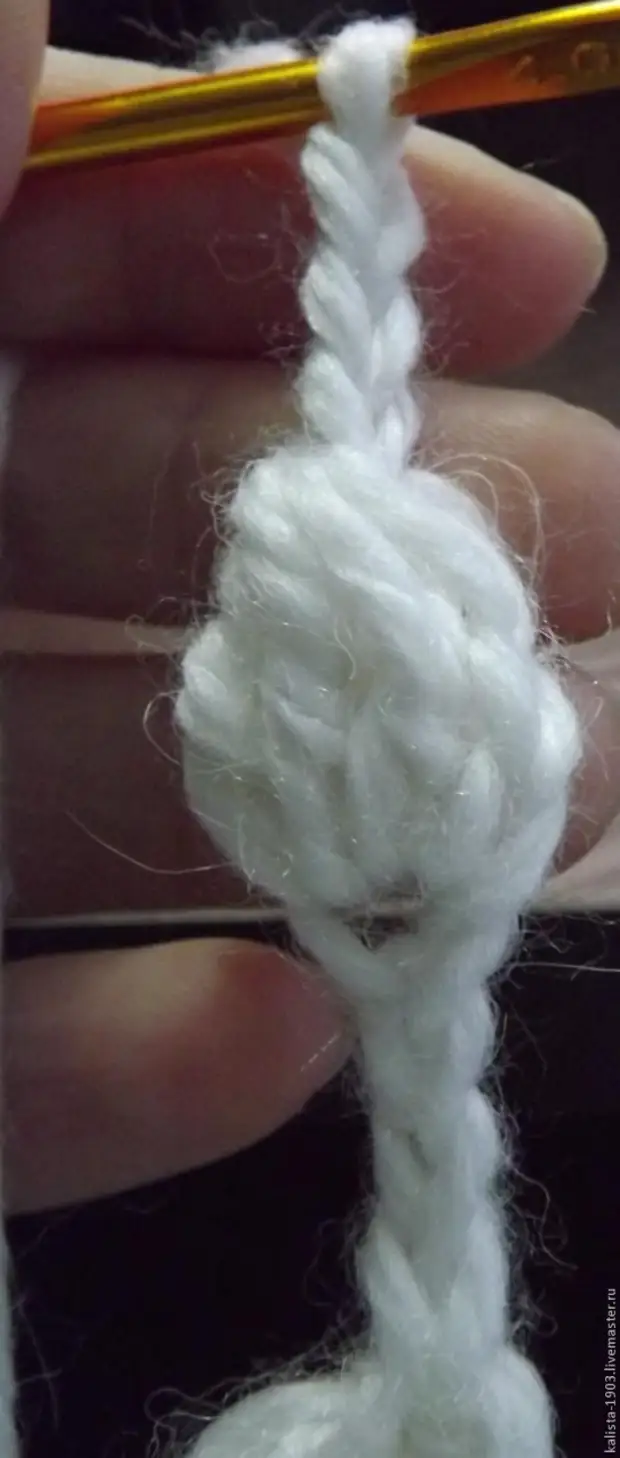
Step 9 - in the third loop from the hook, in the same way as for the first time 3 columns with Nakud, leaving the open vershocks, as I already described.
Step 10 - on the hook again 4 loops, stretch the working thread through all the loops immediately.
Here is our second half of the pomponchik, and in logic now we need to connect them (as in the kinder surprise 2 halves of the eggs :), it is so, for associations)
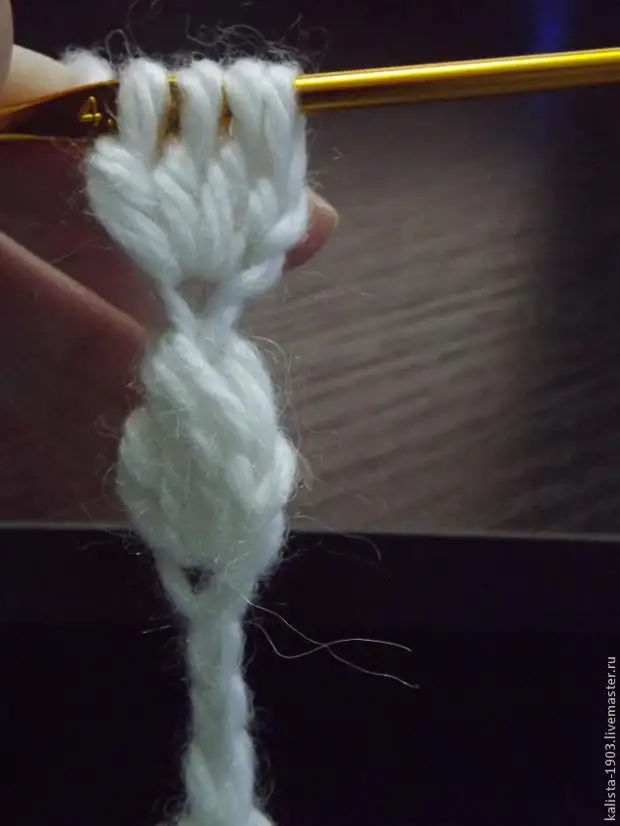
Step 11 - We are looking for a loop from which we have synthered the first half of the pompon and introduce a hook in it in two half of the loops.
Here she is
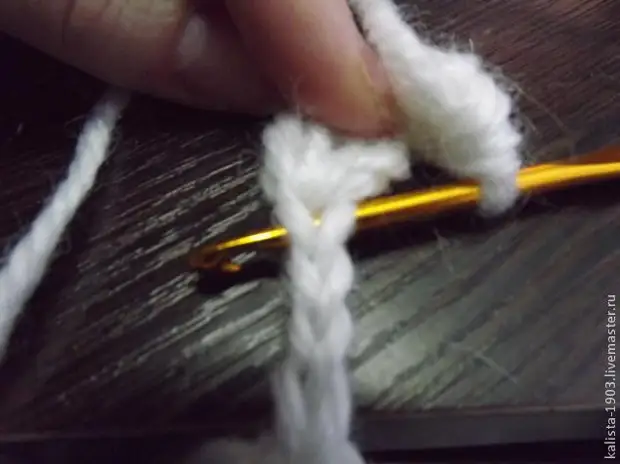
Step 12 - Next, as it were, connect the halves of the pompon, we capture the working thread stretching it through both hinges (the one in which the hook was introduced and the one was on the hook). There is nothing complicated in this, the main thing to try to do it with your own hands, and you will understand that everything is not as scary as it is described :)
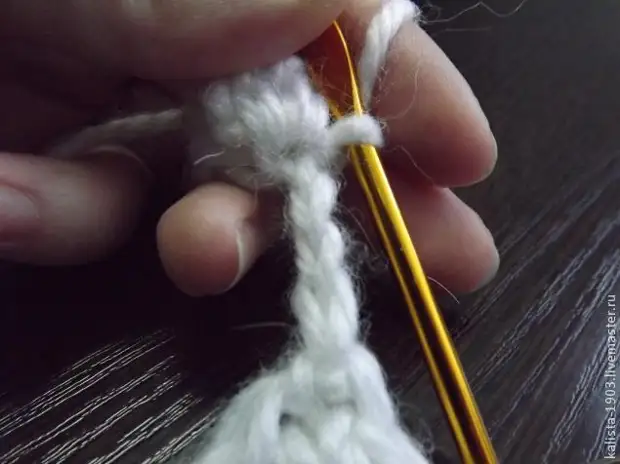
Step 13 - Knit 3 air loops, this is our chain on which and hanging a pomponchik. In my work, I make this chain of 3 loops, but you can and lengthen it as you want, then your pomponiki will hang down, and as an option you can alternate the length of the chain, then you will have multi-level pumps, in general this is the taste and your imagination .
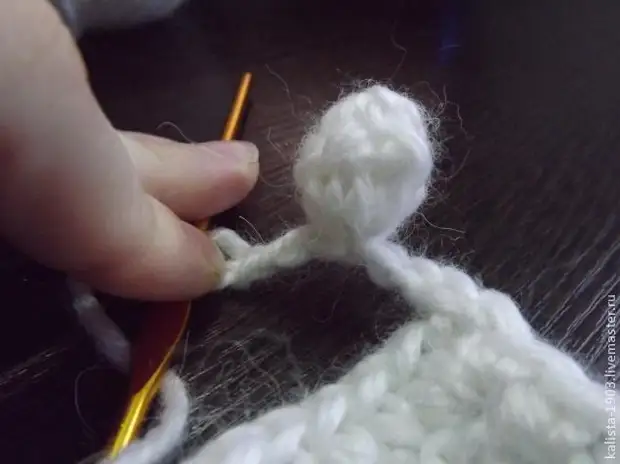
Step 14 - We need to attach a chain to the base of the canvas, I did it through 3 of the lockers of the base, but then I realized that for my product it was too thick and began to retreat 4-5 kettles, so it is also at your discretion. We attach the usual connecting column.
Next, the algorithm of action is repeated!
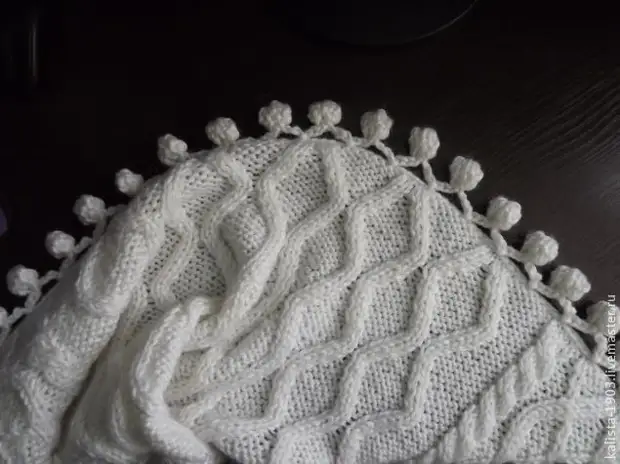
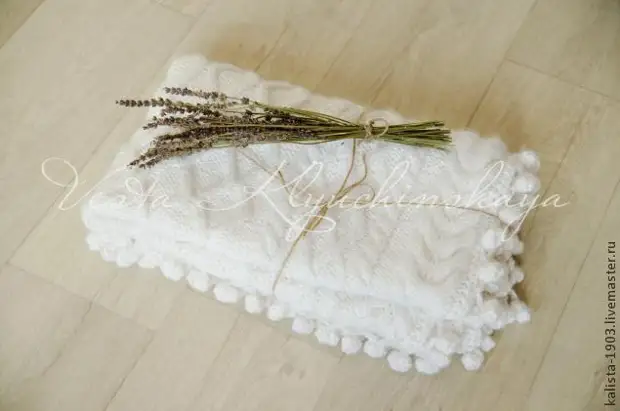
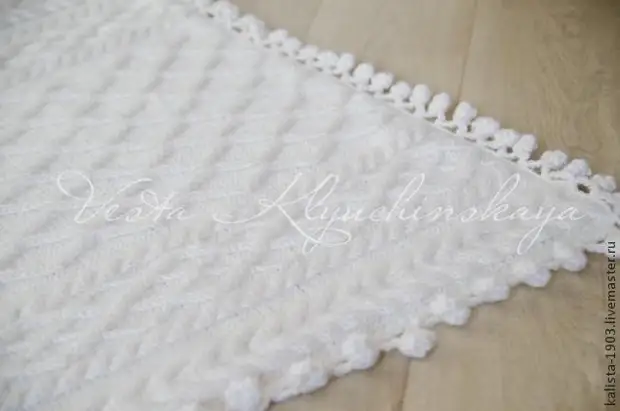
Well, here is the result, my product, the edge of which is rushing in such interesting techniques.

A source