
The author of the work is Tatyana Zibunova (Tanya-Zibunowa).

Finally, they reached the handle to the master class to create a larch.
For the first stage of the work we need:
1. Fabric (I used satin, but it is not fundamentally);
2. Flizelin (I have a nicer, but here again at your discretion);
3. Mononia;
4. Putting (I have fluffy fluff from the gamma);
5. Threads;
6. Wire with a diameter of 1mm;
7. Plaster in a roll, width 0.5mm or 1mm;
8. Pliers (I use pliers with elongated sponges in the work);
9. Pattern;
10. Well, of course, where without a sewing machine, iron and your magic handles :)
A slight retreat. In the manufacture of this doll, a clear goal is to make a master class, I did not pursue, just photographed the stages of work, so some moments were unscrupulous to me and in return, there will be many letters. Please understand and forgive!
Baister! To get started, we need to prepare the fabric, for this pre-her good iron. Then we sample with the wrong side of the phlizelin. When the fabric is ready, fold it in half, face inside, and move the patterns of details.
Here is my workpiece used for this doll:

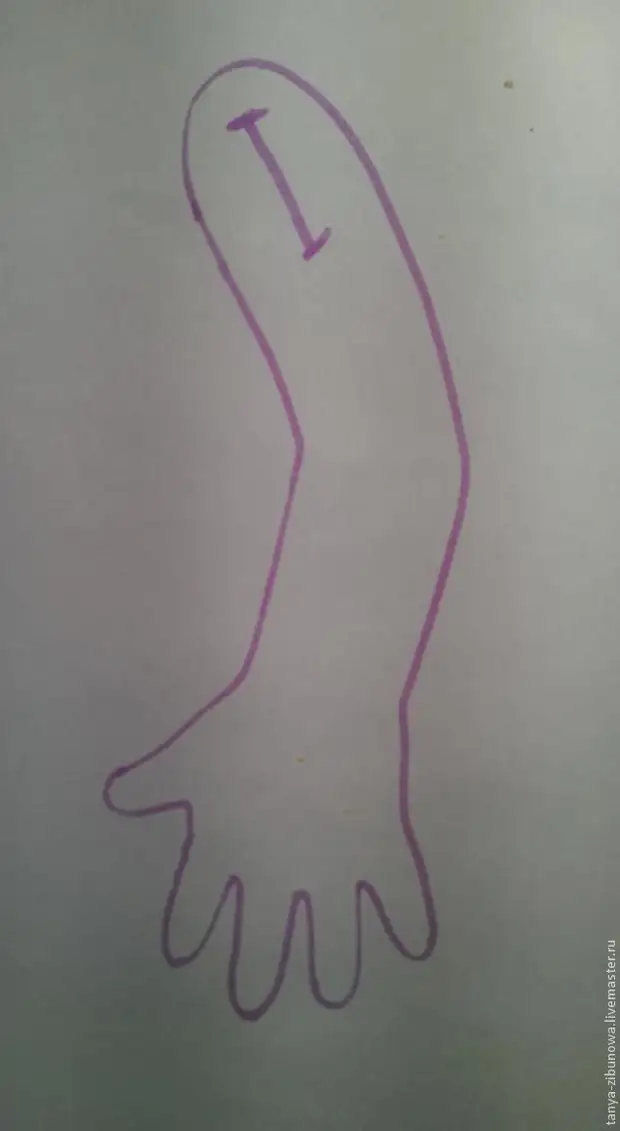
I buck it with the help of an endungent marker. Then, for convenience, stitch the cloth with large stitches between the parts, and you can start sewing on the typewriter. Label the details along the contour, except for marked places:
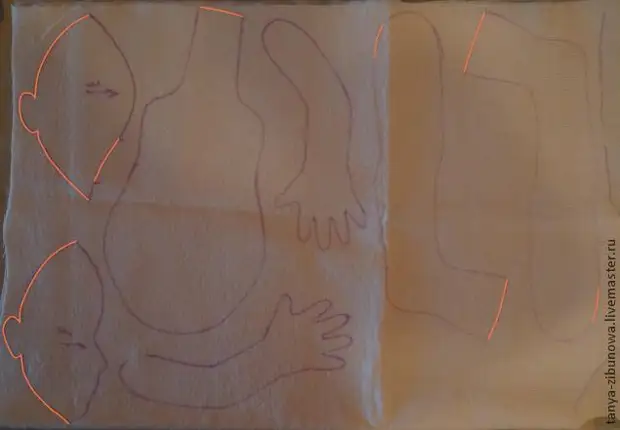
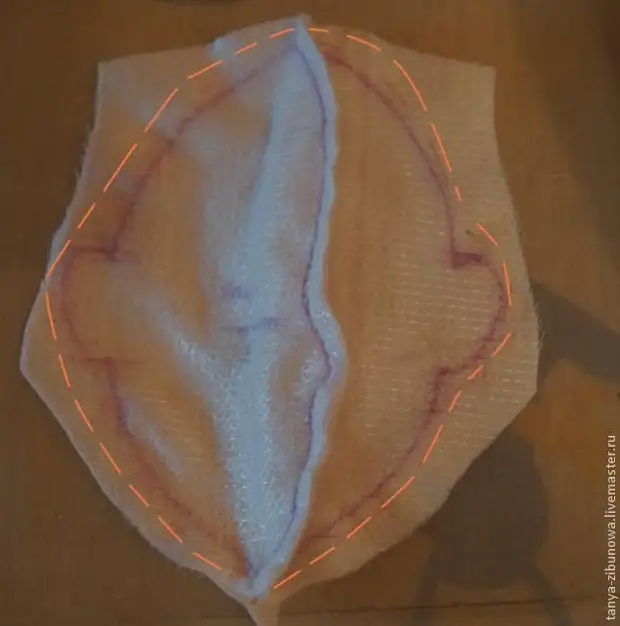
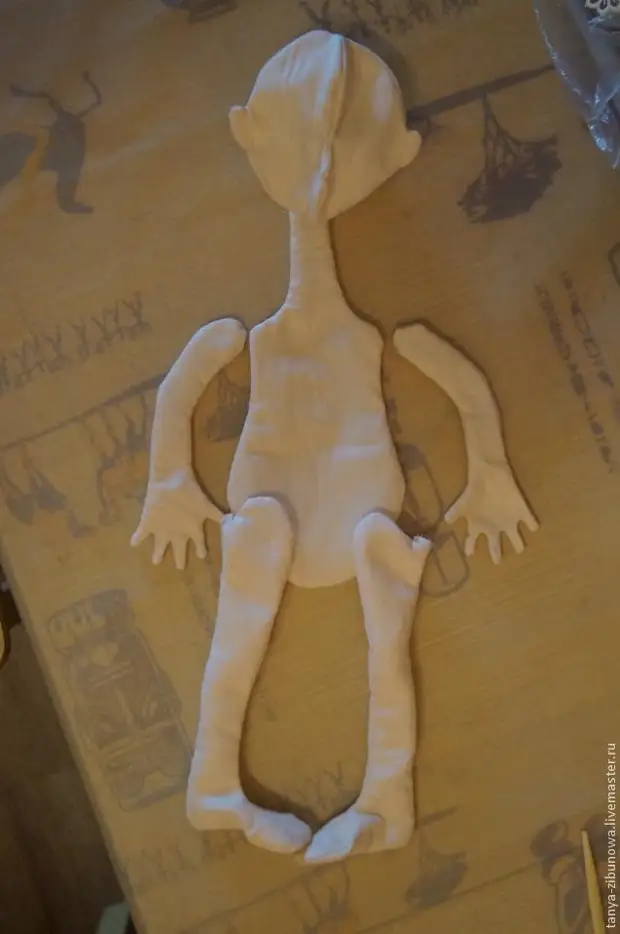
Now you can cut our details back from the circuit 0.5 cm. We lay down the legs, knobs and body (legs and handles will also refine after). We carry out the head;) It is necessary to fold the front and occipital parts, gently aligning the ears and grabbing a thread (you can not grab, but as practice shows, it is better to do it), and we flash:
Legs. We put the sock, we roll the pin, draw the contour, we flash, gently laying the seams.
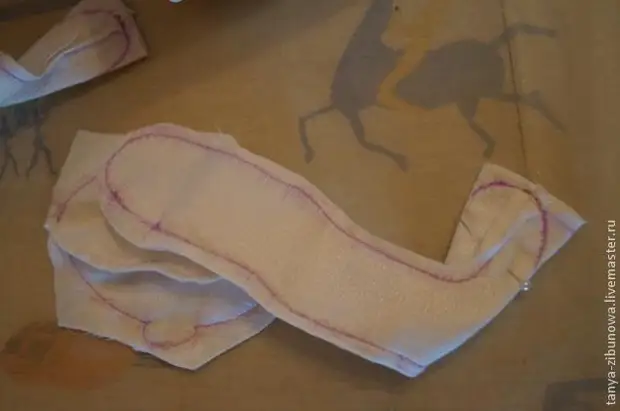
Now it is necessary to trim the surplus of the fabric and make small penetrations along the perimeter of the details so that the fabric in the future when stamping is not tightened in the places of bends. It is necessary to pay special attention to the fingers, the indents must be minimal, otherwise the framework is then there (in his finger) will not include:
Now, I repent, missed the moment you need to turn the handle. To do this, we cut a cloth in the upper part. Mirror, on both handles:
The holes must be medium, not small, but not large. Sufficient so that in the future the framework of the brushes passed through it. Great help in turning you can serve a conventional wand for sushi. Its tip is quite narrow to turn out even fingers, and not sharp enough to damage the fabric.
Soak:
After turning, many craftsmen stroke the details, I do not do this, in my opinion - to straighten the seams well with the help of a stick, then a tight paddling and framework all put in place :)
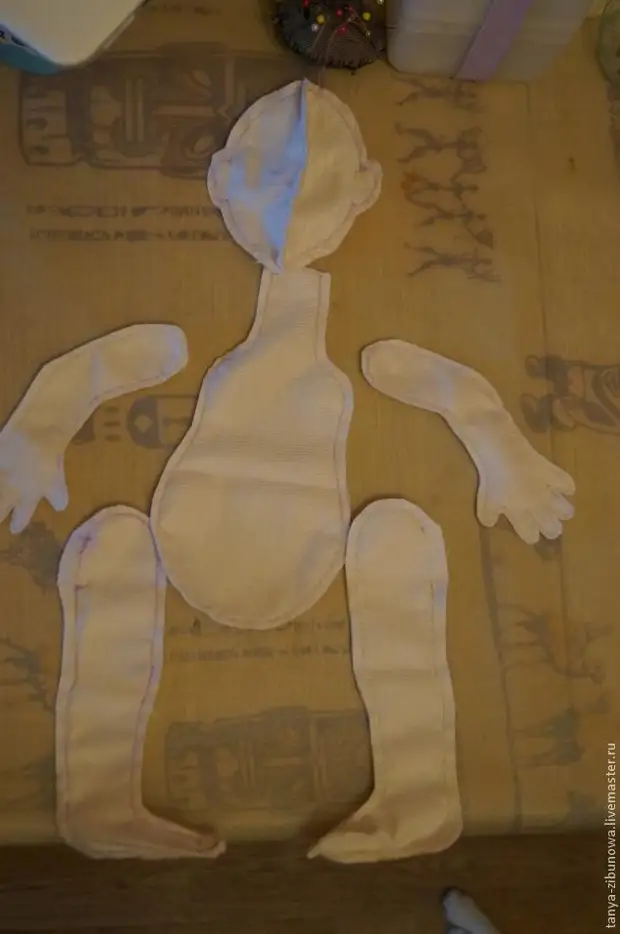
In this part, we, perhaps, still consider the manufacture of pens.
We postpone all the details on the side, we take wire, threads, pliers and leucoplasty.
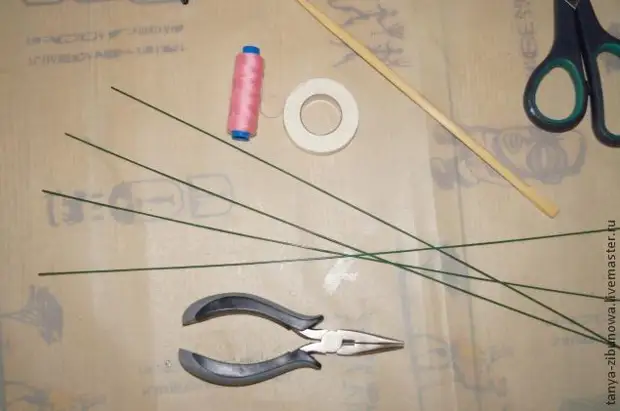
A little about the wire. I use floristic, it is sold by segments of 40cm, they are direct, suitable flexibility and convenient to work. For a start, we take two segments of the wire. Mean the middle and wind the plot of 1.5 cm long plot:
There is a slight digression. We need a leukoplasty for winding a wire frame, but instead you can use a pack (or wool), glue and threads. In a nutshell: a thin bed of glue is applied to the frame, then it's tightly wrapped with a package, overlapping with a thread for consolidation.
Then bending it exactly in the middle and begin to twist in the "pigtail", while constantly trying on the workpiece of the handle, stop at about the beginning of the brush:
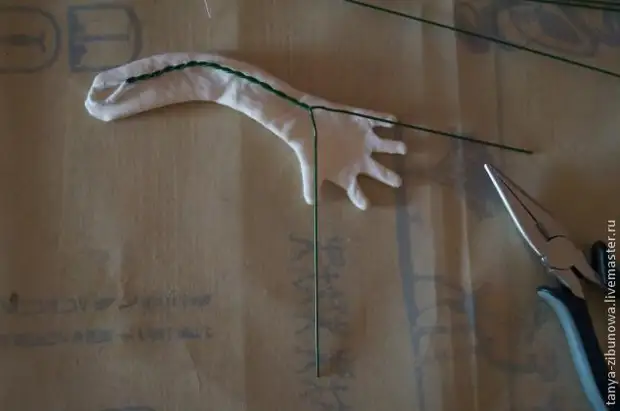
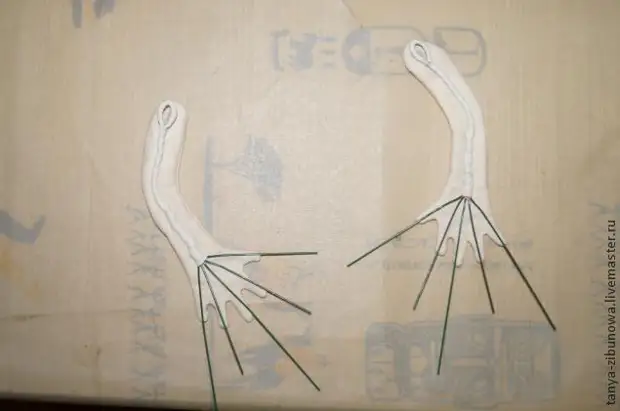
We got a loop from above, it is necessary for us in order to sew a handle in the future. Seving, we will carry out a thread through this loop, so less chance that in the future the pupae will occur tissue in the place of the frame of the frame. Further, we need to make blanks for fingers. I cut off "on the eye" the same pieces of wire, there is no certain length, it all depends on what kind of pens will be. We will only clarify one thing - measure it approximately and take with a margin of 1.5 - 2 cm, let it be better to be a little more than you need, the smaller. Tails of the wires from the frame of the handle can be used as fingers, so we remain cut off 6 pieces. Then it is necessary to neatly send the remaining three fingers to the base:
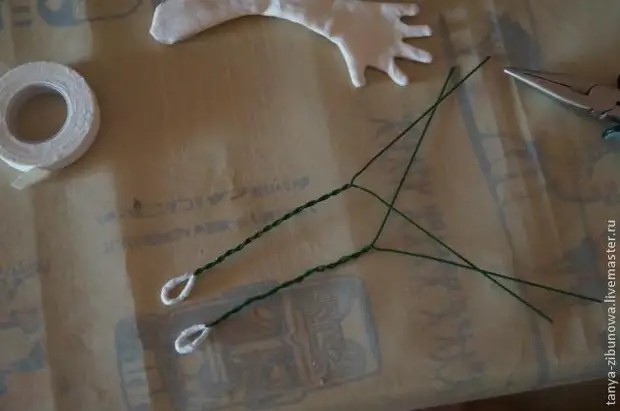
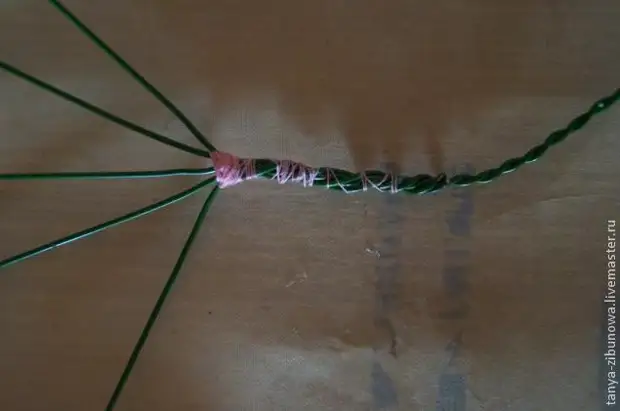
For reliability, fill the wire threads, winding every "finger":
Watch the frame of the handle of the leukoplasty. And you can crush your fingers, applying a handle to the workpiece:
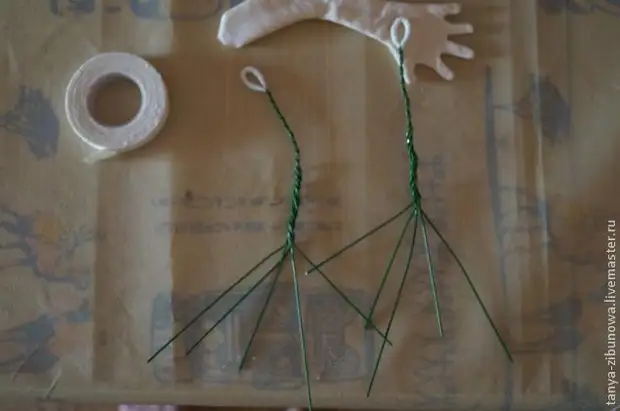
Cut the surplus wire. There is a small moment: try on the frame to the workpiece and cut the wire so that it is a little thoring, then this tail should be beaten. This is done so that the frame does not damage the fabric, the simple stump winding will not save.
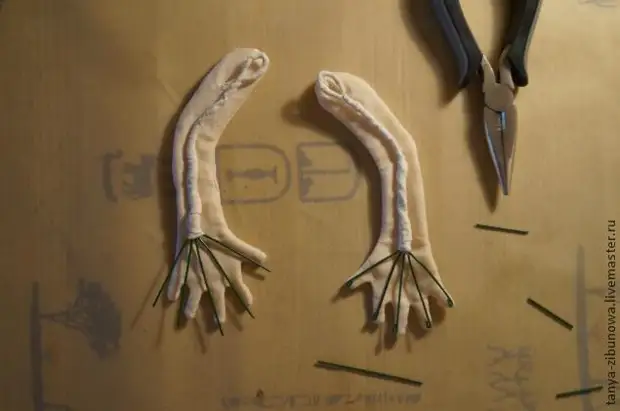
Now you can wind the leukoplasty fingers. And voila! Frame ready :)
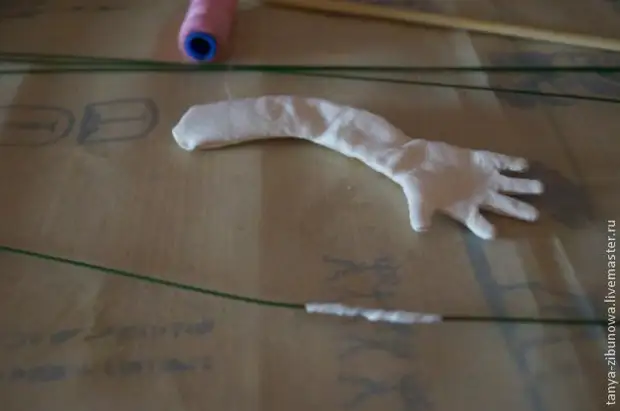
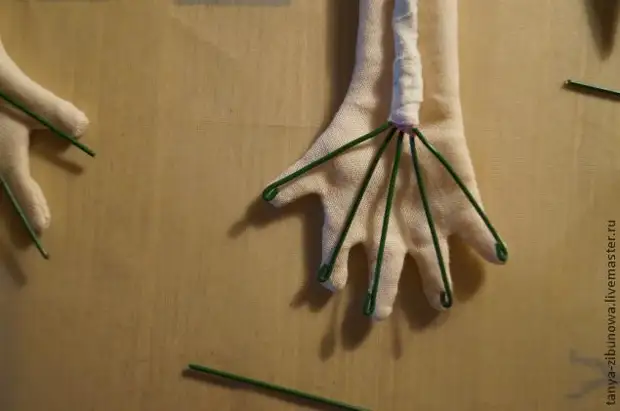
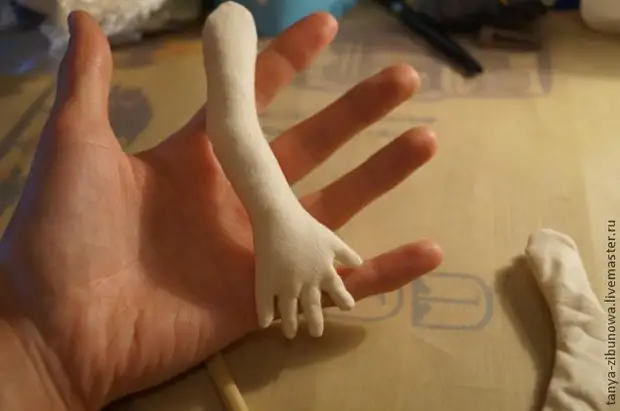
Next, we need to rotate the frame into the tissue blank. It is hard, I need a skill. It is difficult to explain, but about how to put on the glove on the hand:
Gently straighten your fingers, and you can start a stuff. Caution, slightly fill the handle with a packing. With the help of the same great and indispensable tool, sushi sticks;), evenly distributing it around the frame.
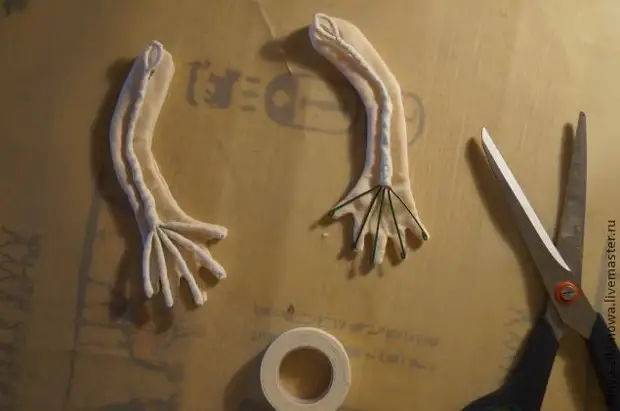
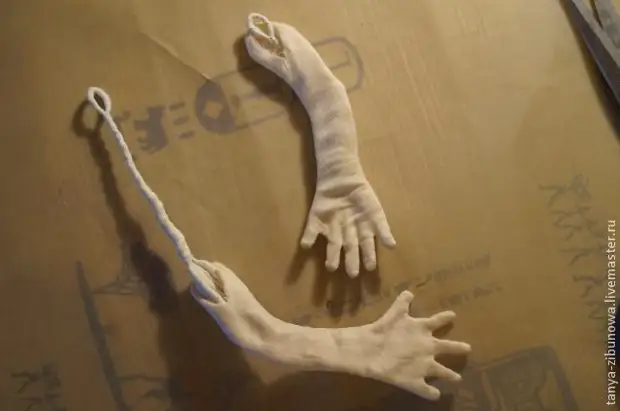
These are the handles turned out:
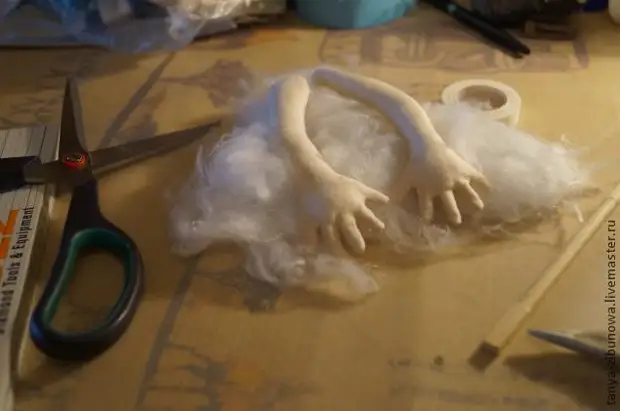
The hole through which the handle was stuffed and squeezed the frame, it is necessary to neatly sew.
On this, in fact, finishing the first part! To be continued...
A source