
The author of the article is Anna Kazantseva bracelets, earrings.
I want to share the idea of creating a comfortable, neat and quite simple in the performance of a wicker rim.
It will be ideal for Greek hairstyles and not only. Honestly, she herself came to him, but for sure that someone already such a row.
It all started with the fact that I decided to let go of a bang ... I was sleeping with the hairpins, ordinary rims are not for all hairstyles (I have long hair, and the dressings, for some reason, all the time they say to slip with me ...) So I wanted something Flexible, quickly dressed, comfortable and universally appropriate.
And so is he invented. (Not immediately, of course, there were other, less successful options)
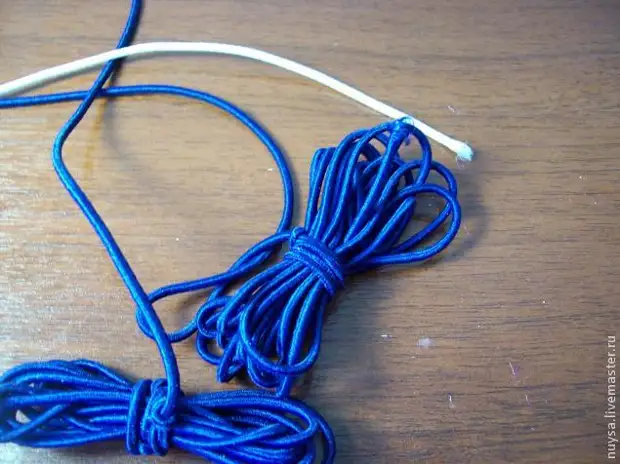
In stores for sewing are sold, here, wonderful gum cords (I do not know the right name) different colors and very flexible. (Diameter about 3-4 mm is the most) Here we will weave the rim.
Chose Macrame weaving from 3 threads, because It looks wonderful and in itself extremely elastic, easily stretches like a harmonica. (In contrast, for example, from the usual weaving "pigtail", tried - the rim gets thinner, tougher and worse on the head).
Stretch with a little effort.
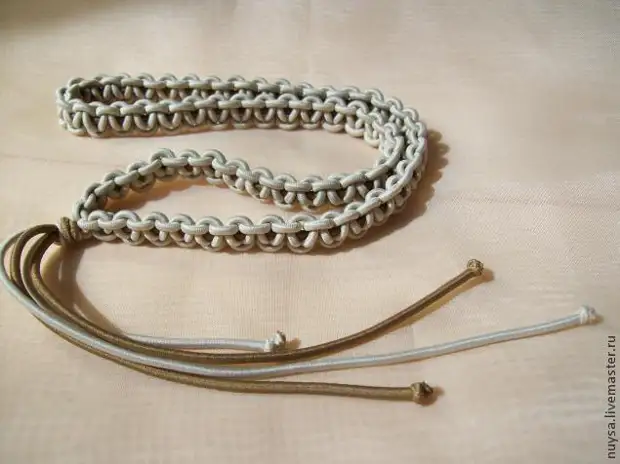
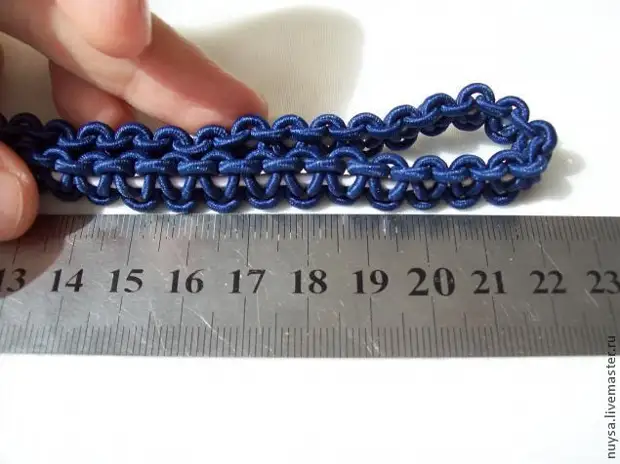
The beauty of the rim, which we wears, in the fact that it turns out a dimensionless, light, gently wars his head (not too squeezing) and apparently, due to the width of weaving, the roughness of the cord itself, does not seek to slip away. Confidently, if it is not enough or Excessive length, then it will take off, according to my observations, the average power length of 45 cm in the deployed form.
Go to weaving
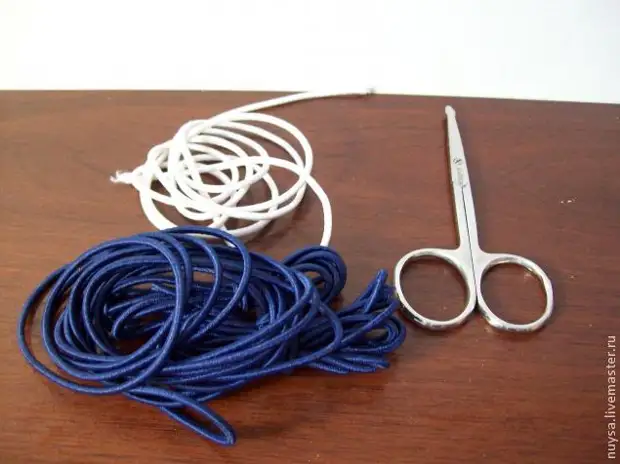
We will need for the manufacture of one rim:
1) cut 0.5 m cord (will be the basis)
2) Cut is a 4 m cord (it will be braided) of preferably different, contrasting colors.
3) any scissors
4) patience and convenient place. It is necessary, one end of a short cut sliced to something (I chose a battery, not too aesthetic place, but it is very convenient :)), and the second end to tie on the waist. Then hesitate more comfortably so that the cord stretches slightly and you freely delivered before it starts.
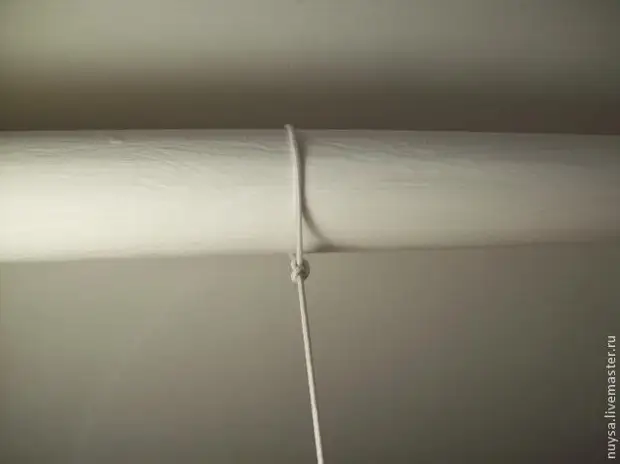
Now we take a long cord, we find it the middle (fold in half, it is not too accurate) and in this place they tie the usual nodules on a strained basis.
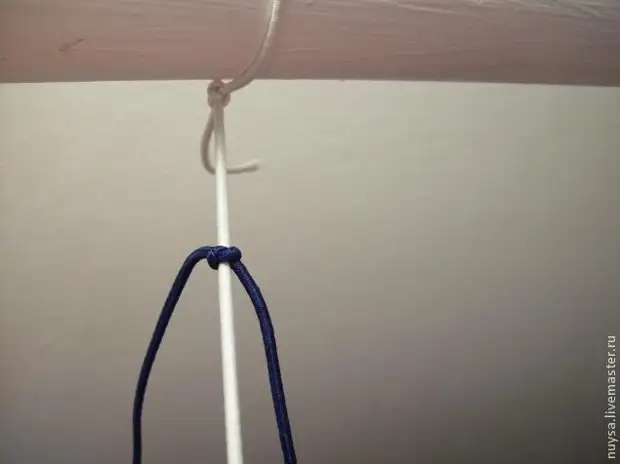
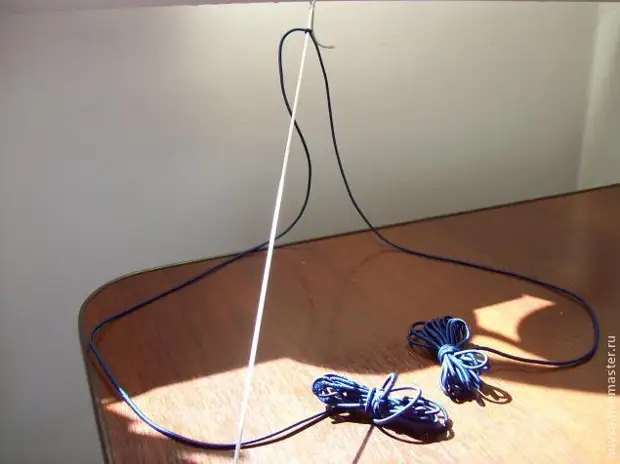
It turns out, on each side 2 meters of cord (inconveniently plays), twist the part of the hanging cords, leaving 30-40 cm on each side. (As needed, then we will produce).
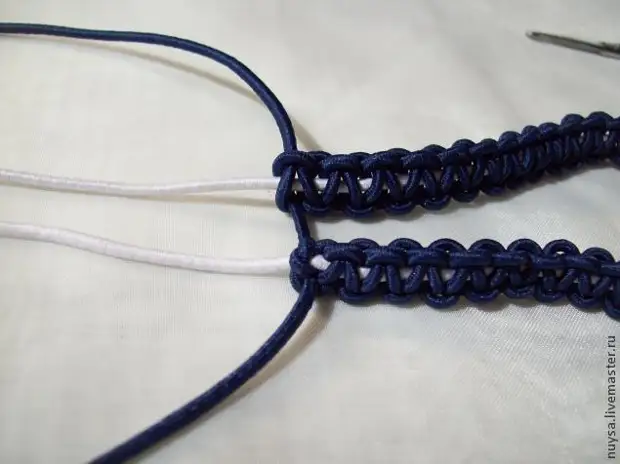
Weaving consists of alternating the right and left nodes.
Right knot = Right thread cladding based on , but Under the left and left thread goes For the basis , but On the right:
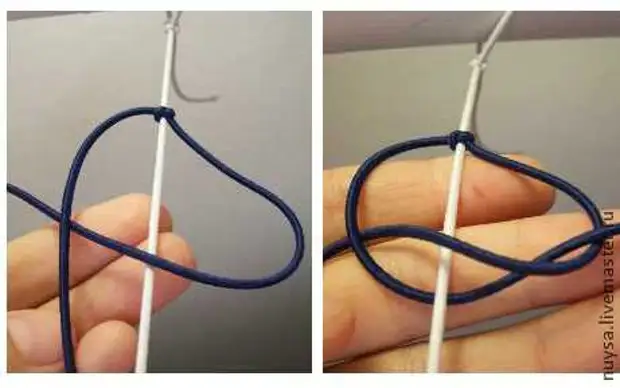
Tighten - ready! (not too much)
Left knot = left thread goes based on , but under right
And the right thread goes for the basis but on Left:
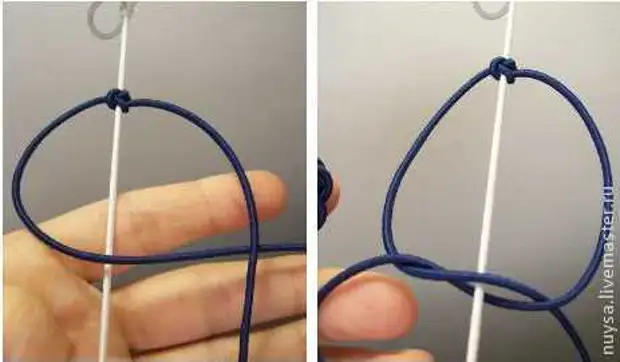
Tighten.
Other times right and left, but on short threads for considerable visibility:
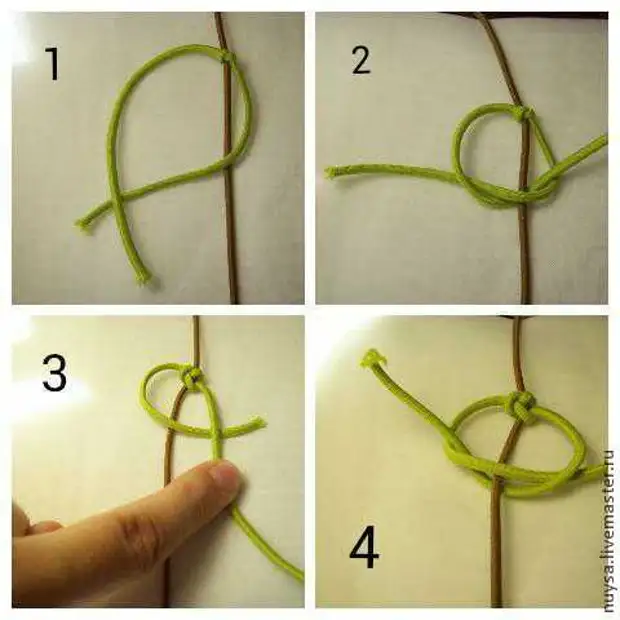
Right knot = hanging on the right cord on the Basis, N. under left,
and hanging on the left, in turn we bring under Basis, N. on the Right cord
Tighten.
Left knot = Left cord on the Basis, N. under right and right cord under on the on the.
Tighten.
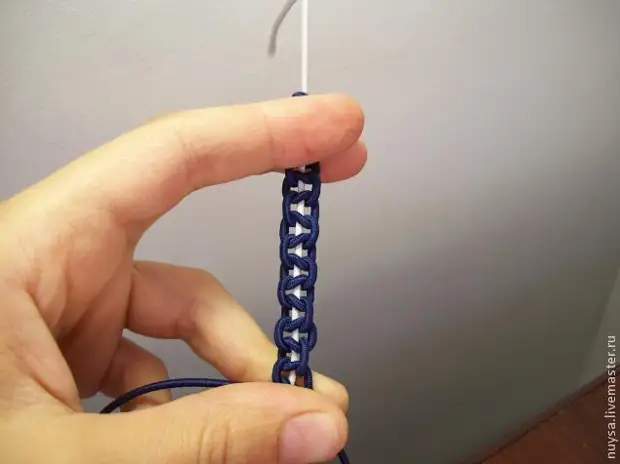
Through several nodes, such a train begins to be charged:
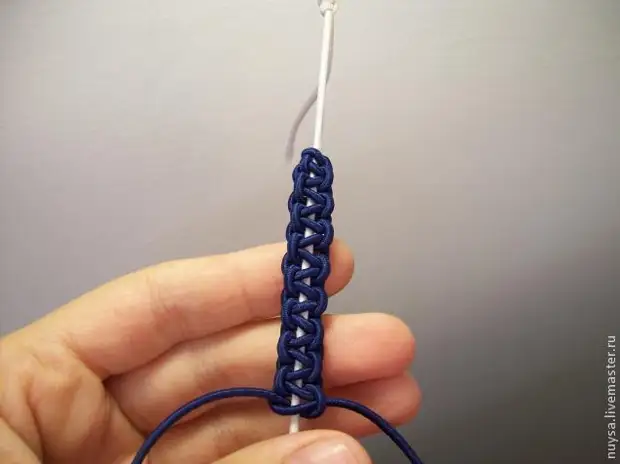
And in the same vein 45 cm, you can try on yourself.
So the finish straight! We fold Rovelessly (so as not to twist) and one thread from the end pushing with something to the loop at the beginning.
Then I tie the whole edge into one tight knot, cutting off the tails in taste and at the end of each thread I make a nodule. (This is seen in the photo of a beige rim).
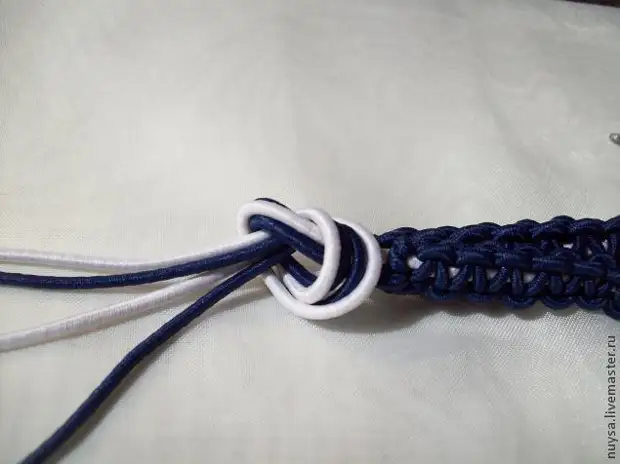
Voila!
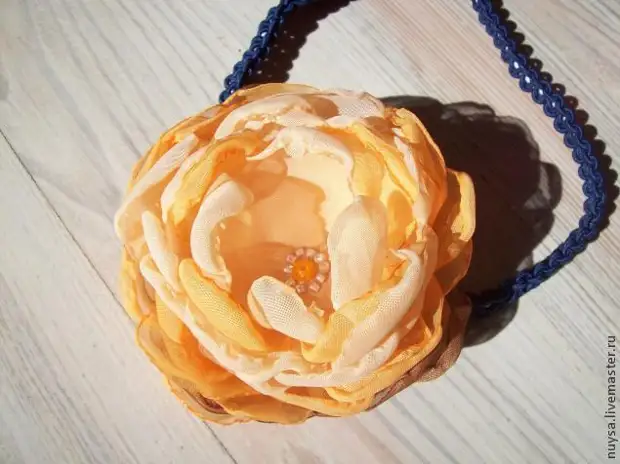
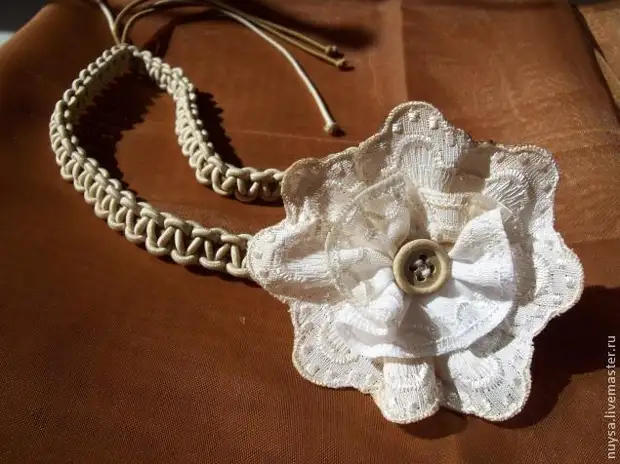
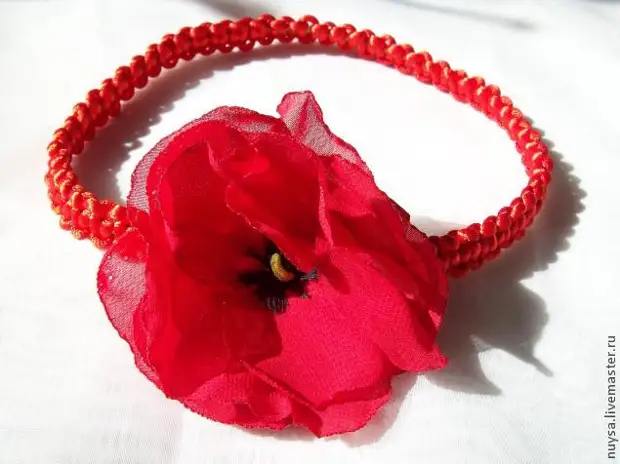
Here he is already with a flower and without tails. The tails can not be left, then instead of a large knot, the ends are well sewn, but the "beauty" of this place is hiding between the flower / bow / ribbon / lace and the lining, about it below.
You can decorate the rims for every taste, briefly show how I decorate my own.
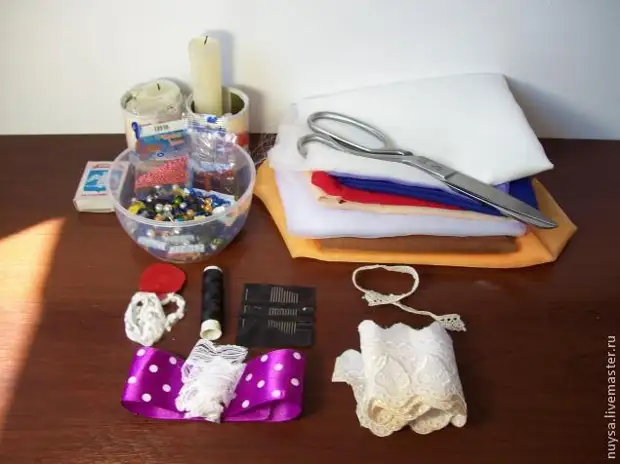
To decorate, I needed:
1) Several small (10-15 cross-cm) of the lining tissue of different colors.
2) Good scissors (for fabric) and any scissors (fed wick)
3) matches (lighter)
4) Candles
5) Small decor to taste: beads, butt, ribbons, lace
6) Threads with needles
7) Slices of suede, leather or felt for overlays from behind.
Now the flowers made of thin tissues - organza, silk, chiffon, veils are very common. I also like me very much, I made a somewhat.
On the Internet there are plenty of detailed master classes for the manufacture of such colors, and mine is not about them, but there are several nuances (which I have not seen information or disagree), which for ourselves noted. (IMHO)
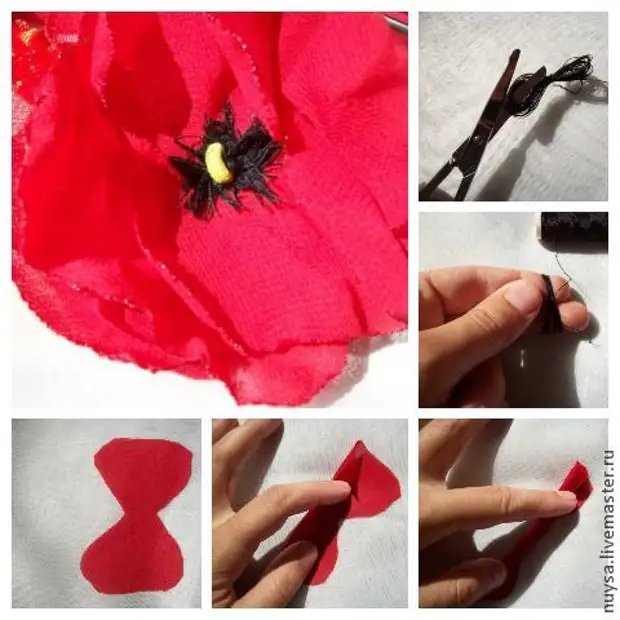
1) I cut separate petals or four hundred without all patterns. I take a cloth folded in several layers (8-12 times) in the form of a square, I grind the needles diagonally and On the eye cut out.
And not because the laziness is messed, but because the more careful = the same petal, the wrongful = refined, or something, I got a flower. And, the more I did from the hand, the more natural and the result was characteristic.
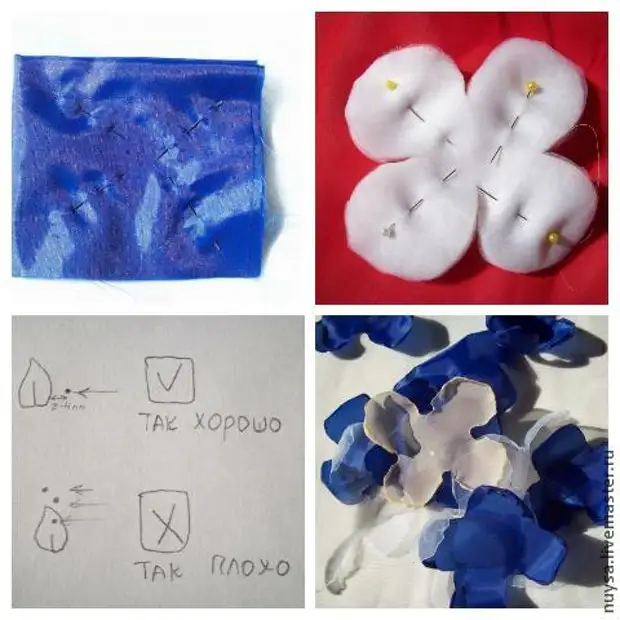
2) peeled with a silence over the candles, there are also a few moments:
- The wick should be short that the flame is small (not ink, not paled), the size of 4-5 mm appeared to be optimal for me, as the phytel gripped it with scissors (the flame can not be hung).
- Believe fabric you need to somehow side at the bottom, where the flame is bluish. Not close! At a distance of 3-4 mm from the fire, the fabric is already starting melting and rolling. If the fabric is too thin and I misinterpret it incorrectly, it lightathes it (here this white synthetics came across), and good fabric was not burning, but if it was highly brought to black.
All the details stitched and decorated with beads to taste. The more leaflets and stronger they are twisted, the closed / lush it turns out the flower, and on the contrary:

Very cute flower came out of lace (for my little princess):
I took such a lace, (in advance exacting in a strong black tea, I use it to decorate boxes with work),
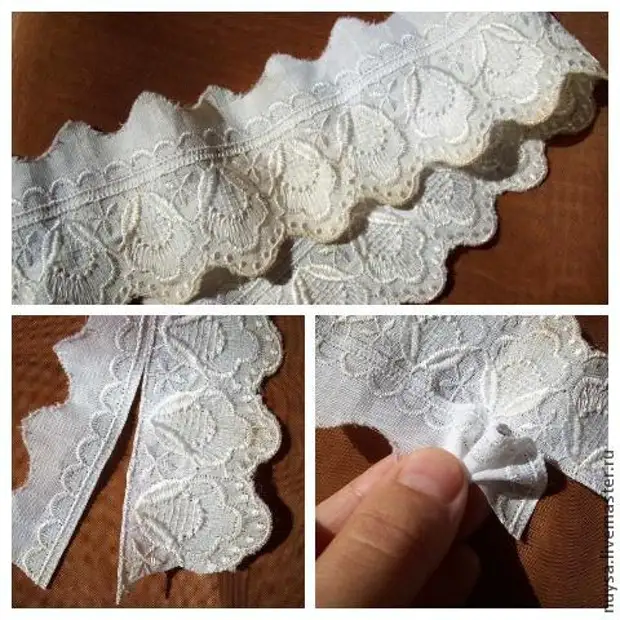
Cut out the necessary details, a little bit of the edges, folded the flower, stitched and go to the center. Voila!
And to the purple dress - the rim with a bow (as did did not shoot):
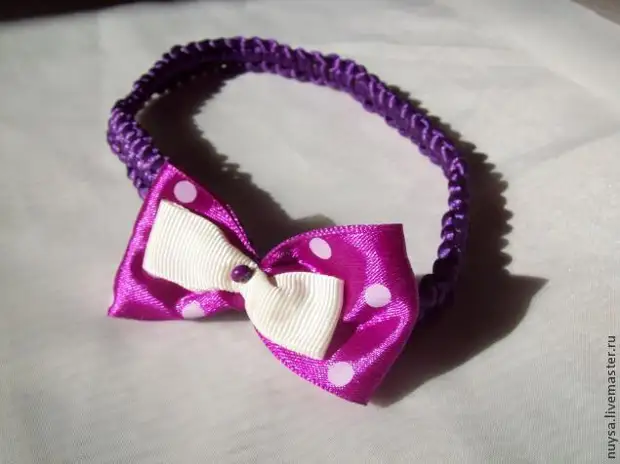
But here, as in history with red, my mistake - I first tried silk cords for the braid, they are slippery - the rims are worse on the head.
Mac did so:
- Form of sheets is a bit different, the amount is a bit (6-8), because of the poppies that I saw in nature are not very lush.
- folded as in the photo and was stored so that they became a little mint, sewed a middle of black strings, and in the center of the green bead.
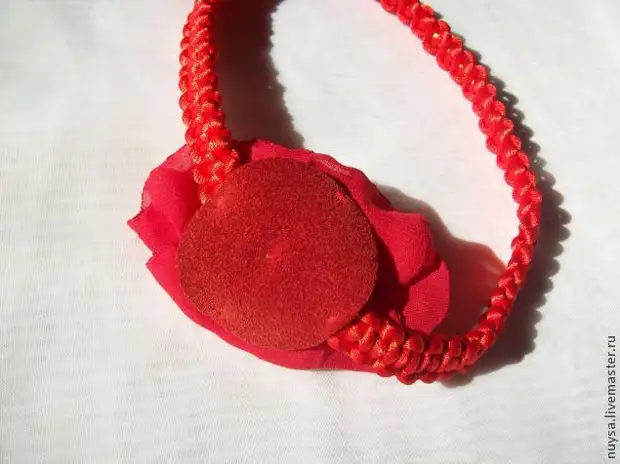
As a result, something that decide to decorate the bezel, sew up to it, and the revolving "beauty" can be hidden under a neat suede / leather / felt circle. Personally, I prefer to sew what to glue.
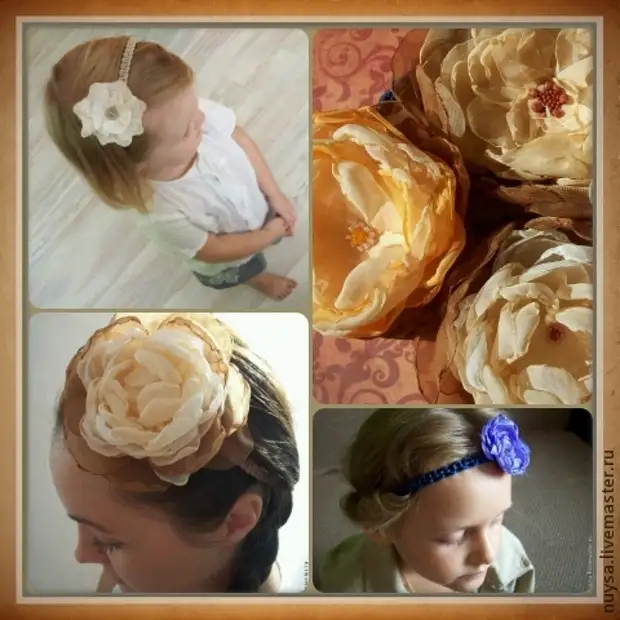
I think it will be relevant and in anticipation of the new school year.
A source