
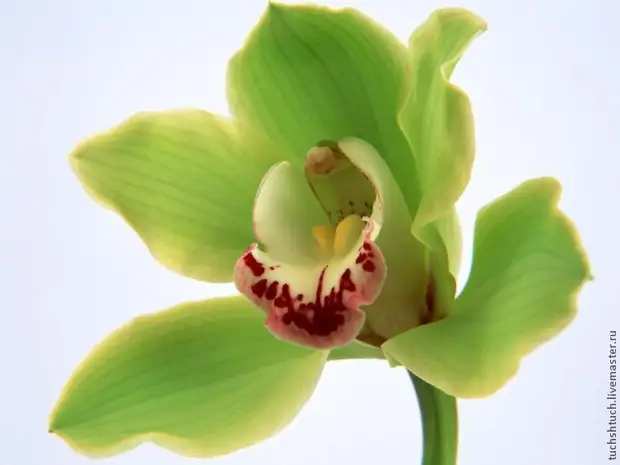
To start a photo of a live flower, which I called somehow a long time to make your very first cymbidium.
That was the result!
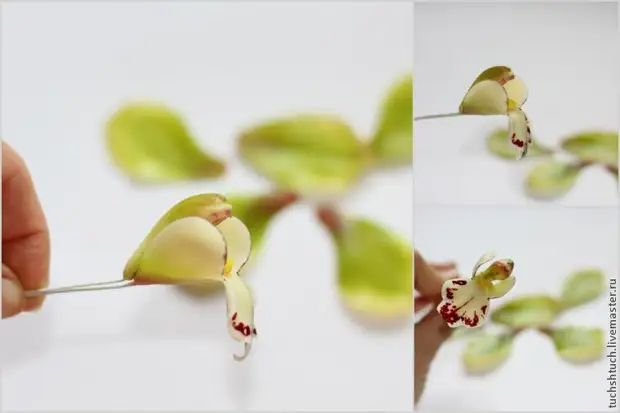
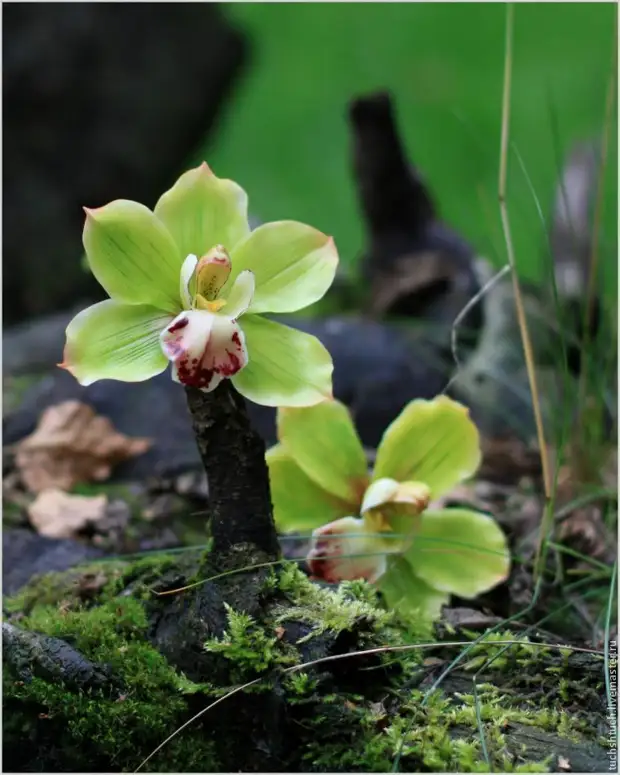
Now I propose to blind here such orchid!
This is a photo of a live flower.
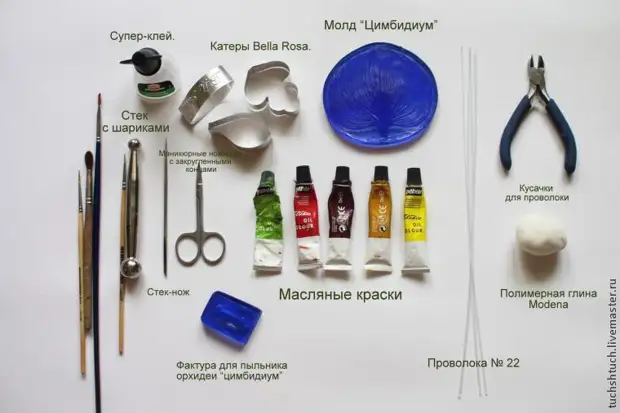
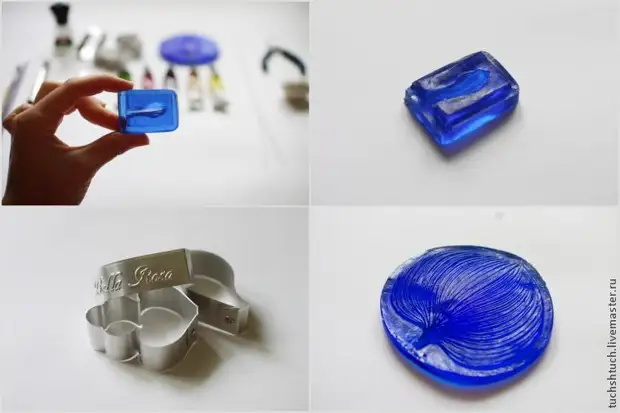
The main materials required for modeling.
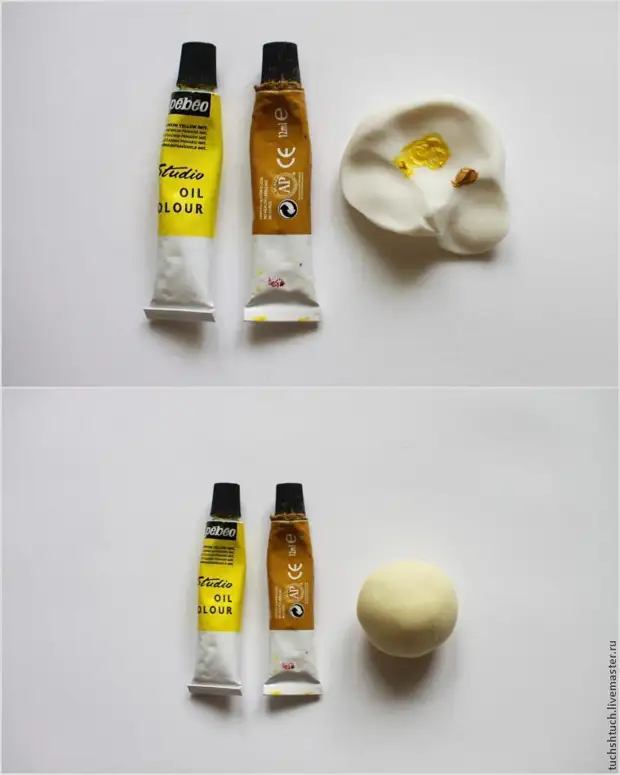
We mix the color of clay. Add a little yellow and even less ocher.
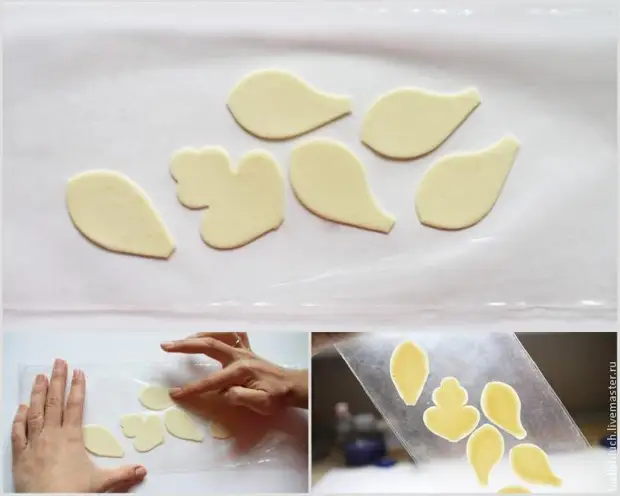
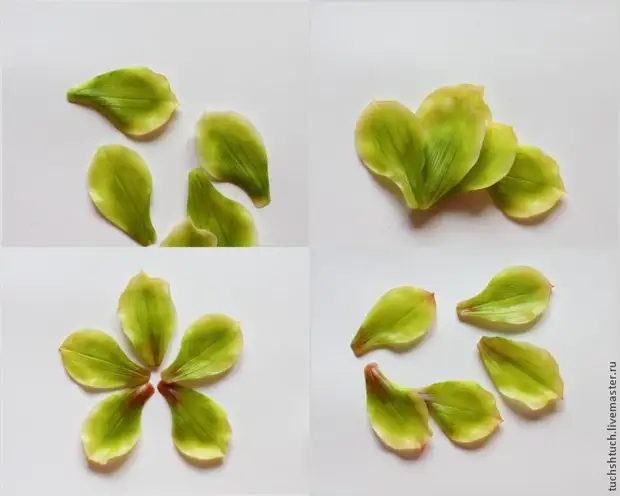
Roll over clay on the pasta machine in thickness number 6.
The thickness of the rolling on different machines may differ. We need that after drying the petals were dense, like a living flower.
Be sure to thin the edges around the perimeter of petals (visible on the lumen).
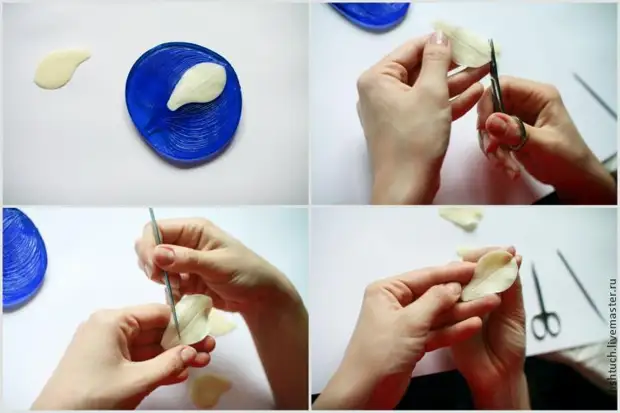
After pulling the petals from the film, they need to give a little to dry, literally less than a minute, then carefully laid them on Mold. (Mold can be pre-lubricated with baby oil so that the flower item does not stick).
Then we roll around the edges, making them thinner and more wavy.
The tip of the petal can be made more acute, then adopting it, giving the necessary shape with his fingers.
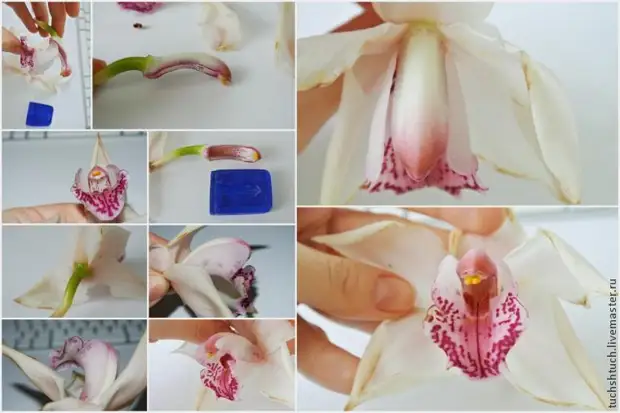
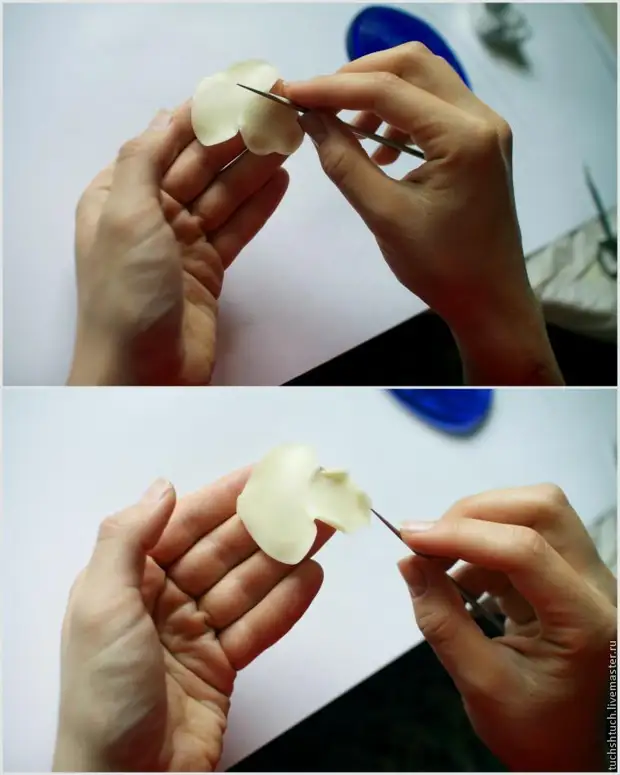
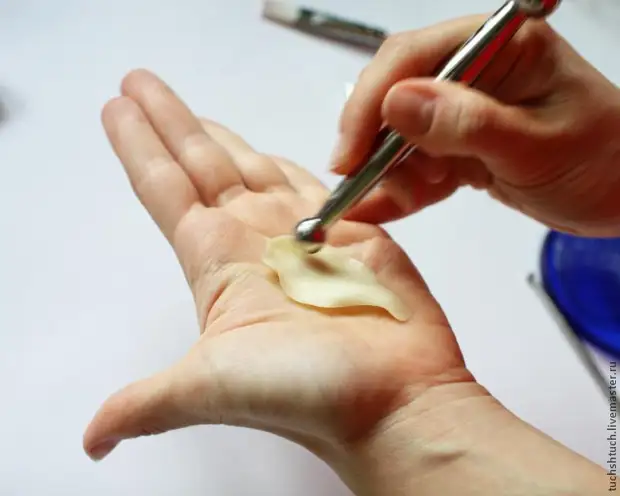
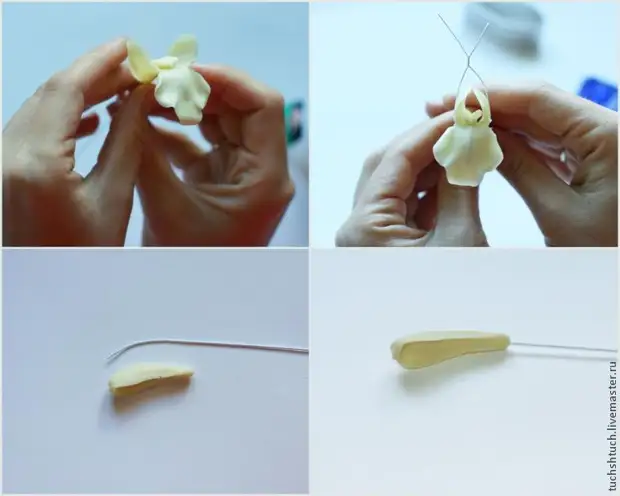
Now we proceed to the formation of the lip of orchids. The edges of the part should also roll out and drown.
In the places specified by the stack, I rolling out the clay slightly, spending the stack to the right and left, so that the fold is formed on the front of the lip. After we leave the item to dry a little.
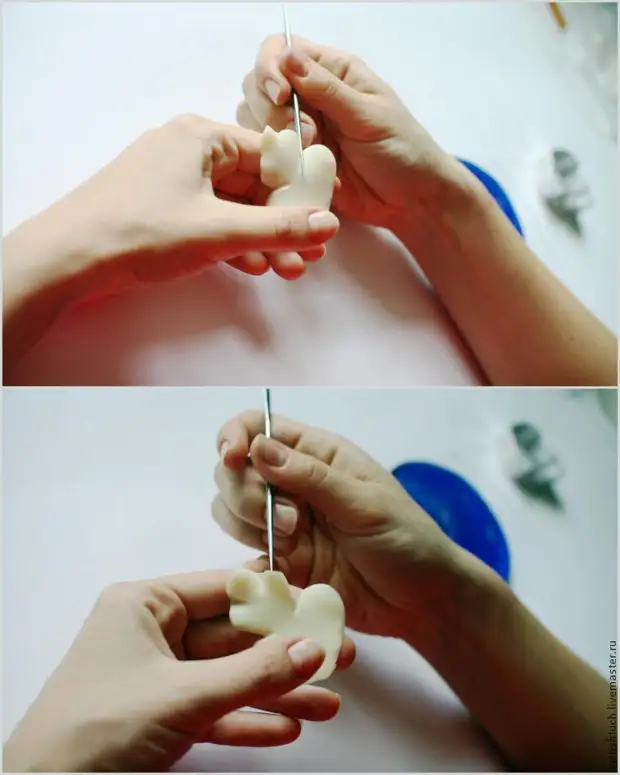
Then carefully, so as not to break the clay, as if screw it on the stack, as shown in the photo below.
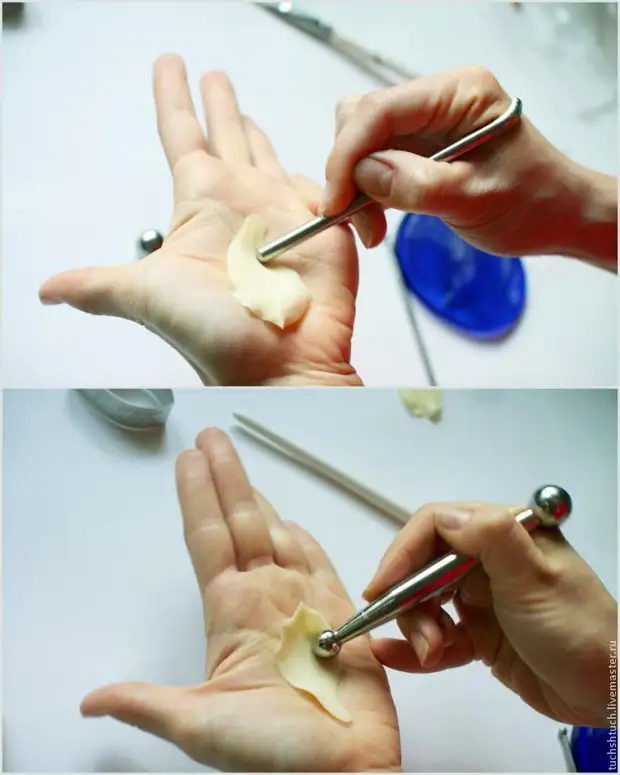
We form the lip of orchid. Stack with balls from the edges to the center by spinning the edge. We do it with a light pressure on the raised part. Still with a small ball on the back of the detail make a small bend. So the lip will take the right form.
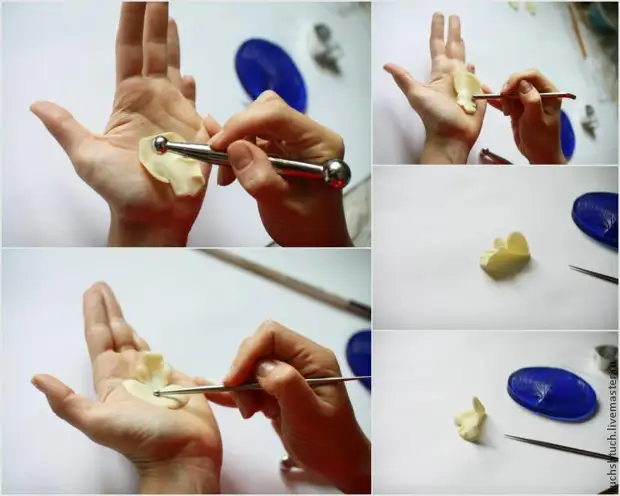
Stack with a big ball give the shape of petals so that they are not flat. We roll the stack around the edges with a small pressure. The petal at this moment should not be sticky, it must be pre-dried. But, most importantly, do not overdo it, otherwise the clay will be cracked, to whit and break.
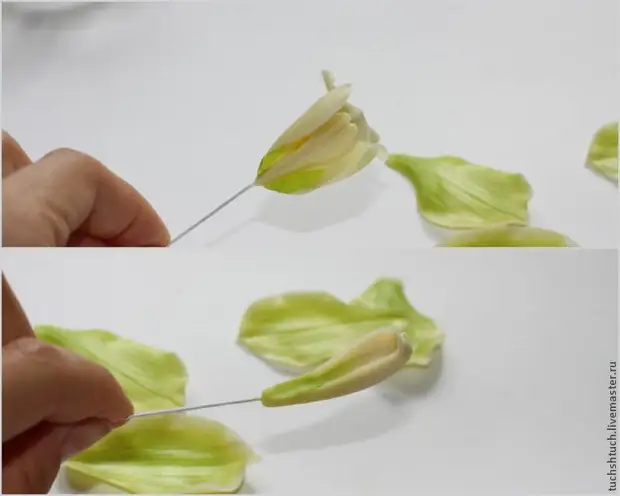
In order for the lip better to hold the form and do not break, we glue the wire from the opposite side to super-glue, having previously bent it on the desired form. In this case, the wire number 22. But I think it is possible and thinner. After tinting the wire on the front side will not be visible at all.
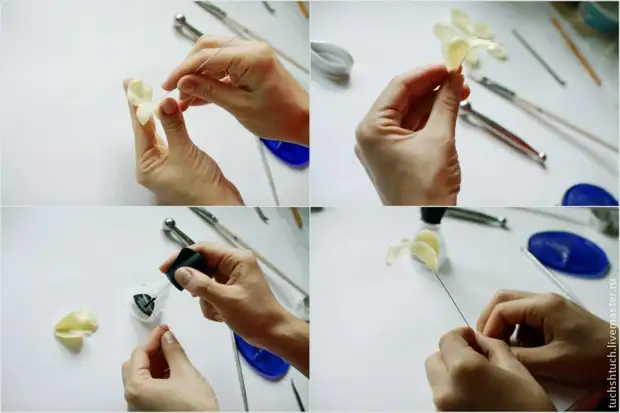
The desired form is achieved. Leave the detail to dry.
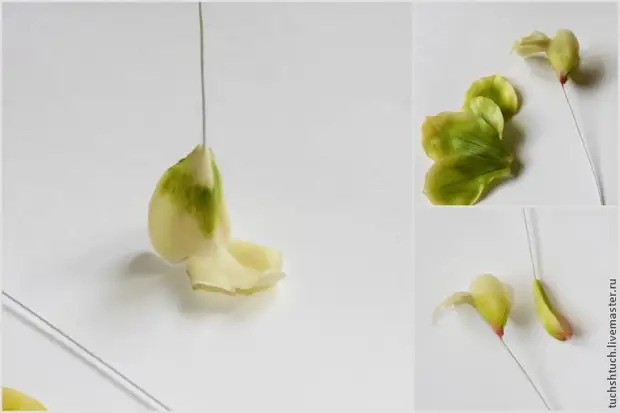
Next, begin to sculpt the orchid column. I use a special form. It is important that before starting work the form was clean, without residual clay. Before you put clay in it, we lubricate the shape of baby oil. So the clay does not stick and it will be easier for you to pull out the item from it.
Rolling the sausage is slightly longer than the shape and gently lay it inside, thoroughly distributing clay so that there is no emptiness and the texture is highly printed.
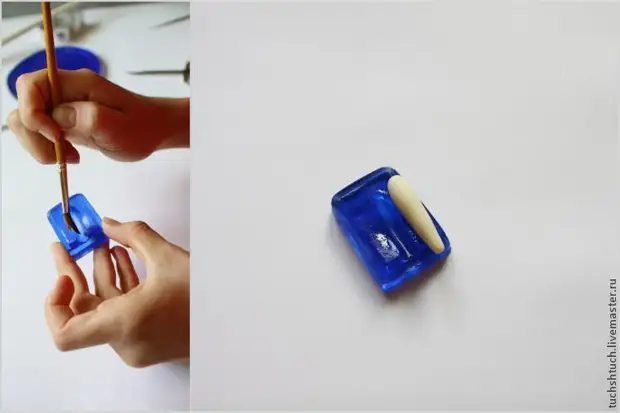
A stack with a ball (I don't have the desired size, and I use the reverse end of the stack "Cat foot") we make a recess in the column. Do not keep the item in the form for too long, otherwise it will be difficult for it to form it later. It is better to lubricate the shallow shape carefully.
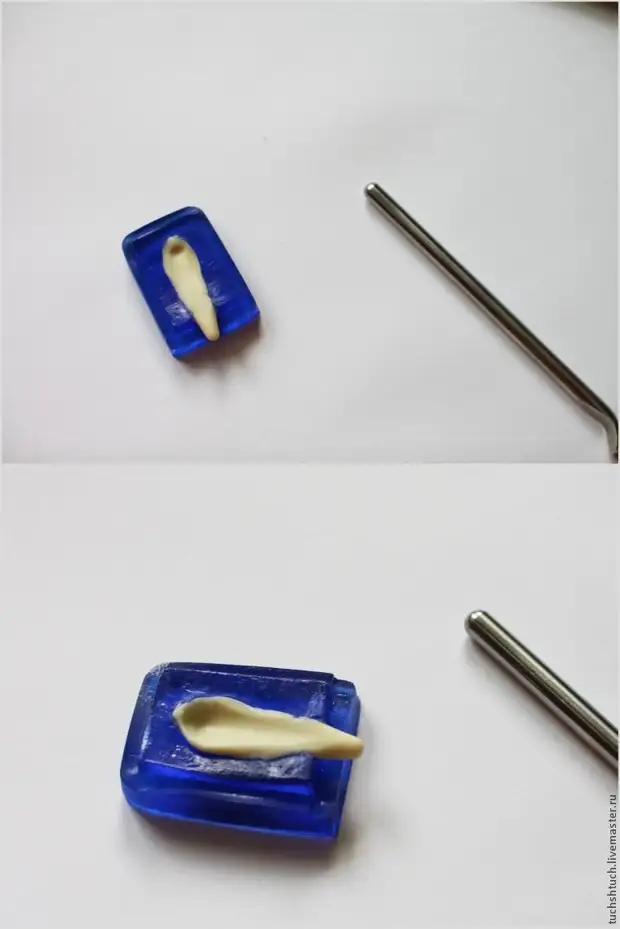
We refine the column, give it the desired form. After the detail got out of the form, we must necessarily correct it. First you need to make "bortals", like a living flower. We attach the necessary shape with your fingers, very carefully, so as not to break the clay.
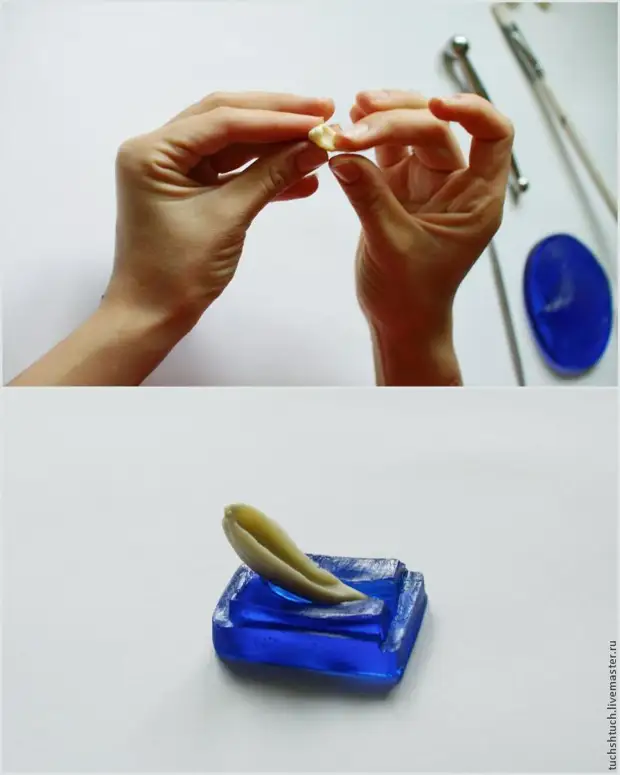
Stack Correct the nose shape at the column. Look as many pictures as possible on the Internet, and it is better to study a live flower to understand what this element looks like.

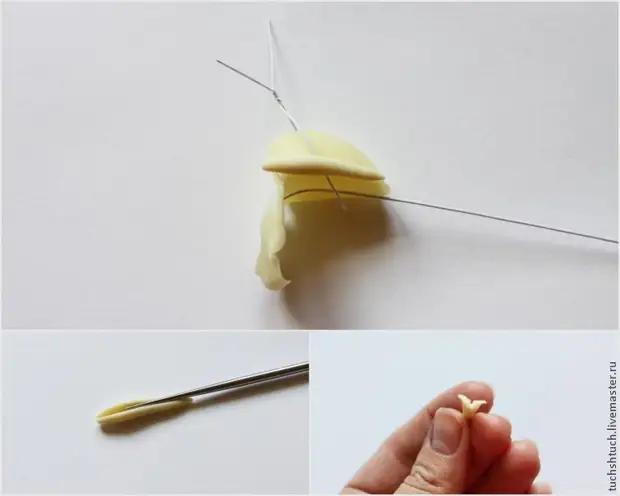
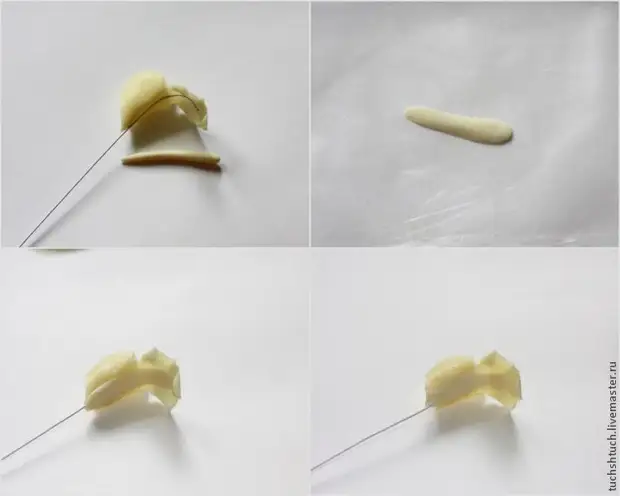
The inner element of the lip of orchid I pester manually, without the use of special tools. Lepim a small sausage. Then the stack of the knife is recess, after which the stack roll over and thin the edges, as shown in the photo. The part must resemble the shape of the check mark.
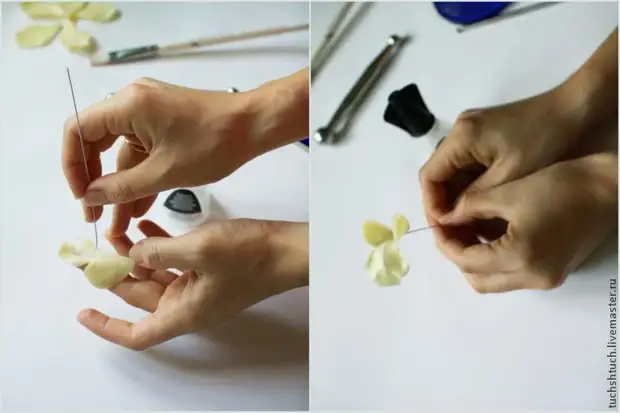
After drying, glue the inner part to super-glue. I reinforce the orchid column with wire No. 22. So we can give the details of the desired bending, and also this wire will need to assemble the flower.
Lubricate wire latex glue. (I do not advise you to use super-glue in this case, because you will not have time to move the wire to the desired depth, it will instantly freeze at the reason).
Wire predeterday to be a little bend. It can only be inserted into the column only after sufficiently dry the part outside so as not to remember it.
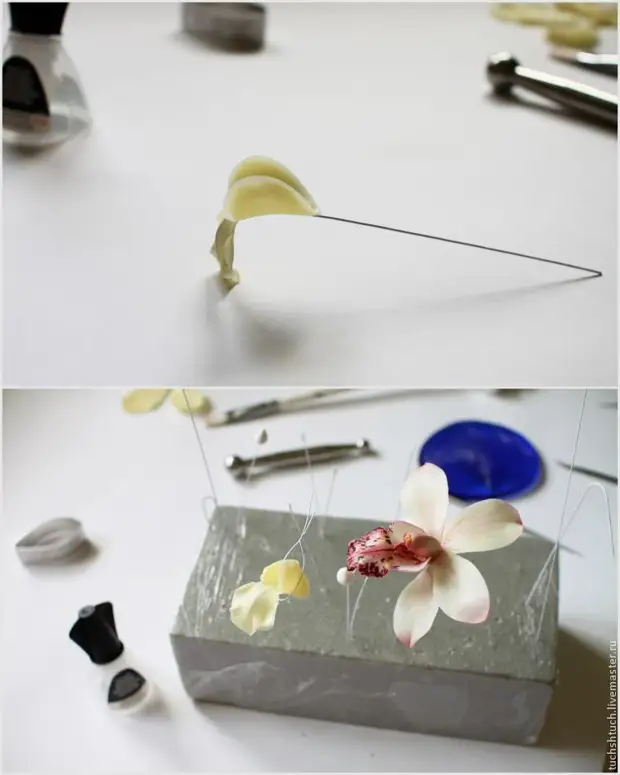
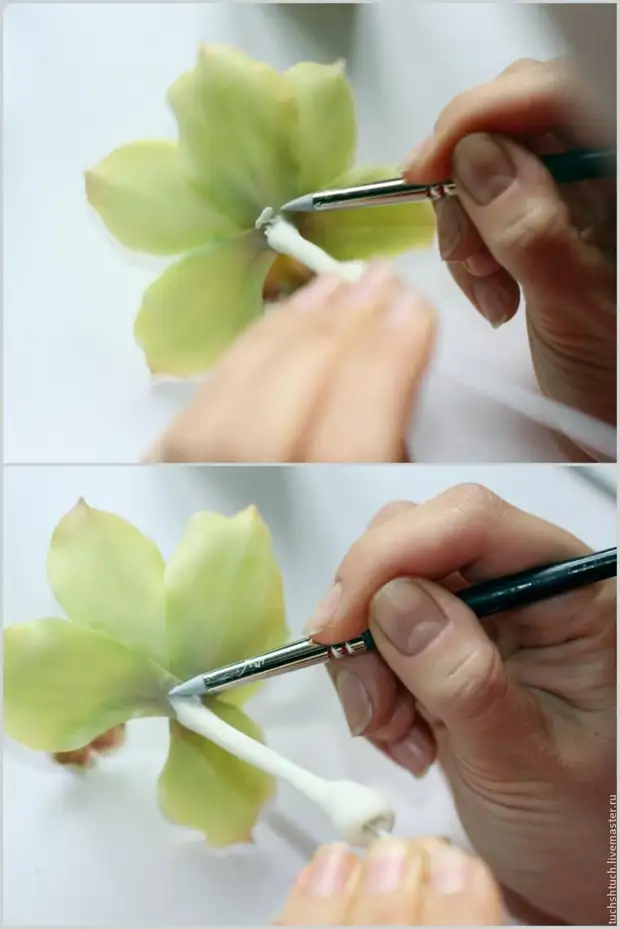
To keep the lip of orchids to save the desired form when dried, I use this trick (see the top photo on the right).
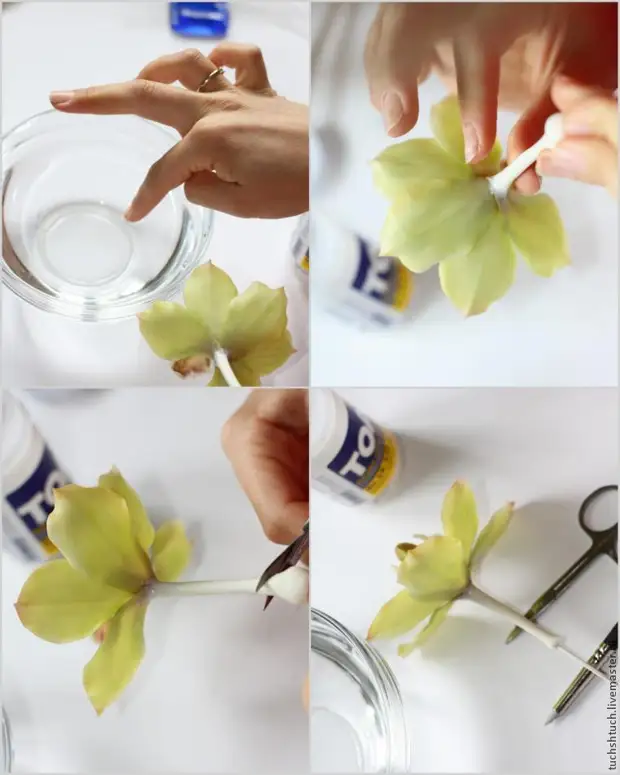
Now hide the wire. To do this, roll a thin sausage of the desired length. In the film for the paste, we distribute clay and make it thinner around the edges. The resulting clay is glued to latex glue to the lip of orchid on the reverse side. We distribute clay so that there are no seams, and the wire was reliably hidden. Let's do it with the help of water and silicone brush (or a simple brush with a synthetic pile).
Start toning.
We will apply a salad paint on the petal, and then we grow with a semi-dry brush. On the palette, paint can be divided by a small amount of diluent for artistic work. So the paint will quickly dry, but it will be not so intense.
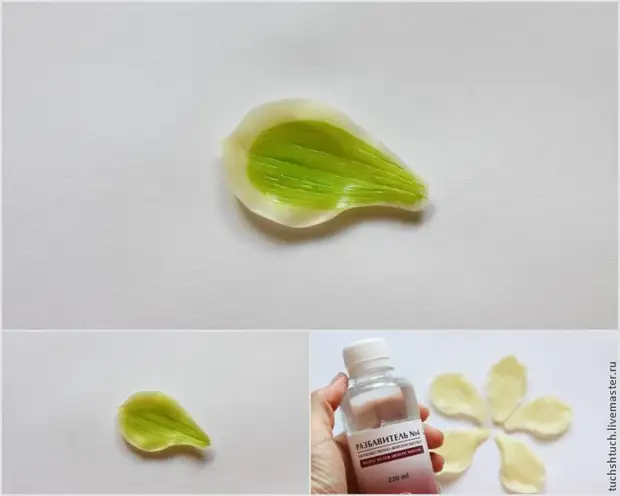
Closer to the base of the petal we will apply the oil paint "herbal green". We grow in.
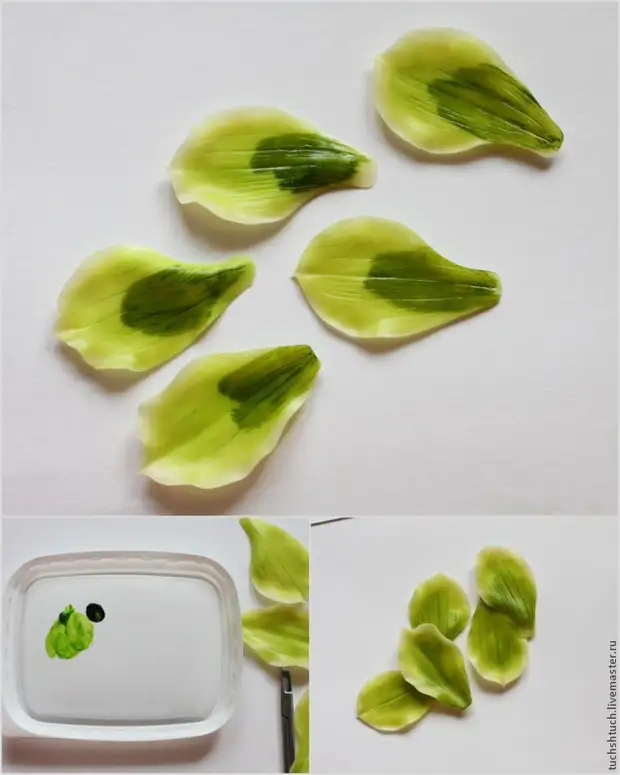
We proton with the edges of the petals of paint "ocher" and also we also grow. Petals at the base with cherry blossom, and the corners slightly protonat the pre-grated pastel shallow reddish-brick color.
We will appline and we grow a salad paint on the basis of the lips of orchids, as well as at the base of the column.
We proton with the lip of orchids on the back side.
Chaotic movements and with enough paint so that it lay down droplets, put the pattern on the lip of orchids. For the lip painting, I use acrylic paint on glass. It looks most bright and winning. However, simple acrylic paints can be used. They are bright and dry quickly.
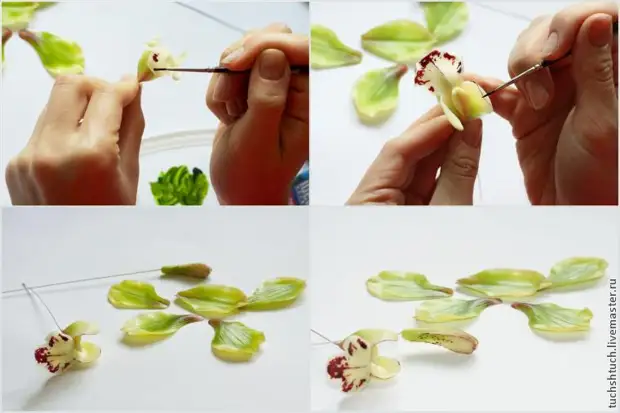
We glue the lip of orchids with a column at the very base with the help of super-glue. First attach details to each other, as the super glue does not allow you to adjust the position of the details in a few seconds. Then your movements should be clear and accurate.
Also we welt the wire with wire and firmly fit it to each other, so the design will be much stronger. After drying the glue, we wrap the wire TEYP-ribbon.
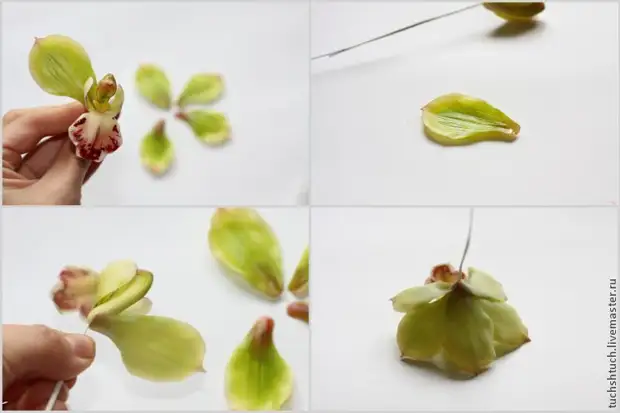
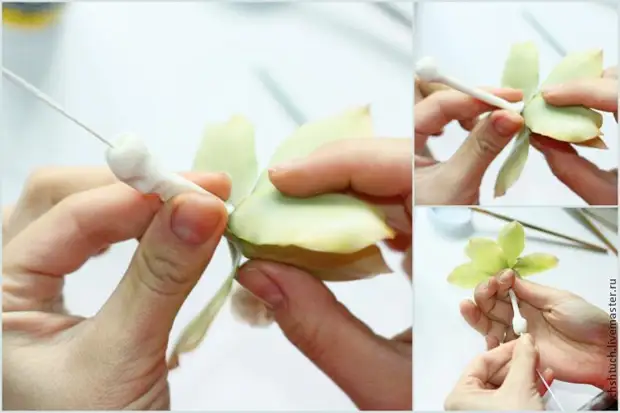
We glue petals. I will glue with a small droplet on the very base (for starters, attach the petal to see, whether it falls). Firmly, but carefully press the petal so as not to deform the orchid column.
First we glue the side petals, then the lower and top.
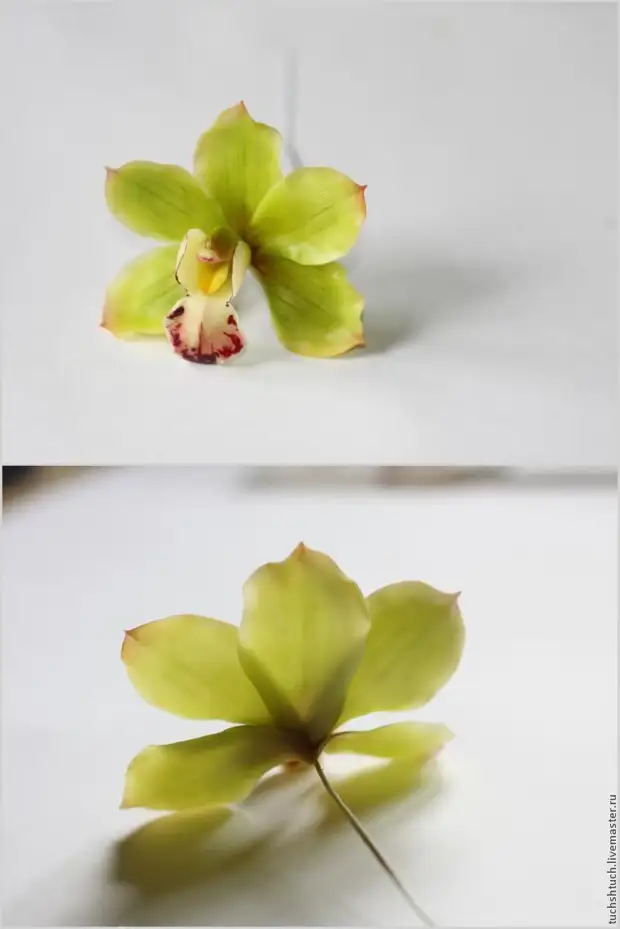
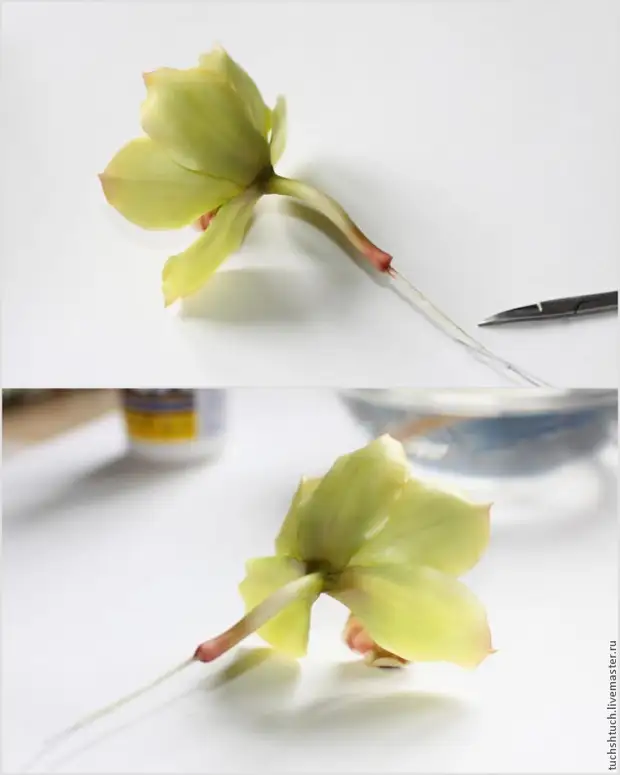
Our flower is almost ready with you. It remains to loose and proton the stem.
For the stem, roll the sausage, we do the stack in it. Wire of the stem must be very good to lubricate latex glue. Then we put the clay on the stem to the very base of the flower and we press it well.
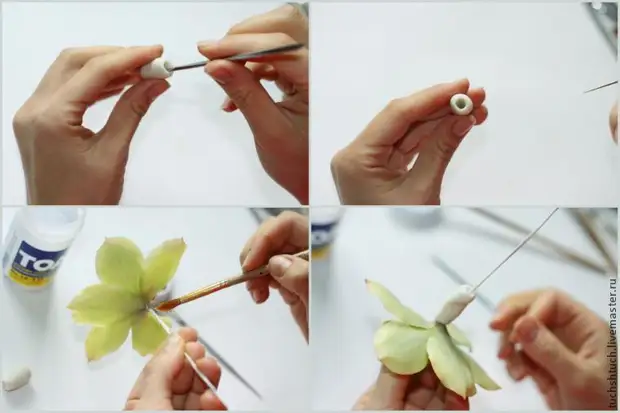
We wear clay on the stem and gently tighten her down, gradually pressing and smoldering it.
Fast movements of the fingers up-down smoothing the stem. We do it almost without push to the stem, so as not to deform it, and the vicinity is only slightly concerned.
Silicone brush neatly confuse the flower stem to the petals. Brush wetting water. Clay on the stem must be sufficiently raw, then it will be mildly to smoke.
The stem silicone brush was linked and gently smoothed the joints of the joint with a wet finger. Supleny cut off. We leave the stem length about 4.5 - 5 cm.
We proton the stem so that he looks more likely and be sure to give him a bend.
Do not cut wire if you plan to make a branch of the orchids of Cymbidium. It will take you to fasten the flower to the stalk.
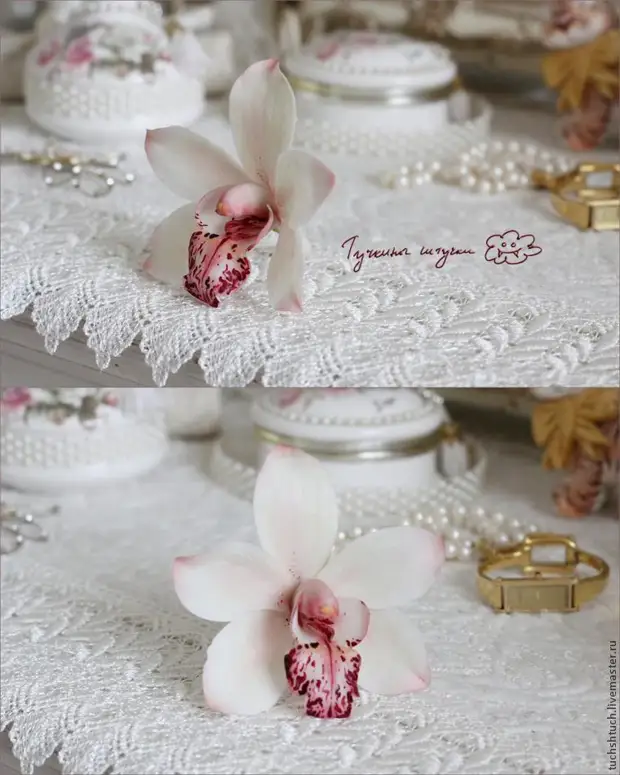
Congratulations! Your orchid is ready.
Thanks to everyone who read and watched to the end! Creative you success!
a source