


Next: the text of the author
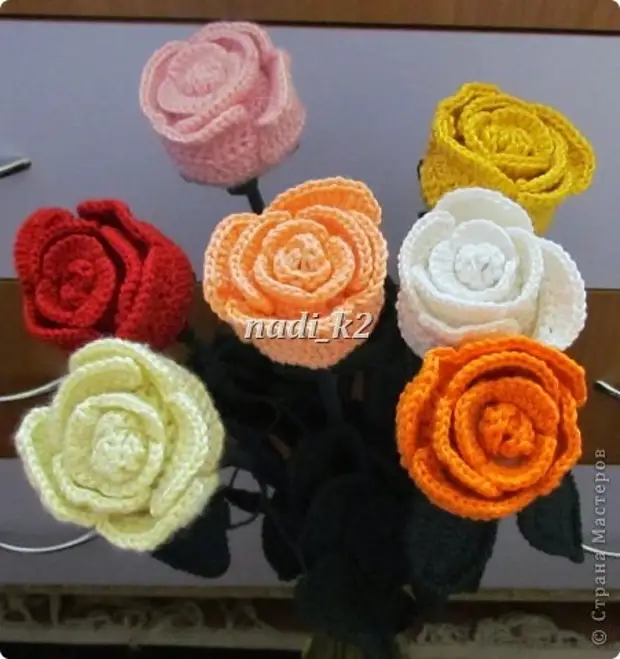
Knit roses by book, but with their changes and additions. The bound rose is clearly on the book, it turns out some kind of scarf, not at the picture at all. Therefore, over each photo with a description and scheme I will write what and where I changed.
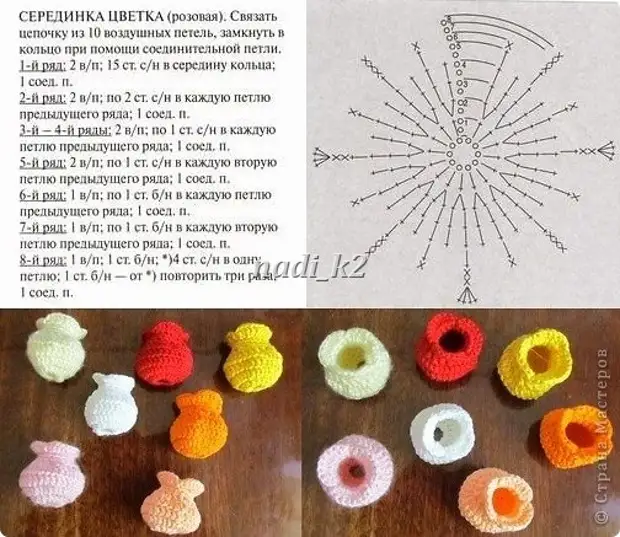
I invented this element myself, let's call it bud. Without it, looking from above on a rose, the hole and filler will be visible in the middle.
I entered it every time, in general, experimented. But I decided to write down your experiment
Bud: Tie a chain of 21 air loops.
1st row: Starting with a third loop hook to check 19 tbsp. b / n.
2nd row: 2 V / n; 1 tbsp. s / n; 2 tbsp. C / 2N; 1 tbsp. s / n; 1 comp.; 1 tbsp. s / n; 3 tbsp. C / 2N; 1 tbsp. s / n; 1 comp.; 1 tbsp. s / n; 6 tbsp. C / 2N; 1 tbsp. s / n; 1 SED.P.
Main knit as in the description until the 7th row
7th row: repeat the 6th row.
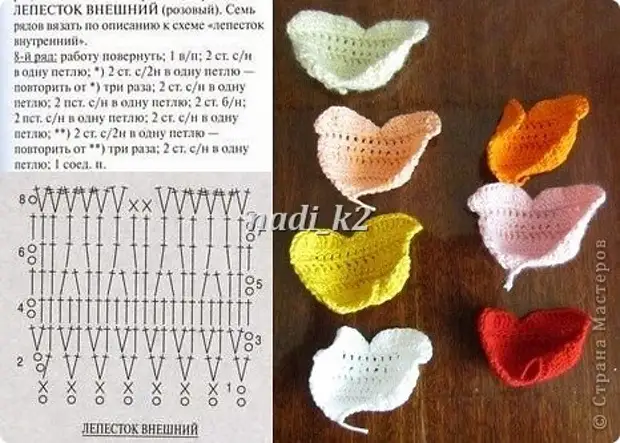
8th row: 1 V / n; *) 2st. s / n in one loop; 2st. s / n in one loop; 2st. s / n in one loop; 2st. s / n in one loop; 1 compound - from *) repeat three times.
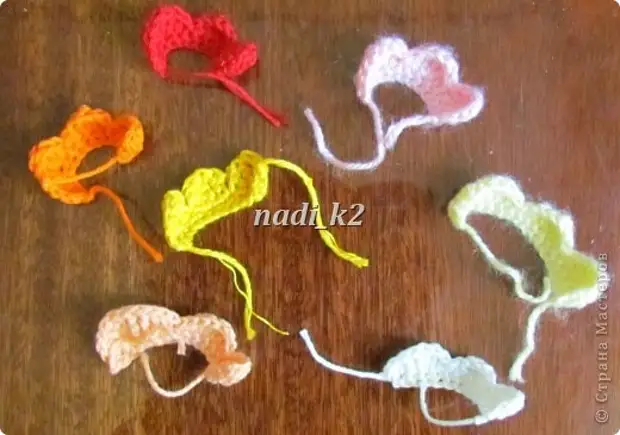
Inner petals unchanged, except for the 8th row, instead of 2 tbsp. B / n in the middle of a row knit 2 compound. loops. And for each rose I knit 2 pcs.
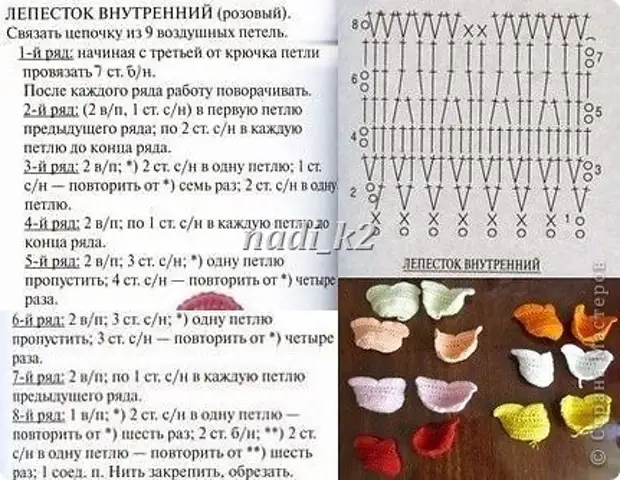
In the external petal I only changed the middle in the eighth row: instead of 2 st .b / n knit 2 coordlines. So petals are obtained more pronounced.
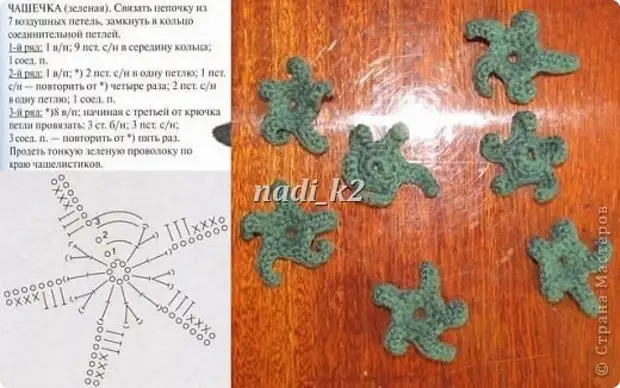
A cup without changes.
The sheet also knit completely by description.
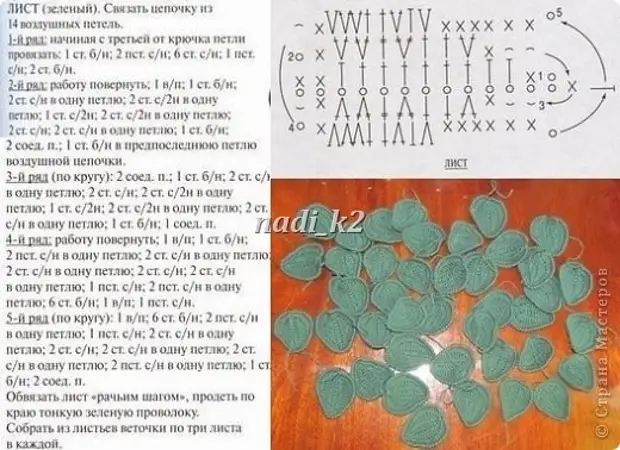
But, oddly enough, it is not described in this book in this book, but I'm generally a novice in knitting and, especially since I didn't know what kind of technique. Therefore, I climbed on the Internet.
In this picture, I learned to bind the leaf "rachy step". It's even easier to watch video tutorial in Utyube.
At the end of knitting the leaf, I left the thread more influential so that it was then to wrap the wire.
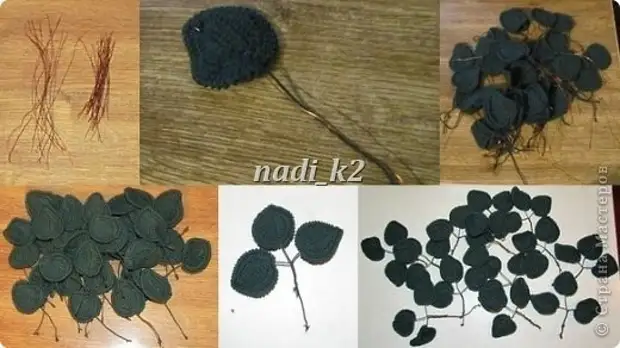
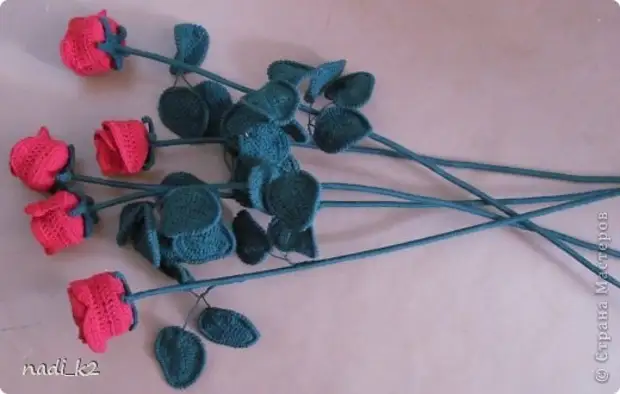
On one rose, I knit 6 leaves so that there are two twigs of three leafs. You can do with one sprig, but with two roses looks richer. On 7 roses I knit 42 leafs.

All items are already connected. Now you can proceed to the design of parts and rose assembly.
For one twig you will need two short, about 14 cm, and one long, about 20 cm, wires. I felt the wire in the middle of the sheet between the threads (it is a bit more difficult than just to tie the wire along the edge, but it is so more on the natural look like) and that then the wire does not climb back, stagnation of the wire tip on the invalid side. On the finished rose, this is not particularly noticeable. Then wrap the wire thread. And you can connect three leafs in a twig and twist them, a leaf on a long wire in the middle.
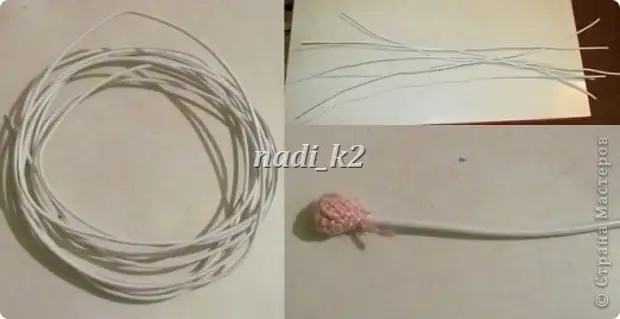
Now the trunk time has come. I bought a cable with a diameter of about 4-4.5 mm with a tin inside. For roses just right, and fits stiffness, and at a price inexpensive. Then cut future trunks. Choose the length yourself. I wanted roses on a long leg, so I made the jackets more influential.
Now the tip of our barrel is lubricating glue (I have dragonfly polymer universal glue, I only used it - I perfectly coped), we take our first linked element of the bud and one edge we stick it to the leg of the rose, then tighten his body of the trunk to get a neat bouton. And we give a rude buton joint with a barrel. The glue will dry enough quickly, but in order for the bud to sit on the trunk tightly, I left to dry overnight.
After the glue is dry, you can proceed to the rose assembly.
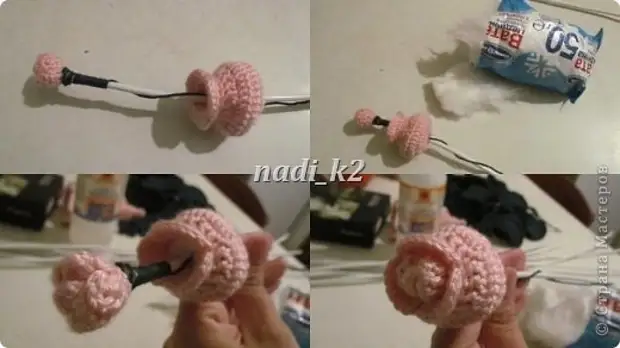
Important!!! You need to skip the tip of the green thread first through a cup, then through the middle, glued to the bud and you can wipe the leg. I forgot about the cup for the first time, and I had to unwind the motok and stretch it from another end through the whole thread. Fortunately it was only a quarter of the day.

Now we will deal with the middle. We dress it on the trunk, stuffed with a tightly filler, in my case it's cotton. But the main thing is not to rearrange with the filler. It is necessary that there is still a bud. From the reverse side, the middle is not fixed yet. This we will deal with all the petals will be sewn.
And now we sew our petals. I took a thread on the tone of Rose and sewed the petals in turn of the mustache.
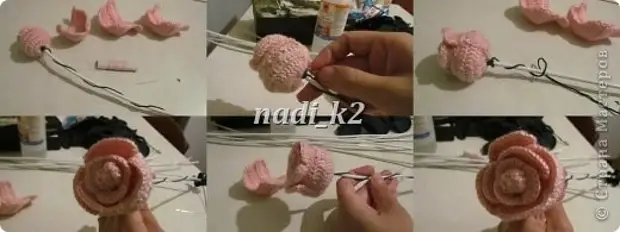
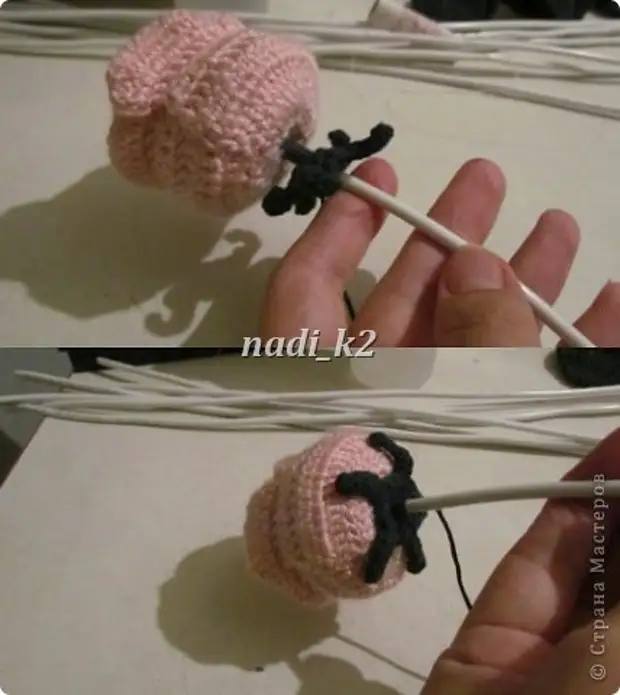
After the flower is assembled, you can proceed to fix it on the trunk. I thought of how to do it more efficiently on the next roses, so I just explain in words. Straight under the biggest flower I dripped with glue and wrapped the slide, preferably higher, so that she would not give a rose to move down the trunk, and the little widespread so that the cup could be seeded. Now you can sew a cup.
And finally, you wind up the leg, adding twigs with leaves at such a height and a distance, as you want. At the bottom of the legs, we wash the glue, wrap. Thread cut and glue.
That's it. Rose is ready.

A source